2012 MERCEDES-BENZ CLS COUPE warning lights
[x] Cancel search: warning lightsPage 119 of 373
Active:
if you are driving at aspeed above
110 km/ hand do not make any large steering
movements for at leas t1000 morify ouare
drivin gatas peedabove 130 km/h.
Not active: if you are driving at speed sbelow
80 km/ hfollowing activation.
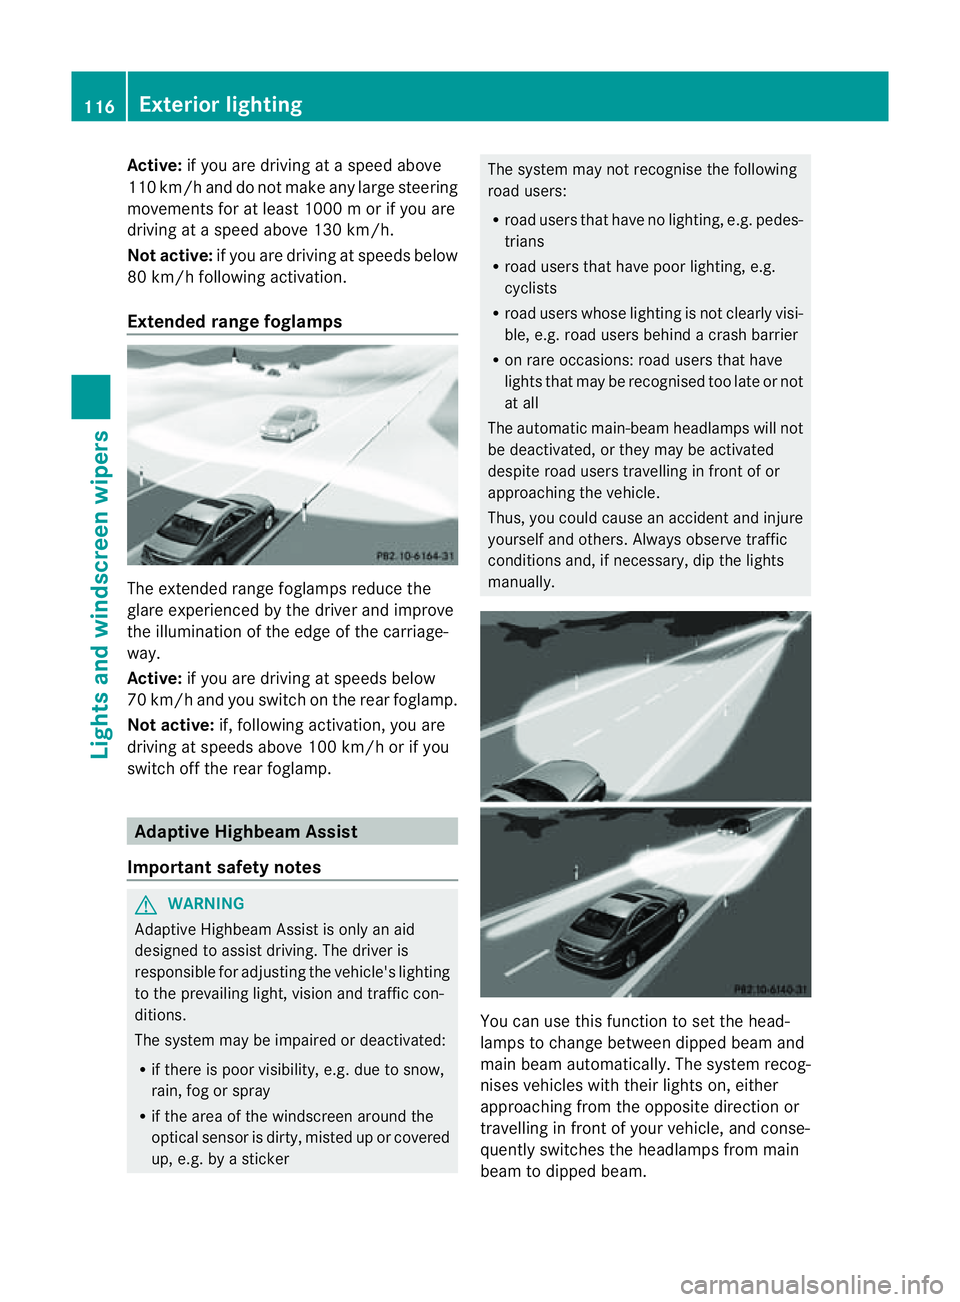
Extended range foglamps The extended range foglamps reduce the
glare experienced by the driver and improve
the illumination of the edge of the carriage-
way.
Active: if you are driving at speeds below
70 km/ hand yo uswitch on the rea rfoglamp.
Not active: if, following activation ,you are
driving at speeds above 100 km/ho rifyou
switch off the rear foglamp. Adaptive Highbeam Assist
Important safety notes G
WARNING
Adaptive Highbeam Assist is only an aid
designed to assist driving. The driver is
responsible for adjusting the vehicle's lighting
to the prevailing light, vision and traffic con-
ditions.
The system may be impaired or deactivated:
R if there is poor visibility, e.g. due to snow,
rain, fog or spray
R if the area of the windscreen around the
optical sensor is dirty, misted up or covered
up, e.g. by asticker The system may not recognise the following
road users:
R
road users that have no lighting, e.g. pedes-
trians
R road users that have poor lighting, e.g.
cyclists
R road users whose lighting is not clearly visi-
ble, e.g. road users behind acrash barrier
R on rare occasions: road users that have
lights that may be recognised too late or not
at all
The automatic main-beam headlamps will not
be deactivated, or they may be activated
despite road users travelling in front of or
approaching the vehicle.
Thus, you could cause an accident and injure
yourself and others. Always observe traffic
conditions and, if necessary, dip the lights
manually. You can use this function to set the head-
lamps to change between dipped beam and
main beam automatically. The system recog-
nises vehicles with their lights on, either
approaching from the opposite direction or
travelling in front of your vehicle, and conse-
quently switches the headlamps from main
beam to dipped beam.116
Exterior lightingLights and windscreen wipers
Page 122 of 373
The interior lighting automatically switches
on if you:
R unlock the vehicle
R open adoor
R remove the key from the ignition lock
The interior lighting is activated for ashort
time when the key is removed from the igni-
tion lock. You can activat ethis delayed
switch-off using the on-board computer
(Y page 224).
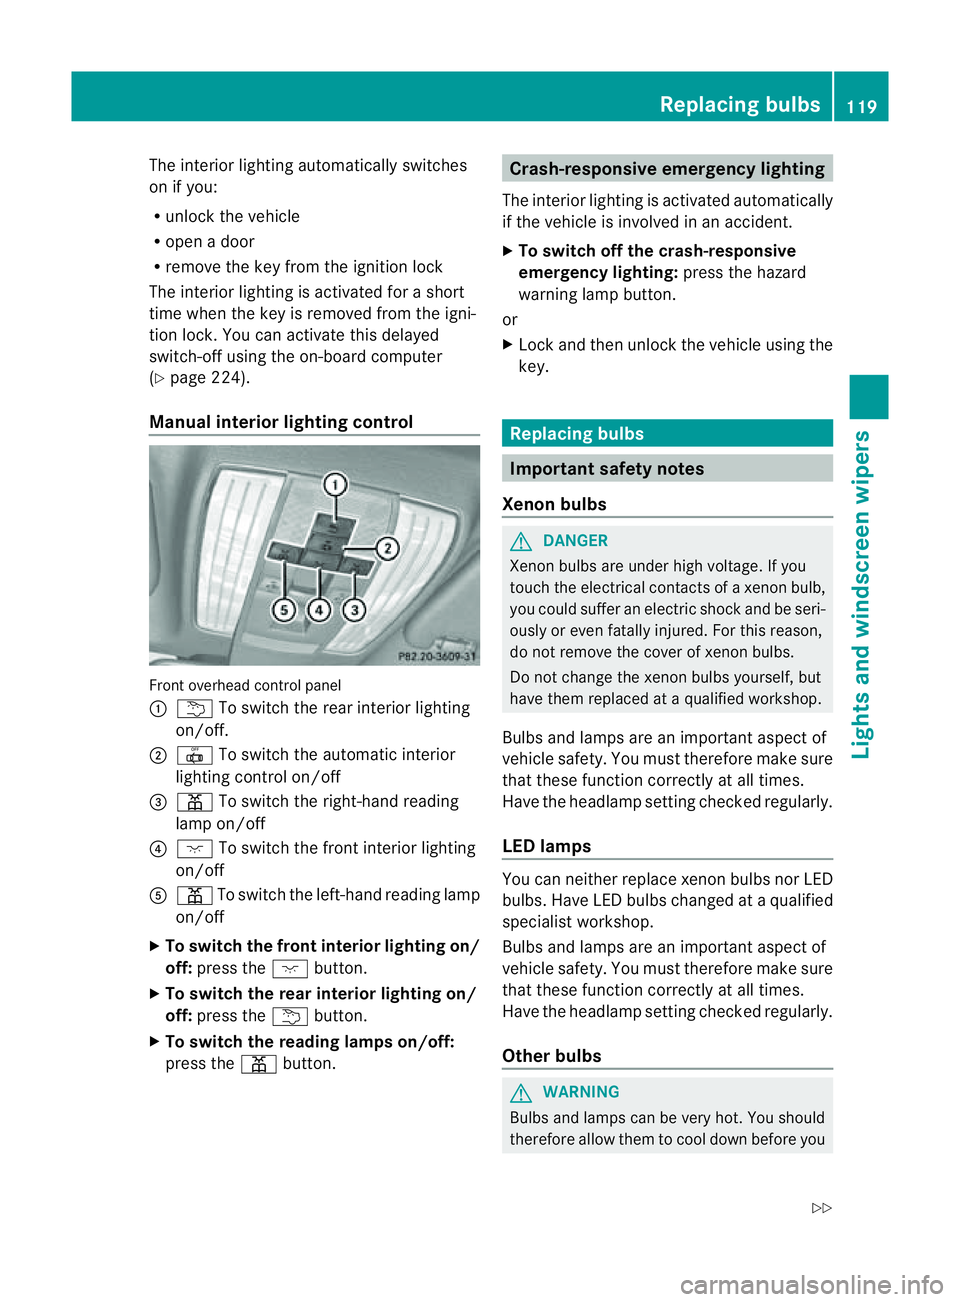
Manua linterior lighting control Fronto
verhead control panel
: u To switch the rear interior lighting
on/off.
; | To switch the automatic interior
lighting control on/off
= p To switch the right-hand reading
lamp on/off
? c To switch the fronti nterior lighting
on/off
A p To switch the left-hand reading lamp
on/off
X To switch the front interior lighting on/
off: press the cbutton.
X To switch the rear interior lighting on/
off: press the ubutton.
X To switch the reading lampso n/off:
press the pbutton. Crash-responsive emergency lighting
The interior lighting is activated automatically
if the vehicle is involved in an accident.
X To switch off the crash-responsive
emergency lighting: press the hazard
warning lamp button.
or
X Lock and then unlock the vehicle using the
key. Replacing bulbs
Important safety notes
Xenon bulbs G
DANGER
Xenon bulbs are under high voltage. If you
touch the electrical contacts of axenon bulb,
you could suffer an electric shock and be seri-
ously or even fatally injured. For this reason,
do not remove the cover of xenon bulbs.
Do not change the xenon bulbs yourself, but
have them replaced at aqualified workshop.
Bulbs and lamps are an importan taspect of
vehicle safety. You must therefore make sure
that these function correctly at all times.
Have the headlamp setting checked regularly.
LED lamps You can neither replace xenon bulbsn
or LED
bulbs. Have LED bulbsc hanged ataqualified
specialist workshop.
Bulbs and lamps are an important aspect of
vehicle safety. You must therefore make sure
that these function correctly at all times.
Have the headlamp setting checked regularly.
Other bulbs G
WARNING
Bulbs and lamps can be very hot. You should
therefore allow them to cool down before you Replacing bulbs
119Lights and windscreen wipers
Z
Page 124 of 373
X
Insert bulbh older=into the lamp and turn
it clockwise.
X Reinsert the lamp cluster.
X Tighten four nuts :.
X Push in connector ;until it engages.
X Insert the side panelling. Windscreen wipers
Switching the windscreen wipers on/
off G
WARNING
The windscree nwill not longer be wiped prop-
erly if the wiper blades are worn .This could
prevent you from observing the traffic condi-
tions, thereby causing an accident. Replace
the wiper blades twice ayear, ideally in spring
and autumn.
! Do not operate the windscreen wipers
when the windscreen is dry, as this could
damage the wiper blades. Moreover, dust
that has collected on the windscreen can
scratcht he glass if wiping takes place when
the windscreen is dry.
If it is necessary to switch on the wind-
screen wipers in dry weather conditions,
always operate them using washer fluid.
! If the windscreen wipers leave smears on
the windscreen after the vehicle has been
washed in an automatic car wash, this may
be due to wax or other residue. Cleant he
windscreen with washer fluid after an auto-
matic car wash.
! Intermittent wiping with rain sensor: due
to optical influences and the windscreen
becoming dirty in dry weather conditions,
the windscreen wipers may be activated
inadvertently. This could damage the wind-
screen wiper blades or scratcht he wind-
screen.
For this reason, you should always switch
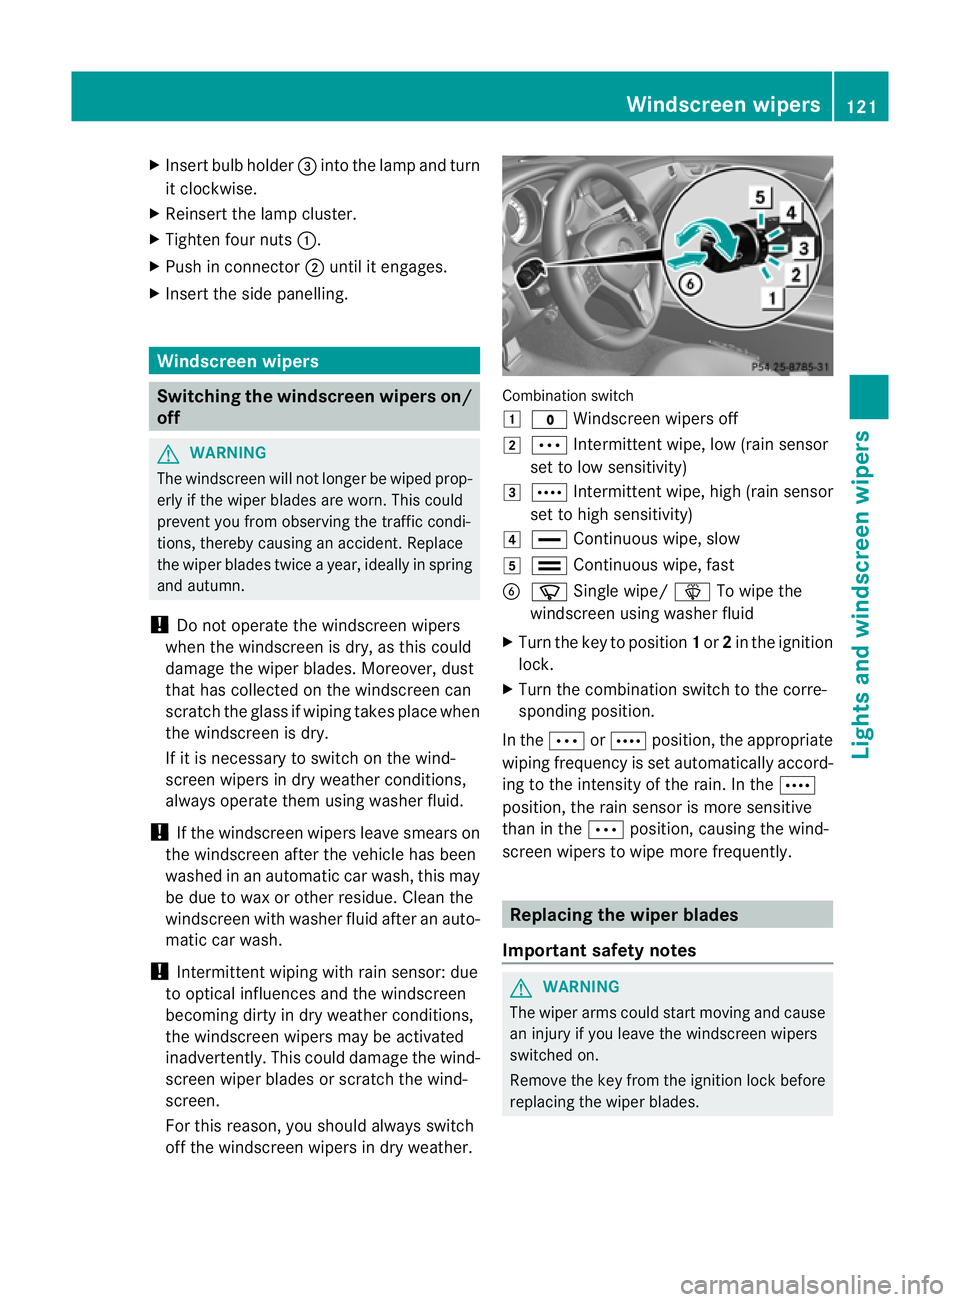
off the windscreen wipers in dry weather. Combination switch
1
$ Windscreen wipers off
2 Ä Intermittent wipe, low (rain sensor
set to low sensitivity)
3 Å Intermittent wipe, high (rain sensor
set to high sensitivity)
4 ° Continuous wipe, slow
5 ¯ Continuous wipe, fast
B í Single wipe/ îTo wipe the
windscreen using washer fluid
X Turn the key to position 1or 2in the ignition
lock.
X Turn the combination switch to the corre-
sponding position.
In the ÄorÅ position, the appropriate
wiping frequency is set automatically accord-
ing to the intensity of the rain. In the Å
position, the rain sensor is more sensitive
than in the Äposition, causing the wind-
screen wipers to wipe more frequently. Replacing the wiper blades
Important safety notes G
WARNING
The wiper arms could start moving and cause
an injury if you leave the windscreen wipers
switched on.
Remove the key from the ignition lock before
replacing the wiper blades. Windscreen wipers
121Lights and windscreen wipers Z
Page 130 of 373
Information abou
tusing
THERMOTRONIC automatic climate
control
The following contains instructions and rec-
ommendations to enable you to get the most
out of your THERMOTRONIC automatic cli-
mate control.
R Activate climate control using the Ãand
¿ buttons. The indicato rlamps above
the à and¿ buttons light up.
R In automatic mode, you can also use the
ñ buttontos etac limate mode
(FOCUS/MEDIUM/DIFFUSE). The
MEDIUM leve lisrecommended.
R Set th etem peratur eto22†.
R Only use th edemisting function briefly until
th ew indscree nisclear again.
R Only use the air-recirculation mode briefly,
e.g. if there are unpleasant outside odours
or when in atunnel. The windows could
otherwise mist up as no fresh air is drawn
into the vehicle in air-recirculation mode.
R Use the ZONE function to adopt the tem-
perature settings on the driver's side for
the front-passenger side and the rear com-
partment as well.T he indicator lamp above
the á button goes out.
R Use the residual heat function if you want
to heat or ventilate the vehicle interior
when the ignition is switched off. The resid-
ual heat function can only be activated or
deactivated with the ignition switched off. Operating the climate control system
Switching climate control on/off
Points to observe before use i
If climate control is switched off, the air
supply and air circulation are also switched
off. Only use this settingf orab rief period.
The windows could otherwise mist up.
i Switch on climate control primarily using
the à button (Y page 128). Switching on/off X
Turn the key to position 2in the ignition
lock.
X To switch on: press theÃbutton.
The indicator lamp in the Ãbutton lights
up. Airflow and air distribution are set to
automatic mode.
or
X Press the ^button.
The indicator lamp in the ^button goes
out. The previous settings are reactivated.
X To switch off: press the^button.
The indicator lamp in the ^button lights
up. Activating/deactivating the cooling
with air dehumidification function
Points to observe before use G
WARNING
If the "cooling with air dehumidification" func-
tion is deactivated, the air inside the vehicle
will not be cooled (during warm weather) or
dehumidified. The windows could mist up
more quickly. This may prevent you from
observing the traffic conditions, thereby caus-
ing an accident.
The cooling with air dehumidification function
is only available when the engine is running.
The air inside the vehicle is cooled and dehu-
midified according to the temperature selec-
ted.
Condensation may drip from the underside of
the vehicle when cooling mode is active. This
is normal and not asign that there is amal-
function.
i The cooling with air dehumidification
function uses refrigerant R134a. This
refrigerant does not contain chlorofluoro-
carbons, and therefore does not damage
the ozone layer. Operating the climate control system
127Climatecontrol Z
Page 134 of 373
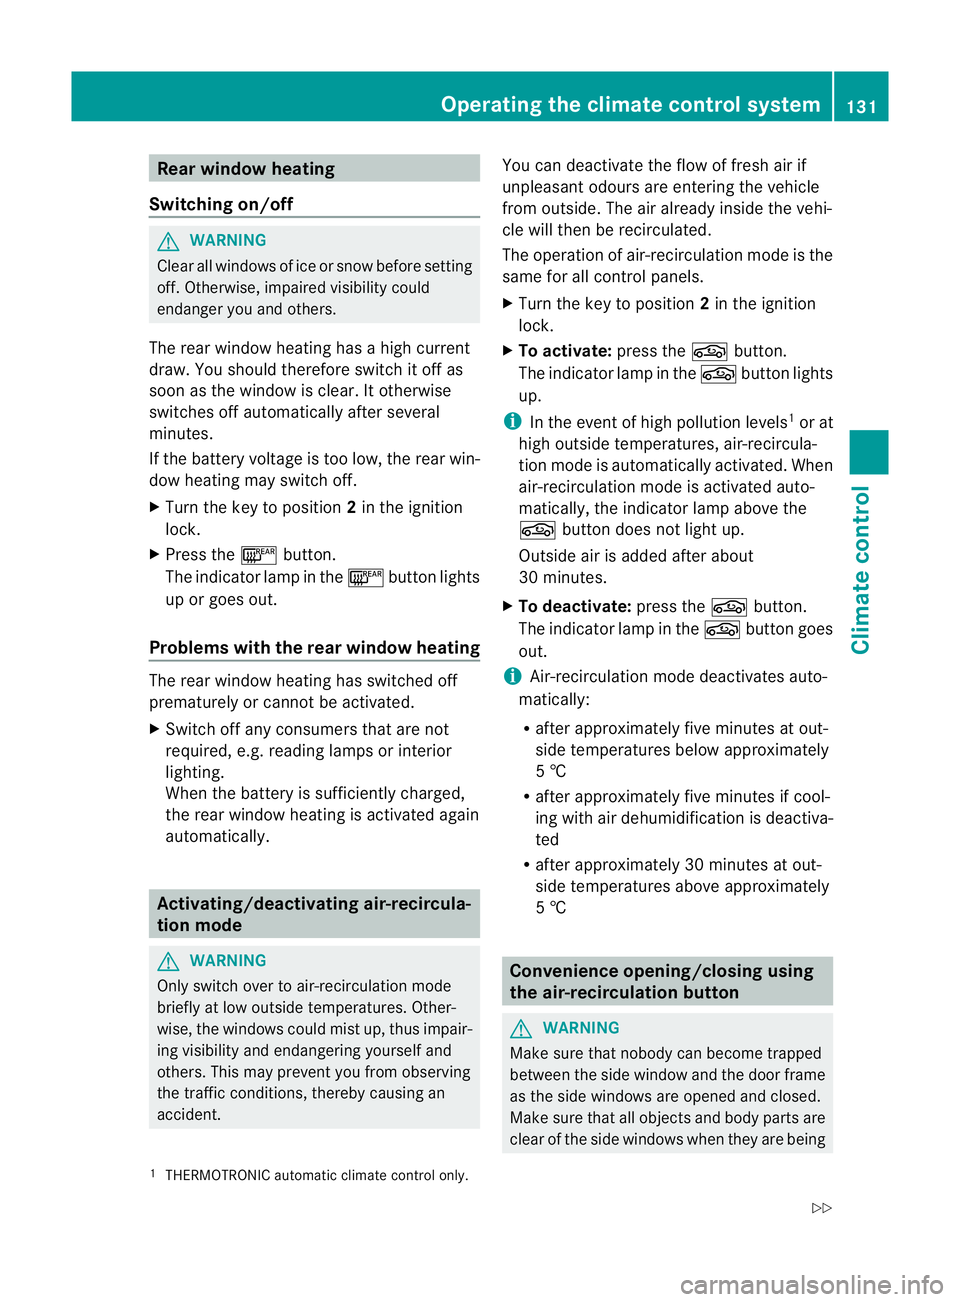
Rear windo
wheating
Switchin gon/off G
WARNING
Clea rall windows of ice or sno wbefor esetting
off .O therwise, impaire dvisibility could
endanger yo uand others.
Th er earw indow heatin ghasah igh current
draw. You should therefore switc hitoff as
soon as the window is clear .Itotherwise
switches off automaticall yafter several
minutes.
If the battery voltag eistoo low, the rea rwin-
dow heatin gmay switc hoff.
X Turn the key to position 2in the ignition
lock.
X Press the ¤button.
The indicator lamp in the ¤button lights
up or goes out.
Problems with th erearw indow heating The rear window heatin
ghas switched off
prematurely or cannot be activated.
X Switch off any consumers that are not
required, e.g. readin glamps or interior
lighting.
When the battery is sufficiently charged,
the rear window heatin gisactivate dagain
automatically. Activating/deactivating air-recircula-
tion mode G
WARNING
Only switc hover to air-recirculatio nmode
briefly at low outside temperatures. Other-
wise, the windows could mist up, thus impair-
ing visibility and endangering yourself and
others. This may prevent you from observing
the traffic conditions, thereby causing an
accident. You can deactivate the flow of fresh air if
unpleasant odours are entering the vehicle
from outside. The air already inside the vehi-
cle will then be recirculated.
The operation of air-recirculation mode is the
same for all control panels.
X
Turn the key to position 2in the ignition
lock.
X To activate: press thegbutton.
The indicator lamp in the gbutton lights
up.
i In the event of high pollution levels 1
or at
high outside temperatures, air-recircula-
tion mode is automatically activated. When
air-recirculation mode is activated auto-
matically, the indicator lamp above the
g button does not light up.
Outside air is added after about
30 minutes.
X To deactivate: press thegbutton.
The indicator lamp in the gbutton goes
out.
i Air-recirculation mode deactivates auto-
matically:
R after approximately five minutes at out-
side temperatures below approximately
5†
R after approximately five minutes if cool-
ing with air dehumidification is deactiva-
ted
R after approximately 30 minutes at out-
side temperatures above approximately
5† Convenience opening/closing using
the air-recirculation button
G
WARNING
Make sure that nobody can become trapped
between the side window and the door frame
as the side windows are opened and closed.
Make sure that all object sand body parts are
clear of the side windows when they are being
1 THERMOTRONIC automatic climate contro lonly. Operatin
gthe climate contro lsystem
131Climate control
Z
Page 135 of 373
opened or closed. You or the object
scould be
drawn in or become trapped between the side
window and the door frame as the window
moves. If there is arisk of entrapment, oper-
ate the Wswitchtom ove the side window
in the opposit edirection.
Make sure that nobody can becom etrapped
as the slidin gsunroof/panorama slidin gsun-
roof is opened and closed. If there is arisk of
entrapment, operat ethe 3 switchtom ove
the slidin gsunroof/panorama slidin gsunroof
in the opposit edirection.
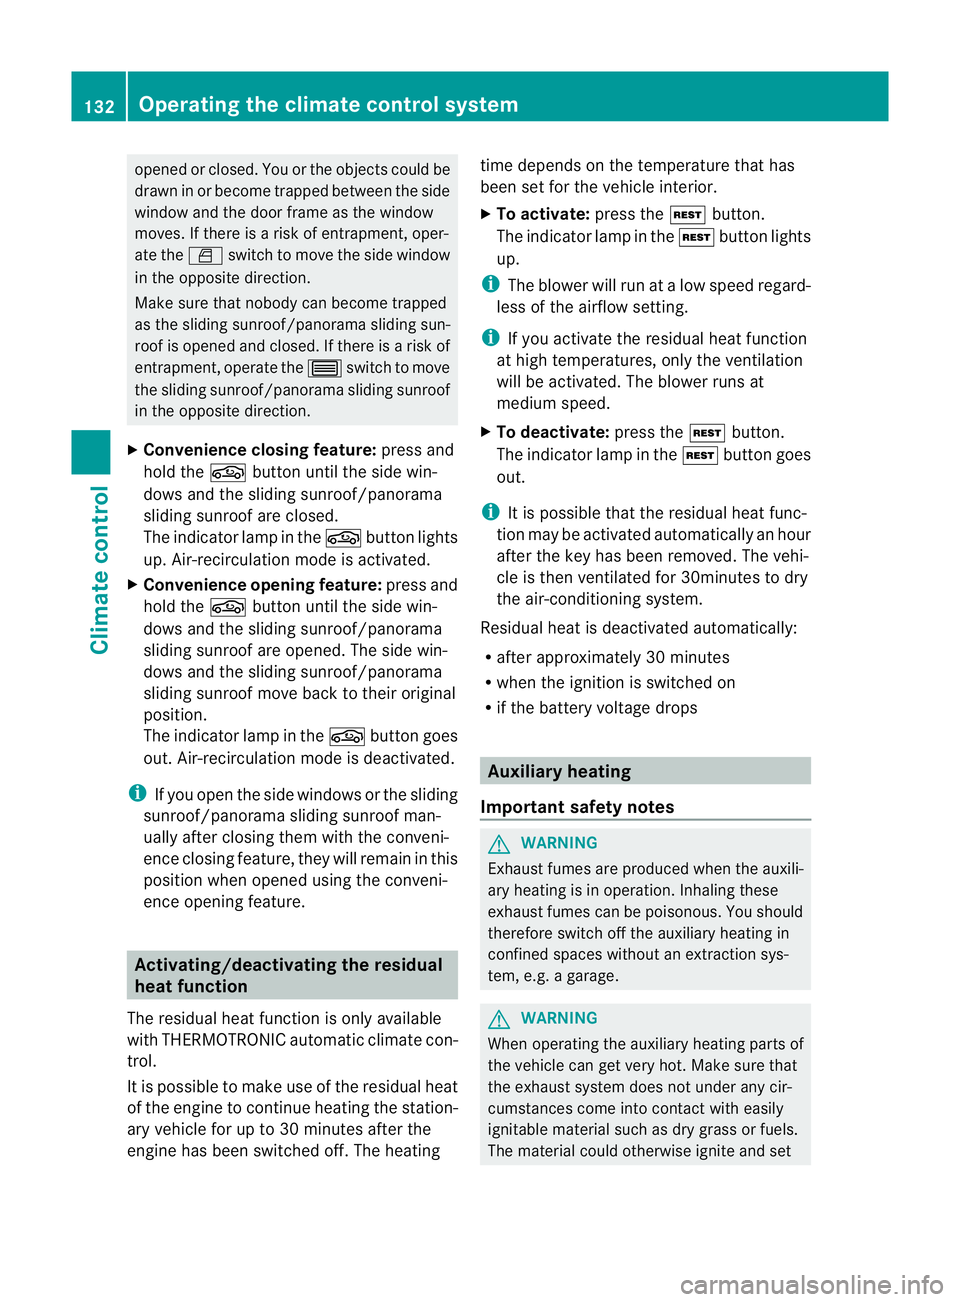
X Convenience closing feature: press and
hold the gbutton until the side win-
dows and the sliding sunroof/panorama
sliding sunroof are closed.
The indicator lamp in the gbutton lights
up. Air-recirculation mode is activated.
X Convenience opening feature: press and
hold the gbutton until the side win-
dows and the sliding sunroof/panorama
sliding sunroof are opened. The side win-
dows and the sliding sunroof/panorama
sliding sunroof move back to their original
position.
The indicator lamp in the gbutton goes
out. Air-recirculation mode is deactivated.
i If you open the side windows or the sliding
sunroof/panorama sliding sunroof man-
ually after closing the mwith the conveni-
enc eclosing feature, the ywill remain in this
position when opened using the conveni-
enc eopening feature. Activating/deactivating th
eresidual
heat function
The residual heat function is only available
with THERMOTRONI Cautomatic climate con-
trol.
It is possible to mak euse of the residual heat
of the engine to continue heatin gthe station-
ary vehicle for up to 30 minutes after the
engine has been switched off .The heating time depends on the temperature that has
been set for the vehicle interior.
X
To activate: press theÌbutton.
The indicator lamp in the Ìbutton lights
up.
i The blower will run at alow speed regard-
less of the airflow setting.
i If you activate the residual heat function
at high temperatures, only the ventilation
will be activated. The blower runs at
medium speed.
X To deactivate: press theÌbutton.
The indicator lamp in the Ìbutton goes
out.
i It is possible that the residual heat func-
tion may be activated automatically an hour
after the key has been removed. The vehi-
cle is then ventilated for 30minutes to dry
the air-conditioning system.
Residual heat is deactivated automatically:
R after approximately 30 minutes
R when the ignition is switched on
R if the battery voltage drops Auxiliary heating
Important safety notes G
WARNING
Exhaust fumes are produced when the auxili-
ary heating is in operation. Inhaling these
exhaust fumes can be poisonous. You should
therefore switch off the auxiliary heating in
confined spaces without an extraction sys-
tem, e.g. agarage. G
WARNING
When operating the auxiliary heating parts of
the vehicle can get very hot. Make sure that
the exhaust system does not under any cir-
cumstances come into contact with easily
ignitable material such as dry grass or fuels.
The material could otherwise ignite and set 132
Operating the climate control systemClimatec
ontrol
Page 164 of 373
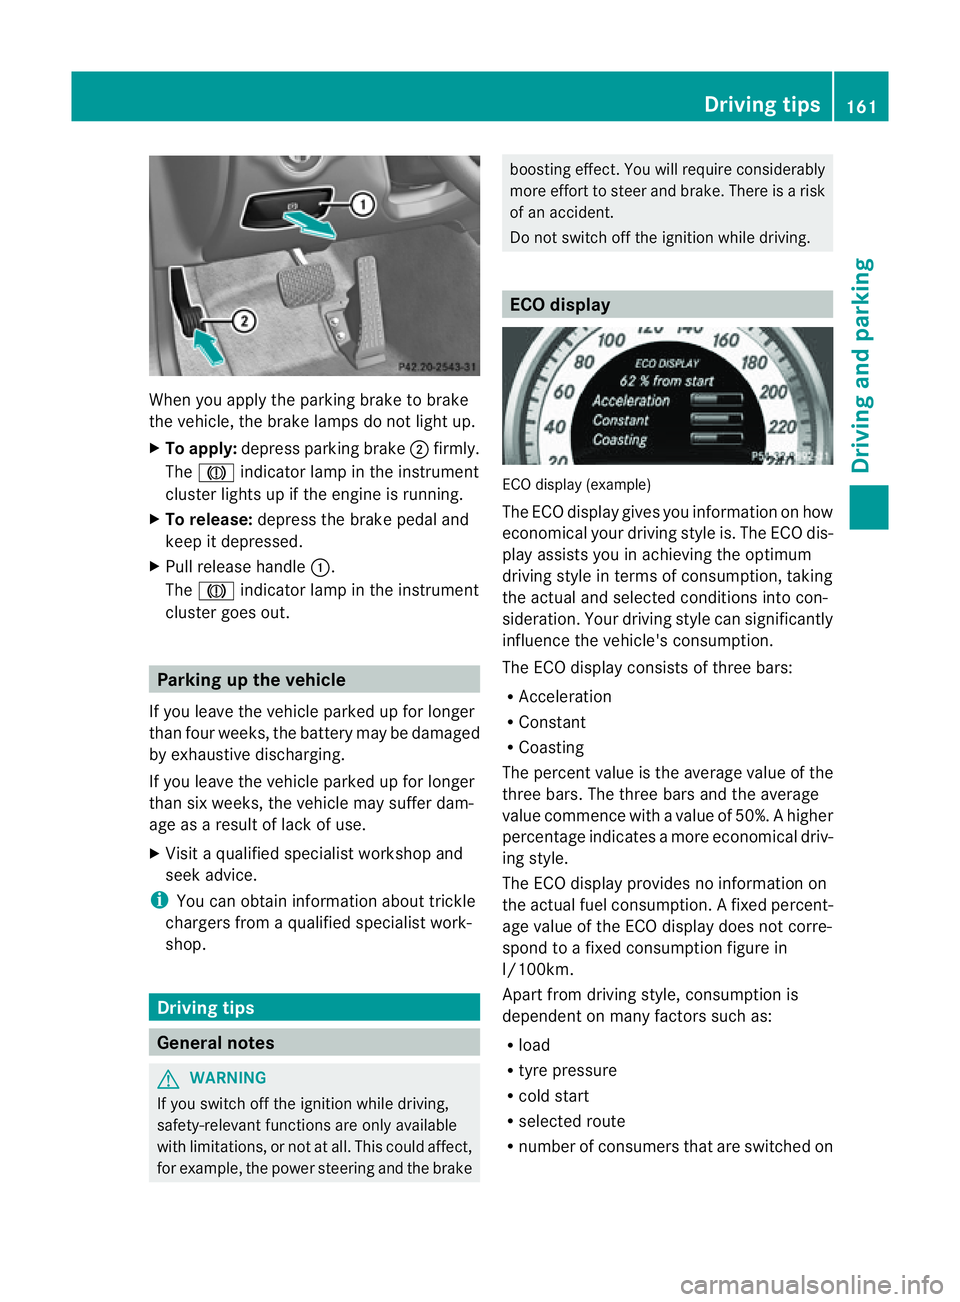
When you apply the parking brake to brake
the vehicle, the brake lamps do not light up.
X To apply: depress parking brake ;firmly.
The J indicato rlamp in the instrument
cluster lights up if the engine is running.
X To release: depress the brake pedal and
keep it depressed.
X Pull release handle :.
The J indicato rlamp in the instrument
cluster goes out. Parking up the vehicle
If you leave the vehicle parked up for longer
than four weeks, the batter ymay be damaged
by exhaustive discharging.
If you leave the vehicle parked up for longer
than six weeks, the vehicle may suffer dam-
age as aresult of lack of use.
X Visit aqualified specialist workshop and
seek advice.
i You can obtain information about trickle
chargers from aqualified specialist work-
shop. Driving tips
General notes
G
WARNING
If you switch off the ignition while driving,
safety-relevant functions are only available
with limitations, or not at all. This could affect,
for example, the power steerin gand the brake boostin
geffect. You will require considerably
more effort to steer and brake. There is arisk
of an accident.
Do not switch off the ignition while driving. ECO display
ECO display (example)
The ECO display gives you information on how
economical your driving style is. The ECO dis-
play assists you in achieving the optimum
driving style in term
sofconsumption ,taking
the actual and selected conditions into con-
sideration. Your driving style can significantly
influenc ethe vehicle's consumption.
The ECO display consists of three bars:
R Acceleration
R Constant
R Coasting
The percen tvalue is th eaverage value of the
three bars .The three bars and the average
value commence with avalue of 50%. Ahigher
percentage indicates amoree conomical driv-
ing style.
The ECO display provides no information on
the actual fue lconsumption. Afixed percent-
age value of the ECO display does not corre-
spon dtoaf ixed consumption figure in
l/100km.
Apar tfromd rivin gstyle, consumption is
dependent on many factors such as:
R load
R tyre pressure
R cold start
R selected route
R number of consumer sthat are switched on Driving tips
161Driving and parking Z
Page 172 of 373
tha
tstore dast he limi tspeed. You could oth-
erwise cause an accident.
You can only exceed the limit speed stored if
you deactivate variable SPEEDTRONIC:
R using the cruise control lever
R by depressin gthe accelerator pedal
beyond the pressure point (kickdown)
It is not possible to deactivate variable
SPEEDTRONIC by braking. X
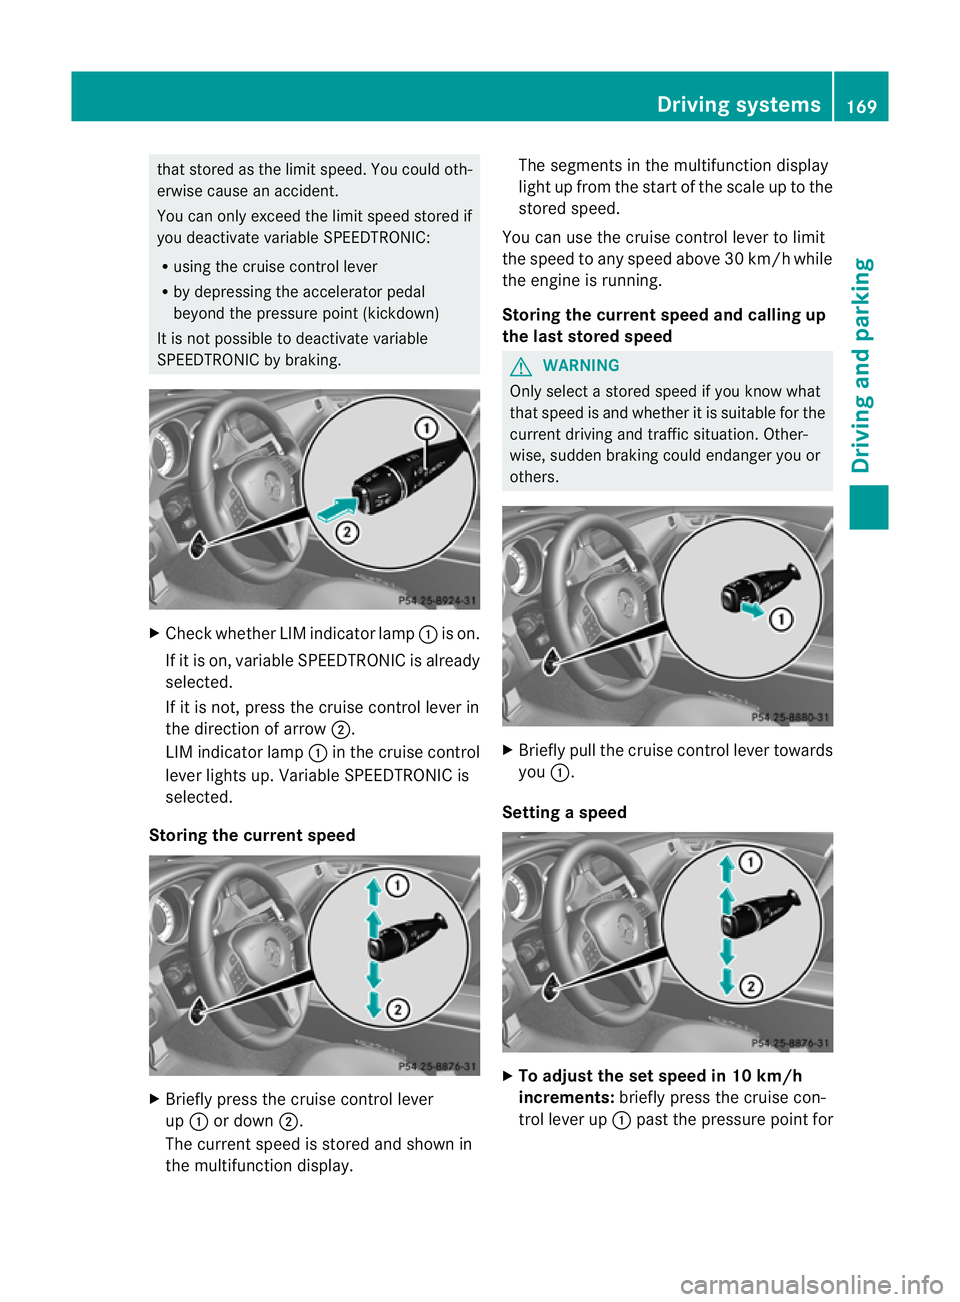
Check whether LIM indicator lamp :is on.
If it is on, variable SPEEDTRONIC is already
selected.
If it is not ,press the cruise contro llever in
the direction of arrow ;.
LIM indicator lamp :in the cruise control
lever lights up. Variable SPEEDTRONIC is
selected.
Storing the current speed X
Briefly press the cruise contro llever
up : or down ;.
The curren tspeed is stored and shown in
the multifunction display. The segments in the multifunction display
light up from the start of the scale up to the
stored speed.
You can use the cruise contro llever to limit
the speed to any speed above 30 km/ hwhile
the engine is running.
Storing the current speed and calling up
the last stored speed G
WARNING
Only select astored speed if you know what
that speed is and whether it is suitable for the
current driving and traffic situation. Other-
wise, sudden braking could endanger you or
others. X
Briefly pull the cruise control lever towards
you :.
Setting aspeed X
To adjust the se tspeed in 10 km/h
increments: brieflypress the cruise con-
trol lever up :past the pressure point for Drivin
gsystems
169Driving and parking Z