2012 MERCEDES-BENZ CLS COUPE change wheel
[x] Cancel search: change wheelPage 218 of 373
to the top of the displa
yasyouapproach the
point of the announced change of direction.
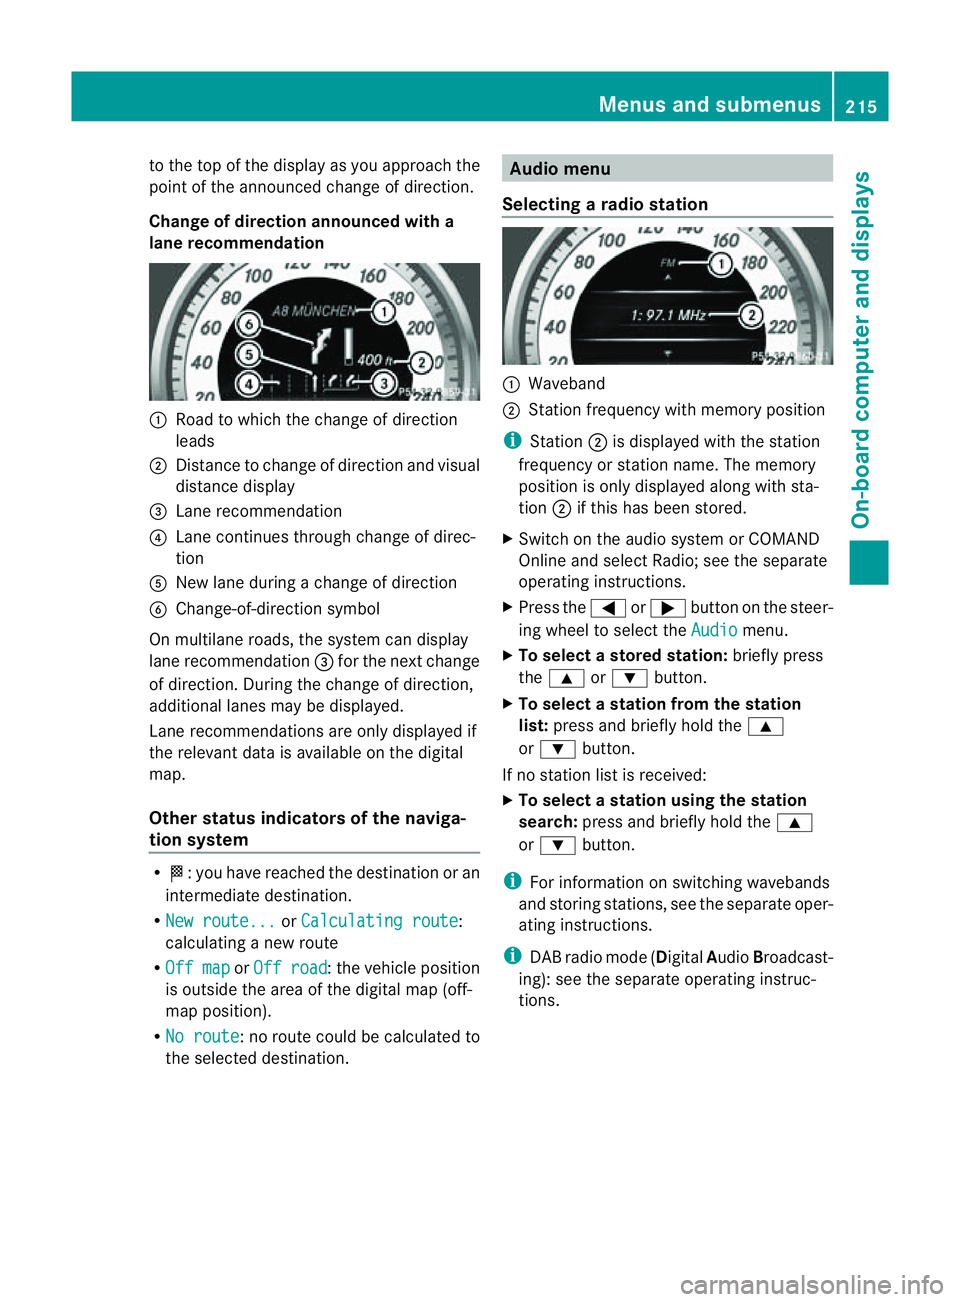
Chang eofdirection announced with a
lan erecommendation :
Road to which the change of direction
leads
; Distanc etochange of directio nand visual
distance display
= Lane recommendation
? Lane continue sthroug hchange of direc-
tion
A New lane during achange of direction
B Change-of-direction symbol
On multilane roads, the system can display
lane recommendation =for the next change
of direction. During the change of direction,
additional lanes ma ybedisplayed.
Lane recommendations ar eonlyd isplayed if
the relevant data is availabl eonthe digital
map.
Other status indicators of the naviga-
tion system R
O:y ou have reached the destination or an
intermediate destination.
R New route... or
Calculating route :
calculating anew route
R Off map or
Off road :t
he vehicle position
is outside the area of the digital map (off-
map position).
R No route :nor
oute could be calculated to
the selected destination. Audio menu
Selecting aradio station :
Waveband
; Station frequency with memory position
i Station ;is displayedw itht he station
frequency or statio nname. The memory
position is only displayeda long with sta-
tion ;if this has bee nstored.
X Switch on the audi osystemorC OMAND
Online and select Radio; see the separate
operating instructions.
X Press the =or; button on the steer-
ing wheel to select the Audio menu.
X To select astore dstation: brieflypress
the 9 or: button.
X To select astation from the station
list: press and briefl yholdt he 9
or : button.
If no statio nlist is received:
X To select astatio nusing the station
search: press and briefl yholdt he 9
or : button.
i For informatio nonswitchin gwavebands
and storin gstations ,see th eseparate oper-
atin ginstructions.
i DABradio mod e(Digital Audio Broadcast-
ing): see th eseparate operatin ginstruc-
tions. Menu
sand submenus
215On-boardcomputer and displays Z
Page 219 of 373
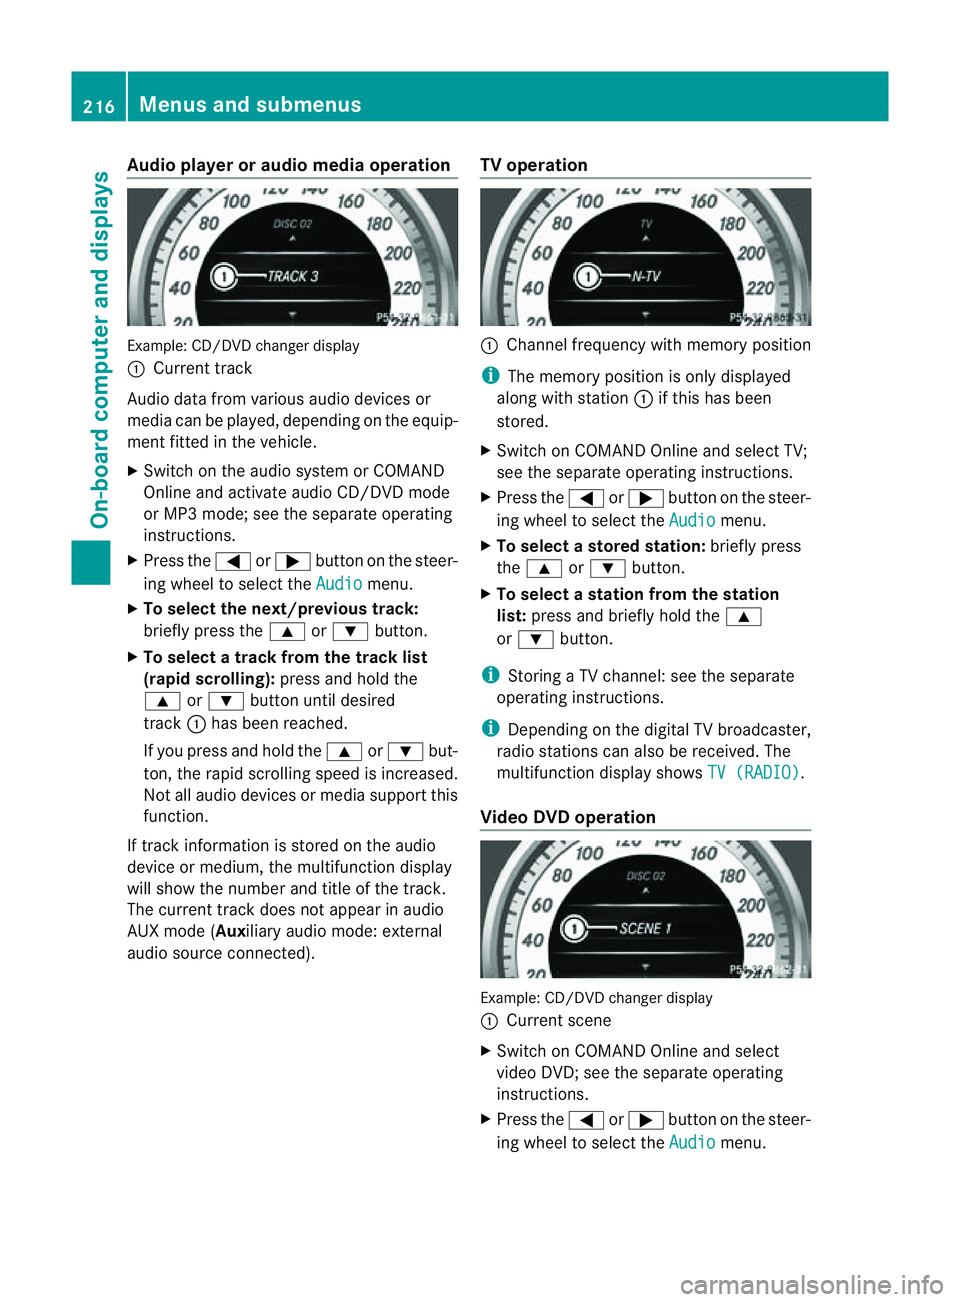
Audio player or audio media operation
Example: CD/DV
Dchanger display
: Current track
Audio data from various audiod evices or
media can be played, depending on the equip-
ment fitted in the vehicle.
X Switc hont he audio system or COMAND
Online and activat eaudio CD/DVD mode
or MP3 mode; see the separate operating
instructions.
X Press the =or; button on the steer-
ing wheel to select the Audio menu.
X To select the next/previous track:
briefly press the 9or: button.
X To select atrack from the track list
(rapid scrolling): press and hold the
9 or: button until desired
track :has been reached.
If you press and hold the 9or: but-
ton,t he rapid scrollin gspeed is increased.
Not all audio devices or media support this
function.
If trac kinformation is stored on the audio
device or medium, the multifunction display
will show the number and title of the track.
The curren ttrack does not appear in audio
AUX mode (Auxil iary audio mode: external
audio source connected). TV operation :
Channel frequency with memory position
i The memory position is only displayed
along with station :if this has been
stored.
X Switch on COMAND Online and select TV;
see the separate operating instructions.
X Press the =or; button on the steer-
ing whee ltoselect the Audio menu.
X To selectas toredstation: brieflypress
the 9 or: button.
X To select astation from the station
list: press and briefl yholdt he 9
or : button.
i Storing aTVchannel :see the separate
operatin ginstructions.
i Depending on the digital TV broadcaster,
radio stations can also be received. The
multifunction display shows TV (RADIO) .
Video DVD operation Example: CD/DVD changer display
:
Current scene
X Switc honC OMAND Online and select
video DVD;s ee the separate operating
instructions.
X Press the =or; button on the steer-
ing wheel to select the Audio menu.216
Menus and submenusOn-boar
dcomputer and displays
Page 224 of 373
In the
Serv. menu, you have the following
options:
R call up display messages in the message
memory (Y page 231)
R restart the tyre pressure loss warning sys-
tem (Y page 333)
R check the tyre pressure electronically
(Y page 334)
R call up when aservice is due
(Y page 300) Settings menu
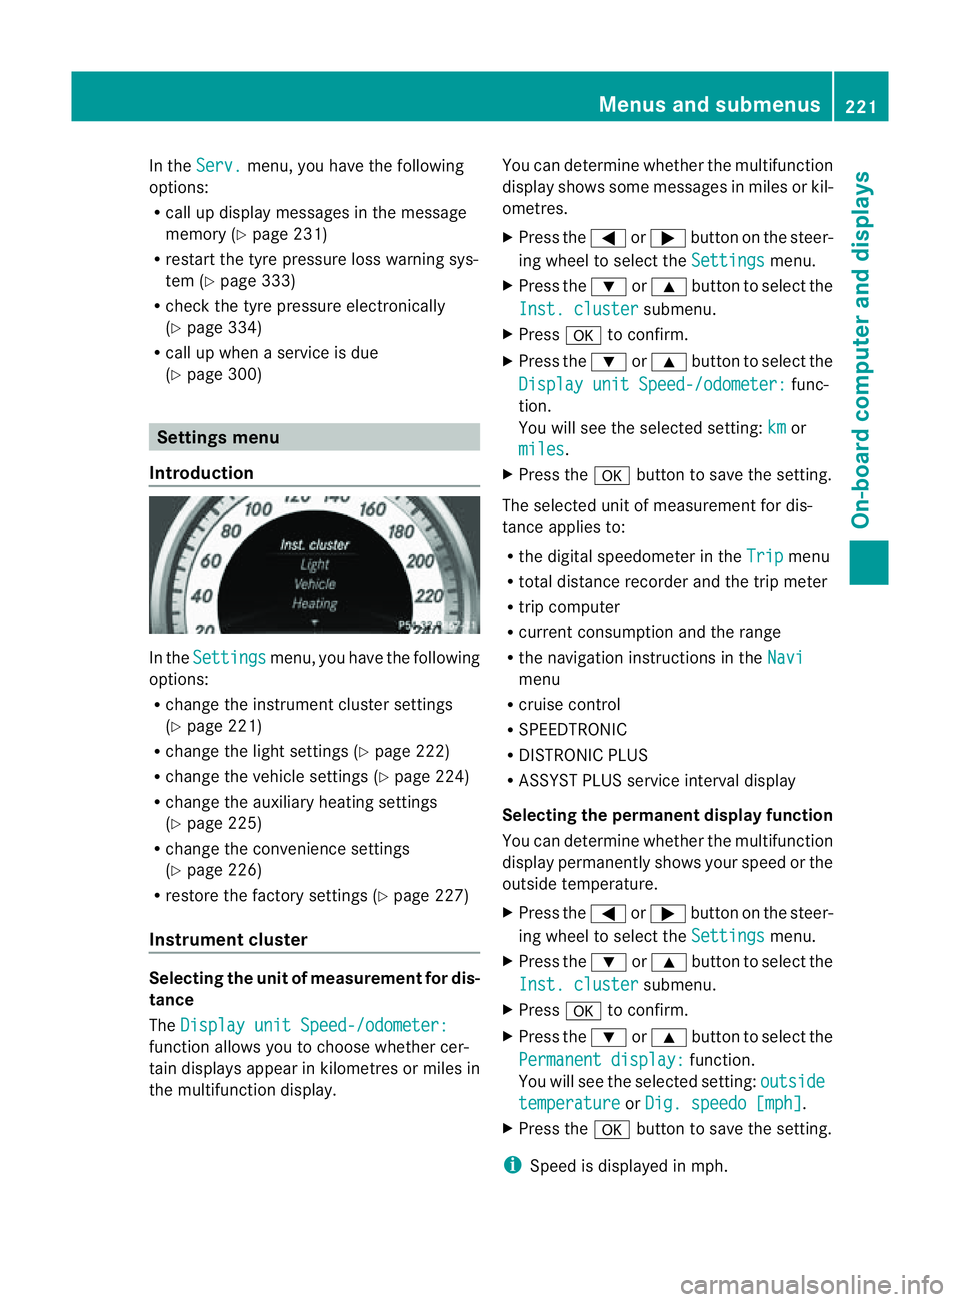
Introduction In the
Settings menu, you have the following
options:
R change the instrument cluster settings
(Y page 221)
R change the lights ettings (Ypage 222)
R change the vehicle settings (Y page 224)
R change the auxiliary heating settings
(Y page 225)
R change the convenience settings
(Y page 226)
R restore the factory settings (Y page 227)
Instrument cluster Selecting the unit of measurement for dis-
tance
The Display unit Speed-/odometer: function allows you to choose whether cer-
tain displays appear in kilometres or miles in
the multifunction display. You can determine whether the multifunction
display shows some messages in miles or kil-
ometres.
X
Press the =or; button on the steer-
ing wheel to select the Settings menu.
X Press the :or9 button to select the
Inst. cluster submenu.
X Press ato confirm.
X Press the :or9 button to select the
Display unit Speed-/odometer: func-
tion.
You will see the selected setting: km or
miles .
X Press the abutton to save the setting.
The selected unit of measuremen tfor dis-
tancea pplies to:
R the digital speedometer in the Trip menu
R total distance recorder and the trip meter
R trip computer
R current consumption and the range
R the navigation instructions in the Navi menu
R cruise control
R SPEEDTRONIC
R DISTRONIC PLUS
R ASSYST PLUS service interval display
Selecting the permanent display function
You can determin ewhether the multifunction
display permanently shows your speed or the
outside temperature.
X Press the =or; button on the steer-
ing wheel to select the Settings menu.
X Press the :or9 button to select the
Inst. cluster submenu.
X Press ato confirm.
X Press the :or9 button to select the
Permanent display: function.
You will see the selected setting: outside temperature or
Dig. speedo [mph] .
X Press the abutton to save the setting.
i Speed is displayed in mph. Menus and submenus
221On-board computer and displays Z
Page 226 of 373
Setting the dipped-beam headlamps for
driving on the left/right
X Press the =or; button on the steer-
ing wheel to select the Settings menu.
X Press the :or9 button to select the
Light submenu.
X Press ato confirm.
X Press the :or9 button to select the
Dipped beams Setting for: function.
You will see the selected setting: Right-side traffic or
Left-side traffic .
X Press the abutton to save the setting.
If you change the setting, conversion does
not take place until the next time the vehi-
cle is stationary.
This function is only available on vehicles with
the Intelligent Light System.
You can use this function to switch between
symmetrical and asymmetrical dipped beam
(Y page 110).
If you set the dipped-beam headlamps for
driving on the right/left ,then motorway
mode and the extended range foglamps are
unavailable.
Aq ualified specialist worksho pcan set the
dipped-beam headlamps for driving on the
right or left .
Switchin gAdaptive Highbeam Assis ton/
off
X Press the =or; button on the steer-
ing wheel to select the Settings menu.
X Press the :or9 button to select the
Light submenu.
X Press ato confirm.
X Press the :or9 button to select the
Adapt. main beam function.
If the Adapt. main beam function has
been switched on, the coneofl ight and the
_ symbol in the upper multifunction
display are shown in red.
X Press the abutton to save the setting.
For further information about Adaptive High-
beam Assist ,see (Y page 117). Setting the brightness of the ambient
lighting
X
Press the =or; button on the steer-
ing wheel to select the Settings menu.
X Press the :or9 button to select the
Light submenu.
X Press ato confirm.
X Press the :or9 button to select the
Amb. light +/- function.
You will see the selected setting.
X Press ato confirm.
X Press the :or9 button to adjust the
brightness to any level from Off to
Level 5 (bright).
X Press the aor% button to save the
setting.
Setting the ambient lighting colour
X Press the =or; button on the steer-
ing wheel to select the Settings menu.
X Press the :or9 button to select the
Light submenu.
X Press ato confirm.
X Press the :or9 button to select the
Ambient light colour function.
X Press ato confirm.
X Press the :or9 button to set the
colour to SOLAR ,
NEUTRAL or
POLAR .
X Press the aor% button to save the
setting.
Activating/deactivating the surround
lighting and exterior lighting delayed
switch-off
X Press the =or; button on the steer-
ing wheel to select the Settings menu.
X Press the :or9 button to select the
Light submenu.
X Press ato confirm. Menus and submenus
223On-boardcomputer and displays Z
Page 229 of 373
!
Operating the auxiliary heating/ventila-
tion draws on the vehicle battery. After you
have heated or ventilated the vehicle a
maximum of two times, drive for alonger
distance.
This function is only available on vehicles with
auxiliary heating (Y page 132).
In the Heating submenu, you can select a
stored departure time or change adeparture
time.
The auxiliary heating timer function calcu-
lates the switch-on time according to the out-
side temperature so that the vehicle is pre-
heated by the departure time. When the
departure time is reached, the auxiliary heat-
ing continues to heat for afurther five
minutes and then switches off. The auxiliary
heating adopts the THERMATIC or
THERMOTRONIC temperature setting.
You can switch off the auxiliary heating by
using the remote control or the auxiliary heat-
ing button on the centre console.
i Switch the auxiliary heating on regularly
once amonth for aboutt en minutes.
Selecting the departure time or deactivat-
ing aselected departure time
X Press the =or; button on the steer-
ing wheel to select the Settings menu.
X Press the :or9 button to select the
Heating submenu.
X Press ato confirm.
You will see the selected setting.
X Press ato confirm.
X Press the :or9 button to select
one of the three departure times or Timeroff (no timer active).
X Press ato confirm.
If ad eparture time is selected, the yellow
indicator lamp lights up on the auxiliary
heating button. Changing the departure time
X
Press the =or; button on the steer-
ing wheel to select the Settings menu.
X Press the :or9 button to select the
Heating submenu.
X Press ato confirm.
You will see the selected setting.
X Press ato confirm.
X Press the :or9 button to select A ,
B or
Change C .
X Press ato confirm.
You can now change the departure time.
X Press the =or; button to select the
displaytobec hanged: hours, minutes.
X Press the :or9 button to set the
selected display.
X Press the abutton to store the entry.
The yellow indicator lamp on the auxiliary
heating button lights up.
Convenience Activating/deactivating the EASY-
ENTRY/EXIT feature
G
WARNING
The steering wheel moves when the EASY-
ENTRY/EXIT feature is active. There is arisk
of occupants becoming trapped. Before acti-
vating the EASY-ENTRY/EXIT feature, make
sure that nobody can become trapped.
Do not leave children unsupervised in the
vehicle, even if they are secured in achild
restraint system. The children could open the
driver's door and thereby unintentionally acti-
vate the EASY-ENTRY/EXIT feature and
become trapped.
X Press the =or; button on the steer-
ing wheel to select the Settings menu.
X Press the :or9 button to select the
Convenience submenu.
X Press ato confirm. 226
Menus and submenusOn-board computer and displays
Page 304 of 373
Special service requirements
Arduous operating condition
sorincreased
loads on the vehicle will require some service
work to be performed more often than for a
vehicle in normal use. Such arduousc ondi-
tions include regular city driving with frequent
intermediate stops and use in mountainous
terrain or on poor road surfaces.
For example, if the vehicle is used under ardu-
ous operating conditions, have air filters,
engine oil and oil filters changed frequently
and check the wheels often.F urther informa-
tion can be obtaine dataqualified specialist
workshop, e.g. aMercedes-Ben zService
Centre.
Driving abroad
An extensive Mercedes-BenzS ervice network
is also available in other countries. The
Service Hotline's curren ttelephone numbers
for use when you are abroad are to be found
in the "Mercedes-Benz Service24h" section
of the Service Booklet. Care
General notes
H
Environmental note
Dispose of empty packagin gand cleaning
cloth sinane nvironmentally responsible man-
ner.
! For cleanin gyour vehicle, do not use any
of the following:
R dry, rough or hard cloths
R abrasive cleanin gagents
R solvents
R cleanin gagents containin gsolvents
Do not scrub.
Do not touch the surfaces or protective
films with hard objects, e.g. aring or ice
scraper. You could otherwise scratch or
damage the surfaces and protective film. !
Do not park up the vehicle for an extended
period straight after cleanin git, particularly
after having cleaned the wheels with wheel
cleaner. Wheel cleaners could cause
increased corrosion of the brake discs and
brake pads/linings. For this reason, you
should drive for afew minutes after clean-
ing. Braking heats the brake discs and the
brake pads/linings, thus drying them. The
vehicle can then be parked up.
Regular care of your vehicle is acondition for
retaining the quality in the long term.
Use care product sand cleanin gagents rec-
ommended and approved by Mercedes-Benz. Washing the vehicle and cleaning the
paintwork
Automatic car wash G
WARNING
Braking efficiency is reduced after washing
the vehicle. This could cause an accident. For
this reason, following acar wash, drive with
particular care until the brakes are dry. G
WARNING
The vehicle is braked when the HOLD function
or DISTRONIC PLUS is activated. Therefore,
deactivat ethe HOLD function and DISTRONIC
PLUS before the vehicle is washed in an auto-
matic car wash.
! Make sure that:
R the side windows and sliding sunroof are
closed completely.
R the blower for the ventilation/heating is
switched off (OFF button is depressed).
R the windscreen wiper switch is at posi-
tion 0.
The vehicle could otherwise be damaged.
! In car washes with atowing mechanism,
make sure that the automatic transmission
is in transmission position N,otherwise the
vehicle could be damaged. Care
301Maintenance and care Z
Page 309 of 373
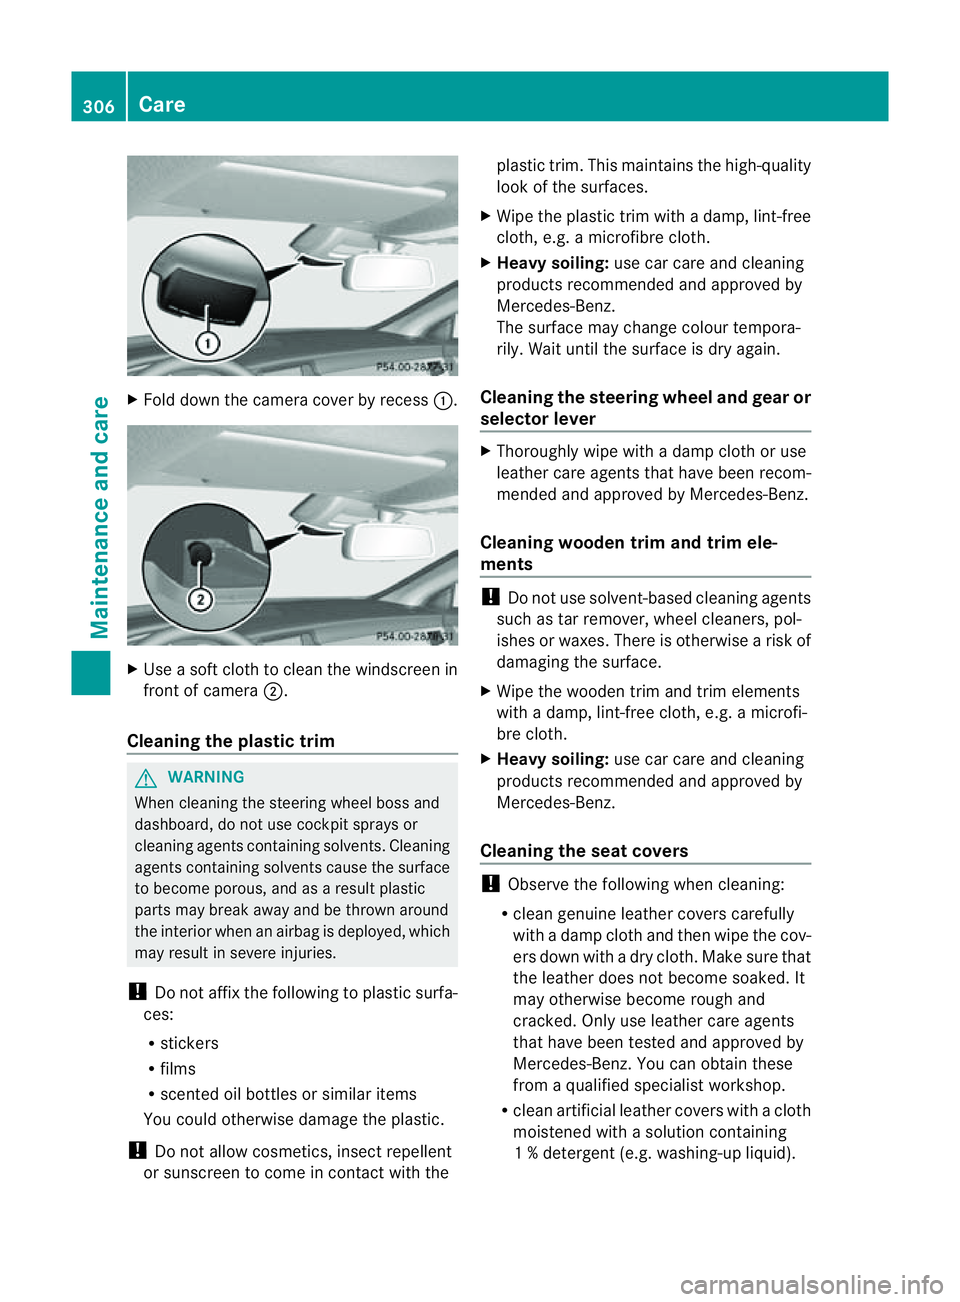
X
Fold dow nthe camera cover by recess :.X
Use asoft cloth to clean the windscreen in
front of camera ;.
Cleaningt he plastic trim G
WARNING
When cleaning the steering wheel boss and
dashboard, do not use cockpit sprays or
cleaning agents containing solvents. Cleaning
agents containing solvents cause the surface
to become porous, and as aresult plastic
parts may break away and be thrown around
the interior when an airbag is deployed, which
may result in severe injuries.
! Do not affix the following to plastic surfa-
ces:
R stickers
R films
R scented oil bottles or similar items
You could otherwise damage the plastic.
! Do not allow cosmetics, insect repellent
or sunscreen to come in contact with the plastic trim
.This maintains the high-quality
look of the surfaces.
X Wipe the plastic trim with adamp, lint-free
cloth, e.g. amicrofibre cloth.
X Heavy soiling: use car care and cleaning
products recommended and approved by
Mercedes-Benz.
The surface may change colour tempora-
rily. Wait until the surface is dry again.
Cleaningt he steering wheel and gear or
selector lever X
Thoroughly wipe with adamp cloth or use
leather care agents that have been recom-
mended and approved by Mercedes-Benz.
Cleaningw ooden trim and trim ele-
ments !
Do not use solvent-based cleaning agents
such as tar remover, wheel cleaners, pol-
ishes or waxes. There is otherwise arisk of
damaging the surface.
X Wipe the wooden trim and trim elements
with adamp, lint-free cloth, e.g. amicrofi-
bre cloth.
X Heavy soiling: use car care and cleaning
products recommended and approved by
Mercedes-Benz.
Cleaningt he seat covers !
Observe the following when cleaning:
R clean genuine leather covers carefully
with adamp cloth and then wipe the cov-
ers down with adry cloth. Make sure that
the leather does not become soaked. It
may otherwise become rough and
cracked. Only use leather care agents
that have been tested and approved by
Mercedes-Benz. You can obtain these
from aqualified specialist workshop.
R clean artificial leather covers with acloth
moistened with asolution containing
1%d etergen t(e.g. washing-up liquid). 306
CareMaintenance and care
Page 314 of 373
Fir
ee xtinguisher
! Kee pthe stowage compartmen tclosed
while the vehicle is in motion. It may oth-
erwise be damaged.
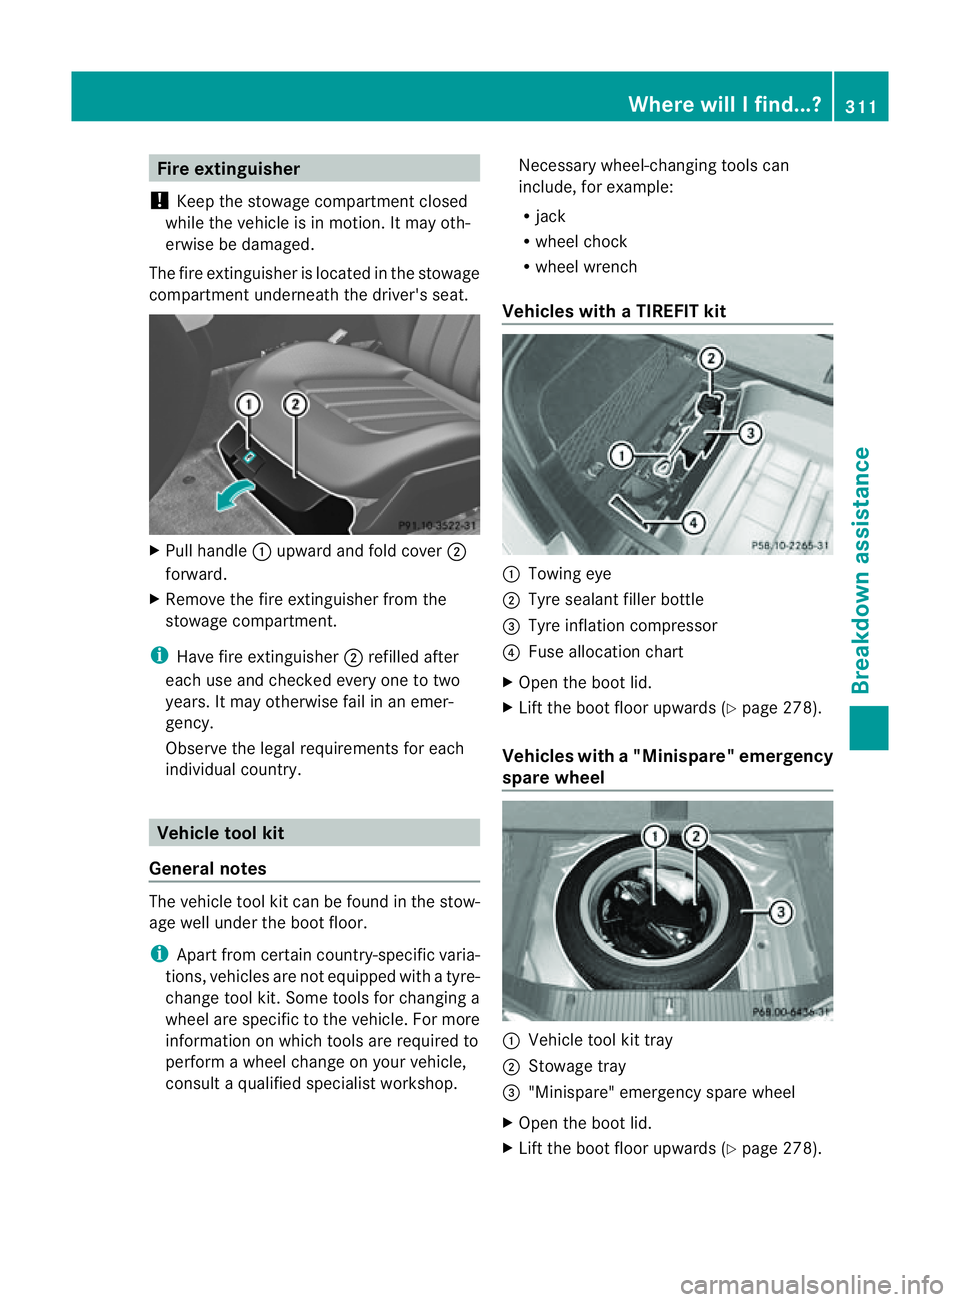
The fire extinguisher is located in the stowage
compartmen tunderneat hthe driver's seat. X
Pull handle :upward and fold cover ;
forward.
X Remove the fire extinguisher fro mthe
stowage compartment.
i Have fire extinguisher ;refilled after
each use and checked every one to two
years. It may otherwise fail in an emer-
gency.
Observe the legal requirements for each
individualc ountry. Vehicle tool kit
General notes The vehicle tool kit can be found in the stow-
age well under the boot floor.
i Apart from certain country-specific varia-
tions, vehicles are not equipped with atyre-
change tool kit. Some tools for changing a
wheel are specific to the vehicle. For more
information on which tools are required to
perform awheel change on your vehicle,
consult aqualified specialist workshop. Necessary wheel-changing tools can
include, for example:
R
jack
R wheel chock
R wheel wrench
Vehicles with aTIREFIT kit :
Towin geye
; Tyre sealan tfiller bottle
= Tyre inflation compressor
? Fuse allocation chart
X Open the boot lid.
X Lift the boot floor upwards ( Ypage 278).
Vehicles with a"Minispare" emergency
spare wheel :
Vehicle tool kit tray
; Stowag etray
= "Minispare" emergency spare wheel
X Open the boot lid.
X Lift the boot floor upwards (Y page278). Where will
Ifind...?
311Breakdown assistance