Page 241 of 488

XTo move to the lower menu bar: select
by sliding ZVÆ the COMAND controller
and press W to confirm.
i
When you press the T function button,
the previously adjusted seat is active.
XTo adjust the lumbar support: select by
sliding XVY or turning cVd the COMAND
controller and press W to confirm.
Multicontour seat
i
Information about the components and
operating principles of COMAND can be
found on ( Y page 108).
The contour of the driver's seat and front-
passenger seat backrests can be individually
adjusted to provide optimum support for your
back. This is achieved by controlling the
pressure in the air chambers in the
multicontour seat.
The adjustments are made using the
COMAND display.
i When you adjust the multicontour seat,
you may hear the air being pumped in or
released.
You can adjust the following air cushions:
R seat side bolsters
R seat backrest side bolsters
R backrest curvature in the lumbar region
R backrest curvature in the upper back
region
XMake sure that the SmartKey is in position
2 in the ignition lock.XPress the T function button.
Selecting the seat
You must first select the seat for which you
wish to make adjustments.
XPress the T function button.
The main area is active.XTo move to the lower menu bar: select
by sliding ZVÆ the COMAND controller
and press W to confirm.XTo select a seat: select by sliding XVY or
turning cVd the COMAND controller and
press W to confirm.
Exiting a menu
There are several ways of exiting the menu for
the multicontour seat:
XPress the T function button again.
or
XPress any function button.
or
XSelect another main function from the
basic menu.
Display values
Two values are displayed on the setting scale
if you adjust the multicontour seat:
R red: this is the desired value which you
specify when making the setting.
R white: this is the current value. It is changed
gradually until it reaches the desired value.
Vehicle239COMANDZ
Page 242 of 488

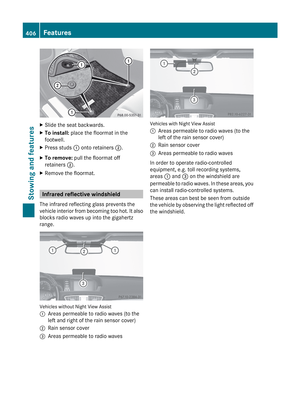
Adjusting the seat side bolsters
This function allows you to adjust the air
cushions in the seat side bolsters.XSelect the seat ( Y page 239).XSelect Seat Sides by sliding XVY or
turning cVd the COMAND controller and
press W to confirm.
A scale appears.XSelect Setting by sliding ZVÆ or turning
cVd the COMAND controller and press
W to confirm.
Adjusting the seat backrest side bolsters
This function allows you to adjust the air
cushions in the seat backrest side bolsters.
XSelect the seat ( Y page 239).XSelect Seatb. Sides by sliding XVY or
turning cVd the COMAND controller and
press W to confirm.
A scale appears.XSelect Setting by sliding ZVÆ or turning
cVd the COMAND controller and press
W to confirm.Adjusting the backrest curvature in the
lumbar region
This function allows you to adjust the air
cushions in the lumbar region of the backrest.XSelect the seat ( Y page 239).XSelect Lumbar by sliding XVY or turning
cVd the COMAND controller and press
W to confirm.
A crosshair appears. You can make two
settings:
R Vertical: to move the point of greatest
lumbar support up or down
R Horizontal: to adjust the amount of
supportXSelect Setting by sliding ZVÆ or turning
cVd the COMAND controller and press
W to confirm.
Adjusting the backrest curvature in the
upper back region
This function allows you to adjust the air
cushions in the upper back region of the
backrest.
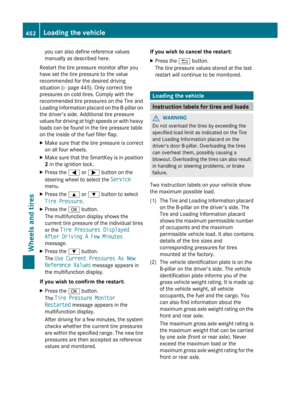
XSelect the seat ( Y page 239).XSelect Shoulders by sliding XVY or
turning cVd the COMAND controller and
press W to confirm.
A scale appears.240VehicleCOMAND
Page 243 of 488

XSelect Setting by sliding ZVÆ or turning
cVd the COMAND controller and press
W to confirm.
Resetting adjustments
You can reset the seat settings to the factory
settings.
XSelect the seat ( Y page 239).XSelect Reset All by sliding XVY or
turning cVd the COMAND controller and
press W to confirm.
Active multicontour seat
The dynamic function of the active
multicontour seat automatically adapts the
side bolsters of the backrest to your current
driving style.
XSelect the seat ( Y page 239).XSelect Dynamic Seat by sliding XVY or
turning cVd the COMAND controller and
press W to confirm.XTo confirm your selection: press W.
A scale appears.
You can select:
R 0: Off
R 1: Level 1
R 2: Level 2XSelect Setting by sliding ZVÆ or turning
cVd the COMAND controller and press
W to confirm.
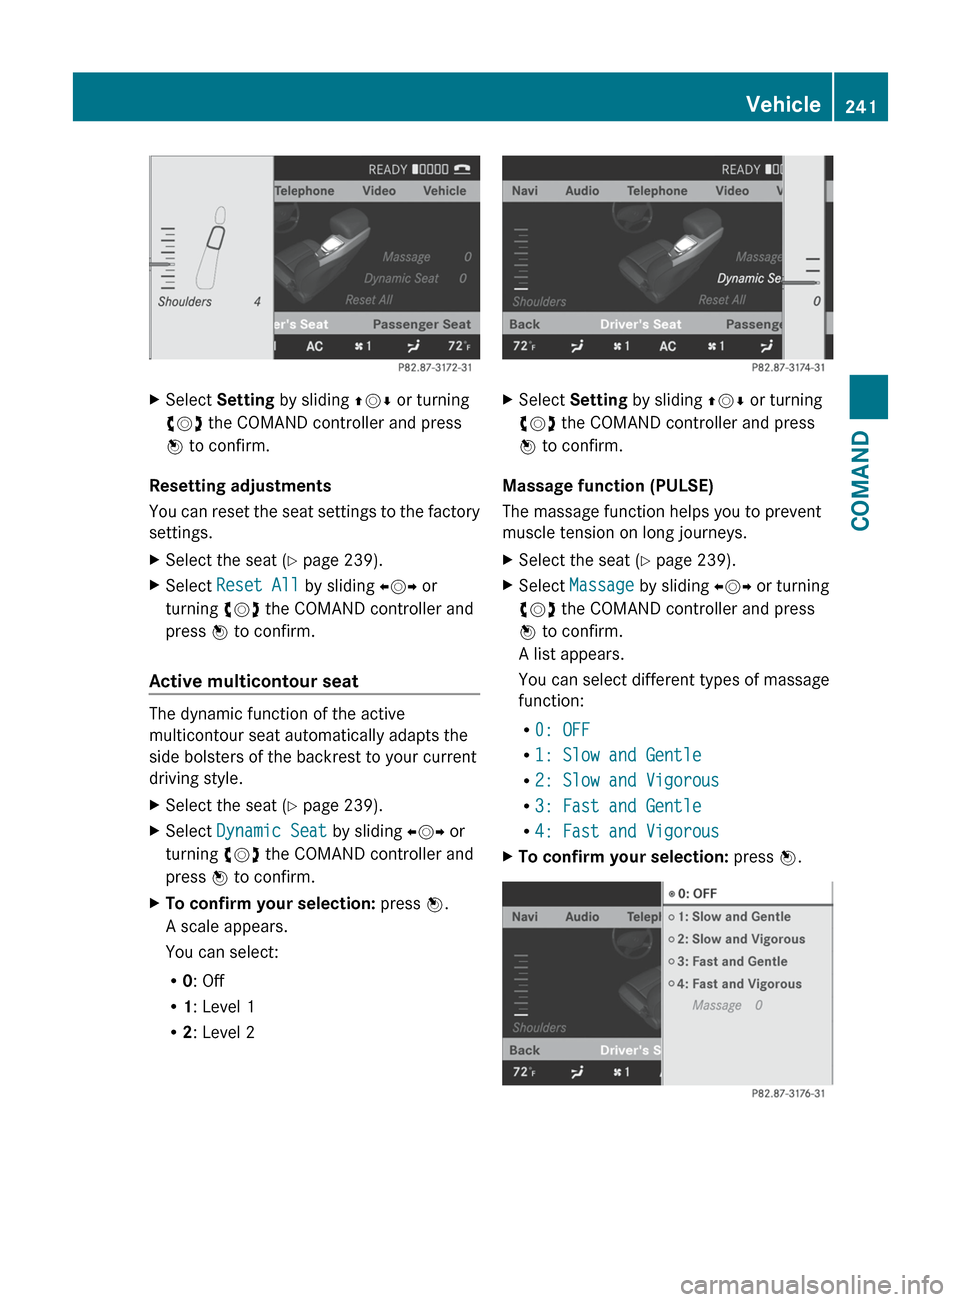
Massage function (PULSE)
The massage function helps you to prevent
muscle tension on long journeys.
XSelect the seat ( Y page 239).XSelect Massage by sliding XVY or turning
cVd the COMAND controller and press
W to confirm.
A list appears.
You can select different types of massage
function:
R 0: OFF
R 1: Slow and Gentle
R 2: Slow and Vigorous
R 3: Fast and Gentle
R 4: Fast and VigorousXTo confirm your selection: press W.Vehicle241COMANDZ
Page 244 of 488

XSelect Setting by sliding ZVÆ or turning
cVd the COMAND controller and press
W to confirm.
The massage function runs for
approximately 6 to 20 minutes, depending
on the setting.
Uploading/downloading data
With this function, you can transfer COMAND
data from one system (vehicle) to another
system (vehicle). You can use either a USB
stick or an SD card as temporary storage.
You can only transfer the complete
transferable data record.
The following data is included in the complete
transferable data record:
R navigation destination memory and last
destination
R address book entries
R audio station/video channel presets
R system settings
Copying data to a storage medium
XInsert an SD card into the SD card slot
or
XInsert a USB stick into the socket on the
side in the glove box.XSelect Vehicle in the main function bar by
turning cVd the COMAND controller and
press W to confirm.
The "Vehicle" menu appears.XSelect System and press W to confirm.XSelect Upload/Download Data and press
W to confirm.XSelect Copy Data to Storage Medium
and press W to confirm.XSelect the storage medium to which the
data should be copied.XSelect Start Copying .
COMAND checks whether the storage
medium has enough storage capacity. If
there is enough storage capacity, the data
is copied to the storage medium.XIf there is not enough storage capacity,
remove the storage medium. Make more
storage space available on the storage
medium. Then, try to copy the COMAND
data to the storage medium again.XRemove the storage medium.
Transferring data to another system
(vehicle)
XInsert/connect the storage medium (SD
card or USB stick) with the saved data into/
to the relevant interface.XSelect Vehicle in the main function bar by
turning cVd the COMAND controller and
press W to confirm.
The "Vehicle" menu appears.XSelect System and press W to confirm.XSelect Upload/Download Data and press
W to confirm.XSelect Import Data from Storage
Medium and press W to confirm.XSelect Start Data Import .
A prompt appears, asking whether the
COMAND data should be overwritten.XPress Yes to confirm that the data saved in
COMAND should be overwritten.
COMAND imports the data and restarts the
system.
or
XPress No to cancel the import process.242VehicleCOMAND
Page 245 of 488
Useful information ............................244
Exterior lighting ................................ 244
Interior lighting ................................. 249
Replacing bulbs ................................. 250
Windshield wipers ............................251243Lights and windshield wipers
Page 246 of 488

Useful information
i This Operator's Manual describes all
models and all standard and optional
equipment of your vehicle available at the
time of publication of the Operator's
Manual. Country-specific differences are
possible. Please note that your vehicle may
not be equipped with all features
described. This also applies to safety-
related systems and functions.
i Please read the information on qualified
specialist workshops ( Y page 29).
Exterior lighting
Important safety notes
For reasons of safety, Mercedes-Benz
recommends that you drive with the lights
switched on even during the daytime. In some
countries, operation of the headlamps varies
due to legal requirements and self-imposed
obligations.
Information about driving abroad
Converting to symmetrical low beam
when driving abroad: switch the headlamps
to symmetrical low beam in countries in
which traffic drives on the opposite side of the
road to the country where the vehicle is
registered. This prevents glare to oncoming
traffic. Symmetrical lights do not illuminate
as large an area of the edge of the road.
Have the headlamps converted at a qualified
specialist workshop, e.g. an authorized
Mercedes-Benz Center, as close to the border
as possible before driving in these countries.
Converting to asymmetrical low beam
after returning: have the headlamps
converted back to asymmetrical low beam at
a qualified specialist workshop, e.g. an
authorized Mercedes-Benz Center, as soon as
possible after crossing the border again.
Light switch
Operation
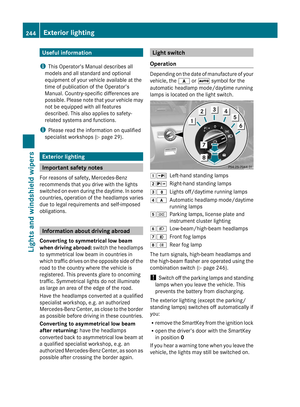
Depending on the date of manufacture of your
vehicle, the c or à symbol for the
automatic headlamp mode/daytime running
lamps is located on the light switch.
1 WLeft-hand standing lamps2XRight-hand standing lamps3$Lights off/daytime running lamps4cAutomatic headlamp mode/daytime
running lamps5 TParking lamps, license plate and
instrument cluster lighting6 LLow-beam/high-beam headlamps7NFront fog lamps8RRear fog lamp
The turn signals, high-beam headlamps and
the high-beam flasher are operated using the
combination switch ( Y page 246).
! Switch off the parking lamps and standing
lamps when you leave the vehicle. This
prevents the battery from discharging.
The exterior lighting (except the parking/
standing lamps) switches off automatically if
you:
R remove the SmartKey from the ignition lock
R open the driver's door with the SmartKey
in position 0
If you hear a warning tone when you leave the
vehicle, the lights may still be switched on.
244Exterior lightingLights and windshield wipers
Page 247 of 488

XTurn the light switch to $ or c .
or
XIf the rear fog lamp is switched on: press
the light switch in to the stop.
Low-beam headlamps
XTo switch on the low-beam headlamps:
turn the SmartKey in the ignition lock to
position 2 or start the engine.XTurn the light switch to L.
The T indicator lamp on the light switch
lights up.XTo switch off the low-beam
headlamps: turn the light switch to $.
Daytime running lamps
Daytime running lamps in Canada
The daytime running lamps function is
required by law in Canada. It cannot therefore
be deactivated.
XTurn the light switch to $ or c .
With the engine running: depending on the
ambient light, the daytime running lamps or
the low-beam headlamps are switched on.
When the low-beam headlamps are
activated, the T indicator lamp on the
light switch lights up.
When the engine is running and the vehicle is
stationary or if the electronic parking brake is
applied: if you move the selector lever from a
drive position to P, the daytime running
lamps/low-beam headlamps go out after
three minutes.
When the engine is running, the vehicle is
stationary and in high ambient light
brightness: if you turn the light switch
to T , the daytime running lamps and the
parking lamps are switched on.
If the engine is running and you turn the light
switch to L, the manual settings take
precedence over the daytime running lamps.
Daytime running lamps in the USA
In the USA, the daytime running lamps are
deactivated upon delivery from the factory.XTo activate the daytime running
lamps: activate the daytime running lamps
function in the on-board computer
( Y page 343).XTurn the light switch to $ or c .
With the engine running: depending on the
ambient light, the daytime running lamps or
the low-beam headlamps are switched on.
When the low-beam headlamps are
activated, the T indicator lamp on the
light switch lights up.
If the engine is running and you turn the light
switch to T or L , the manual settings
take precedence over the daytime running
lamps.
Automatic headlamp mode
XTo switch on automatic headlamp
mode: turn the light switch to c.
SmartKey in position 1 in the ignition lock:
the parking lamps are switched on or off
automatically depending on the brightness
of the ambient light.
With the engine running: depending on the
brightness of the ambient light, the daytime
running lamps 10
or the parking lamps and
low-beam headlamps are switched on or off
automatically.
When the low-beam headlamps are
switched on, the T indicator lamp on
the light switch lights up.GWARNING
If the light switch is set to c, the low-beam
headlamps will not come on automatically if
it is foggy. This could endanger you and
others. Therefore, turn the light switch to
L in fog.
10
Only if daytime running lamps have been activated via the on-board computer.Exterior lighting245Lights and windshield wipersZ
Page 248 of 488

The automatic headlamp feature is only an
aid. The driver is responsible for the vehicle's
lighting at all times.GWARNING
When it is dark or foggy, turn the light switch
quickly from c to L . Otherwise, the
headlamps could switch off temporarily and
you could cause an accident.
Front fog lamps
GWARNING
If you suspect that driving conditions will be
foggy, turn the light switch to L before you
start your journey. Otherwise, your vehicle
may not be visible and you could endanger
yourself and others.
GWARNING
In low ambient lighting or foggy conditions,
only switch from position c to L with
the vehicle at a standstill in a safe location.
Switching from c to L will briefly
switch off the headlamps. Doing so while
driving in low ambient lighting conditions may
result in an accident.
XTo switch on the front fog lamps: turn
the SmartKey in the ignition lock to position
2 or start the engine.XTurn the light switch to L or T . If the
light switch is set to c, you cannot
switch on the fog lamps.XPull the light switch out to the first detent.
The green N indicator lamp on the light
switch lights up.XTo switch off the front fog lamps: press
the light switch in as far as it will go.
The green N indicator lamp on the light
switch goes out.Rear fog lampXTo switch on the rear fog lamp: turn the
SmartKey in the ignition lock to position 2
or start the engine.XTurn the light switch to L or T . If the
light switch is set to c, you cannot
switch on the rear fog lamp.XTurn the light switch to L. If the light
switch is set to T, you cannot switch on
the rear fog lamp.XPull the light switch out to the second
detent.
The yellow R indicator lamp on the light
switch lights up.XTo switch off the rear fog lamp: press the
light switch in as far as it will go.
The yellow R indicator lamp on the light
switch goes out.
Headlamp cleaning system
The headlamps are cleaned automatically if
the "Wipe with washer fluid" function is
operated ten times while the lights are on and
the engine is running (Y page 251). When you
switch off the ignition, the automatic
headlamp cleaning system is reset and
counting is resumed from 0.
Combination switch
Turn signals
:High-beam headlamps;Right turn signal246Exterior lightingLights and windshield wipers