2012 MERCEDES-BENZ B-CLASS warning
[x] Cancel search: warningPage 84 of 340
Opening and closing
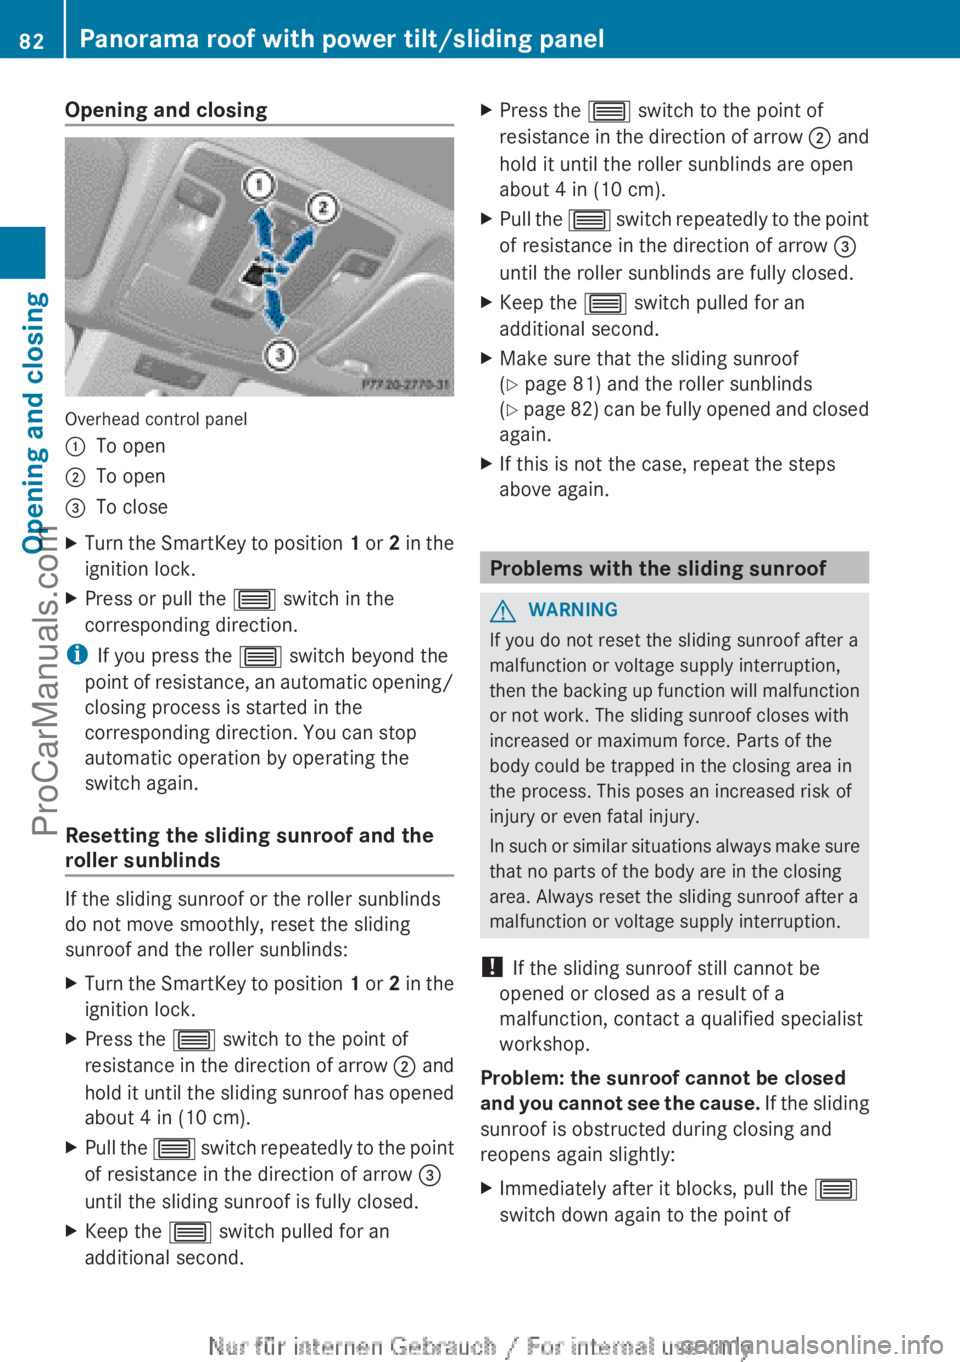
Overhead control panel
:
To open
; To open
= To close
X Turn the SmartKey to position 1 or
2 in the
ignition lock.
X Press or pull the 3 switch in the
corresponding direction.
i If you press the 3 switch beyond the
point of resistance,
an automatic opening/
closing process is started in the
corresponding direction. You can stop
automatic operation by operating the
switch again.
Resetting the sliding sunroof and the
roller sunblinds If the sliding sunroof or the roller sunblinds
do not move smoothly, reset the sliding
sunroof and the roller sunblinds:
X
Turn the SmartKey to position 1 or 2
in the
ignition lock.
X Press the 3 switch to the point of
resistance in the
direction of arrow ; and
hold it until the sliding sunroof has opened
about 4 in (10 cm).
X Pull the 3 switch
repeatedly
to the point
of resistance in the direction of arrow =
until the sliding sunroof is fully closed.
X Keep the 3 switch pulled for an
additional second. X
Press the 3 switch to the point of
resistance in the
direction of arrow ; and
hold it until the roller sunblinds are open
about 4 in (10 cm).
X Pull the 3 switch
repeatedly
to the point
of resistance in the direction of arrow =
until the roller sunblinds are fully closed.
X Keep the 3 switch pulled for an
additional second.
X Make sure that the sliding sunroof
(Y page 81) and the roller sunblinds
(Y page
82)
can be fully opened and closed
again.
X If this is not the case, repeat the steps
above again. Problems with the sliding sunroof
G
WARNING
If you do not reset the sliding sunroof after a
malfunction or voltage supply interruption,
then the backing
up function will malfunction
or not work. The sliding sunroof closes with
increased or maximum force. Parts of the
body could be trapped in the closing area in
the process. This poses an increased risk of
injury or even fatal injury.
In such or similar situations always make sure
that no parts of the body are in the closing
area. Always reset the sliding sunroof after a
malfunction or voltage supply interruption.
! If the sliding sunroof still cannot be
opened or closed as a result of a
malfunction, contact a qualified specialist
workshop.
Problem: the sunroof cannot be closed
and you cannot see the cause. If the sliding
sunroof is obstructed during closing and
reopens again slightly:
X Immediately after it blocks, pull the 3
switch down again to the point of 82
Panorama roof with power tilt/sliding panel
Opening and closing
ProCarManuals.com
Page 89 of 340
Seats
Important safety notes
G
WARNING
Children could become trapped if they adjust
the seats, particularly when unattended.
There is a risk of injury.
When leaving the vehicle, always take the
SmartKey with you
and lock the vehicle. Never
leave children unsupervised in the vehicle. G
WARNING
You could lose control of your vehicle if you
do the following while driving:
R adjust the driver's seat, head restraint,
steering wheel or mirrors
R fasten the seat belt
There is a risk of an accident.
Adjust the driver's seat, head restraint,
steering wheel and mirror and fasten your
seat belt before starting the engine. G
WARNING
If you adjust the seat height carelessly, you or
other vehicle occupants
could be trapped and
thereby injured. Children in particular could
accidentally press the electrical seat
adjustment buttons and become trapped.
There is a risk of injury.
While moving the seats, make sure that your
hands or other body parts do not get under
the lever assembly of the seat adjustment
system. G
WARNING
When you adjust a seat, you or other vehicle
occupants could become
trapped, e.g. on the
seat guide rail. There is a risk of injury.
Make sure when adjusting a seat that no one
has any body parts in the sweep of the seat. G
WARNING
The seat belt does not offer the intended level
of protection if the backrest is not in the
upright position. When
braking or in the event of an accident, you could slide underneath the
seat belt and sustain abdomen or neck
injuries, for
example.
This poses an increased
risk of injury or even fatal injury.
Adjust the seat properly before beginning
your journey. Always make sure that the seat
is in the upright position. G
WARNING
If head restraints are not installed and
adjusted correctly, they cannot provide
protection as intended.
There is an increased
risk of injury in the head and neck area, e.g.
in the event of an accident or when braking.
Always drive with the head restraints
installed. Before driving off, make sure for
every vehicle occupant that the center of the
head restraint supports the back of the head
at about eye level. G
WARNING
According to accident statistics, children are
safer when properly restrained on the rear
seats than on
the front-passenger seat. Thus,
we strongly recommend that children be
placed in the rear seat whenever possible.
Regardless of seating position, children 12
years old and under must be seated and
properly secured in an appropriately sized
child restraint system or booster seat
recommended for the size and weight of the
child. For additional information, see the
"Children in the vehicle" section.
A child's risk of serious or fatal injuries is
significantly increased if the child restraints
are not properly secured in the vehicle and/
or the child is not properly secured in the child
restraint.
! To avoid damage to the seats and the seat
heating, observe the following information:
R keep liquids from spilling on the seats. If
liquid is spilled on the seats, dry them as
soon as possible.
R if the seat covers are damp or wet, do not
switch on the seat heating. The seat Seats
87
Seats, steering wheel and mirrors Z
ProCarManuals.com
Page 91 of 340
i
You can store the seat settings using the
memory function ( Y page 95).Adjusting the head restraints
G
WARNING
You could lose control of your vehicle if you
do the following while driving:
R adjust the driver's seat, head restraint,
steering wheel or mirrors
R fasten the seat belt
There is a risk of an accident.
Adjust the driver's seat, head restraint,
steering wheel and mirror and fasten your
seat belt before starting the engine. G
WARNING
If head restraints are not installed and
adjusted correctly, they cannot provide
protection as intended.
There is an increased
risk of injury in the head and neck area, e.g.
in the event of an accident or when braking.
Always drive with the head restraints
installed. Before driving off, make sure for
every vehicle occupant that the center of the
head restraint supports the back of the head
at about eye level.
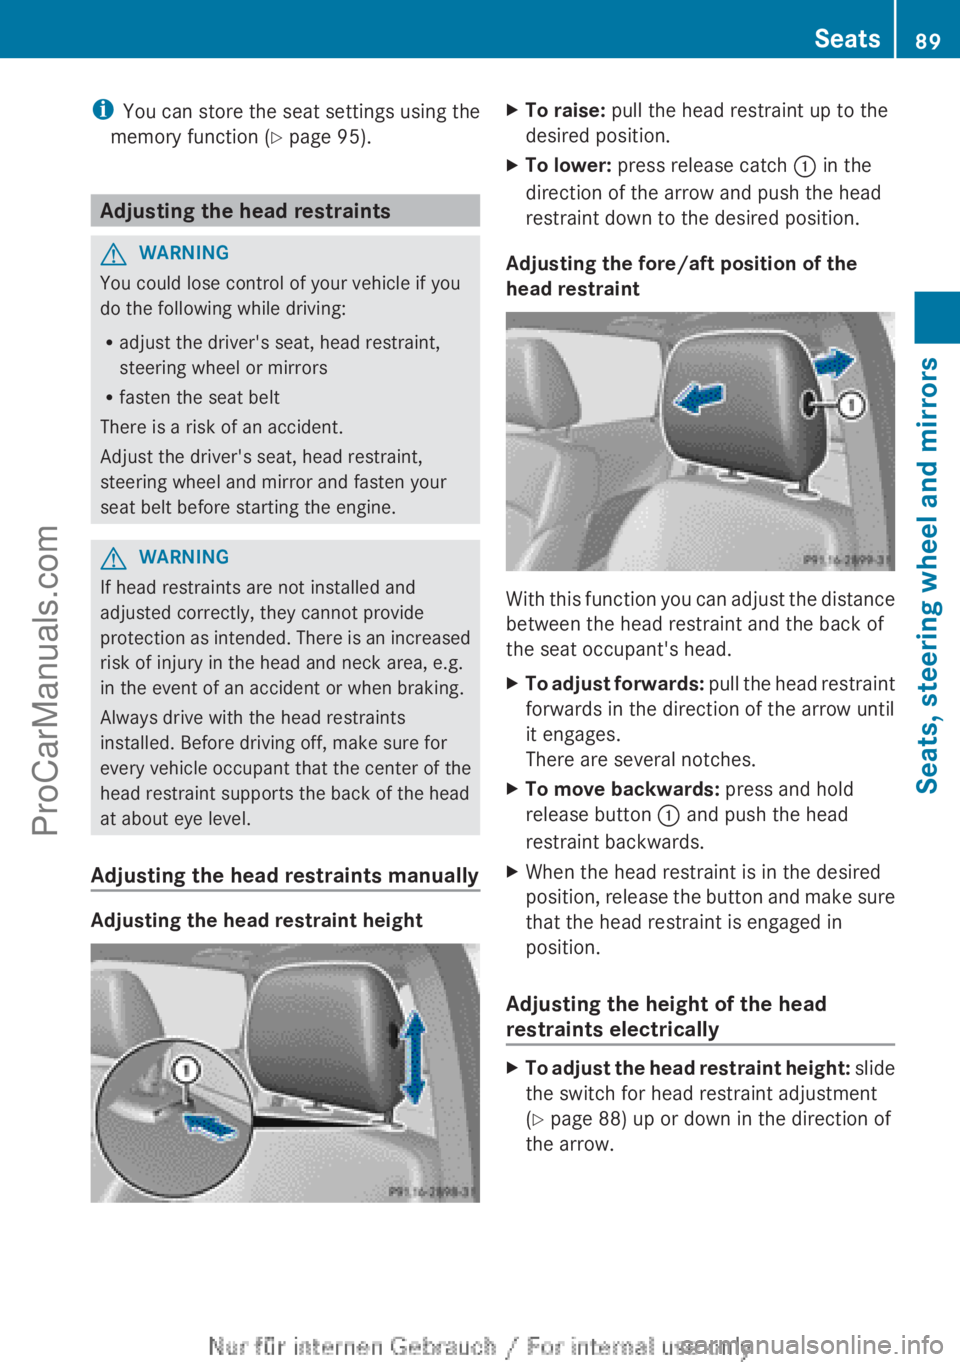
Adjusting the head restraints manually Adjusting the head restraint height X
To raise: pull the head restraint up to the
desired position.
X To lower: press release catch : in the
direction of the arrow and push the head
restraint down to the desired position.
Adjusting the fore/aft position of the
head restraint With this function you can adjust the distance
between the head restraint and the back of
the seat occupant's head.
X
To adjust forwards: pull the
head restraint
forwards in the direction of the arrow until
it engages.
There are several notches.
X To move backwards: press and hold
release button : and push the head
restraint backwards.
X When the head restraint is in the desired
position, release the
button and make sure
that the head restraint is engaged in
position.
Adjusting the height of the head
restraints electrically X
To adjust the head restraint height: slide
the switch for head restraint adjustment
( Y
page 88) up or down in the direction of
the arrow. Seats
89
Seats, steering wheel and mirrors Z
ProCarManuals.com
Page 92 of 340

Rear seat head restraints
Adjusting the rear seat head restraint
height
X
To raise: pull the head restraint up to the
desired position.
X To lower: press release catch : and push
the head restraint down until it is in the
desired position.
Removing and installing the rear seat
head restraints G
WARNING
If head restraints are not installed and
adjusted correctly, they cannot provide
protection as intended.
There is an increased
risk of injury in the head and neck area, e.g.
in the event of an accident or when braking.
Always drive with the head restraints
installed. Before driving off, make sure for
every vehicle occupant that the center of the
head restraint supports the back of the head
at about eye level.
The rear head restraints on the outer seats
can be removed and re-installed. X
Fold the seat backrest slightly forwards in
order to remove the head restraint
(Y page 240).
X To remove: pull the head restraint up to
the stop.
X Press release catch : and pull the head
restraint out of the guides.
X To re-install: insert the head restraint so
that the notches on the bar are on the left
when viewed in the direction of travel.
X Push the head restraint down until you hear
it engage in position. Adjusting the 4-way lumbar support
You can adjust the contour of the front seat
backrests individually to provide optimum
support for your back. :
To raise the backrest contour
; To soften the backrest contour
= To lower the backrest contour
? To harden the backrest contour90
Seats
Seats, steering wheel and mirrors
ProCarManuals.com
Page 93 of 340
Switching the seat heating on/off
Activating/deactivating G
WARNING
Repeatedly switching on the seat heating can
cause the seat cushion and backrest pads to
become very hot. The health of persons with
limited temperature sensitivity or a limited
ability to react to excessively high
temperatures may be affected or they may
even suffer burn-like injuries. There is a risk
of injury.
Therefore, do not switch the seat heating on
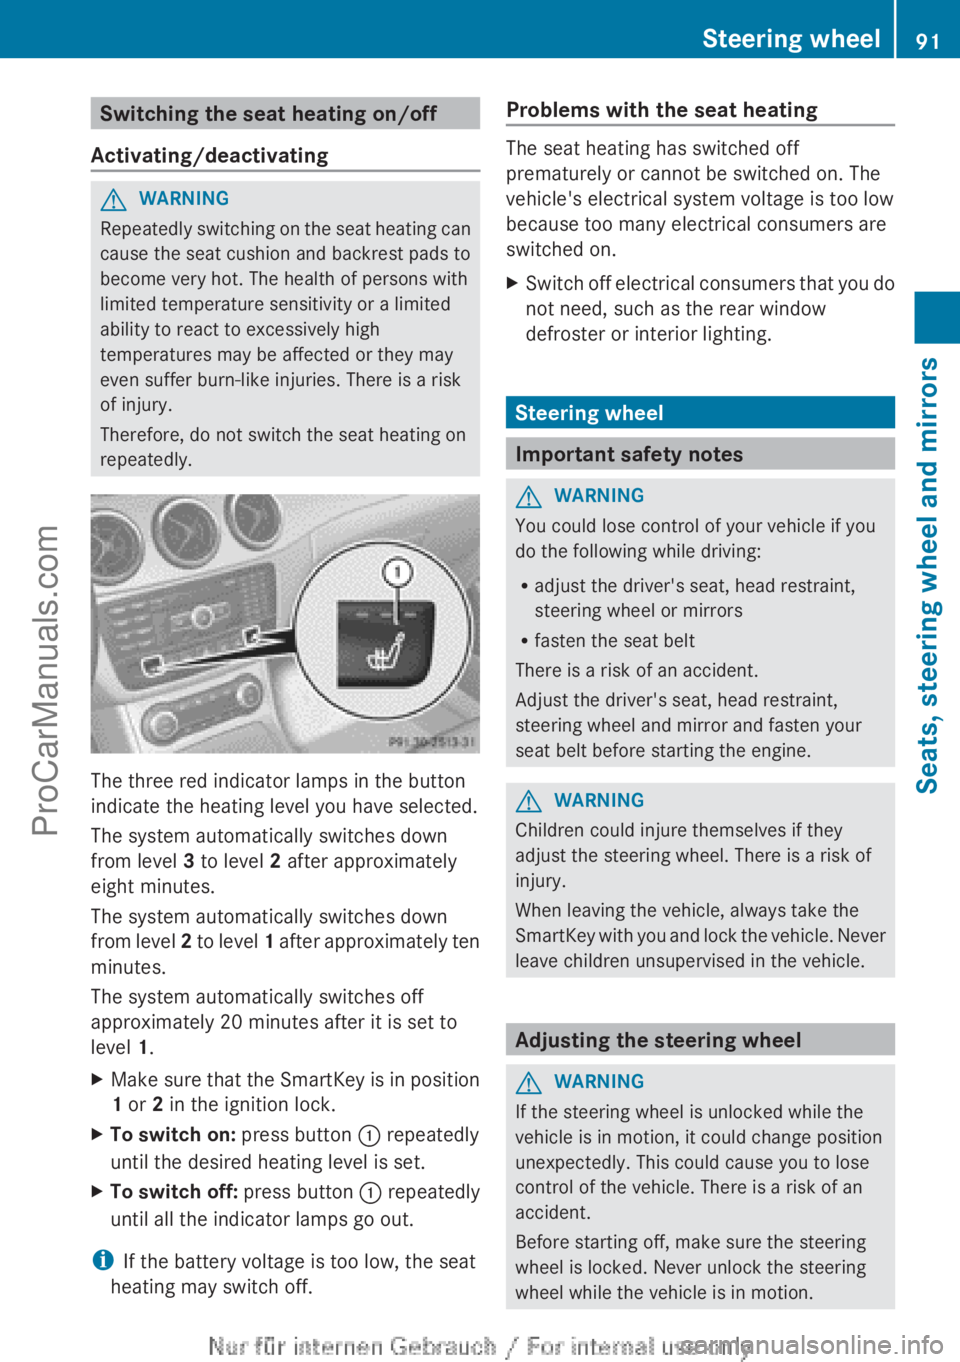
repeatedly. The three red indicator lamps in the button
indicate the heating level you have selected.
The system automatically switches down
from level 3 to level 2 after approximately
eight minutes.
The system automatically switches down
from level
2
to level 1 after approximately ten
minutes.
The system automatically switches off
approximately 20 minutes after it is set to
level 1.
X Make sure that the SmartKey is in position
1 or 2 in the ignition lock.
X To switch on: press button : repeatedly
until the desired heating level is set.
X To switch off: press button : repeatedly
until all the indicator lamps go out.
i If the battery voltage is too low, the seat
heating may switch off. Problems with the seat heating The seat heating has switched off
prematurely or cannot be switched on. The
vehicle's electrical system voltage is too low
because too many electrical consumers are
switched on.
X
Switch off electrical consumers that you do
not need, such as the rear window
defroster or interior lighting. Steering wheel
Important safety notes
G
WARNING
You could lose control of your vehicle if you
do the following while driving:
R adjust the driver's seat, head restraint,
steering wheel or mirrors
R fasten the seat belt
There is a risk of an accident.
Adjust the driver's seat, head restraint,
steering wheel and mirror and fasten your
seat belt before starting the engine. G
WARNING
Children could injure themselves if they
adjust the steering wheel. There is a risk of
injury.
When leaving the vehicle, always take the
SmartKey with you
and lock the vehicle. Never
leave children unsupervised in the vehicle. Adjusting the steering wheel
G
WARNING
If the steering wheel is unlocked while the
vehicle is in motion, it could change position
unexpectedly. This could cause you to lose
control of the vehicle. There is a risk of an
accident.
Before starting off, make sure the steering
wheel is locked. Never unlock the steering
wheel while the vehicle is in motion. Steering wheel
91
Seats, steering wheel and mirrors Z
ProCarManuals.com
Page 94 of 340
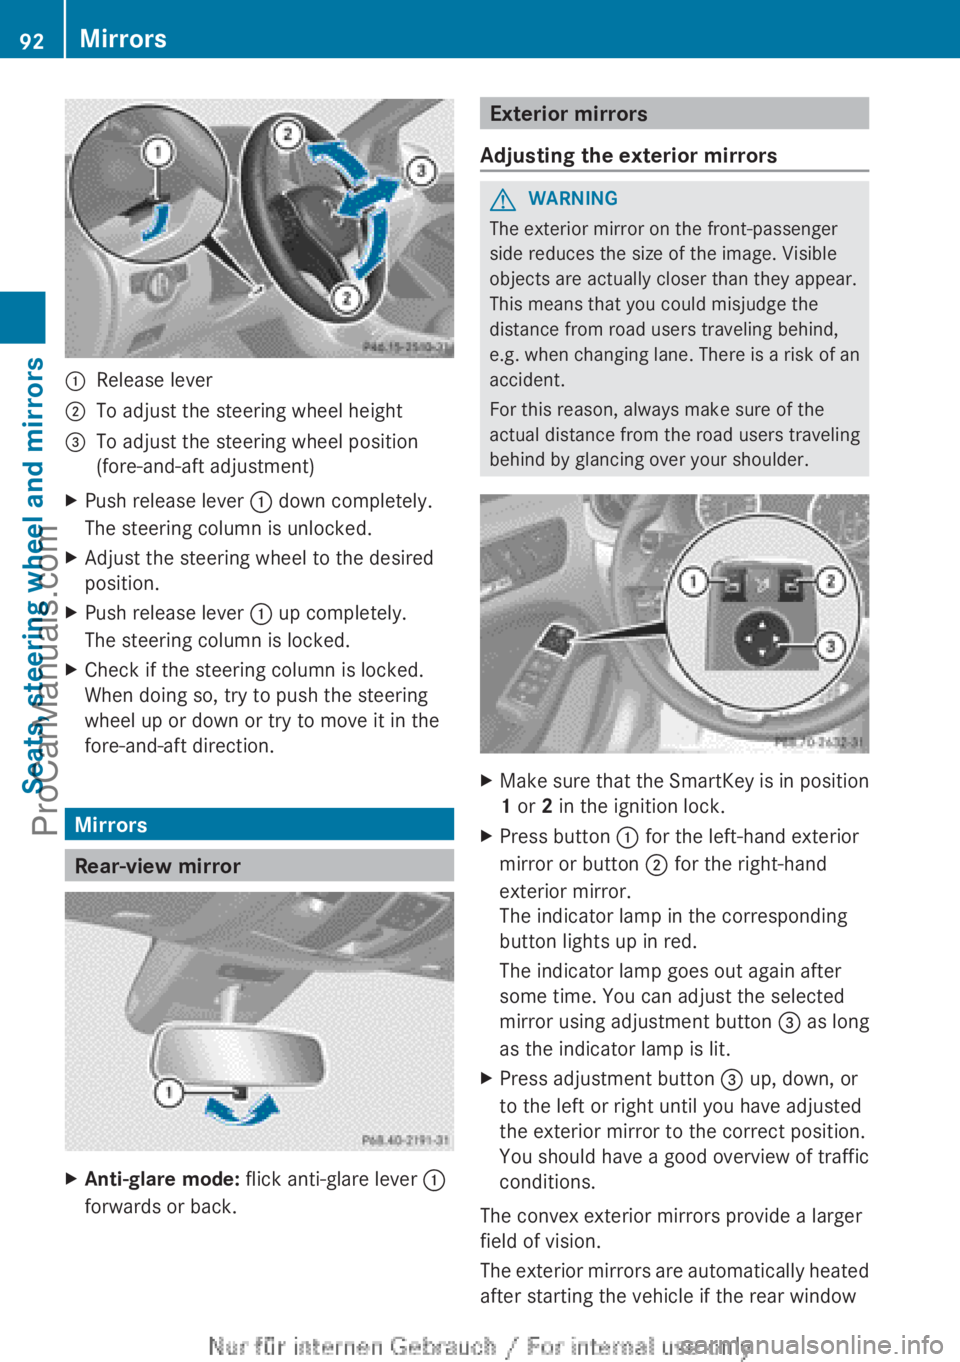
:
Release lever
; To adjust the steering wheel height
= To adjust the steering wheel position
(fore-and-aft adjustment)
X Push release lever : down completely.
The steering column is unlocked.
X Adjust the steering wheel to the desired
position.
X Push release lever : up completely.
The steering column is locked.
X Check if the steering column is locked.
When doing so, try to push the steering
wheel up or down or try to move it in the
fore-and-aft direction. Mirrors
Rear-view mirror
X
Anti-glare mode: flick anti-glare lever :
forwards or back. Exterior mirrors
Adjusting the exterior mirrors G
WARNING
The exterior mirror on the front-passenger
side reduces the size of the image. Visible
objects are actually closer than they appear.
This means that you could misjudge the
distance from road users traveling behind,
e.g. when changing
lane. There is a risk of an
accident.
For this reason, always make sure of the
actual distance from the road users traveling
behind by glancing over your shoulder. X
Make sure that the SmartKey is in position
1 or 2 in the ignition lock.
X Press button : for the left-hand exterior
mirror or button ; for the right-hand
exterior mirror.
The indicator lamp in the corresponding
button lights up in red.
The indicator lamp goes out again after
some time. You can adjust the selected
mirror using adjustment button = as long
as the indicator lamp is lit.
X Press adjustment button = up, down, or
to the left or right until you have adjusted
the exterior mirror to the correct position.
You should have a good overview of traffic
conditions.
The convex exterior mirrors provide a larger
field of vision.
The exterior
mirrors
are automatically heated
after starting the vehicle if the rear window 92
Mirrors
Seats, steering wheel and mirrors
ProCarManuals.com
Page 97 of 340
Memory functions
Storing settings
G
WARNING
If you use the memory function on the driver's
side while driving, you could lose control of
the vehicle as a result of the adjustments
being made. There is a risk of an accident.
Only use the
memory function on the driver's
side when the vehicle is stationary. G
WARNING
When the memory function adjusts the seat,
you and other
vehicle occupants – particularly
children – could become trapped. There is a
risk of injury.
While the memory function is making
adjustments, make sure that no one has any
body parts in the sweep of the seat. If
somebody becomes trapped, immediately
release the memory function position button.
The adjustment process is stopped. G
WARNING
Children could become trapped if they
activate the memory function, particularly
when unattended. There is a risk of injury.
When leaving the vehicle, always take the
SmartKey with you
and lock the vehicle. Never
leave children unsupervised in the vehicle.
With the memory function, you can store up
to three different settings, e.g. for three
different people.
The following settings are stored as a single
memory preset:
R position of the seat, backrest and head
restraint
R driver's side: position of the exterior
mirrors on the driver's and front-passenger
sides X
Adjust the seat ( Y page 88).
X Adjust the exterior mirror on the driver's
side ( Y page 92).
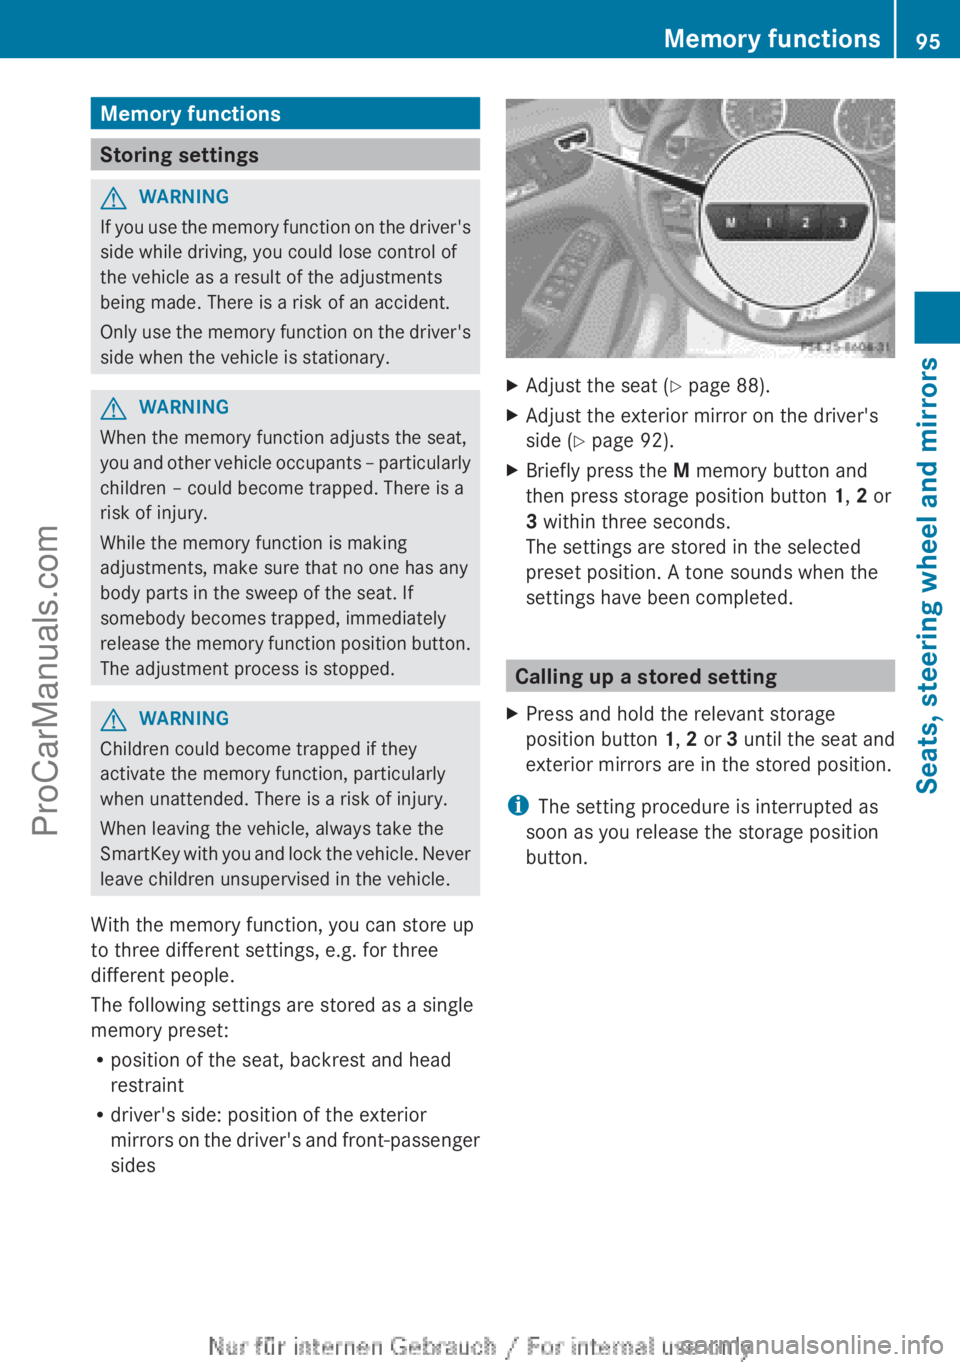
X Briefly press the M memory button and
then press storage position button 1, 2 or
3 within three seconds.
The settings are stored in the selected
preset position. A tone sounds when the
settings have been completed. Calling up a stored setting
X Press and hold the relevant storage
position button 1, 2 or 3
until the
seat and
exterior mirrors are in the stored position.
i The setting procedure is interrupted as
soon as you release the storage position
button. Memory functions
95
Seats, steering wheel and mirrors Z
ProCarManuals.com
Page 100 of 340

Useful information
i This Operator's Manual describes all
models and all standard and optional
equipment of your vehicle available at the
time of publication of the Operator's
Manual. Country-specific differences are
possible. Please note
that your vehicle may
not be equipped with all features
described. This also applies to safety-
related systems and functions.
i Read the information on qualified
specialist workshops: ( Y page 24).Exterior lighting
General notes
For reasons of safety, Mercedes-Benz
recommends that you drive with the lights
switched on even
during the daytime. In some
countries, operation of the headlamps varies
due to legal requirements and self-imposed
obligations. Driving abroad
Conversion to symmetrical low beam Switch the headlamps to symmetrical low
beam in countries in which traffic drives on
the opposite
side
of the road from the country
where the vehicle is registered. This prevents
glare to oncoming traffic. When using
symmetrical lights, the edge of the road is not
lit as widely and as far ahead as normal.
Have the headlamps converted at a qualified
specialist workshop as close to the border as
possible before driving in these countries.
Conversion to asymmetrical low beam
after returning Have the headlamps converted back to
asymmetrical low-beam headlamps at a
qualified specialist workshop as soon as
possible after crossing the border again. Setting the exterior lighting
Setting options Exterior lighting can be set using:
R
the light switch
R the combination switch ( Y page 100)
R the on-board computer (Y page 197)
Light switch Operation
1W
Left-hand standing lamps
2X Right-hand standing lamps
3T Parking lamps, license plate and
instrument cluster lighting
4Ã Automatic headlamp mode,
controlled by the light sensor
5L Low-beam/high-beam headlamps
BR Rear fog lamp
CN Fog lamp (only vehicles with front fog
lamps)
If you hear a warning tone when you leave the
vehicle, the lights may still be switched on.
X Turn the light switch to Ã.
The exterior lighting (except the parking/
standing lamps) switches off automatically if
you:
R remove the
SmartKey
from the ignition lock
R open the driver's door with the SmartKey
in position 0.98
Exterior lighting
Lights and windshield wipers
ProCarManuals.com