Page 287 of 436

287
1. AUDIO/VIDEO SYSTEM OPERATION
5
AUDIO/VIDEO SYSTEM
CT200h_Navi_OM76078E_(EE)
14.02.06 12:30
PLAYING THE TRACKS ON
THE ALBUM IN RANDOM OR-
DER
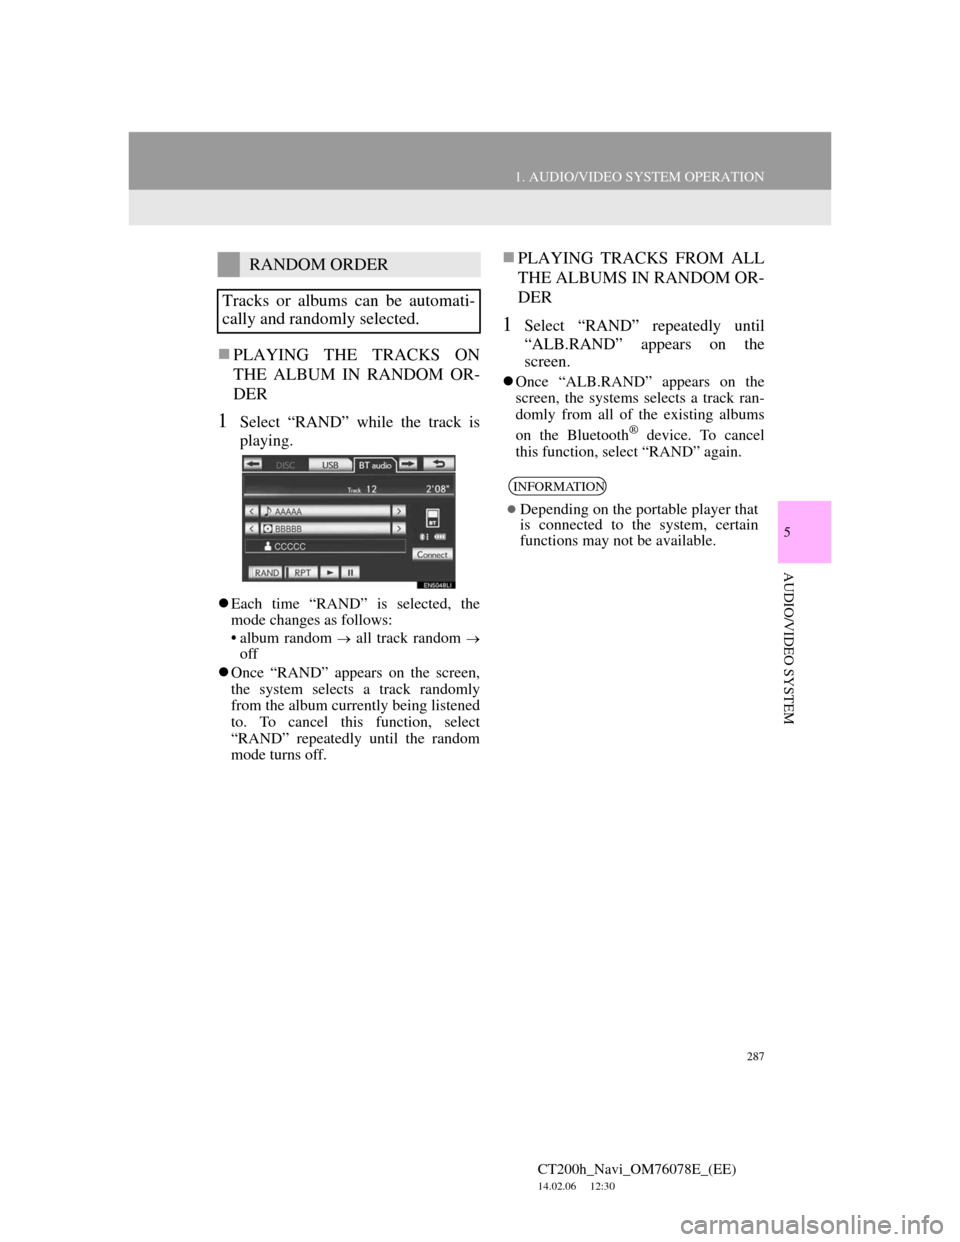
1Select “RAND” while the track is
playing.
Each time “RAND” is selected, the
mode changes as follows:
• album random
all track random
off
Once “RAND” appears on the screen,
the system selects a track randomly
from the album currently being listened
to. To cancel this function, select
“RAND” repeatedly until the random
mode turns off.
PLAYING TRACKS FROM ALL
THE ALBUMS IN RANDOM OR-
DER
1Select “RAND” repeatedly until
“ALB.RAND” appears on the
screen.
Once “ALB.RAND” appears on the
screen, the systems selects a track ran-
domly from all of the existing albums
on the Bluetooth
® device. To cancel
this function, select “RAND” again.
RANDOM ORDER
Tracks or albums can be automati-
cally and randomly selected.
INFORMATION
Depending on the portable player that
is connected to the system, certain
functions may not be available.
Page 289 of 436

289
1. AUDIO/VIDEO SYSTEM OPERATION
5
AUDIO/VIDEO SYSTEM
CT200h_Navi_OM76078E_(EE)
14.02.06 12:30
DVD player
Use the “ ” or “ ” switch to skip up or
down to a different track, file or chapter
in either direction.
To select a desired track, file or chapter:
Quickly press and release the “ ” or
“ ” switch until the desired track, file or
chapter to play is selected. To return to
the beginning of the current track, file or
chapter, press the “ ” switch once
quickly.
To select a desired folder: Press and
hold the “ ” or “ ” switch until a beep
is heard to change to the next or the pre-
vious folder. Repeat it until the desired
folder is selected.
Bluetooth
® audio player
Use the “ ” or “ ” switch to skip up or
down to a different track or album in
either direction.
To select a desired track: Quickly press
and release the “ ” or “ ” switch until
the desired track is selected. To return to
the beginning of the current track, press
the “ ” switch once quickly.
To select a desired album: Press and
hold the “ ” or “ ” switch until a beep
is heard to change to the next or the pre-
vious album. Repeat it until the desired
album is selected.USB memory/iPod
Use the “ ” or “ ” switch to skip up or
down to a different file, track, folder or
album in either direction.
To select a desired file or track: Press the
“ ” or “ ” switch until the desired file
or track is selected. To return to the be-
ginning of the current file or track, press
the “ ” switch once quickly.
To select a desired folder or album
(USB memory only): Press and hold the
“ ” or “ ” switch until a beep is heard
to change to the next or the previous
folder or album. Repeat it until the de-
sired folder or album is selected.
Volume control switch
Press the “+” side to increase the vol-
ume. The volume continues to increase
while the switch is being pressed.
Press the “-” side to decrease the vol-
ume. The volume continues to decrease
while the switch is being pressed.
Page 334 of 436
334
1. INFORMATION DISPLAY
CT200h_Navi_OM76078E_(EE)
14.02.06 12:30
On map screen
On motorway screen
TRAFFIC INFORMATION
SCREENS
Traffic information such as traffic
congestion, accidents and road clo-
sures are displayed on the map. (For
setting traffic information icons dis-
played on the screen, see page 332.)No.NameFunction
Traffic
informa-
tion icon
Icons are displayed
on the map. To dis-
play information,
select the corre-
sponding icon on
the screen.
Traffic
informa-
tion arrow
Using traffic infor-
mation, the system
displays arrows
along a route. The
colour of the arrow
indicates specific
road condition in-
formation.
“Red” indicates
normal traffic
flow.
“Orange” indicates
a traffic jam.
“Blue” indicates a
closed road, acci-
dent and so on.
Traffic
informa-
tion
indicatorThe indicator
comes on when
traffic information
is received.
Page 343 of 436
9
343
1
2
3
4
5
6
7
CT200h_Navi_OM76078E_(EE)
14.02.06 12:30
8
9
10
1. CONNECTED SERVICES
OVERVIEW ................................. 344
BEFORE USING CONNECTED
SERVICES ........................................... 346
2. SETTINGS REQUIRED FOR
USING THE SERVICE ................ 347
OBTAINING A PORTAL SITE
ACCOUNT .......................................... 347
SETTING A Bluetooth
® DUN
COMPATIBLE CELLULAR
PHONE ................................................ 348
SETTING A Bluetooth
® DUN
PROFILE.............................................. 350
3. USING CONNECTED
SERVICES .................................... 353
ONLINE SEARCH ................................. 353
IMPORTING MEMORY POINTS ........ 358
1. ONLINE SEARCH SETTINGS...... 363
SCREENS FOR ONLINE SEARCH
SETTINGS ........................................... 363
1CONNECTED SERVICES
2SETUP
CONNECTED SERVICES
Page 346 of 436

346
1. CONNECTED SERVICES
CT200h_Navi_OM76078E_(EE)
14.02.06 12:30
In order to use this service, a
Bluetooth® DUN compatible cellular
phone with sufficient network coverage
and a SIM card with a contract that
allows access to the internet are
required.
Before using this service, it is necessary
to access Lexus’s portal site via a per-
sonal computer and create an account.
When creating an account, “Navigation
Identification” will be required. (For
details about “CHECKING NAVIGA-
TION IDENTIFICATION”, see page
347.)
When using the connected services,
depending on your telephone subscrip-
tion, some related fees might apply.
When a cellular phone is used in a
roaming situation (when outside the
geographical coverage area of mobile
network provider) connection fees will
be more expensive.
Bluetooth is a registered trademark of
Bluetooth SIG, Inc.
BEFORE USING
CONNECTED SERVICESINFORMATION
This system supports the following
service:
• Bluetooth
® Specification
Ver.1.1 or higher
(Recommended: Ver.2.1 + EDR or
higher)
•Profiles
HFP (Hands Free Profile)
Ver.1.0 or higher
(Recommended: Ver.1.5 or higher)
OPP (Object Push Profile)
Ver.1.1 or higher
PBAP (Phone Book Access Profile)
Ver.1.0 or higher
DUN (Dial-Up Networking Profile)
Ver.1.1 or higher
If your cellular phone does not sup-
port HFP, you cannot register the
Bluetooth
® DUN compatible cellular
phone, or use DUN, OPP or PBAP
profiles individually.
If the connected Bluetooth® DUN
compatible cellular phone version is
older than recommended or incom-
patible, this function may not be used.
Page 348 of 436
348
1. CONNECTED SERVICES
CT200h_Navi_OM76078E_(EE)
14.02.06 12:30
1Press the “MENU” button on the
Remote Touch, then select “Setup”.
2Select “Bluetooth*”.
3Select “Registered devices”.
4Select “Add new”.
If 5 Bluetooth® devices have already
been registered, a registered device
needs to be deleted. See “When 5
Bluetooth
® devices have already been
registered” on page 349.
5When this screen is displayed, oper-
ate the Bluetooth
® device.
Search for the navigation system dis-
played on the system’s screen using
your Bluetooth
® device, and register
the Bluetooth® device.
For details about operating the
Bluetooth
® device, see the manual that
comes with it.
*:Bluetooth is a registered trademark of
Bluetooth SIG, Inc.
SETTING A Bluetooth® DUN
COMPATIBLE CELLULAR
PHONE
Before setting up the Bluetooth®
DUN profile, a Bluetooth® DUN
compatible cellular phone needs to
be registered with the vehicle-
mounted device. The following will
explain how to register a cellular
phone.
Page 349 of 436

349
1. CONNECTED SERVICES
CT200h_Navi_OM76078E_(EE)
14.02.06 12:30
9
CONNECTED SERVICES
A passcode is not required for SSP
(Secure Simple Pairing) compatible
Bluetooth
® devices. Depending on the
type of Bluetooth® DUN compatible
cellular phone being connected, a mes-
sage confirming registration may be
displayed on the “Connect Bluetooth*”
screen. Respond and operate the
Bluetooth
® DUN compatible cellular
phone according to the confirmation
message.
To cancel the registration, select “Can-
cel”.
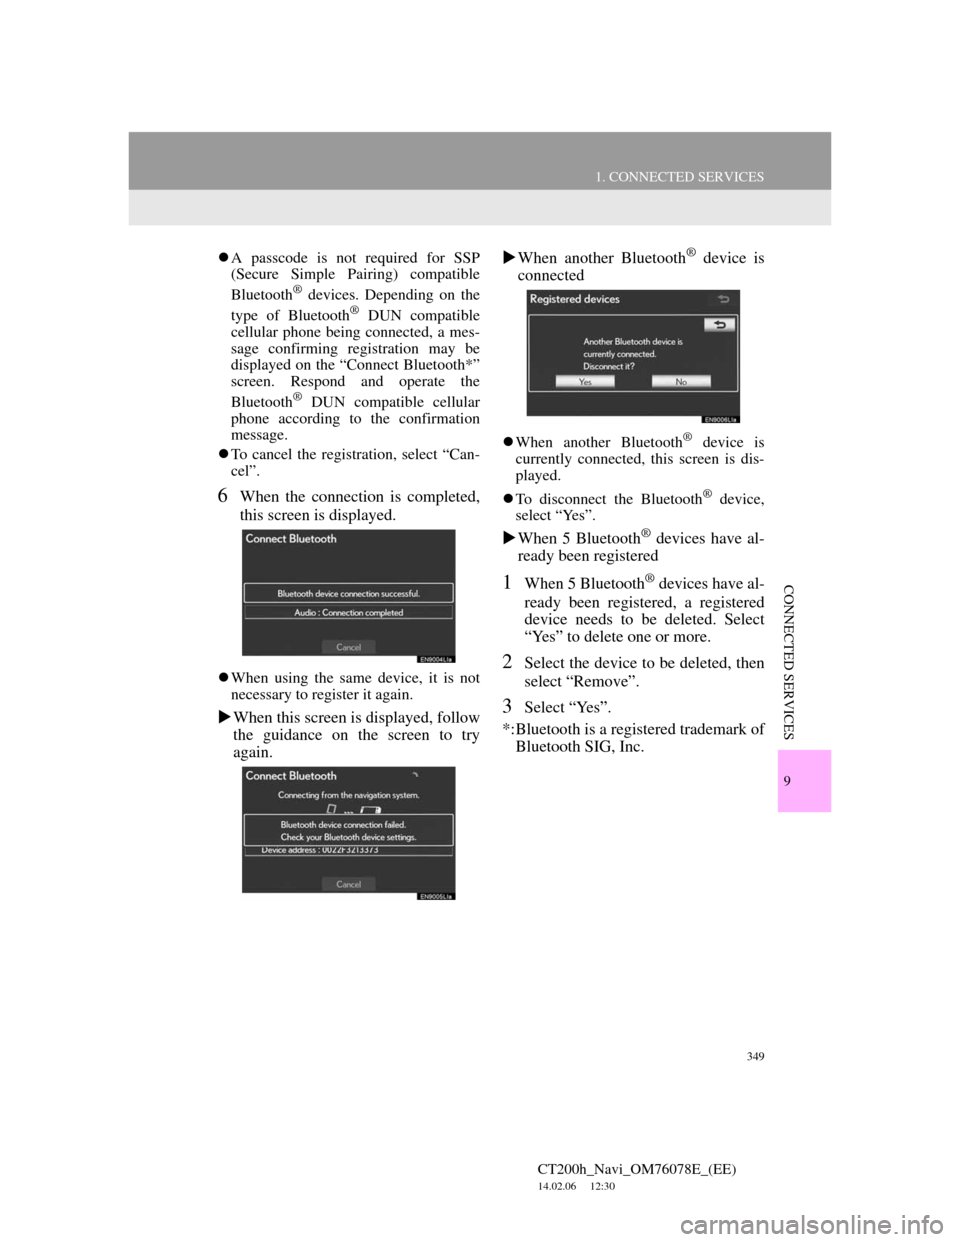
6When the connection is completed,
this screen is displayed.
When using the same device, it is not
necessary to register it again.
When this screen is displayed, follow
the guidance on the screen to try
again.When another Bluetooth
® device is
connected
When another Bluetooth® device is
currently connected, this screen is dis-
played.
To disconnect the Bluetooth
® device,
select “Yes”.
When 5 Bluetooth® devices have al-
ready been registered
1When 5 Bluetooth® devices have al-
ready been registered, a registered
device needs to be deleted. Select
“Yes” to delete one or more.
2Select the device to be deleted, then
select “Remove”.
3Select “Yes”.
*:Bluetooth is a registered trademark of
Bluetooth SIG, Inc.
Page 350 of 436
350
1. CONNECTED SERVICES
CT200h_Navi_OM76078E_(EE)
14.02.06 12:30
1Press the “MENU” button on the
Remote Touch. (See “Remote
Touch” on page 12.)
2Select “Setup” on the “Menu”
screen.
3Select “Bluetooth*”.
4Select “Communication settings”.
5Select “Yes” if a portal account has
already been created.
If a portal account has not been created,
select “No” and the following message
will be displayed.
A portal account is an account that is
obtained from the website Lexus pre-
pares for its customers.
6Select “Country”.
*:Bluetooth is a registered trademark of
Bluetooth SIG, Inc.
SETTING A Bluetooth® DUN
PROFILE
After having created an account on
Lexus’s portal site, it is necessary to
setup a Bluetooth
® DUN connection
between the telephone and the navi-
gation unit.