Page 118 of 436
118
2. ROUTE GUIDANCE
CT200h_Navi_OM76078E_(EE)
14.02.06 12:29
1Press the “MENU” button on the
Remote Touch. (See “Remote
Touch” on page 12.)
2Select “Navi” on the “Menu” screen.
3Select “Menu” on the map screen.
4Select “Route” on the navigation
menu screen.
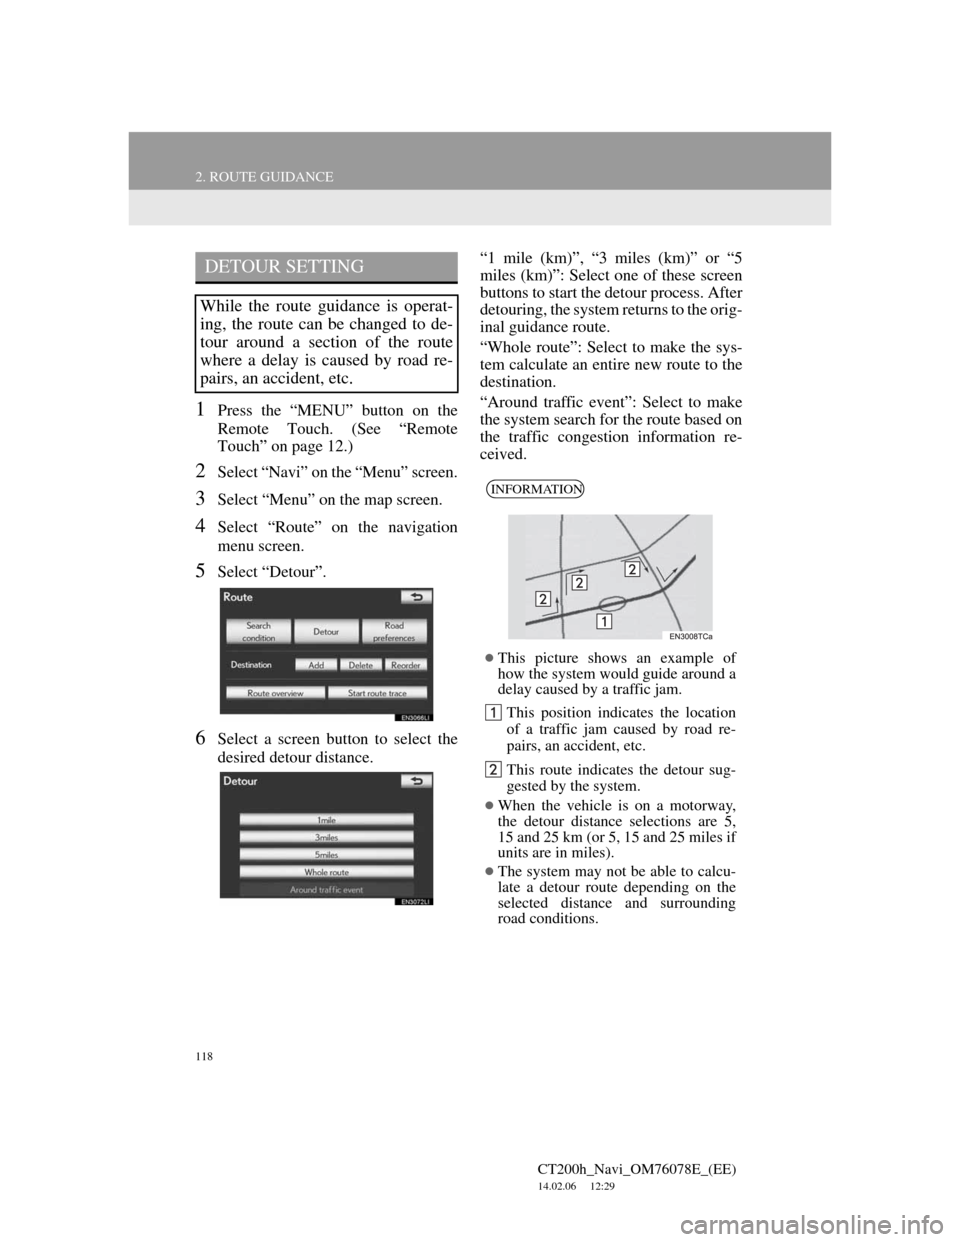
5Select “Detour”.
6Select a screen button to select the
desired detour distance.“1 mile (km)”, “3 miles (km)” or “5
miles (km)”: Select one of these screen
buttons to start the detour process. After
detouring, the system returns to the orig-
inal guidance route.
“Whole route”: Select to make the sys-
tem calculate an entire new route to the
destination.
“Around traffic event”: Select to make
the system search for the route based on
the traffic congestion information re-
ceived.
DETOUR SETTING
While the route guidance is operat-
ing, the route can be changed to de-
tour around a section of the route
where a delay is caused by road re-
pairs, an accident, etc.
INFORMATION
This picture shows an example of
how the system would guide around a
delay caused by a traffic jam.
This position indicates the location
of a traffic jam caused by road re-
pairs, an accident, etc.
This route indicates the detour sug-
gested by the system.
When the vehicle is on a motorway,
the detour distance selections are 5,
15 and 25 km (or 5, 15 and 25 miles if
units are in miles).
The system may not be able to calcu-
late a detour route depending on the
selected distance and surrounding
road conditions.
Page 121 of 436
121
2. ROUTE GUIDANCE
CT200h_Navi_OM76078E_(EE)
14.02.06 12:29
3
NAVIGATION SYSTEM
1Press the “MENU” button on the
Remote Touch.
2Select “Navi”, and select “Menu” if
the map screen is displayed.
3Select “Route” on the navigation
menu screen.
4Select “Start route trace”.
1Press the “MENU” button on the
Remote Touch.
2Select “Navi”, and select “Menu” if
the map screen is displayed.
3Select “Route” on the navigation
menu screen.
4Select “Stop route trace”.
Selecting “Yes” stops recording and the
route trace remains displayed on the
screen.
Selecting “No” stops recording and the
route trace is erased.
ROUTE TRACE
Up to 200 km (124 miles) of the trav-
eled route can be stored and retraced
on the display.
INFORMATION
This feature is available when the
map scale is more than 50 km (30
miles).
TO START RECORDING THE
ROUTE TRACE
TO STOP RECORDING THE
ROUTE TRACE
Page 147 of 436
147
3. MEMORY POINTS
CT200h_Navi_OM76078E_(EE)
14.02.06 12:29
3
NAVIGATION SYSTEM
1Press the lid, open the cover and con-
nect a USB memory.
Turn on the power of the USB memory
if it is not turned on.
2Press the “MENU” button on the
Remote Touch.
3Select “Navi”, and select “Menu” if
the map screen is displayed.
4Select “Memory point” on the navi-
gation menu screen.
5Select “Backup to USB”.
6Select “Start backup”.
7Enter the password and select “OK”.
BACKUP TO A USB
MEMORY
Memory points registered in the nav-
igation system can be copied to a
USB memory.
A password must first be set in order
to back up data. (For instructions on
setting a password, see page 148.)
Exporting memory point data is for
your back-up use only and distribu-
tion or usage in other system is
strictly prohibited.
Page 148 of 436
148
3. MEMORY POINTS
CT200h_Navi_OM76078E_(EE)
14.02.06 12:29
8When backup starts, this screen is
displayed.
To cancel this function, select “Can-
cel”.
When backup is completed, the system
will return to the “Memory point”
screen.
SETTING A PASSWORD
1Press the “MENU” button on the
Remote Touch.
2Select “Navi”, and select “Menu” if
the map screen is displayed.
3Select “Memory point” on the navi-
gation menu screen.
4Select “Backup to USB” on the
“Memory point” screen.
5Select “Set password”.
INFORMATION
In the following situations, the mem-
ory point cannot be backed up to a
USB memory:
• When the memory point was regis-
tered using “UK Postal Code”
• When the memory point was regis-
tered using connected service
SET PASSWORD
Once a password has been set, it will
be requested not only to back up da-
ta, but also when copying memory
points from a USB memory to the
navigation system.
Page 192 of 436
192
1. TELEPHONE OPERATION
CT200h_Navi_OM76078E_(EE)
14.02.06 12:30
7. Bluetooth® PHONE MESSAGE FUNCTION
1Press the “MENU” button on the
Remote Touch. (See “Remote
Touch” on page 12.)
2Select “Telephone” on the “Menu”
screen.
The “Telephone” screen can be dis-
played by pressing
on the steering
wheel.
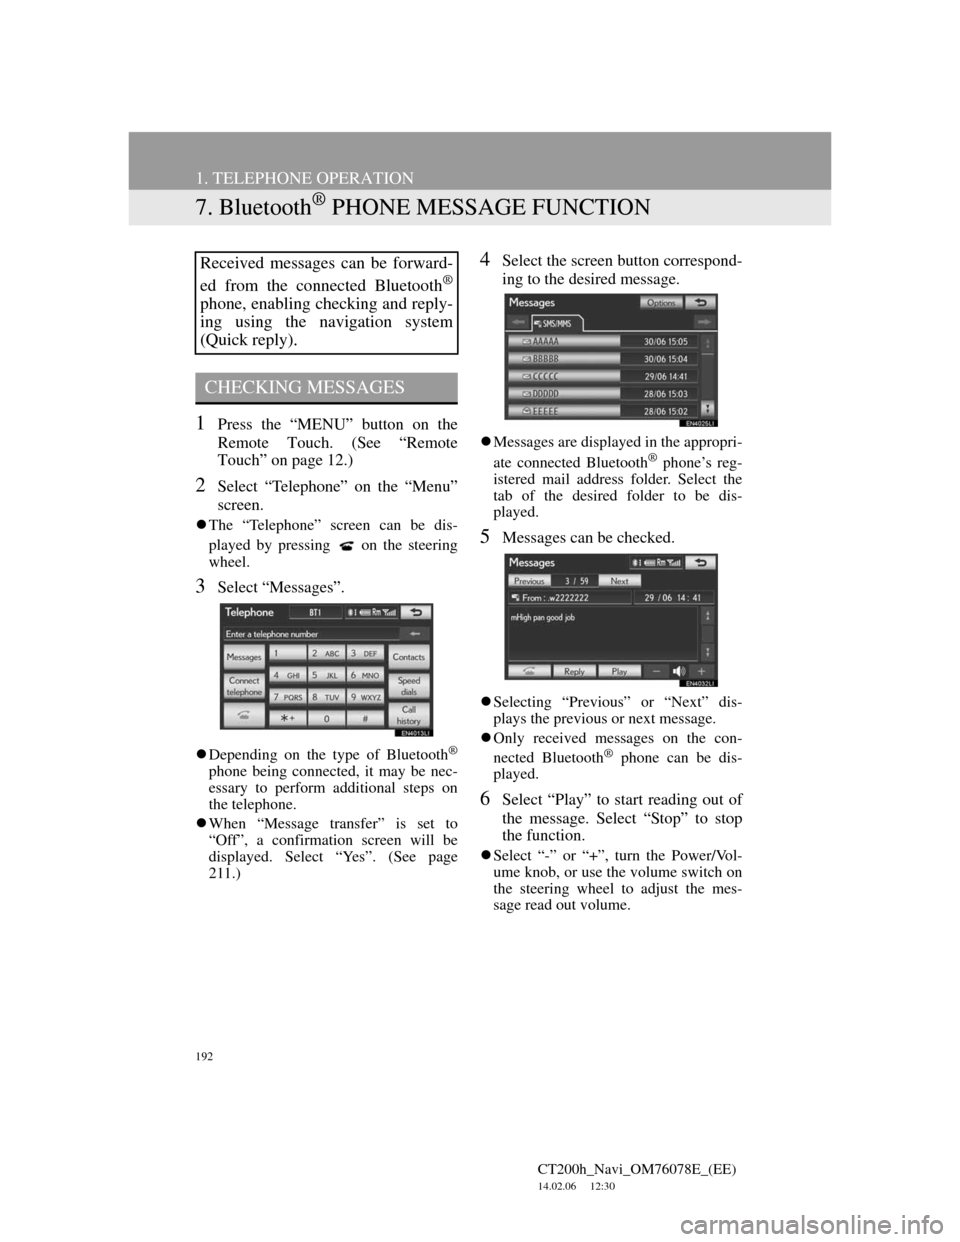
3Select “Messages”.
Depending on the type of Bluetooth®
phone being connected, it may be nec-
essary to perform additional steps on
the telephone.
When “Message transfer” is set to
“Off”, a confirmation screen will be
displayed. Select “Yes”. (See page
211.)
4Select the screen button correspond-
ing to the desired message.
Messages are displayed in the appropri-
ate connected Bluetooth® phone’s reg-
istered mail address folder. Select the
tab of the desired folder to be dis-
played.
5Messages can be checked.
Selecting “Previous” or “Next” dis-
plays the previous or next message.
Only received messages on the con-
nected Bluetooth
® phone can be dis-
played.
6Select “Play” to start reading out of
the message. Select “Stop” to stop
the function.
Select “-” or “+”, turn the Power/Vol-
ume knob, or use the volume switch on
the steering wheel to adjust the mes-
sage read out volume.
Received messages can be forward-
ed from the connected Bluetooth
®
phone, enabling checking and reply-
ing using the navigation system
(Quick reply).
CHECKING MESSAGES
Page 243 of 436
243
1. AUDIO/VIDEO SYSTEM OPERATION
5
AUDIO/VIDEO SYSTEM
CT200h_Navi_OM76078E_(EE)
14.02.06 12:30
WHEN LISTENING TO OR
WATCHING A DISC
“TA VOL” (TRAFFIC AN-
NOUNCEMENT VOLUME)
FUNCTION
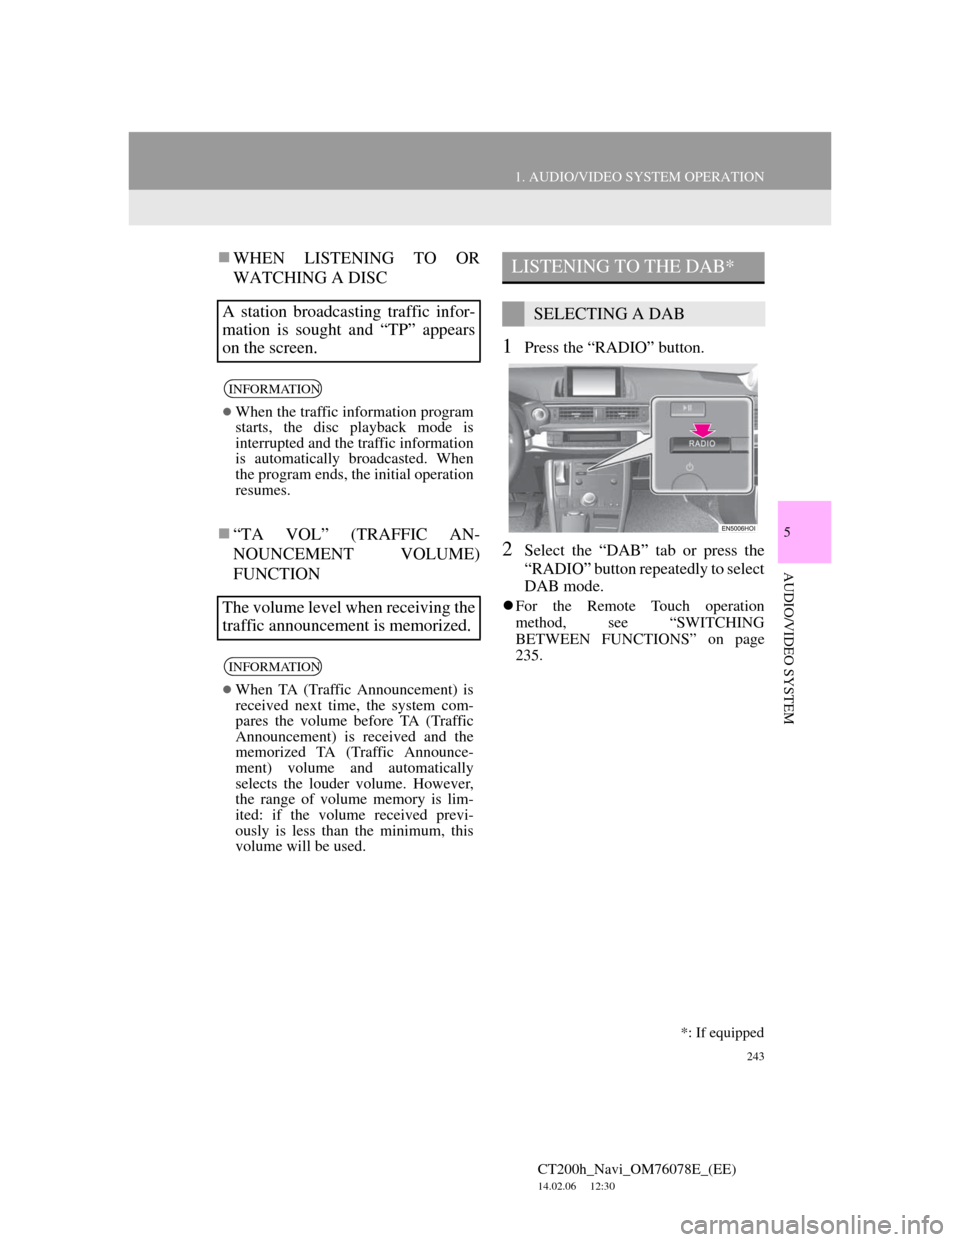
1Press the “RADIO” button.
2Select the “DAB” tab or press the
“RADIO” button repeatedly to select
DAB mode.
For the Remote Touch operation
method, see “SWITCHING
BETWEEN FUNCTIONS” on page
235.
A station broadcasting traffic infor-
mation is sought and “TP” appears
on the screen.
INFORMATION
When the traffic information program
starts, the disc playback mode is
interrupted and the traffic information
is automatically broadcasted. When
the program ends, the initial operation
resumes.
The volume level when receiving the
traffic announcement is memorized.
INFORMATION
When TA (Traffic Announcement) is
received next time, the system com-
pares the volume before TA (Traffic
Announcement) is received and the
memorized TA (Traffic Announce-
ment) volume and automatically
selects the louder volume. However,
the range of volume memory is lim-
ited: if the volume received previ-
ously is less than the minimum, this
volume will be used.
LISTENING TO THE DAB*
SELECTING A DAB
*: If equipped
Page 269 of 436
269
1. AUDIO/VIDEO SYSTEM OPERATION
5
AUDIO/VIDEO SYSTEM
CT200h_Navi_OM76078E_(EE)
14.02.06 12:30
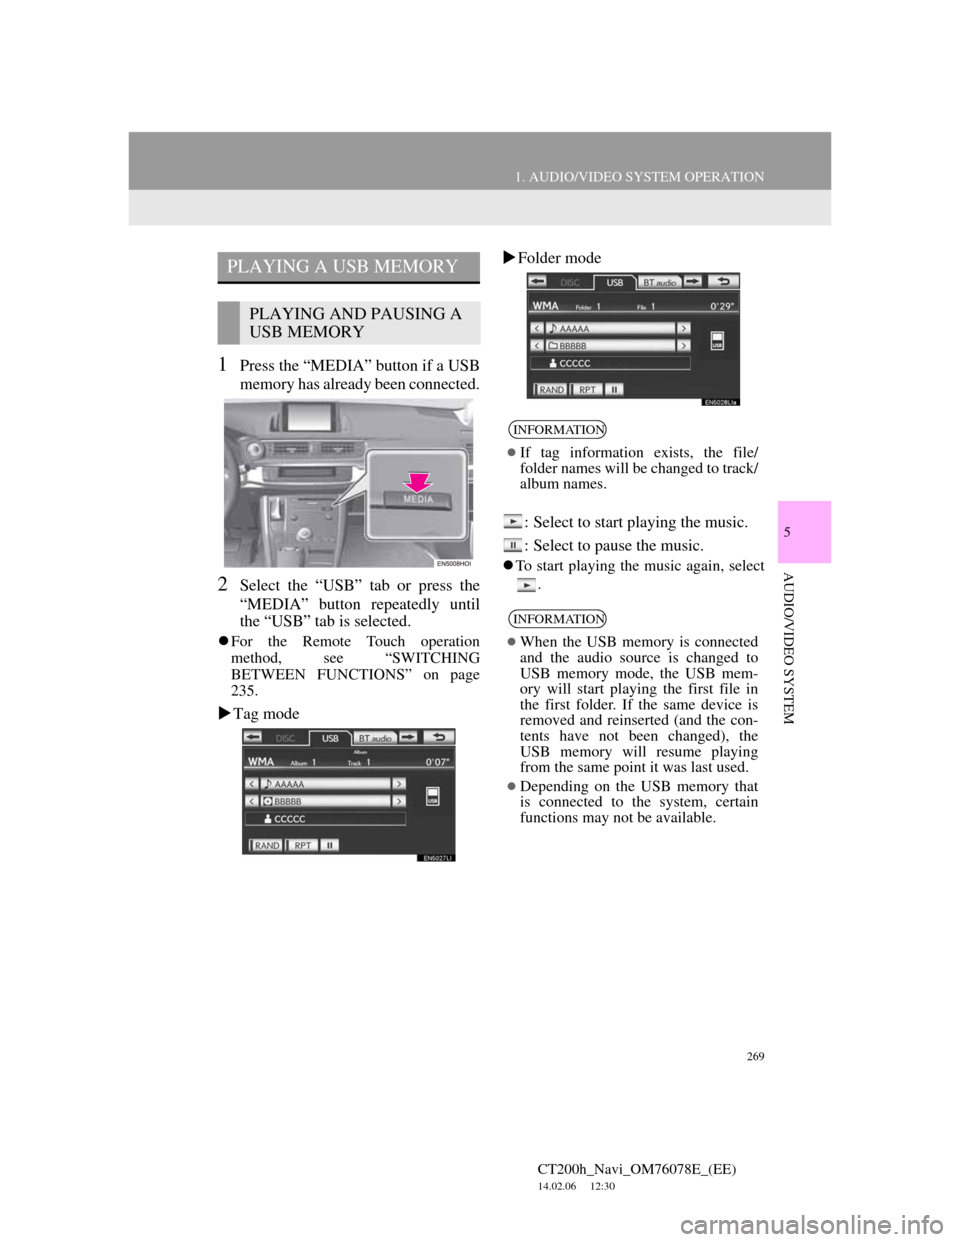
1Press the “MEDIA” button if a USB
memory has already been connected.
2Select the “USB” tab or press the
“MEDIA” button repeatedly until
the “USB” tab is selected.
For the Remote Touch operation
method, see “SWITCHING
BETWEEN FUNCTIONS” on page
235.
Tag modeFolder mode
: Select to start playing the music.
: Select to pause the music.
To start playing the music again, select
.
PLAYING A USB MEMORY
PLAYING AND PAUSING A
USB MEMORY
INFORMATION
If tag information exists, the file/
folder names will be changed to track/
album names.
INFORMATION
When the USB memory is connected
and the audio source is changed to
USB memory mode, the USB mem-
ory will start playing the first file in
the first folder. If the same device is
removed and reinserted (and the con-
tents have not been changed), the
USB memory will resume playing
from the same point it was last used.
Depending on the USB memory that
is connected to the system, certain
functions may not be available.
Page 275 of 436
275
1. AUDIO/VIDEO SYSTEM OPERATION
5
AUDIO/VIDEO SYSTEM
CT200h_Navi_OM76078E_(EE)
14.02.06 12:30
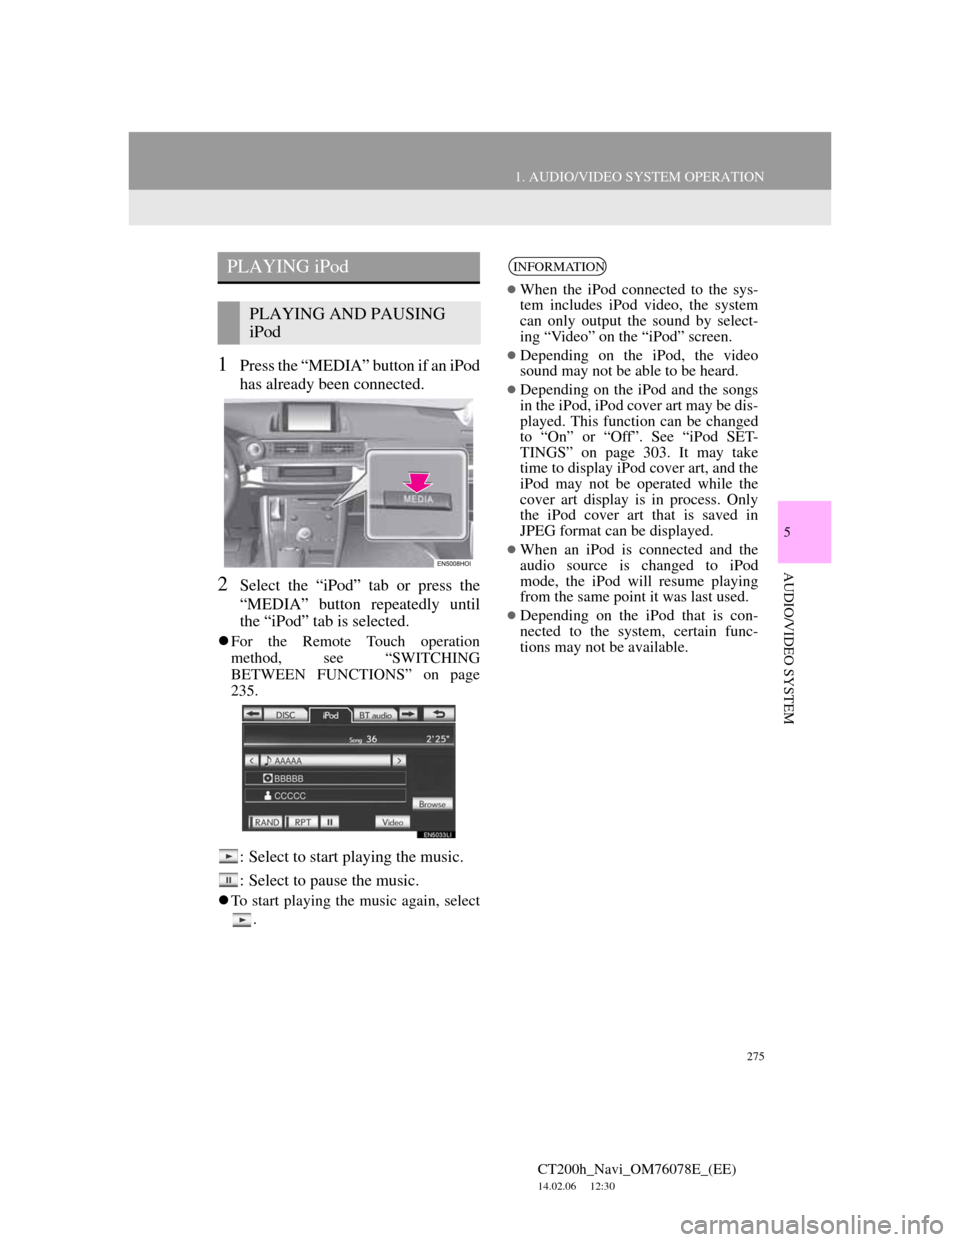
1Press the “MEDIA” button if an iPod
has already been connected.
2Select the “iPod” tab or press the
“MEDIA” button repeatedly until
the “iPod” tab is selected.
For the Remote Touch operation
method, see “SWITCHING
BETWEEN FUNCTIONS” on page
235.
: Select to start playing the music.
: Select to pause the music.
To start playing the music again, select
.
PLAYING iPod
PLAYING AND PAUSING
iPod
INFORMATION
When the iPod connected to the sys-
tem includes iPod video, the system
can only output the sound by select-
ing “Video” on the “iPod” screen.
Depending on the iPod, the video
sound may not be able to be heard.
Depending on the iPod and the songs
in the iPod, iPod cover art may be dis-
played. This function can be changed
to “On” or “Off”. See “iPod SET-
TINGS” on page 303. It may take
time to display iPod cover art, and the
iPod may not be operated while the
cover art display is in process. Only
the iPod cover art that is saved in
JPEG format can be displayed.
When an iPod is connected and the
audio source is changed to iPod
mode, the iPod will resume playing
from the same point it was last used.
Depending on the iPod that is con-
nected to the system, certain func-
tions may not be available.