Page 161 of 436
161
4. SETUP
CT200h_Navi_OM76078E_(EE)
14.02.06 12:30
3
NAVIGATION SYSTEM
TO EDIT “Dealer” OR “Contact”
1Select “Dealer” or “Contact”.
2Enter the name using the alphanu-
meric keys.
Up to 70 characters can be entered for
“Dealer” and 24 characters for “Con-
tact”.
3Select “OK”.
The previous screen will be displayed.
TO EDIT “Location”
1Select “Location”.
2Select one of the 8 directional screen
buttons to move the cursor to the
desired point on the map.
3Select “OK”.
The previous screen will be displayed.
TO EDIT “Tel. no.” (TELEPHONE
NUMBER)
1Select “Tel. no.”.
2Enter the number using number
keys.
3Select “OK”.
The previous screen will be displayed.
Page 196 of 436
196
2. SETUP
CT200h_Navi_OM76078E_(EE)
14.02.06 12:30
3When all settings are completed, se-
lect “OK”.
1Select “Call volume” on the “Sound
settings” screen.
2Select “-” or “+” to adjust the call
volume.
3Select “OK”.
1Select “Ring tone volume” on the
“Sound settings” screen.
2Select “-” or “+” to adjust the ring
tone volume.
3Select “OK”.
1Select “Ring tone” on the “Sound
settings” screen.
2Select the screen button correspond-
ing to the desired ring tone.
Ring tones can be heard by selecting
the screen buttons.
3Select “OK”.
INFORMATION
The system will automatically
increase the volume when the speed
exceeds 80 km/h (50 mph).
CALL VOLUME SETTING
RING TONE VOLUME
SETTING
RING TONE SETTING
Page 213 of 436
213
2. SETUP
4
TELEPHONE
CT200h_Navi_OM76078E_(EE)
14.02.06 12:30
1Select “New message notification
volume”.
2Select “-” or “+” to adjust the new
message notification volume.
3Select “OK”.
1Select “New message voice notifica-
tion tone”.
2Select the desired new message noti-
fication tone.
New message notification tones can be
heard by selecting the screen buttons.
3Select “OK”.
INFORMATION
Depending on the phone, these func-
tions may not be available.
NEW MESSAGE
NOTIFICATION VOLUME
SETTINGS
The new message notification vol-
ume can be adjusted.
INFORMATION
The system will automatically
increase the volume when the speed
exceeds 80 km/h (50 mph).
NEW MESSAGE
NOTIFICATION TONE
SETTINGS
A new message voice notification
tone can be selected.
Page 235 of 436
235
1. AUDIO/VIDEO SYSTEM OPERATION
5
AUDIO/VIDEO SYSTEM
CT200h_Navi_OM76078E_(EE)
14.02.06 12:30
Power/Volume knob: Press to turn the
audio/video system on and off. Turn this
knob to adjust the volume. The system
turns on in the last mode used.
“RADIO”, “MEDIA” button: Press to
display screen buttons for the audio/vid-
eo system. Using the instrument panel
1Every time the “RADIO” or “ME-
DIA” button is pressed, the audio
control mode changes.
The audio control mode changes in the
following order:
“RADIO” button: To display the
“AM”, “FM” and “DAB” tabs on the
screen. (Radio mode)
“MEDIA” button: To display the
“DISC”, “BT audio”, “AUX”, “USB”
and “iPod” tabs on the screen. (Media
mode)
Using the Remote Touch
1Press the “MENU” button on the
Remote Touch.
TURNING THE SYSTEM ON
AND OFF
A function that enables automatic
return to the previous screen from the
audio/video screen can be selected.
See page 60 for details.
SWITCHING BETWEEN
FUNCTIONS
Page 236 of 436
236
1. AUDIO/VIDEO SYSTEM OPERATION
CT200h_Navi_OM76078E_(EE)
14.02.06 12:30
2Select “Audio”.
3Select the desired tab.
1Press the “MEDIA” button. (Using
the instrument panel)
Press the “MENU” button on the
Remote Touch, then select “Audio”.
(Using the Remote Touch)
2Select the “DISC” tab.
3Select “Options”.
4Select “Wide”.
Up to 3 tabs can be displayed on the
screen. Select or , located
either side of the screen tabs, to dis-
play tabs from the previous or next
page.
The desired audio mode can be found
by selecting or and then
selecting that audio mode tab.
INFORMATION
If a disc is not inserted, the DVD
player cannot be turned on.
The DVD player can be turned off by
ejecting a disc.
When the audio control mode is
selected, the respective screen buttons
are displayed on the screen.
Dimmed screen buttons cannot be
operated.
SELECTING SCREEN SIZE
Before selecting screen size, it is
necessary to insert a DVD disc and
select DISC mode.
Page 241 of 436

241
1. AUDIO/VIDEO SYSTEM OPERATION
5
AUDIO/VIDEO SYSTEM
CT200h_Navi_OM76078E_(EE)
14.02.06 12:30
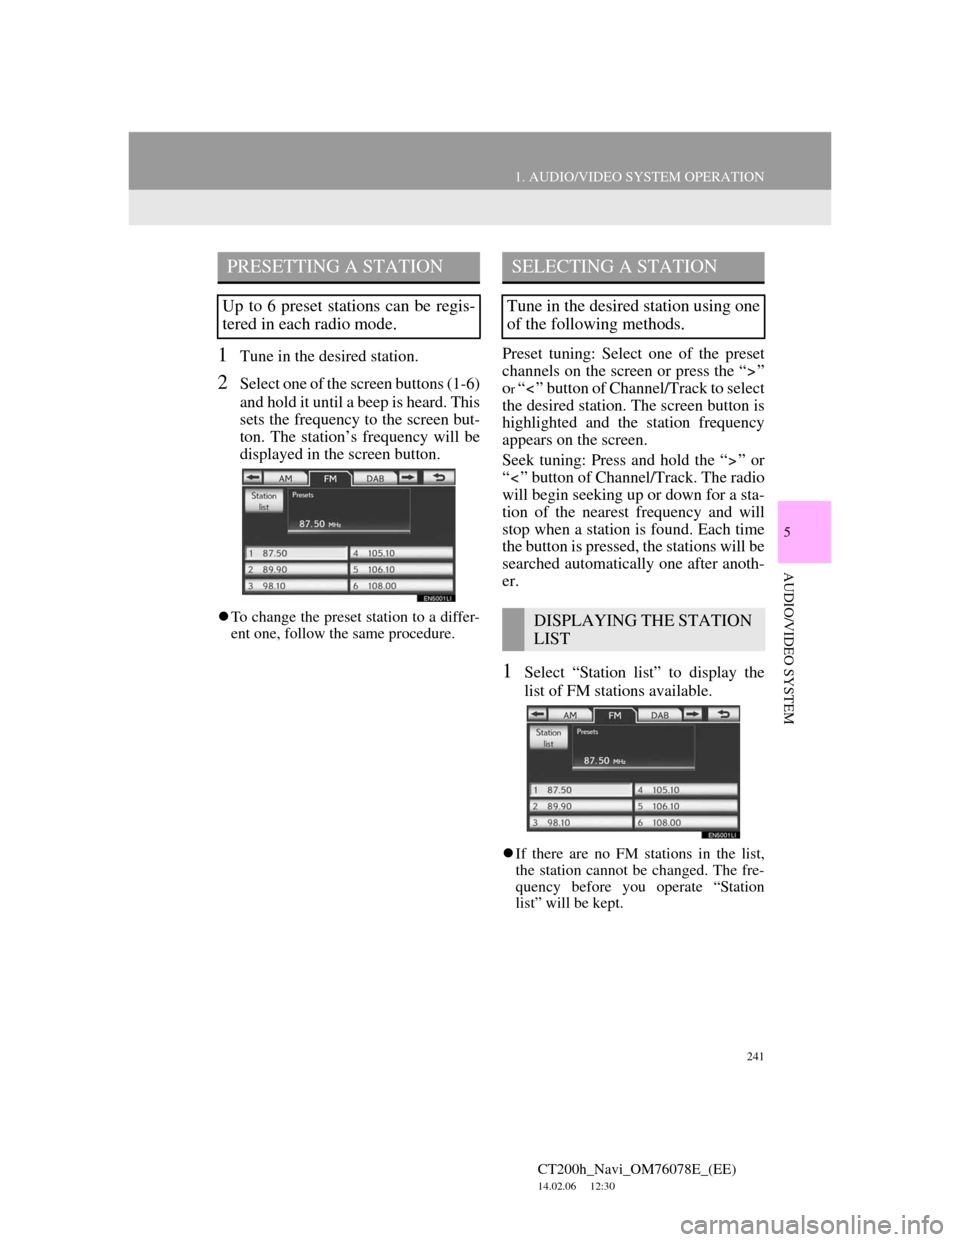
1Tune in the desired station.
2Select one of the screen buttons (1-6)
and hold it until a beep is heard. This
sets the frequency to the screen but-
ton. The station’s frequency will be
displayed in the screen button.
To change the preset station to a differ-
ent one, follow the same procedure.
Preset tuning: Select one of the preset
channels on the screen or press the “ ”
o
r “ ” button of Channel/Track to select
the desired station. The screen button is
highlighted and the station frequency
appears on the screen.
Seek tuning: Press and hold the “ ” or
“ ” button of Channel/Track. The radio
will begin seeking up or down for a sta-
tion of the nearest frequency and will
stop when a station is found. Each time
the button is pressed, the stations will be
searched automatically one after anoth-
er.
1Select “Station list” to display the
list of FM stations available.
If there are no FM stations in the list,
the station cannot be changed. The fre-
quency before you operate “Station
list” will be kept.
PRESETTING A STATION
Up to 6 preset stations can be regis-
tered in each radio mode.
SELECTING A STATION
Tune in the desired station using one
of the following methods.
DISPLAYING THE STATION
LIST
Page 244 of 436

244
1. AUDIO/VIDEO SYSTEM OPERATION
CT200h_Navi_OM76078E_(EE)
14.02.06 12:30
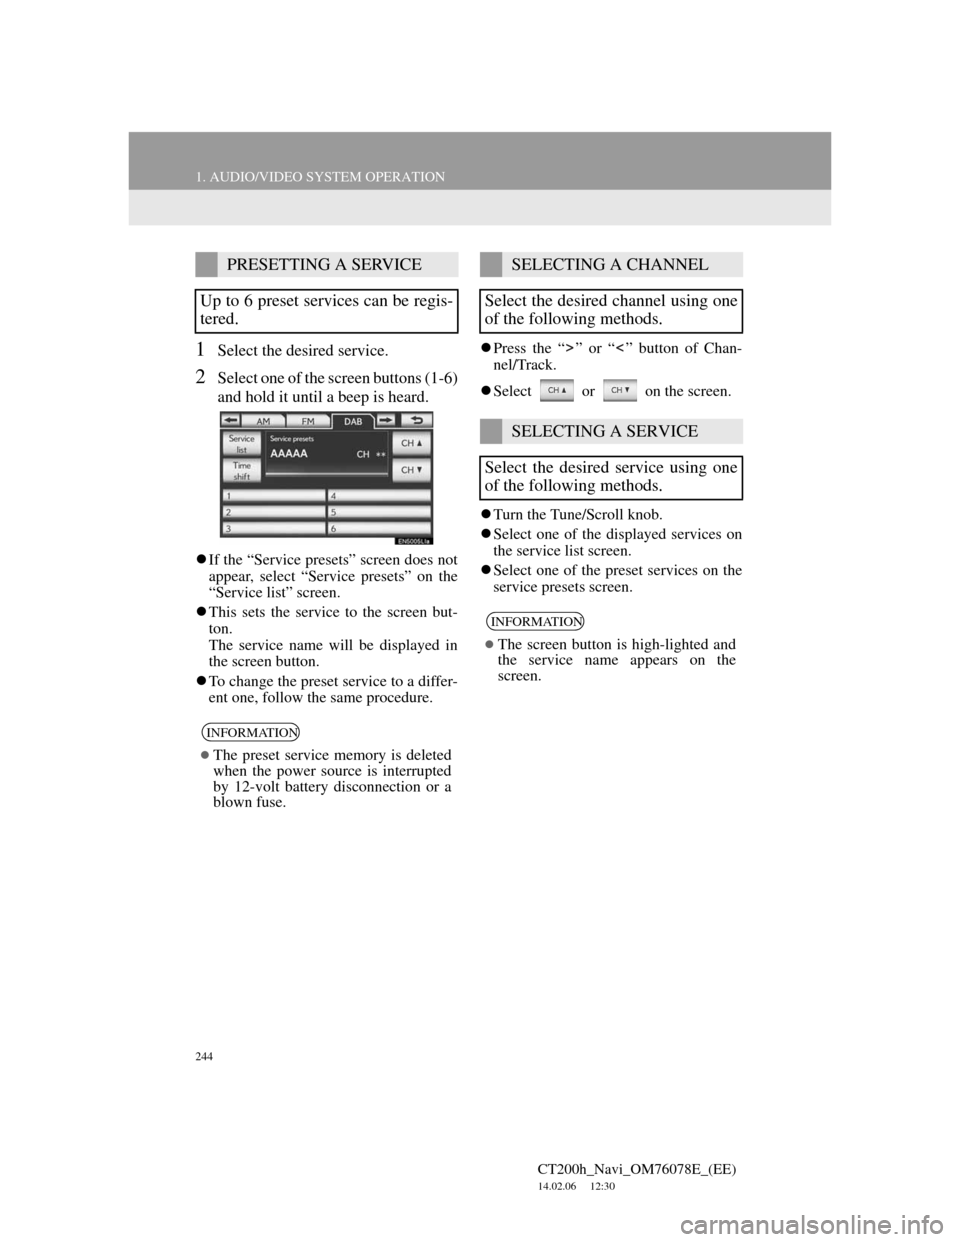
1Select the desired service.
2Select one of the screen buttons (1-6)
and hold it until a beep is heard.
If the “Service presets” screen does not
appear, select “Service presets” on the
“Service list” screen.
This sets the service to the screen but-
ton.
The service name will be displayed in
the screen button.
To change the preset service to a differ-
ent one, follow the same procedure.Press the “ ” or “ ” button of Chan-
nel/Track.
Select or on the screen.
Turn the Tune/Scroll knob.
Select one of the displayed services on
the service list screen.
Select one of the preset services on the
service presets screen.
PRESETTING A SERVICE
Up to 6 preset services can be regis-
tered.
INFORMATION
The preset service memory is deleted
when the power source is interrupted
by 12-volt battery disconnection or a
blown fuse.
SELECTING A CHANNEL
Select the desired channel using one
of the following methods.
SELECTING A SERVICE
Select the desired service using one
of the following methods.
INFORMATION
The screen button is high-lighted and
the service name appears on the
screen.
Page 248 of 436

248
1. AUDIO/VIDEO SYSTEM OPERATION
CT200h_Navi_OM76078E_(EE)
14.02.06 12:30
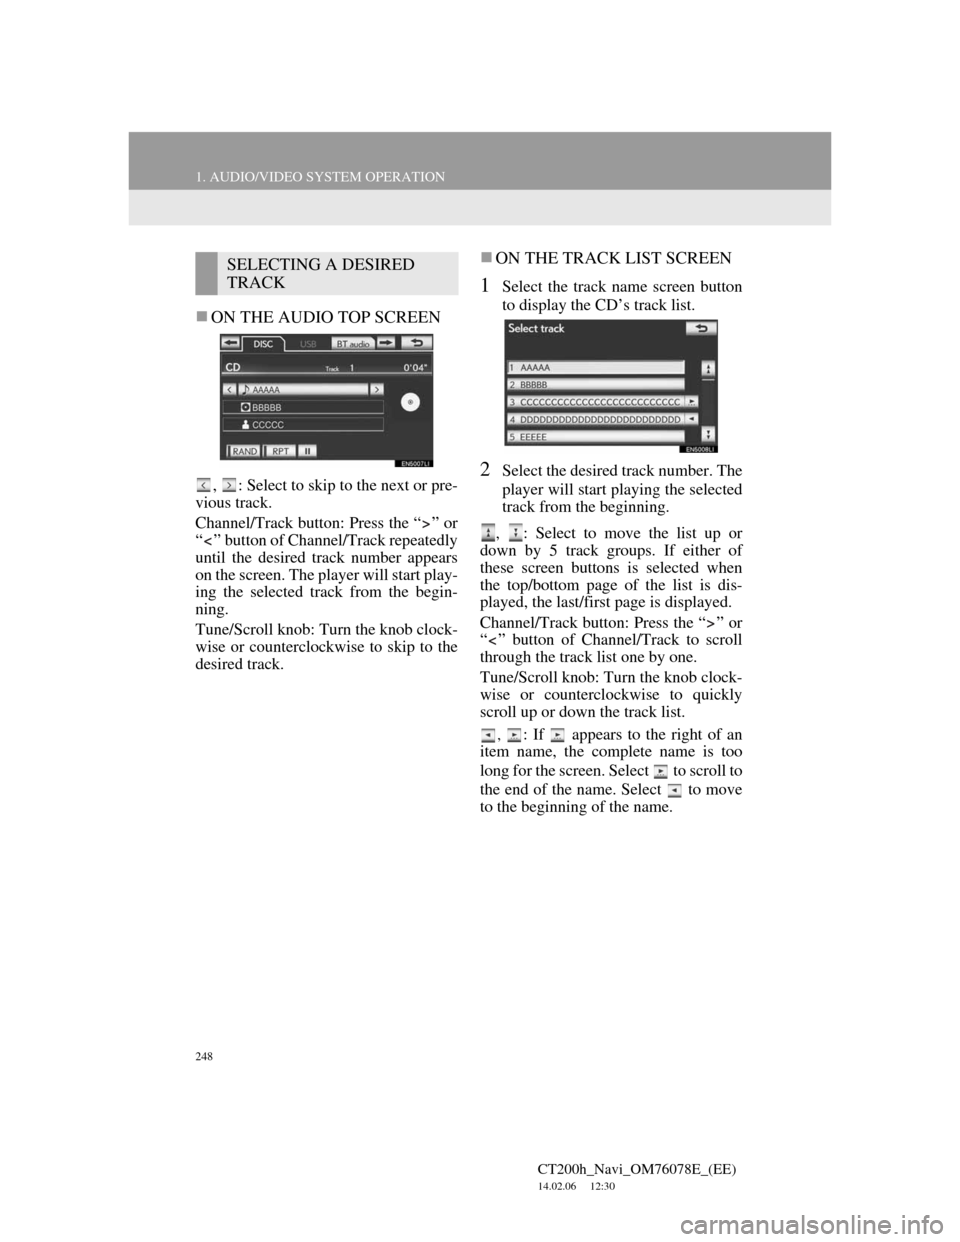
ON THE AUDIO TOP SCREEN
, : Select to skip to the next or pre-
vious track.
Channel/Track button: Press the “ ” or
“ ” button of Channel/Track repeatedly
until the desired track number appears
on the screen. The player will start play-
ing the selected track from the begin-
ning.
Tune/Scroll knob: Turn the knob clock-
wise or counterclockwise to skip to the
desired track.
ON THE TRACK LIST SCREEN
1Select the track name screen button
to display the CD’s track list.
2Select the desired track number. The
player will start playing the selected
track from the beginning.
, : Select to move the list up or
down by 5 track groups. If either of
these screen buttons is selected when
the top/bottom page of the list is dis-
played, the last/first page is displayed.
Channel/Track button: Press the “ ” or
“ ” button of Channel/Track to scroll
through the track list one by one.
Tune/Scroll knob: Turn the knob clock-
wise or counterclockwise to quickly
scroll up or down the track list.
, : If appears to the right of an
item name, the complete name is too
long for the screen. Select to scroll to
the end of the name. Select to move
to the beginning of the name.
SELECTING A DESIRED
TRACK