2012 Lexus CT200h reset
[x] Cancel search: resetPage 241 of 436
241
1. AUDIO/VIDEO SYSTEM OPERATION
5
AUDIO/VIDEO SYSTEM
CT200h_Navi_OM76078E_(EE)
14.02.06 12:30
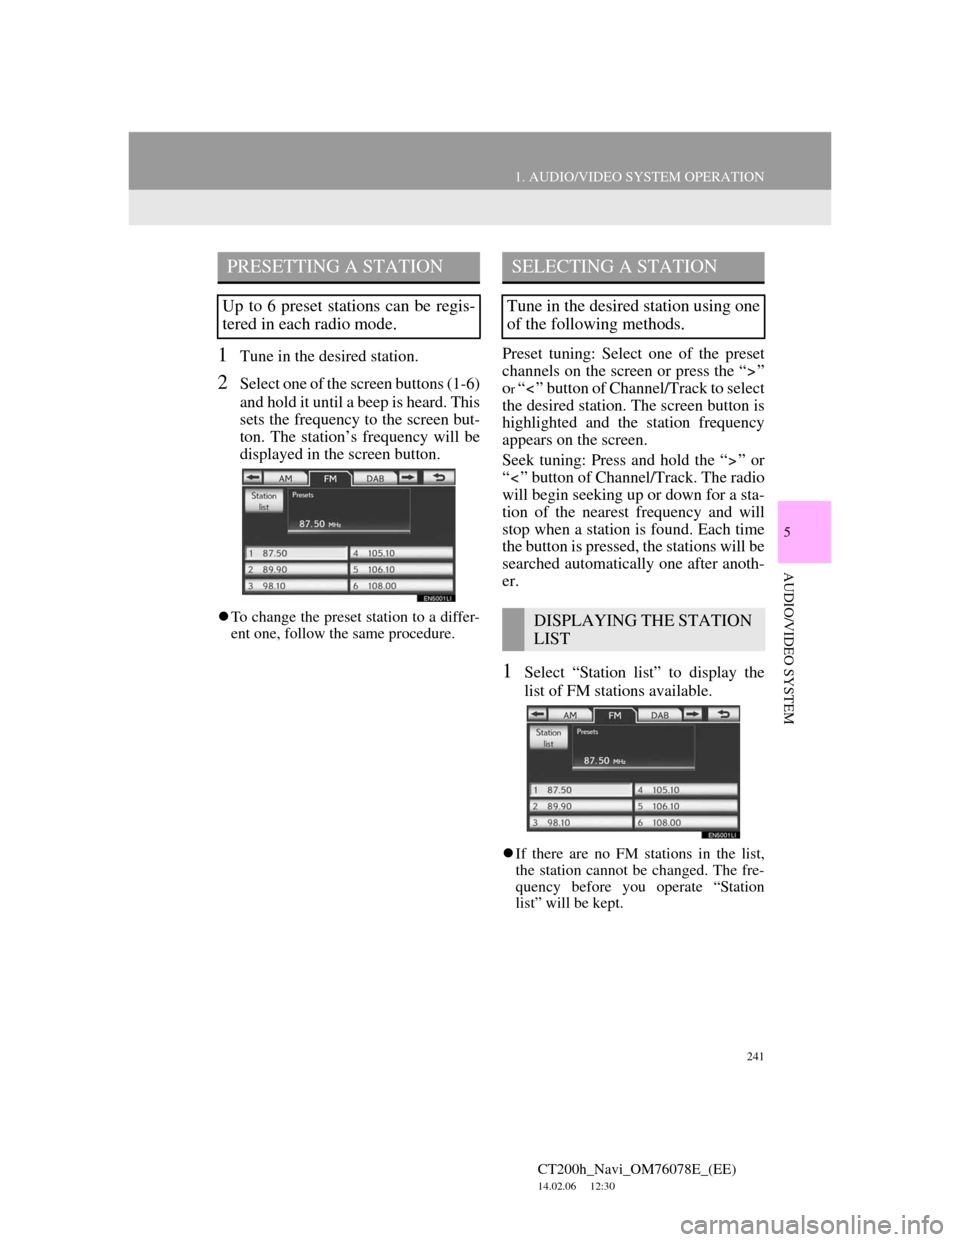
1Tune in the desired station.
2Select one of the screen buttons (1-6)
and hold it until a beep is heard. This
sets the frequency to the screen but-
ton. The station’s frequency will be
displayed in the screen button.
To change the preset station to a differ-
ent one, follow the same procedure.
Preset tuning: Select one of the preset
channels on the screen or press the “ ”
o
r “ ” button of Channel/Track to select
the desired station. The screen button is
highlighted and the station frequency
appears on the screen.
Seek tuning: Press and hold the “ ” or
“ ” button of Channel/Track. The radio
will begin seeking up or down for a sta-
tion of the nearest frequency and will
stop when a station is found. Each time
the button is pressed, the stations will be
searched automatically one after anoth-
er.
1Select “Station list” to display the
list of FM stations available.
If there are no FM stations in the list,
the station cannot be changed. The fre-
quency before you operate “Station
list” will be kept.
PRESETTING A STATION
Up to 6 preset stations can be regis-
tered in each radio mode.
SELECTING A STATION
Tune in the desired station using one
of the following methods.
DISPLAYING THE STATION
LIST
Page 244 of 436
244
1. AUDIO/VIDEO SYSTEM OPERATION
CT200h_Navi_OM76078E_(EE)
14.02.06 12:30
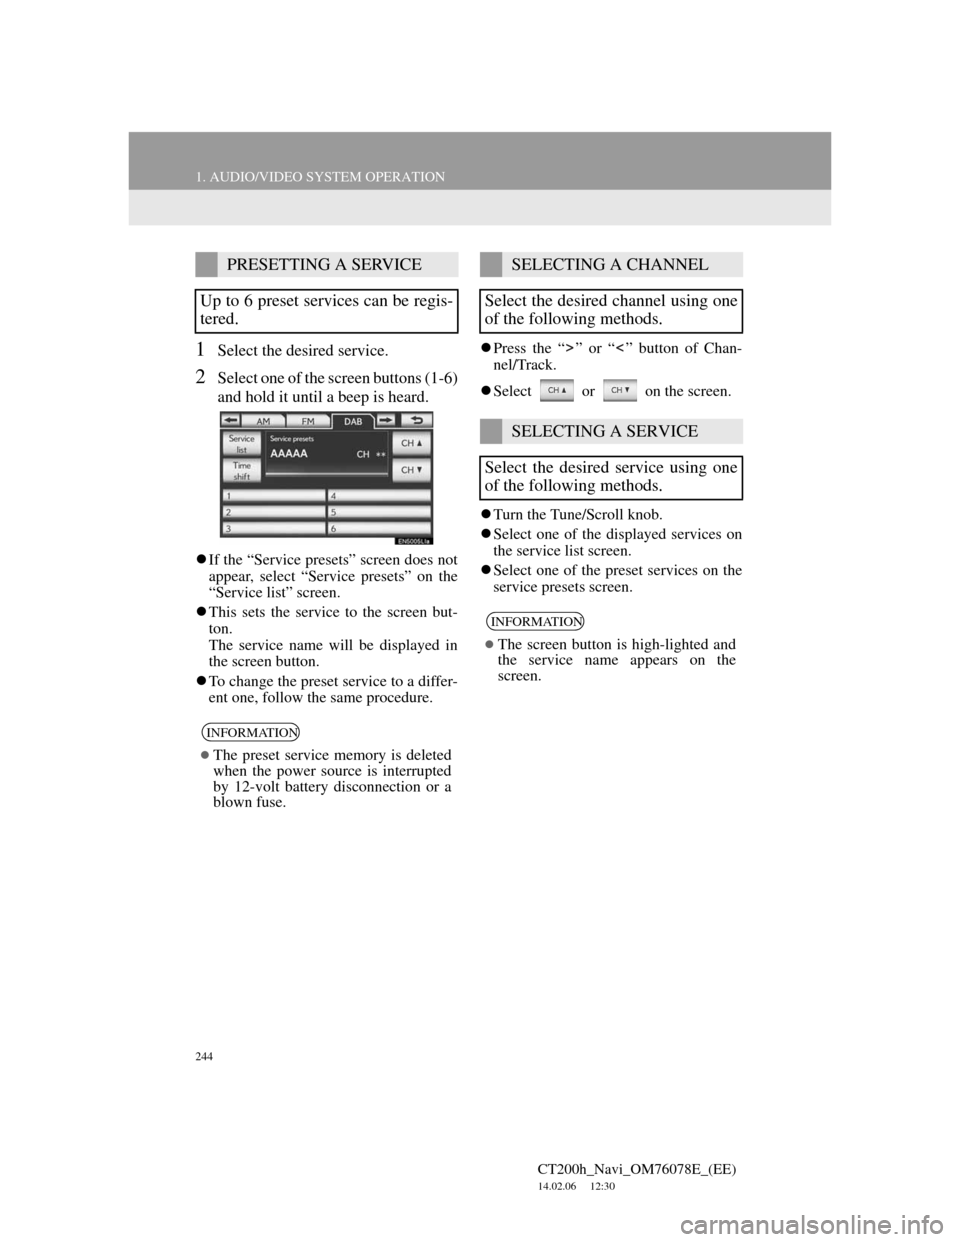
1Select the desired service.
2Select one of the screen buttons (1-6)
and hold it until a beep is heard.
If the “Service presets” screen does not
appear, select “Service presets” on the
“Service list” screen.
This sets the service to the screen but-
ton.
The service name will be displayed in
the screen button.
To change the preset service to a differ-
ent one, follow the same procedure.Press the “ ” or “ ” button of Chan-
nel/Track.
Select or on the screen.
Turn the Tune/Scroll knob.
Select one of the displayed services on
the service list screen.
Select one of the preset services on the
service presets screen.
PRESETTING A SERVICE
Up to 6 preset services can be regis-
tered.
INFORMATION
The preset service memory is deleted
when the power source is interrupted
by 12-volt battery disconnection or a
blown fuse.
SELECTING A CHANNEL
Select the desired channel using one
of the following methods.
SELECTING A SERVICE
Select the desired service using one
of the following methods.
INFORMATION
The screen button is high-lighted and
the service name appears on the
screen.
Page 254 of 436
254
1. AUDIO/VIDEO SYSTEM OPERATION
CT200h_Navi_OM76078E_(EE)
14.02.06 12:30
PLAYING THE FILES IN ALL
THE FOLDERS ON THE DISC IN
RANDOM ORDER
1Select “RAND” repeatedly until
“FLD.RAND” appears on the
screen.
Once “FLD.RAND” appears on the
screen, the system selects a file ran-
domly from all of the existing folders.
To cancel this function, select “RAND”
again.
INFORMATION
When a file is skipped or the system
is inoperative, select “RAND” to
reset.
OPERATING A DVD DISC
The playback condition of some
DVD discs may be determined by
the DVD software producer. This
DVD player plays a disc as the soft-
ware producer intended. As such
some functions may not work prop-
erly. Be sure to read the instruction
manual that comes with the individu-
al DVD disc. For detailed informa-
tion about DVD video discs, see
“DVD PLAYER AND DVD VID-
EO DISC INFORMATION” on
page 266.
PRECAUTIONS ON DVD
VIDEO DISC
When recording with a DVD video,
audio tracks may not record in some
cases while the menu is displayed.
As audio will not play in this case,
verify that the video tracks are play-
ing and then activate playback.
When playback of a disc is complet-
ed:
If an audio CD or MP3/WMA disc is
playing, the first track or file starts.
If a DVD video is playing, playback
will stop or the menu screen will be
displayed.
The title/chapter number and play-
back time display may not appear
while playing back certain DVD vid-
eo discs.
CAUTION
Conversational speech on some
DVDs is recorded at a low volume to
emphasize the impact of sound
effects. If you adjust the volume
assuming that the conversations rep-
resent the maximum volume level
that the DVD will play, you may be
startled by louder sound effects or
when you change to a different audio
source. The louder sounds may have a
significant impact on the human body
or pose a driving hazard. Keep this in
mind when you adjust the volume.
Page 288 of 436
288
1. AUDIO/VIDEO SYSTEM OPERATION
CT200h_Navi_OM76078E_(EE)
14.02.06 12:30
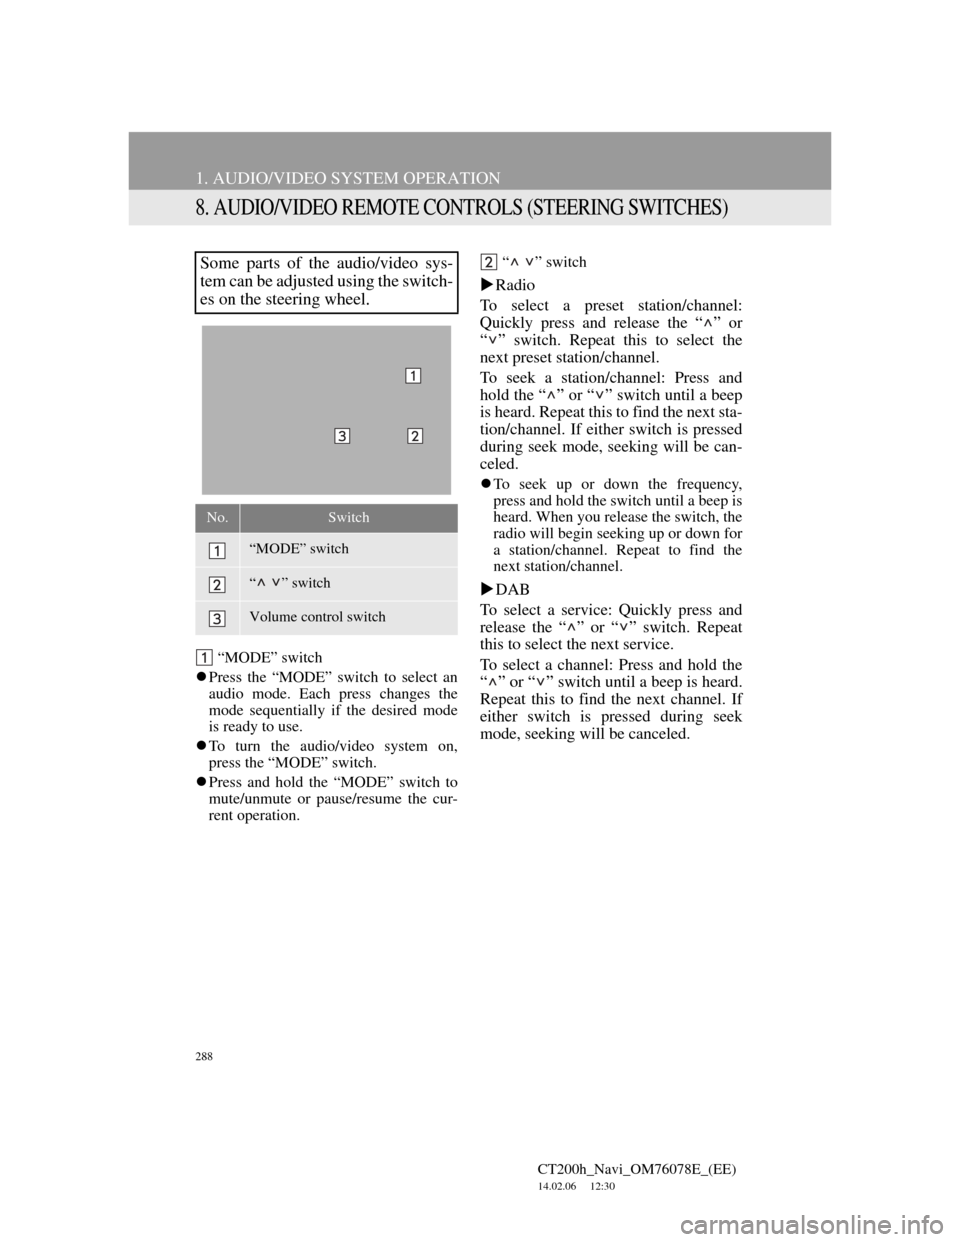
8. AUDIO/VIDEO REMOTE CONTROLS (STEERING SWITCHES)
“MODE” switch
Press the “MODE” switch to select an
audio mode. Each press changes the
mode sequentially if the desired mode
is ready to use.
To turn the audio/video system on,
press the “MODE” switch.
Press and hold the “MODE” switch to
mute/unmute or pause/resume the cur-
rent operation.“ ” switch
Radio
To select a preset station/channel:
Quickly press and release the “ ” or
“ ” switch. Repeat this to select the
next preset station/channel.
To seek a station/channel: Press and
hold the “ ” or “ ” switch until a beep
is heard. Repeat this to find the next sta-
tion/channel. If either switch is pressed
during seek mode, seeking will be can-
celed.
To seek up or down the frequency,
press and hold the switch until a beep is
heard. When you release the switch, the
radio will begin seeking up or down for
a station/channel. Repeat to find the
next station/channel.
DAB
To select a service: Quickly press and
release the “ ” or “ ” switch. Repeat
this to select the next service.
To select a channel: Press and hold the
“ ” or “ ” switch until a beep is heard.
Repeat this to find the next channel. If
either switch is pressed during seek
mode, seeking will be canceled.
Some parts of the audio/video sys-
tem can be adjusted using the switch-
es on the steering wheel.
No.Switch
“MODE” switch
“ ” switch
Volume control switch
Page 364 of 436
364
2. SETUP
CT200h_Navi_OM76078E_(EE)
14.02.06 12:30
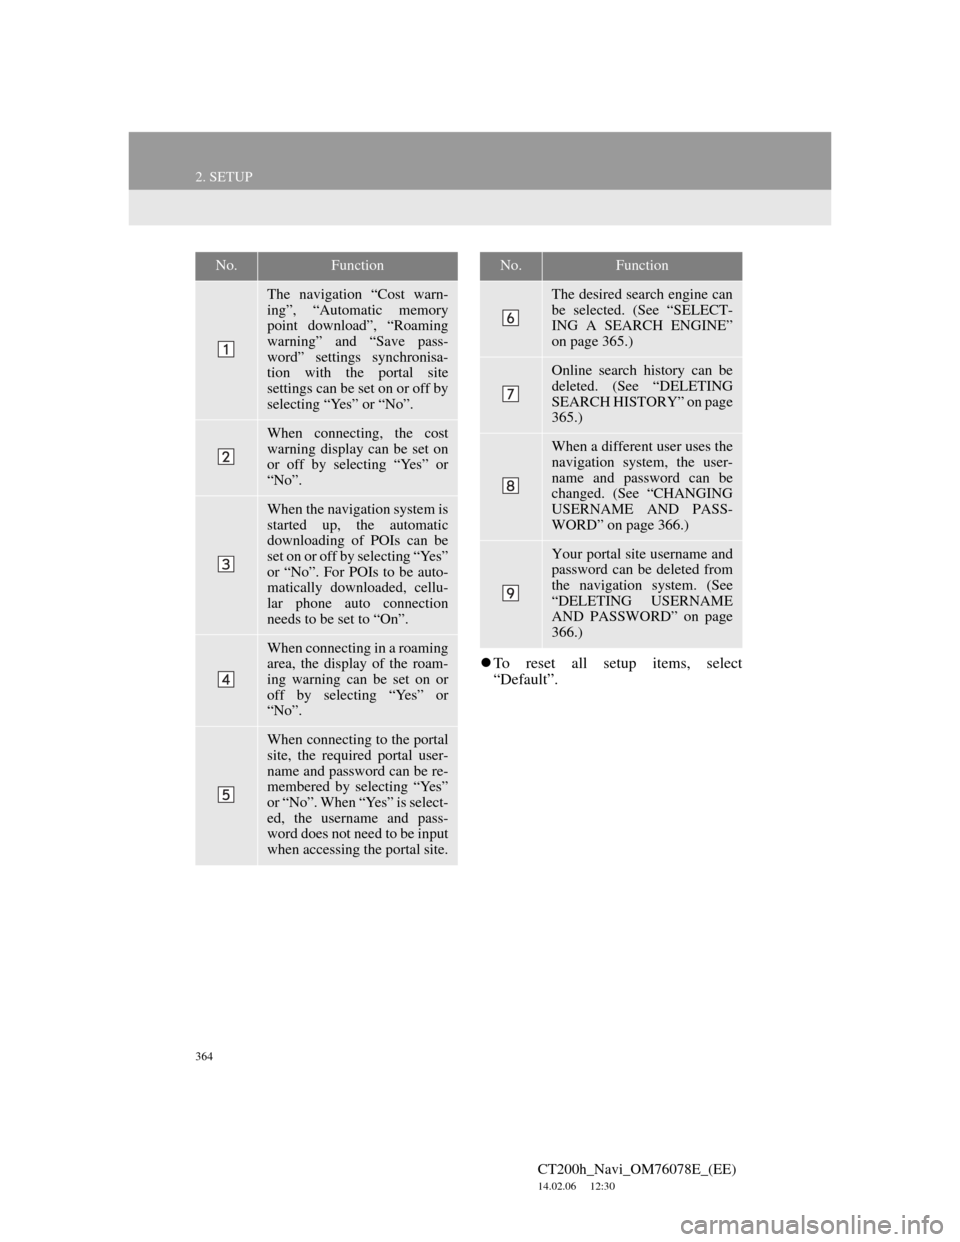
To reset all setup items, select
“Default”.
No.Function
The navigation “Cost warn-
ing”, “Automatic memory
point download”, “Roaming
warning” and “Save pass-
word” settings synchronisa-
tion with the portal site
settings can be set on or off by
selecting “Yes” or “No”.
When connecting, the cost
warning display can be set on
or off by selecting “Yes” or
“No”.
When the navigation system is
started up, the automatic
downloading of POIs can be
set on or off by selecting “Yes”
or “No”. For POIs to be auto-
matically downloaded, cellu-
lar phone auto connection
needs to be set to “On”.
When connecting in a roaming
area, the display of the roam-
ing warning can be set on or
off by selecting “Yes” or
“No”.
When connecting to the portal
site, the required portal user-
name and password can be re-
membered by selecting “Yes”
or “No”. When “Yes” is select-
ed, the username and pass-
word does not need to be input
when accessing the portal site.
The desired search engine can
be selected. (See “SELECT-
ING A SEARCH ENGINE”
on page 365.)
Online search history can be
deleted. (See “DELETING
SEARCH HISTORY” on page
365.)
When a different user uses the
navigation system, the user-
name and password can be
changed. (See “CHANGING
USERNAME AND PASS-
WORD” on page 366.)
Your portal site username and
password can be deleted from
the navigation system. (See
“DELETING USERNAME
AND PASSWORD” on page
366.)
No.Function
Page 366 of 436

366
2. SETUP
CT200h_Navi_OM76078E_(EE)
14.02.06 12:30
1Press the “MENU” button on the
Remote Touch, then select “Setup”.
2Select “Navigation” on the “Setup”
screen.
3Select “Online search” on the “Nav-
igation settings” screen.
4Select “Change username and pass-
word”.
5Input the desired username and pass-
word.
6Select “OK”.
In order for the new username and
password to be applied to the naviga-
tion system, the system connects to
Lexus centre.
1Press the “MENU” button on the
Remote Touch, then select “Setup”.
2Select “Navigation” on the “Setup”
screen.
3Select “Online search” on the “Nav-
igation settings” screen.
4Select “Delete username and pass-
word”. A confirmation screen will
be displayed.
5To delete the password, select “Yes”.
To cancel the deletion, select “No”.
CHANGING USERNAME
AND PASSWORD
User name and password can be
changed.DELETING USERNAME
AND PASSWORD
The preset username and password
can be deleted.
Page 401 of 436

401
CT200h_Navi_OM76078E_(EE)
14.02.06 12:30
M
Manual clock setting ................................ 64
Map database version and
covered area........................................ 166
Map information ................................. 166
Map screen ............................................... 25
Map screen operation ............................... 47
Current position display ....................... 47
Map orientation and 3D map mode ...... 58
Map scale.............................................. 57
Screen scroll operation ......................... 48
Standard map icons .............................. 59
Switching map configurations .............. 55
“MEDIA” button.................................... 232
Memory point settings ........................... 125
Backup to a USB memory.................. 147
Copying from a USB memory............ 149
Deleting previous destinations ........... 146
Setting up the “Area to avoid” ........... 141
Setting up the “Home” ....................... 126
Setting up the “Memory points”......... 133
Setting up the “Quick access” ............ 129
Memory points ....................................... 125
“MENU” button ....................................... 12
“Menu” screen ......................................... 29
MP3 ................................ 250, 295, 297, 298
N
Navigation menu screen........................... 27
Navigation operation................................ 12
Navigation settings................................. 151
Screens for navigation settings ........... 151
Navigation system.................................... 77
Navigation system function index ........... 23
North-up screen........................................ 58
O
Online search settings ............................ 363
Screens for online search settings ...... 363
Operation flow: Guiding the route .......... 19
P
Peripheral monitoring system ................ 370
Portable audio device holder ................. 239
Power/Volume knob .............................. 232
Q
Quick guide ............................................. 11
Quick reference ......... 25, 78, 170, 232, 306
R
“RADIO” button.................................... 232
Radio operation ..................................... 240
Listening to the DAB ......................... 243
Listening to the radio ......................... 240
Presetting a station ............................. 241
RDS (Radio data system) ................... 242
Selecting a station .............................. 241
Receive on the Bluetooth
® phone ......... 188
Register a Bluetooth® phone ................. 176
Connecting a Bluetooth® phone ........ 178
Reconnecting the Bluetooth® phone.. 180
Registering home ..................................... 15
Registering quick access.......................... 17
Remote Touch ......................................... 12
Remote Touch knob ................................ 12
Route guidance ...................................... 105
Route guidance screen ........................... 105