2012 Hyundai H-100 Truck clock
[x] Cancel search: clockPage 91 of 217
1
FEATURES OF YOUR HYUNDAI
79
FM/AM
K240B01HR-GAT
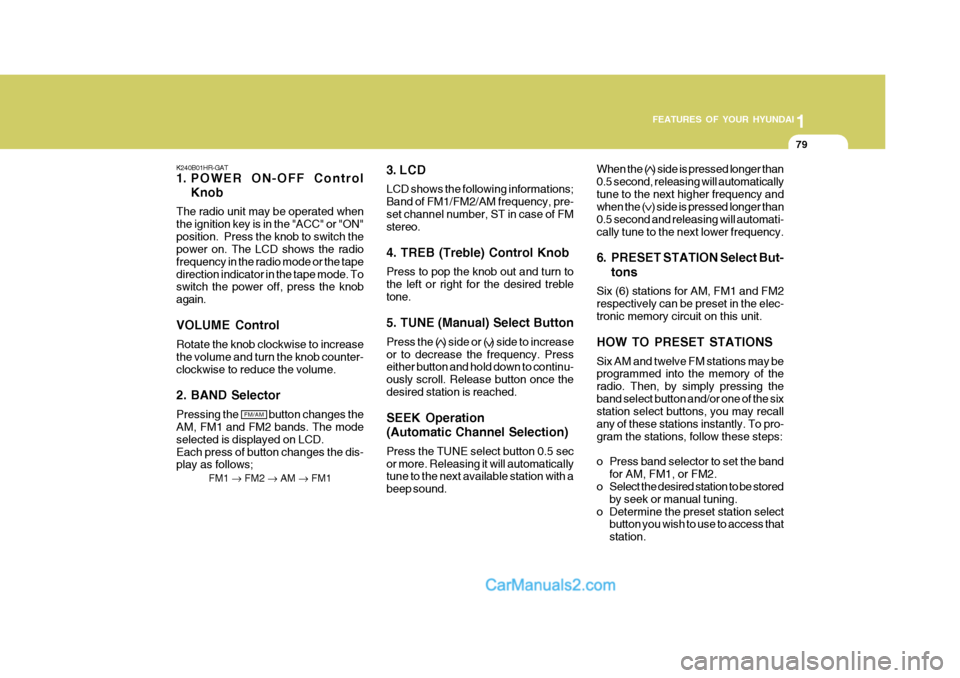
1. POWER ON-OFF Control
Knob
The radio unit may be operated when the ignition key is in the "ACC" or "ON"position. Press the knob to switch the power on. The LCD shows the radio frequency in the radio mode or the tapedirection indicator in the tape mode. To switch the power off, press the knob again. VOLUME Control Rotate the knob clockwise to increase the volume and turn the knob counter-clockwise to reduce the volume. 2. BAND Selector Pressing the button changes the AM, FM1 and FM2 bands. The mode selected is displayed on LCD.Each press of button changes the dis- play as follows; FM1 � FM2 � AM � FM1 3. LCD LCD shows the following informations; Band of FM1/FM2/AM frequency, pre-set channel number, ST in case of FM stereo. 4. TREB (Treble) Control Knob Press to pop the knob out and turn to the left or right for the desired trebletone. 5. TUNE (Manual) Select Button Press the ( ) side or ( ) side to increase or to decrease the frequency. Press either button and hold down to continu- ously scroll. Release button once thedesired station is reached. SEEK Operation (Automatic Channel Selection) Press the TUNE select button 0.5 sec or more. Releasing it will automatically tune to the next available station with a beep sound. When the ( ) side is pressed longer than0.5 second, releasing will automaticallytune to the next higher frequency and when the ( ) side is pressed longer than 0.5 second and releasing will automati-cally tune to the next lower frequency.
6. PRESET STATION Select But-
tons
Six (6) stations for AM, FM1 and FM2 respectively can be preset in the elec- tronic memory circuit on this unit. HOW TO PRESET STATIONS Six AM and twelve FM stations may be programmed into the memory of the radio. Then, by simply pressing theband select button and/or one of the six station select buttons, you may recall any of these stations instantly. To pro-gram the stations, follow these steps:
o Press band selector to set the band for AM, FM1, or FM2.
o Select the desired station to be stored
by seek or manual tuning.
o Determine the preset station select button you wish to use to access that station.
Page 92 of 217
1FEATURES OF YOUR HYUNDAI
80
o Press the station select button formore than two seconds. A select button indicator will show in the dis- play indicating which select button you have depressed. The frequencydisplay will flash after it has been stored into the memory with beep sound. You should then release thebutton, and proceed to program the next desired station. A total of 18 stations can be programmed by se-lecting one AM and two FM stations per button.
o When completed, any preset station may be recalled by selecting AM,FM1 or FM2 band and the appropri- ate station button.
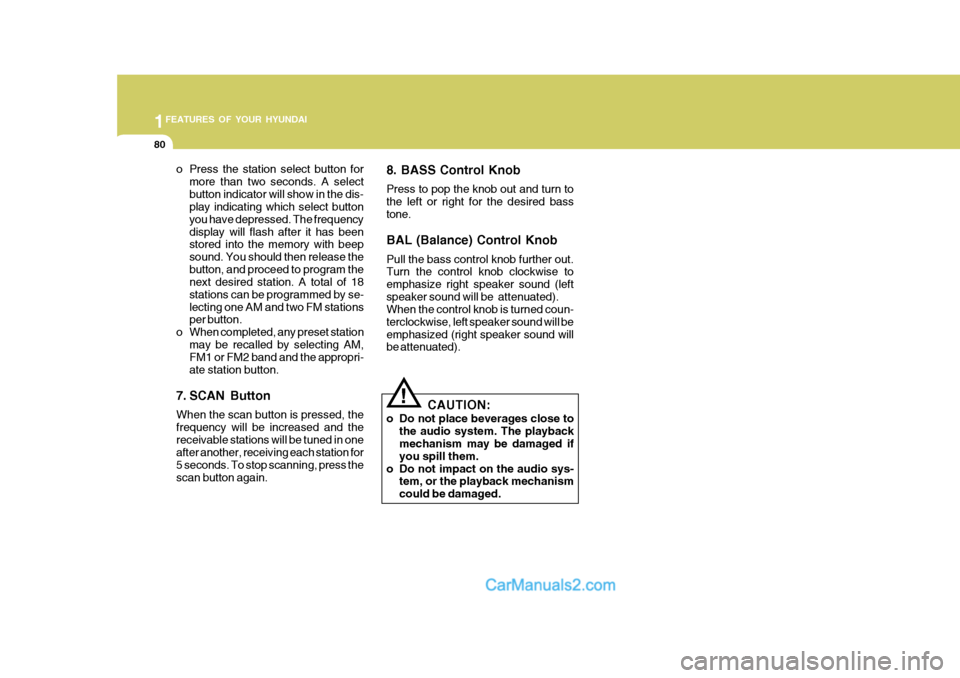
7. SCAN Button When the scan button is pressed, the frequency will be increased and thereceivable stations will be tuned in one after another, receiving each station for 5 seconds. To stop scanning, press thescan button again. 8. BASS Control Knob Press to pop the knob out and turn to the left or right for the desired basstone. BAL (Balance) Control Knob Pull the bass control knob further out. Turn the control knob clockwise to emphasize right speaker sound (leftspeaker sound will be attenuated). When the control knob is turned coun- terclockwise, left speaker sound will beemphasized (right speaker sound will be attenuated).
!
CAUTION:
o Do not place beverages close to the audio system. The playback mechanism may be damaged if you spill them.
o Do not impact on the audio sys- tem, or the playback mechanismcould be damaged.
Page 101 of 217

2
DRIVING YOUR HYUNDAI
5
C070C01A-AAT
To Remove the Ignition Key
1. Turn the ignition key to the "ACC"
position.
2. Simultaneously push and turn the
ignition key counterclockwise from the "ACC" position to the "LOCK" position.
3. The key can be removed in the "LOCK" position.
NOTE: Do not hold the key in the "START" position for more than 15 seconds.
o "ON" When the key is in the "ON" position, the ignition is on and all accessories may be turned on. If the engine is notrunning, the key should not be left in the "ON" position. This will discharge the battery and may also damage theignition system.
o "ACC" With the key in the "ACC" position, some electrical accessories (radio etc.)may be operated.
o "LOCK" The key can be removed or inserted in this position. To protect against theft, the steering wheel locks by removing the key. NOTE: If difficulty is experienced turning the ignition key to the ACC position, turn the key while turning steeringwheel right and left to release the tension.
C070C01E-1
LOCK
ACC
ON
START
!
C050A01A-AAT STARTING
WARNING:
Never run the engine in a closed or poorly ventilated area any longer than is needed to move your car in or out of the area. The carbon mon-oxide gas emitted is odorless and can cause serious injury or death. C050A01E-1
Page 119 of 217
3 WHAT TO DO IN AN EMERGENCY
4
!
IF THE ENGINE OVERHEATS
D030A01HR-GAT If your temperature gauge indicates overheating, you experience a loss of power, or hear loud pinging or knock- ing, the engine is probably too hot. Ifthis happens to you, you should:
1. Pull off the road and stop as soon as it is safe to do so.
2. Place the gear selector lever in neu-
tral and set the parking brake. If the air conditioning is on, turn it off.
3. If engine coolant is running out un-
der the car or steam is coming outfrom the hood, allow the engine to idle. Do not open the hood until the engine coolant has stopped runningor the steaming has stopped. If there is no visible loss of engine coolant and no steam, leave the enginerunning, lift up the passenger's seat
(Refer to "To Inspect the Engine
Compartment Under the Passenger's
Seat" on page 1-13.) and check to be sure the engine cooling fan is oper- ating. If the fan is not running, turnthe engine off.
6. Carefully remove the jumper cables
in the reverse order of attachment.
If you do not know why your batterybecame discharged (because the lightswere left on, etc.), have the charging system checked by your Hyundai dealer. 4. Check to see if the water pump drive
belt is missing. If it is not missing,check to see that it is tight. If the drive belt seems to be satisfactory, check for coolant leaking from theradiator, hoses or under the car. (If the air conditioning had been in use, it is normal for cold water to bedraining from it when you stop).
WARNING:
While the engine is running, keephair, hands, and clothing away from moving parts such as the fan and drive belts to prevent injury.
HHR4002
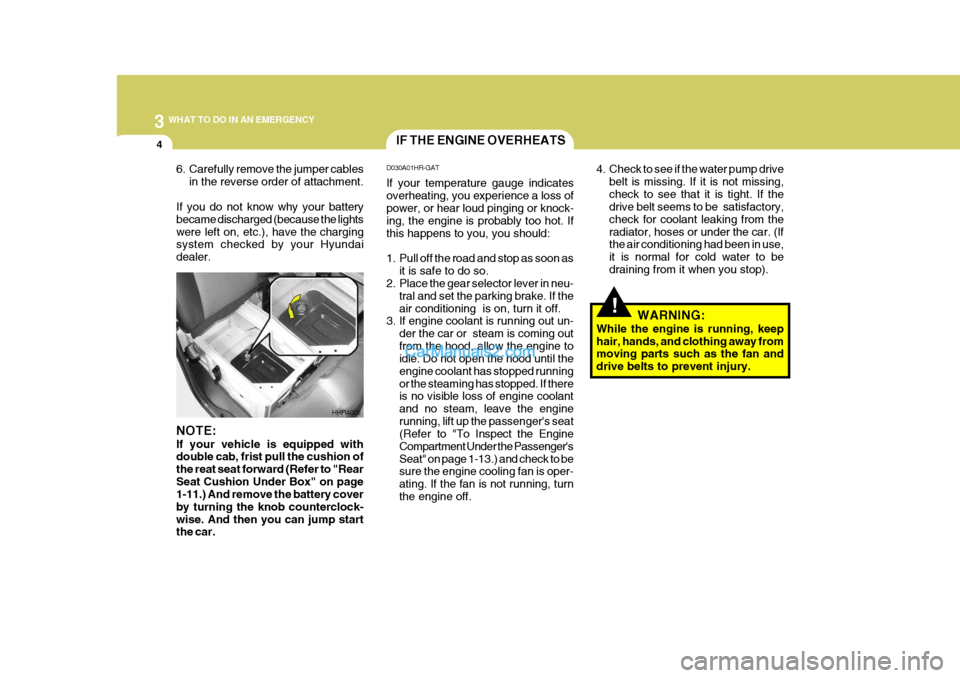
NOTE: If your vehicle is equipped with double cab, frist pull the cushion of the reat seat forward (Refer to "RearSeat Cushion Under Box" on page 1-11.) And remove the battery cover by turning the knob counterclock-wise. And then you can jump start the car.
Page 121 of 217
3 WHAT TO DO IN AN EMERGENCY
6
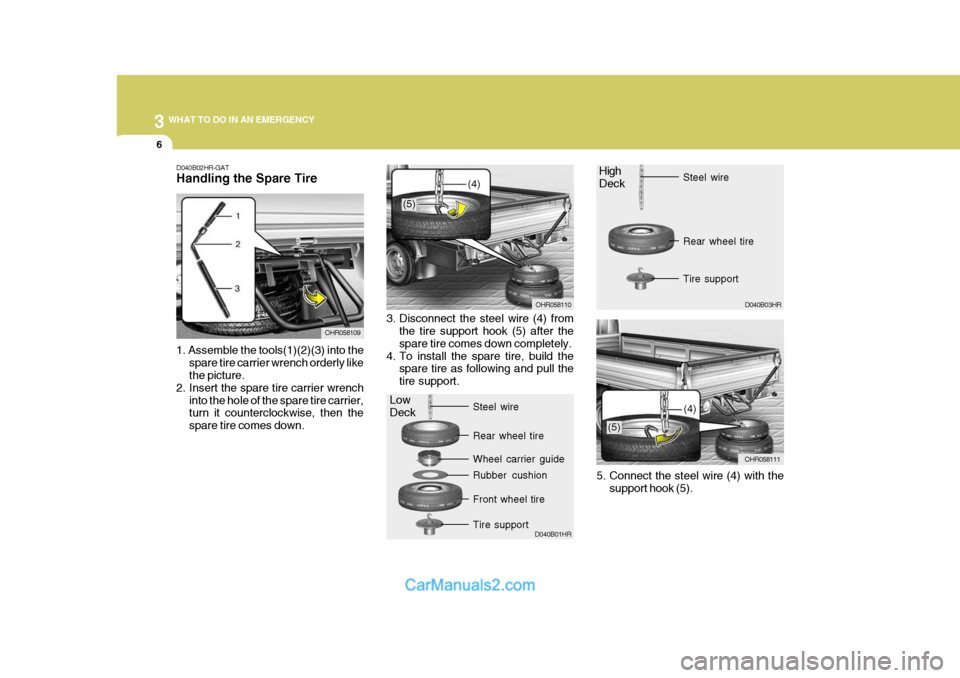
D040B02HR-GAT Handling the Spare Tire 1. Assemble the tools(1)(2)(3) into the
spare tire carrier wrench orderly like the picture.
2. Insert the spare tire carrier wrench into the hole of the spare tire carrier,turn it counterclockwise, then the spare tire comes down. OHR058109
3. Disconnect the steel wire (4) from
the tire support hook (5) after thespare tire comes down completely.
4. To install the spare tire, build the spare tire as following and pull thetire support. OHR058110
(4)
D040B01HR5. Connect the steel wire (4) with the
support hook (5).
Rear wheel tire Front wheel tire
Wheel carrier guide Tire support
Rubber cushion
Steel wire
OHR058111
(4) D040B03HR
Rear wheel tire Tire support
Steel wire
Low Deck HighDeck
(5)
(5)
Page 122 of 217
3
WHAT TO DO IN AN EMERGENCY
7
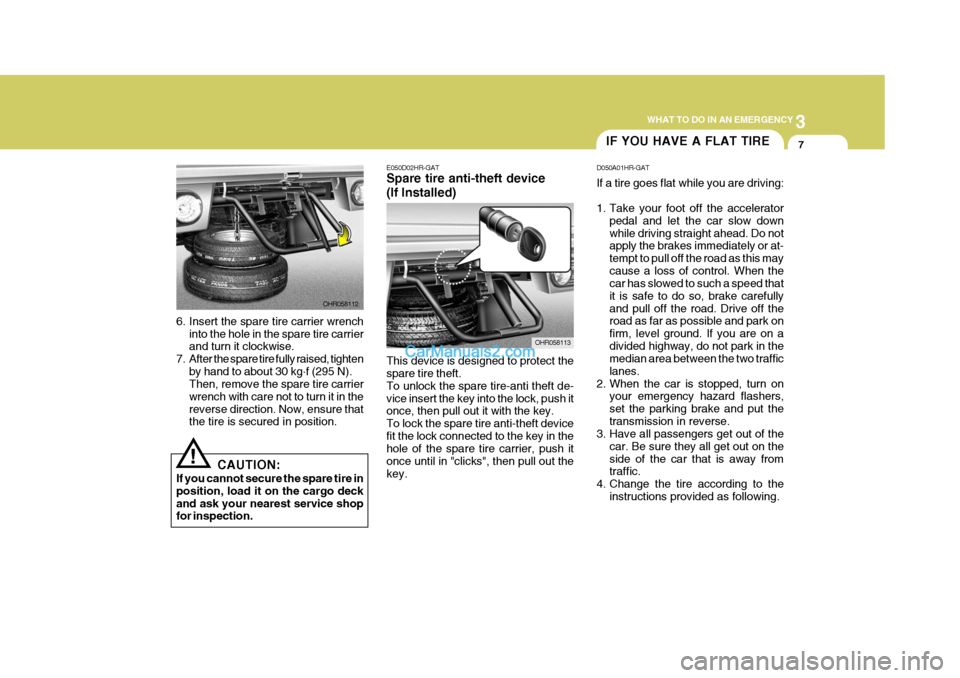
6. Insert the spare tire carrier wrench
into the hole in the spare tire carrier and turn it clockwise.
7. After the spare tire fully raised, tighten by hand to about 30 kg .
f (295 N).
Then, remove the spare tire carrier wrench with care not to turn it in thereverse direction. Now, ensure that the tire is secured in position.
! CAUTION:
If you cannot secure the spare tire in position, load it on the cargo deckand ask your nearest service shop for inspection. E050D02HR-GAT Spare tire anti-theft device (If Installed) This device is designed to protect the spare tire theft. To unlock the spare tire-anti theft de-vice insert the key into the lock, push it once, then pull out it with the key. To lock the spare tire anti-theft devicefit the lock connected to the key in the hole of the spare tire carrier, push it once until in "clicks", then pull out thekey.
OHR058113
OHR058112
IF YOU HAVE A FLAT TIRE
D050A01HR-GAT If a tire goes flat while you are driving:
1. Take your foot off the accelerator pedal and let the car slow down while driving straight ahead. Do not apply the brakes immediately or at- tempt to pull off the road as this maycause a loss of control. When the car has slowed to such a speed that it is safe to do so, brake carefullyand pull off the road. Drive off the road as far as possible and park on firm, level ground. If you are on adivided highway, do not park in the median area between the two traffic lanes.
2. When the car is stopped, turn on your emergency hazard flashers,set the parking brake and put thetransmission in reverse.
3. Have all passengers get out of the
car. Be sure they all get out on theside of the car that is away from traffic.
4. Change the tire according to the instructions provided as following.
Page 125 of 217
3 WHAT TO DO IN AN EMERGENCY
10
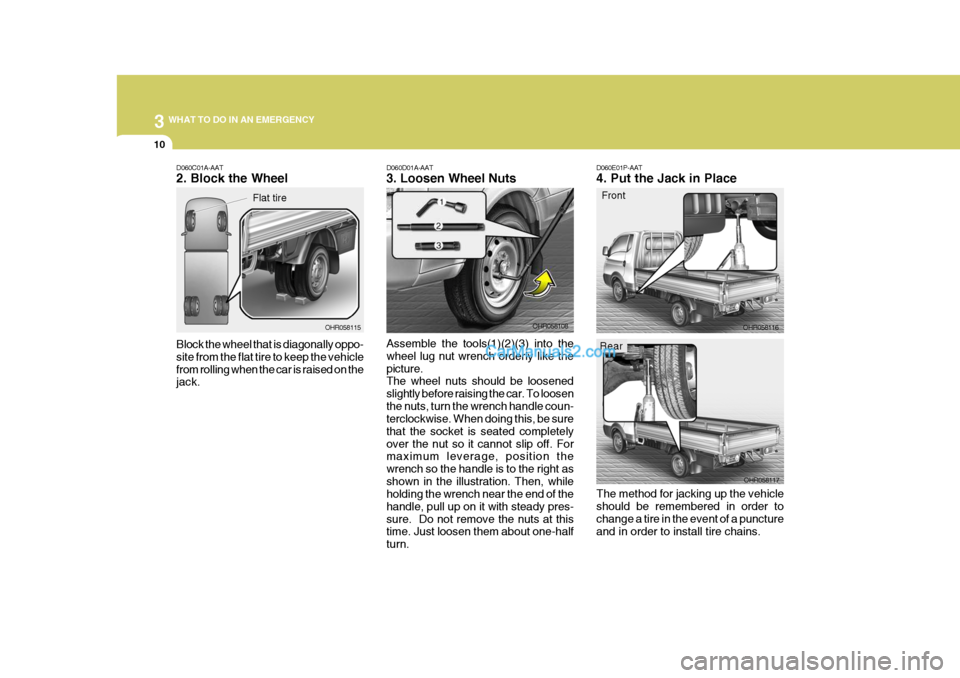
D060E01P-AAT 4. Put the Jack in Place
Front
The method for jacking up the vehicle should be remembered in order to change a tire in the event of a puncture and in order to install tire chains. OHR058116
OHR058117D060D01A-AAT 3. Loosen Wheel Nuts Assemble the tools(1)(2)(3) into the wheel lug nut wrench orderly like thepicture. The wheel nuts should be loosened slightly before raising the car. To loosenthe nuts, turn the wrench handle coun- terclockwise. When doing this, be sure that the socket is seated completelyover the nut so it cannot slip off. For maximum leverage, position the wrench so the handle is to the right asshown in the illustration. Then, while holding the wrench near the end of the handle, pull up on it with steady pres-sure. Do not remove the nuts at this time. Just loosen them about one-half turn. OHR058108D060C01A-AAT 2. Block the Wheel Block the wheel that is diagonally oppo- site from the flat tire to keep the vehiclefrom rolling when the car is raised on the jack.
OHR058115
Flat tire
Rear
Page 126 of 217
3
WHAT TO DO IN AN EMERGENCY
11
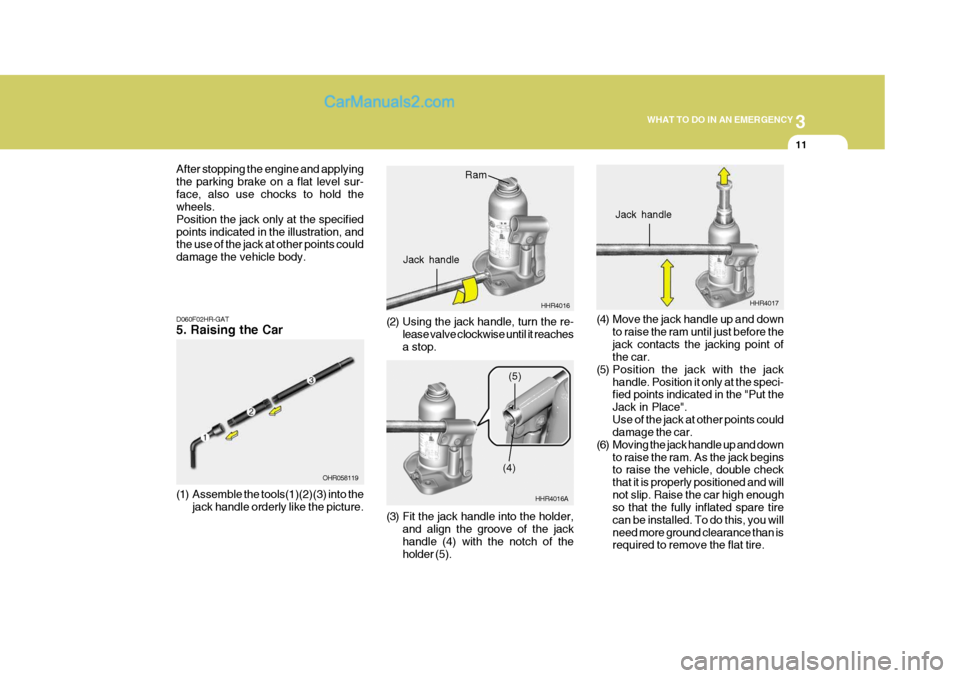
After stopping the engine and applying the parking brake on a flat level sur-face, also use chocks to hold the wheels. Position the jack only at the specifiedpoints indicated in the illustration, and the use of the jack at other points could damage the vehicle body.
D060F02HR-GAT 5. Raising the Car
(1) Assemble the tools(1)(2)(3) into the jack handle orderly like the picture. OHR058119
HHR4016
Ram
Jack handle
(2) Using the jack handle, turn the re- lease valve clockwise until it reaches a stop.
(3) Fit the jack handle into the holder,and align the groove of the jack handle (4) with the notch of the holder (5). HHR4016A
(4)(5)
HHR4017
Jack handle
(4) Move the jack handle up and down to raise the ram until just before the jack contacts the jacking point of the car.
(5) Position the jack with the jack handle. Position it only at the speci-fied points indicated in the "Put the Jack in Place".Use of the jack at other points could damage the car.
(6) Moving the jack handle up and down to raise the ram. As the jack beginsto raise the vehicle, double check that it is properly positioned and will
not slip. Raise the car high enough so that the fully inflated spare tire can be installed. To do this, you willneed more ground clearance than is required to remove the flat tire.