2012 GMC SIERRA 1500 transmission
[x] Cancel search: transmissionPage 400 of 556
Black plate (14,1)GMC Sierra Owner Manual - 2012 - CRC - 11/15/11
10-14 Vehicle Care
Automatic Transmission
Fluid (6-Speed
Transmission)
When to Check and Change
Automatic Transmission Fluid
It is usually not necessary to check
the transmission fluid level. The
only reason for fluid loss is a
transmission leak or overheated
transmission. If a small leak is
suspected, then use the following
checking procedures to check the
fluid level. However, if there is a
large leak, then it may be necessary
to have the vehicle towed to a
dealer service department and have
it repaired before driving the vehicle
further.
Notice:Use of the incorrect
automatic transmission fluid
may damage the vehicle, and the
damages may not be covered by
the vehicle warranty. Always use
the automatic transmission fluid
listed in Recommended Fluids
and Lubricants on page 11‑12. Change the fluid and filter at the
scheduled maintenance intervals
listed in
Maintenance Schedule on
page 11‑3. Be sure to use the
transmission fluid listed in
Recommended Fluids and
Lubricants on page 11‑12.How to Check Automatic
Transmission Fluid
Notice: Too much or too
little fluid can damage the
transmission. Too much can
mean that some of the fluid could
come out and fall on hot engine
parts or exhaust system parts,
starting a fire. Too little fluid
could cause the transmission
to overheat. Be sure to get an
accurate reading if checking the
transmission fluid. Before checking the fluid level,
prepare the vehicle as follows:
1. Start the engine and park the
vehicle on a level surface. Keep
the engine running.
2. Apply the parking brake and place the shift lever in P (Park).
3. With your foot on the brake pedal, move the shift lever
through each gear range,
pausing for about three seconds
in each range. Then, move the
shift lever back to P (Park).
4. Allow the engine to idle (500 –800 rpm) for at least
1 minute. Slowly release the
brake pedal.
5. Keep the engine running and press the Trip/Fuel button or
trip odometer reset stem until
TRANS TEMP (Transmission
Temperature) displays on the
Driver Information Center (DIC).
Page 401 of 556
Black plate (15,1)GMC Sierra Owner Manual - 2012 - CRC - 11/15/11
Vehicle Care 10-15
6. Using the TRANS TEMPreading, determine and
perform the appropriate check
procedure. If the TRANS TEMP
reading is not within the required
temperature ranges, allow the
vehicle to cool, or operate the
vehicle until the appropriate
transmission fluid temperature is
reached.
Cold Check Procedure
Use this procedure only as a
reference to determine if the
transmission has enough fluid to be
operated safely until a hot check
procedure can be made. The hot
check procedure is the most
accurate method to check the
fluid level. Perform the hot check
procedure at the first opportunity.
Use this cold check procedure
to check fluid level when the
transmission temperature is
between 27°C and 32°C
(80°F and 90°F).
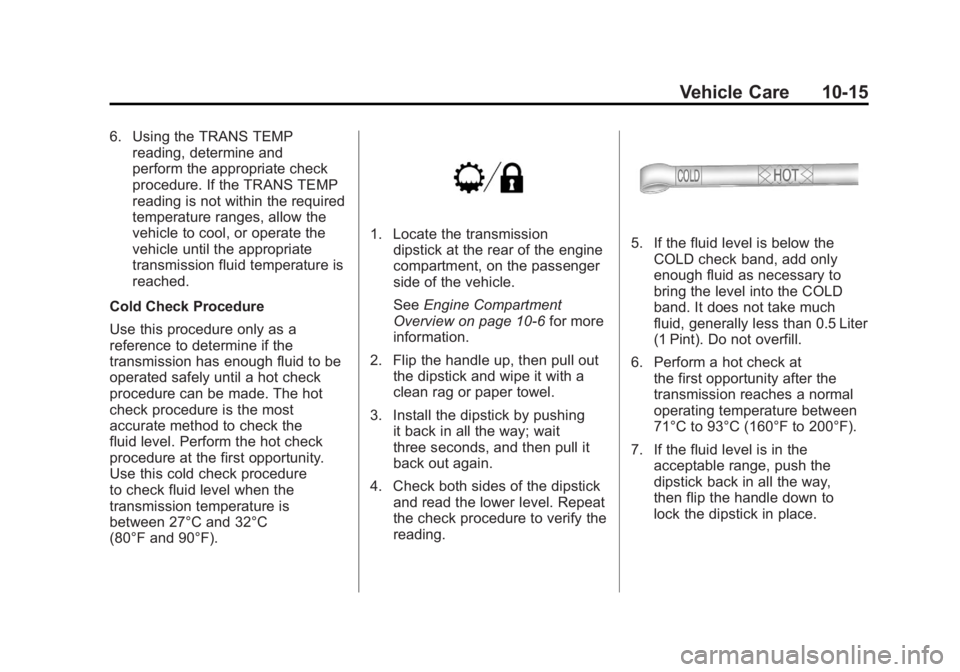
1. Locate the transmission dipstick at the rear of the engine
compartment, on the passenger
side of the vehicle.
See Engine Compartment
Overview on page 10‑6 for more
information.
2. Flip the handle up, then pull out the dipstick and wipe it with a
clean rag or paper towel.
3. Install the dipstick by pushing it back in all the way; wait
three seconds, and then pull it
back out again.
4. Check both sides of the dipstick and read the lower level. Repeat
the check procedure to verify the
reading.5. If the fluid level is below theCOLD check band, add only
enough fluid as necessary to
bring the level into the COLD
band. It does not take much
fluid, generally less than 0.5 Liter
(1 Pint). Do not overfill.
6. Perform a hot check at the first opportunity after the
transmission reaches a normal
operating temperature between
71°C to 93°C (160°F to 200°F).
7. If the fluid level is in the acceptable range, push the
dipstick back in all the way,
then flip the handle down to
lock the dipstick in place.
Page 402 of 556
Black plate (16,1)GMC Sierra Owner Manual - 2012 - CRC - 11/15/11
10-16 Vehicle Care
Hot Check Procedure
Use this procedure to check the
transmission fluid level when the
transmission fluid temperature
is between 71°C and 93°C
(160°F and 200°F).
The hot check is the most accurate
method to check the fluid level. The
hot check should be performed at
the first opportunity in order to verify
the cold check. The fluid level rises
as fluid temperature increases,
so it is important to ensure the
transmission temperature is within
range.
1. Locate the transmission dipstickat the rear of the engine
compartment, on the passenger
side of the vehicle. See
Engine Compartment
Overview on page 10‑6 for more
information.
2. Flip the handle up, then pull out the dipstick and wipe it with a
clean rag or paper towel.
3. Install the dipstick by pushing it back in all the way; wait
three seconds, and then pull it
back out again.
4. Check both sides of the dipstick and read the lower level. Repeat
the check procedure to verify the
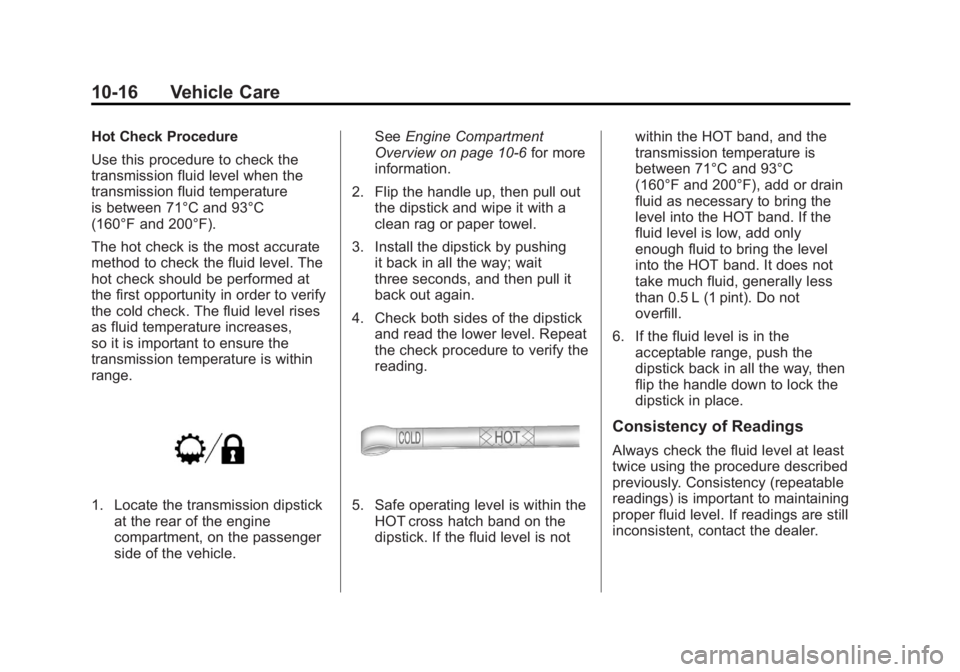
reading.5. Safe operating level is within theHOT cross hatch band on the
dipstick. If the fluid level is not within the HOT band, and the
transmission temperature is
between 71°C and 93°C
(160°F and 200°F), add or drain
fluid as necessary to bring the
level into the HOT band. If the
fluid level is low, add only
enough fluid to bring the level
into the HOT band. It does not
take much fluid, generally less
than 0.5 L (1 pint). Do not
overfill.
6. If the fluid level is in the acceptable range, push the
dipstick back in all the way, then
flip the handle down to lock the
dipstick in place.
Consistency of Readings
Always check the fluid level at least
twice using the procedure described
previously. Consistency (repeatable
readings) is important to maintaining
proper fluid level. If readings are still
inconsistent, contact the dealer.
Page 411 of 556
Black plate (25,1)GMC Sierra Owner Manual - 2012 - CRC - 11/15/11
Vehicle Care 10-25
loading, trailer towing, and/or high
outside temperatures, the fan speed
increases as the clutch more fully
engages, so an increase in fan
noise may be heard. This is normal
and should not be mistaken as the
transmission slipping or making
extra shifts. It is merely the cooling
system functioning properly. The fan
will slow down when additional
cooling is not required and the
clutch disengages.
This fan noise may also be heard
when starting the engine. It will go
away as the fan clutch partially
disengages.
If the vehicle has electric cooling
fans, the fans may be heard
spinning at low speed during most
everyday driving. The fans may
turn off if no cooling is required.
Under heavy vehicle loading, trailer
towing, high outside temperatures,
or operation of the air conditioning
system, the fans may change to
high speed and an increase in fan
noise may be heard. This is normal
and indicates that the coolingsystem is functioning properly. The
fans will change to low speed when
additional cooling is no longer
required.
Power Steering Fluid
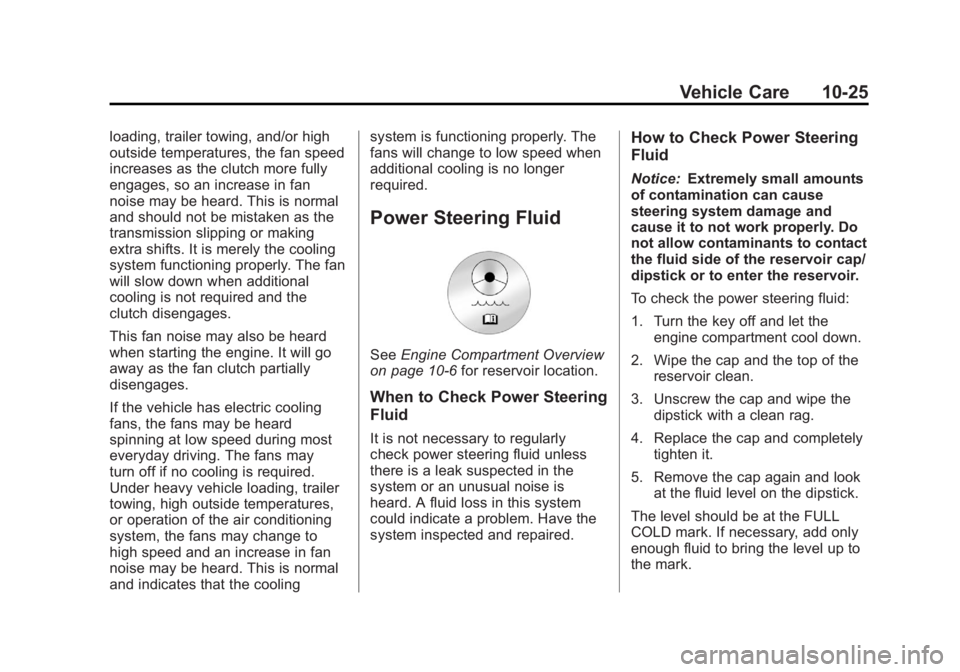
See
Engine Compartment Overview
on page 10‑6 for reservoir location.
When to Check Power Steering
Fluid
It is not necessary to regularly
check power steering fluid unless
there is a leak suspected in the
system or an unusual noise is
heard. A fluid loss in this system
could indicate a problem. Have the
system inspected and repaired.
How to Check Power Steering
Fluid
Notice:Extremely small amounts
of contamination can cause
steering system damage and
cause it to not work properly. Do
not allow contaminants to contact
the fluid side of the reservoir cap/
dipstick or to enter the reservoir.
To check the power steering fluid:
1. Turn the key off and let the engine compartment cool down.
2. Wipe the cap and the top of the reservoir clean.
3. Unscrew the cap and wipe the dipstick with a clean rag.
4. Replace the cap and completely tighten it.
5. Remove the cap again and look at the fluid level on the dipstick.
The level should be at the FULL
COLD mark. If necessary, add only
enough fluid to bring the level up to
the mark.
Page 421 of 556
Black plate (35,1)GMC Sierra Owner Manual - 2012 - CRC - 11/15/11
Vehicle Care 10-35
Starter Switch Check
{WARNING
When you are doing this
inspection, the vehicle could
move suddenly. If the vehicle
moves, you or others could be
injured.
1. Before starting this check, be sure there is enough room
around the vehicle.
2. Firmly apply both the parking brake and the regular brake.
See Parking Brake on
page 9‑54.
Do not use the accelerator
pedal, and be ready to turn off
the engine immediately if it
starts.
3. Try to start the engine in each gear. The vehicle should start
only in P (Park) or N (Neutral). If the vehicle starts in any other
position, contact your dealer for
service.Automatic Transmission
Shift Lock Control
Function Check
{WARNING
When you are doing this
inspection, the vehicle could
move suddenly. If the vehicle
moves, you or others could be
injured.
1. Before starting this check, be sure there is enough room
around the vehicle. It should be
parked on a level surface.
2. Firmly apply the parking brake. See Parking Brake on
page 9‑54.
Be ready to apply the regular
brake immediately if the vehicle
begins to move. 3. With the engine off, turn the
ignition on, but do not start the
engine. Without applying the
regular brake, try to move the
shift lever out of P (Park) with
normal effort. If the shift lever
moves out of P (Park), contact
your dealer for service.
Ignition Transmission
Lock Check
While parked, and with the parking
brake set, try to turn the ignition to
LOCK/OFF in each shift lever
position.
.The ignition should turn to
LOCK/OFF only when the shift
lever is in P (Park).
.The ignition key should come
out only in LOCK/OFF.
Contact your dealer if service is
required.
Page 422 of 556

Black plate (36,1)GMC Sierra Owner Manual - 2012 - CRC - 11/15/11
10-36 Vehicle Care
Park Brake and P (Park)
Mechanism Check
{WARNING
When you are doing this check,
the vehicle could begin to move.
You or others could be injured
and property could be damaged.
Make sure there is room in front
of the vehicle in case it begins to
roll. Be ready to apply the regular
brake at once should the vehicle
begin to move.Park on a fairly steep hill, with the
vehicle facing downhill. Keeping
your foot on the regular brake, set
the parking brake.
.To check the parking brake's
holding ability: With the engine
running and the transmission in
N (Neutral), slowly remove foot
pressure from the regular brake
pedal. Do this until the vehicle is
held by the parking brake only.
.To check the P (Park)
mechanism's holding ability:
With the engine running, shift
to P (Park). Then release the
parking brake followed by the
regular brake.
Contact your dealer if service is
required.
Wiper Blade Replacement
Windshield wiper blades should be
inspected for wear or cracking.
See Maintenance Schedule on
page 11‑3 for more information on
wiper blade inspection.
Replacement blades come in
different types and are removed in
different ways. To remove the wiper
blade:
1. Pull the windshield wiper arm connector away from the
windshield.
2. Squeeze the grooved areas on
each side of the blade, and turn
the blade assembly away from
the arm connector.
Page 432 of 556
Black plate (46,1)GMC Sierra Owner Manual - 2012 - CRC - 11/15/11
10-46 Vehicle Care
FusesUsage
9 Antilock Brakes System 2
10 Trailer Back-up Lamps
11 Driver Side Low-Beam
Headlamp
12 Engine Control Module
(Battery)
13 Fuel Injectors, Ignition
Coils (Right Side)
14 Transmission Control
Module (Battery)
15 Vehicle Back-up Lamps
16 Passenger Side
Low-Beam Headlamp
17 Air Conditioning
Compressor
18 Oxygen Sensors
19 Transmission Controls
(Ignition)
20 Fuel Pump
21 Fuel System Control
Module Fuses
Usage
22 Not Used
23 Not Used
24 Fuel Injectors, Ignition
Coils (Left Side)
25 Trailer Park Lamps
26 Driver Side Park Lamps
27 Passenger Side Park
Lamps
28 Fog Lamps
29 Horn
30 Passenger Side
High-Beam Headlamp
31 Daytime Running
Lamps (DRL)
32 Driver Side High-Beam
Headlamp
33 Daytime Running Lamps 2
34 Sunroof
35 Key Ignition System, Theft
Deterrent System Fuses
Usage
36 Windshield Wiper
37 SEO B2 Upfitter Usage
(Battery)
38 Electric Adjustable Pedals
39 Climate Controls (Battery)
40 Airbag System (Ignition)
41 Amplifier
42 Audio System
43 Miscellaneous (Ignition),
Cruise Control
44 Not Used
45 Airbag System (Battery)
46 Instrument Panel Cluster
47 Power Take-Off
48 Auxiliary Climate Control
(Ignition)
49 Center High-Mounted
Stoplamp (CHMSL)
50 Rear Defogger
Page 441 of 556
Black plate (55,1)GMC Sierra Owner Manual - 2012 - CRC - 11/15/11
Vehicle Care 10-55
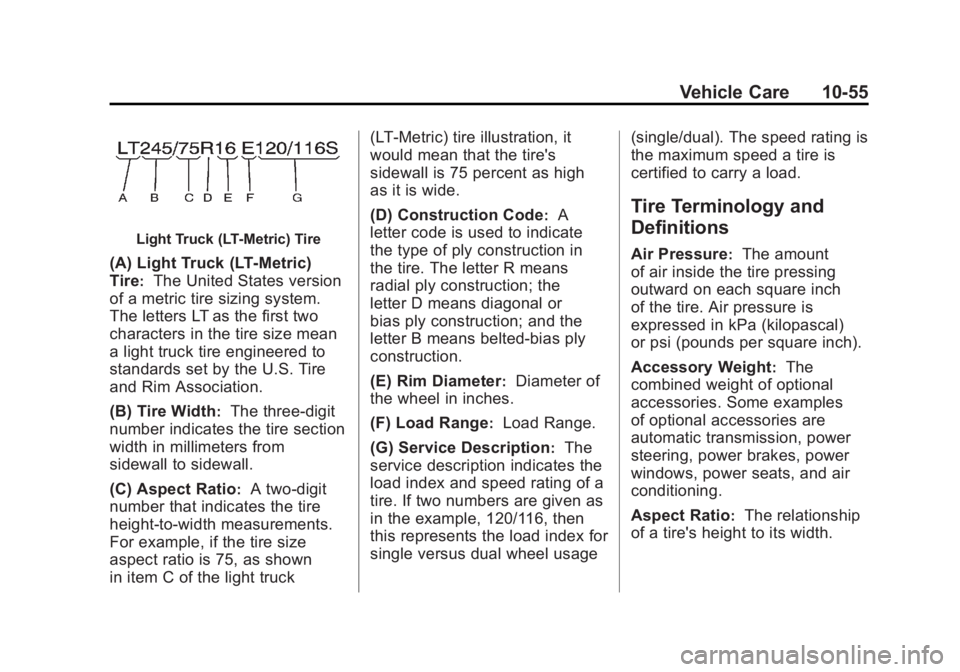
Light Truck (LT‐Metric) Tire
(A) Light Truck (LT‐Metric)
Tire
:The United States version
of a metric tire sizing system.
The letters LT as the first two
characters in the tire size mean
a light truck tire engineered to
standards set by the U.S. Tire
and Rim Association.
(B) Tire Width
:The three‐digit
number indicates the tire section
width in millimeters from
sidewall to sidewall.
(C) Aspect Ratio
:A two‐digit
number that indicates the tire
height‐to‐width measurements.
For example, if the tire size
aspect ratio is 75, as shown
in item C of the light truck (LT‐Metric) tire illustration, it
would mean that the tire's
sidewall is 75 percent as high
as it is wide.
(D) Construction Code
:A
letter code is used to indicate
the type of ply construction in
the tire. The letter R means
radial ply construction; the
letter D means diagonal or
bias ply construction; and the
letter B means belted‐bias ply
construction.
(E) Rim Diameter
:Diameter of
the wheel in inches.
(F) Load Range
:Load Range.
(G) Service Description
:The
service description indicates the
load index and speed rating of a
tire. If two numbers are given as
in the example, 120/116, then
this represents the load index for
single versus dual wheel usage (single/dual). The speed rating is
the maximum speed a tire is
certified to carry a load.
Tire Terminology and
Definitions
Air Pressure:The amount
of air inside the tire pressing
outward on each square inch
of the tire. Air pressure is
expressed in kPa (kilopascal)
or psi (pounds per square inch).
Accessory Weight
:The
combined weight of optional
accessories. Some examples
of optional accessories are
automatic transmission, power
steering, power brakes, power
windows, power seats, and air
conditioning.
Aspect Ratio
:The relationship
of a tire's height to its width.