Page 25 of 556
Black plate (19,1)GMC Sierra Owner Manual - 2012 - CRC - 11/15/11
In Brief 1-19
Manual Rearview Mirror
For vehicles with a manual rearview
mirror, push the tab forward for
daytime use and pull it for nighttime
use to avoid glare from the
headlamps from behind. See
Manual Rearview Mirror on
page 2‑18.
Automatic Dimming Rearview
Mirror
For vehicles with an automatic
dimming rearview mirror. The mirror
will automatically reduce the glare
from the headlamps from behind.
The dimming feature comes on
when the vehicle is started.
SeeAutomatic Dimming Rearview
Mirror on page 2‑18.Steering Wheel
Adjustment
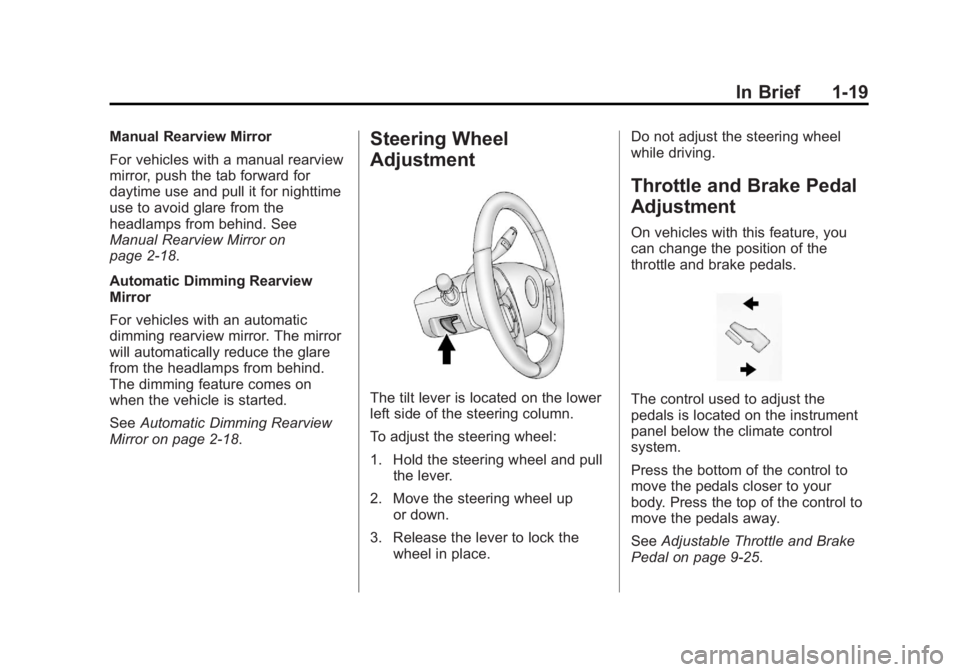
The tilt lever is located on the lower
left side of the steering column.
To adjust the steering wheel:
1. Hold the steering wheel and pull the lever.
2. Move the steering wheel up or down.
3. Release the lever to lock the wheel in place. Do not adjust the steering wheel
while driving.
Throttle and Brake Pedal
Adjustment
On vehicles with this feature, you
can change the position of the
throttle and brake pedals.
The control used to adjust the
pedals is located on the instrument
panel below the climate control
system.
Press the bottom of the control to
move the pedals closer to your
body. Press the top of the control to
move the pedals away.
See
Adjustable Throttle and Brake
Pedal on page 9‑25.
Page 28 of 556
Black plate (22,1)GMC Sierra Owner Manual - 2012 - CRC - 11/15/11
1-22 In Brief
6:Slow wipes.
?: Fast wipes.
L:Push the paddle at the top of
the lever to spray washer fluid on
the windshield.
See Windshield Wiper/Washer on
page 5‑4.
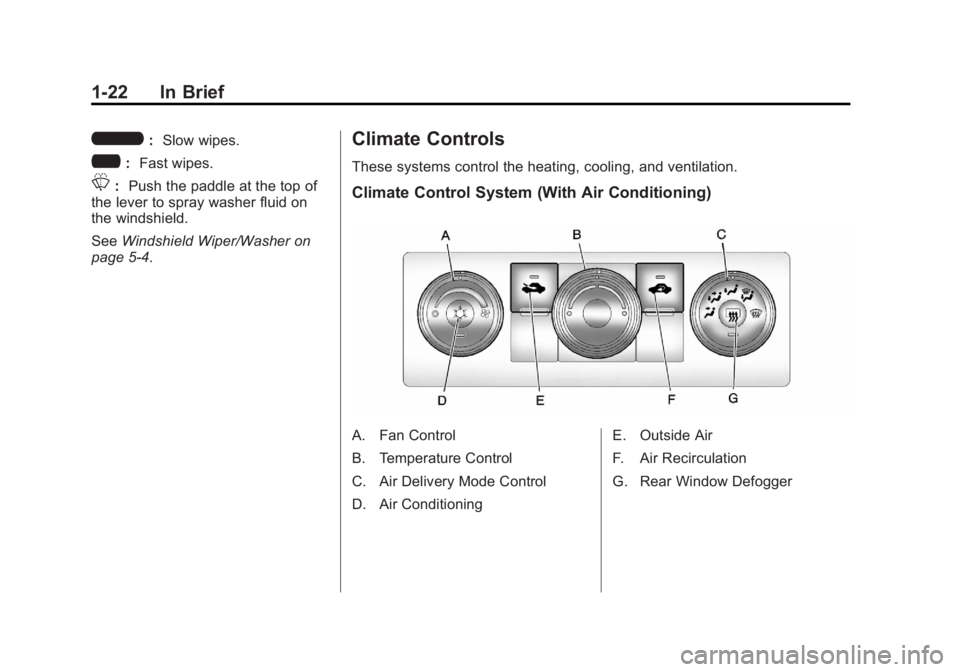
Climate Controls
These systems control the heating, cooling, and ventilation.
Climate Control System (With Air Conditioning)
A. Fan Control
B. Temperature Control
C. Air Delivery Mode Control
D. Air Conditioning E. Outside Air
F. Air Recirculation
G. Rear Window Defogger
Page 30 of 556
Black plate (24,1)GMC Sierra Owner Manual - 2012 - CRC - 11/15/11
1-24 In Brief
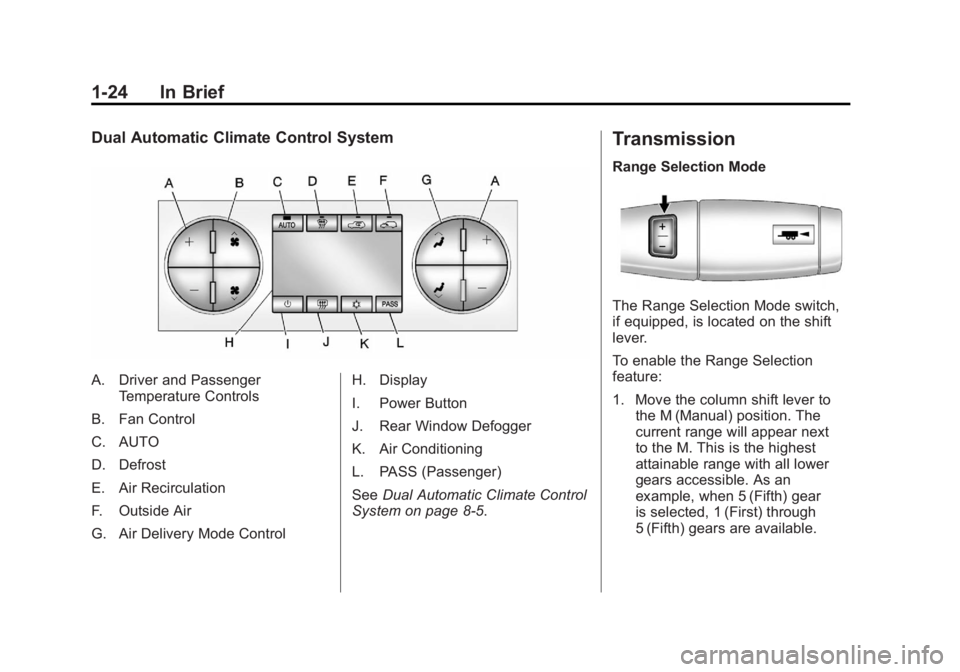
Dual Automatic Climate Control System
A. Driver and PassengerTemperature Controls
B. Fan Control
C. AUTO
D. Defrost
E. Air Recirculation
F. Outside Air
G. Air Delivery Mode Control H. Display
I. Power Button
J. Rear Window Defogger
K. Air Conditioning
L. PASS (Passenger)
See
Dual Automatic Climate Control
System on page 8‑5.
Transmission
Range Selection Mode
The Range Selection Mode switch,
if equipped, is located on the shift
lever.
To enable the Range Selection
feature:
1. Move the column shift lever to the M (Manual) position. The
current range will appear next
to the M. This is the highest
attainable range with all lower
gears accessible. As an
example, when 5 (Fifth) gear
is selected, 1 (First) through
5 (Fifth) gears are available.
Page 33 of 556
Black plate (27,1)GMC Sierra Owner Manual - 2012 - CRC - 11/15/11
In Brief 1-27
Vehicle Features
Radio(s)
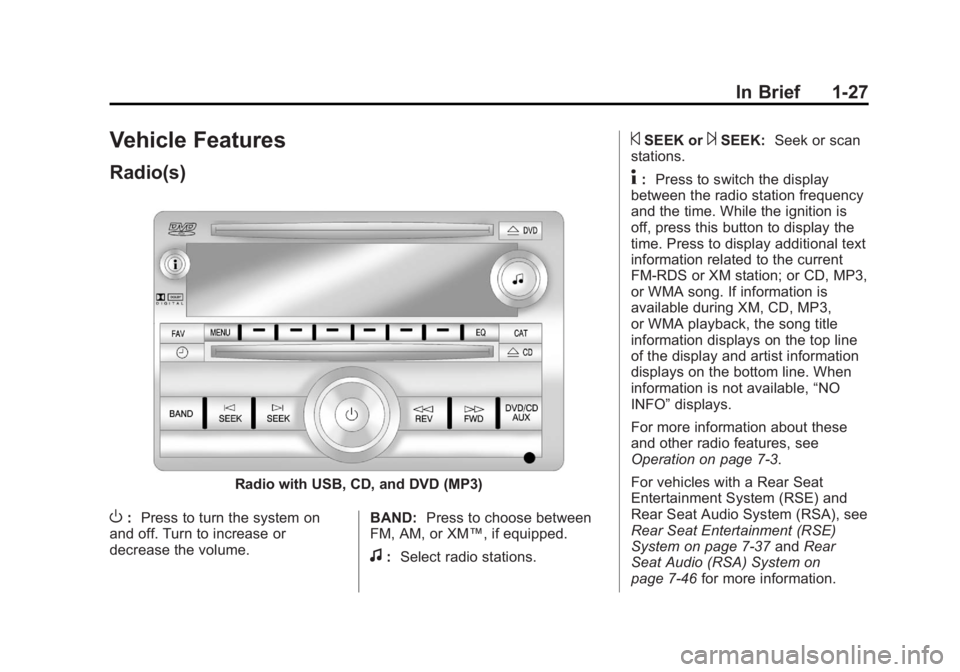
Radio with USB, CD, and DVD (MP3)
O:Press to turn the system on
and off. Turn to increase or
decrease the volume. BAND:
Press to choose between
FM, AM, or XM™, if equipped.
f: Select radio stations.
©SEEK or¨SEEK: Seek or scan
stations.
4: Press to switch the display
between the radio station frequency
and the time. While the ignition is
off, press this button to display the
time. Press to display additional text
information related to the current
FM-RDS or XM station; or CD, MP3,
or WMA song. If information is
available during XM, CD, MP3,
or WMA playback, the song title
information displays on the top line
of the display and artist information
displays on the bottom line. When
information is not available, “NO
INFO” displays.
For more information about these
and other radio features, see
Operation on page 7‑3.
For vehicles with a Rear Seat
Entertainment System (RSE) and
Rear Seat Audio System (RSA), see
Rear Seat Entertainment (RSE)
System on page 7‑37 andRear
Seat Audio (RSA) System on
page 7‑46 for more information.
Page 35 of 556
Black plate (29,1)GMC Sierra Owner Manual - 2012 - CRC - 11/15/11
In Brief 1-29
Bluetooth®
For vehicles with a Bluetooth
system, it allows users with a
Bluetooth‐enabled cell phone to
make and receive hands-free calls
using the vehicle’s audio system
and controls.
The Bluetooth‐enabled cell phone
must be paired with the Bluetooth
system before it can be used in the
vehicle. Not all phones will support
all functions. For more information,
visit www.gm.com/bluetooth.
For more information, see Bluetooth
on page 7‑48.
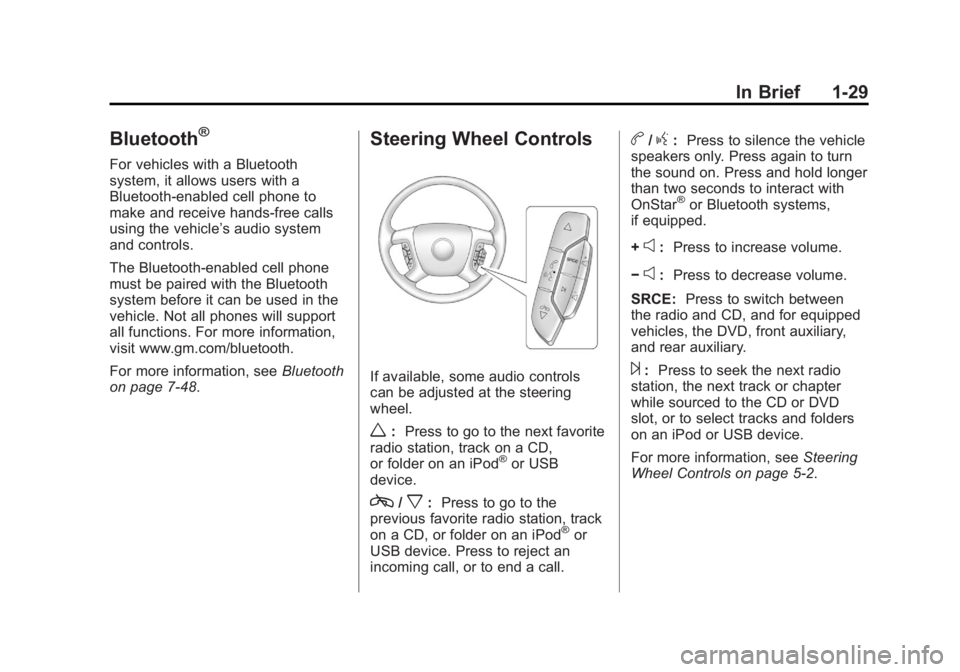
Steering Wheel Controls
If available, some audio controls
can be adjusted at the steering
wheel.
w: Press to go to the next favorite
radio station, track on a CD,
or folder on an iPod
®or USB
device.
c/x: Press to go to the
previous favorite radio station, track
on a CD, or folder on an iPod
®or
USB device. Press to reject an
incoming call, or to end a call.
b/g: Press to silence the vehicle
speakers only. Press again to turn
the sound on. Press and hold longer
than two seconds to interact with
OnStar
®or Bluetooth systems,
if equipped.
+
e: Press to increase volume.
−
e: Press to decrease volume.
SRCE: Press to switch between
the radio and CD, and for equipped
vehicles, the DVD, front auxiliary,
and rear auxiliary.
¨: Press to seek the next radio
station, the next track or chapter
while sourced to the CD or DVD
slot, or to select tracks and folders
on an iPod or USB device.
For more information, see Steering
Wheel Controls on page 5‑2.
Page 37 of 556
Black plate (31,1)GMC Sierra Owner Manual - 2012 - CRC - 11/15/11
In Brief 1-31
3:Press to display the
odometer, trip odometer, fuel range,
average economy, fuel used, timer,
instantaneous economy and Active
Fuel Management™ indicator,
and transmission temperature.
The compass and outside air
temperature will also be shown in
the display. The temperature will be
shown in °C or °F depending on the
units selected.
T: Press to display the oil life,
units, tire pressure readings for
vehicles with the Tire Pressure
Monitor System (TPMS), trailer
brake gain and output information
for vehicles with the Integrated
Trailer Brake Control (ITBC) system,
engine hours, compass zone
setting, and compass recalibration.
U: Press to customize the feature
settings on your vehicle. See
Vehicle Personalization (With DIC
Buttons) on page 5‑48 for more
information.
V: Press to set or reset certain
functions and to turn off or
acknowledge messages on the DIC.
For more information, see Driver
Information Center (DIC) on
page 5‑30.
Vehicle Customization
Some vehicle features can be
programmed by using the DIC
buttons next to the steering wheel.
These features include:
.Language
.Door Lock and Unlock Settings
.RKE Lock and Unlock Feedback
.Lighting
.Chime Volume
.Memory Features
See Vehicle Personalization (With
DIC Buttons) on page 5‑48.
Rear Vision
Camera (RVC)
If available, the RVC displays a
view of the area behind the vehicle
when the vehicle is shifted into
R (Reverse). This is displayed on
the inside rearview mirror or the
navigation screen, if equipped.
To clean the camera lens, located
in the bezel of the tailgate handle,
rinse it with water and wipe it with a
soft cloth.
For more information, see Rear
Vision Camera (RVC) on page 9‑62.
Ultrasonic Parking Assist
If available, the Ultrasonic Rear
Parking Assist (URPA) system uses
sensors on the rear bumper to
assist with parking and avoiding
objects while in R (Reverse).
It operates at speeds less than
8 km/h (5 mph). URPA uses audible
beeps to provide distance and
system information.
Page 38 of 556
Black plate (32,1)GMC Sierra Owner Manual - 2012 - CRC - 11/15/11
1-32 In Brief
Keep the sensors on the vehicle's
rear bumper clean to ensure proper
operation.
SeeUltrasonic Parking Assist on
page 9‑61.
Power Outlets
Accessory power outlets can be
used to plug in electrical equipment,
such as a cell phone, MP3
player, etc.
The vehicle may have two
accessory power outlets located
below the climate control system,
or may have one accessory power
outlet and one cigarette lighter. The
cigarette lighter is designed to fit
only in the receptacle closest to the
driver.
There may be another accessory
power outlet in the rear cargo area.
If the vehicle has a floor console,
there is an accessory power outlet
inside the storage bin and one on
the rear of the floor console. The accessory power outlets are
powered, even when the ignition is
in LOCK/OFF. Continuing to use
power outlets while the ignition is in
LOCK/OFF may cause the vehicle's
battery to run down.
See
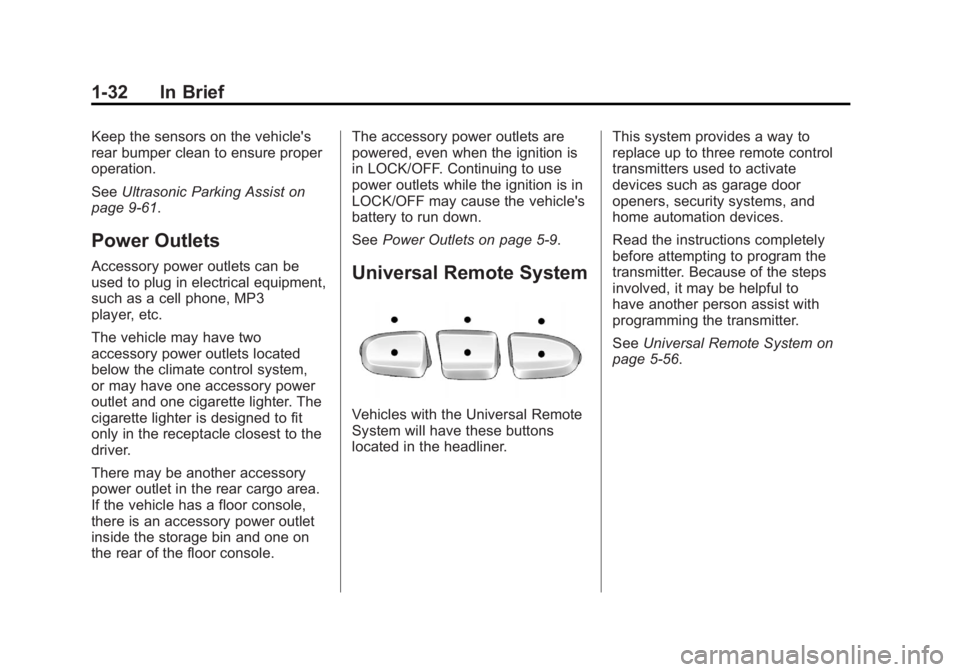
Power Outlets on page 5‑9.Universal Remote System
Vehicles with the Universal Remote
System will have these buttons
located in the headliner. This system provides a way to
replace up to three remote control
transmitters used to activate
devices such as garage door
openers, security systems, and
home automation devices.
Read the instructions completely
before attempting to program the
transmitter. Because of the steps
involved, it may be helpful to
have another person assist with
programming the transmitter.
See
Universal Remote System on
page 5‑56.
Page 39 of 556
Black plate (33,1)GMC Sierra Owner Manual - 2012 - CRC - 11/15/11
In Brief 1-33
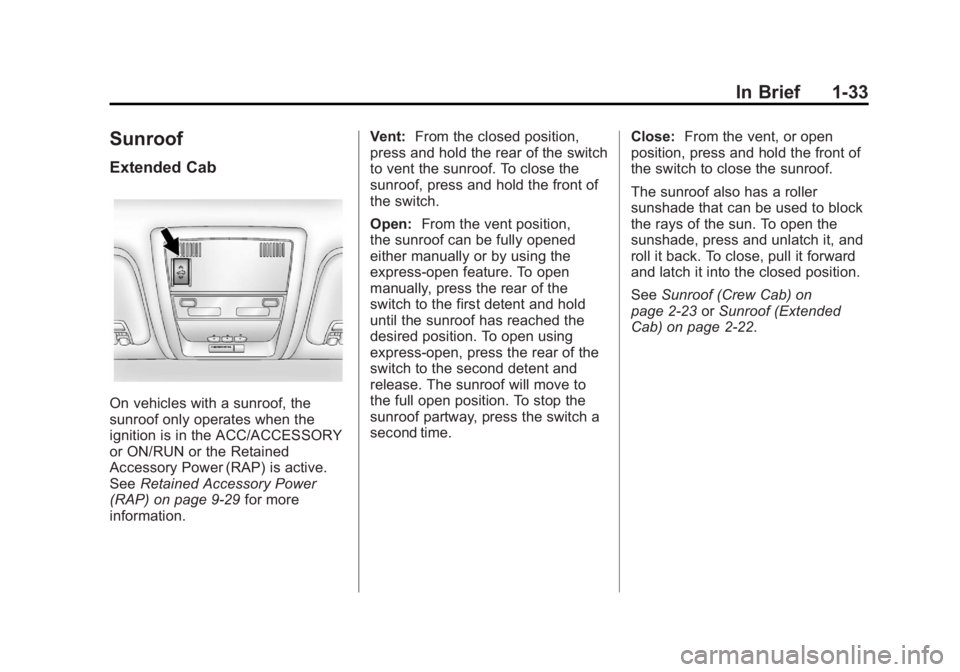
Sunroof
Extended Cab
On vehicles with a sunroof, the
sunroof only operates when the
ignition is in the ACC/ACCESSORY
or ON/RUN or the Retained
Accessory Power (RAP) is active.
SeeRetained Accessory Power
(RAP) on page 9‑29 for more
information. Vent:
From the closed position,
press and hold the rear of the switch
to vent the sunroof. To close the
sunroof, press and hold the front of
the switch.
Open: From the vent position,
the sunroof can be fully opened
either manually or by using the
express-open feature. To open
manually, press the rear of the
switch to the first detent and hold
until the sunroof has reached the
desired position. To open using
express-open, press the rear of the
switch to the second detent and
release. The sunroof will move to
the full open position. To stop the
sunroof partway, press the switch a
second time. Close:
From the vent, or open
position, press and hold the front of
the switch to close the sunroof.
The sunroof also has a roller
sunshade that can be used to block
the rays of the sun. To open the
sunshade, press and unlatch it, and
roll it back. To close, pull it forward
and latch it into the closed position.
See Sunroof (Crew Cab) on
page 2‑23 orSunroof (Extended
Cab) on page 2‑22.