Page 44 of 118
CD voice commands
While listening to a CD, press
or VOICE on the steering wheel
controls. When prompted, you may say any of the following commands:
•Play•Pause
•Repeat•Repeat off
•Shuffle•Shuffle off
•Play next track•Play previous track
•Play track <1–512>•Play folder <1–255>
•Play folder <1–255>
track <1–512>•Play next folder
•Play previous folder•Folder mode
•Folder mode off•Help
Note:If you are not listening to a CD, press
or VOICE on the
steering wheel controls. When prompted, say, “CD” and then any of the
above commands.
PLAYING A DVD IN THE SYSTEM (available in North America only)
Your system allows you to play DVD audio and video discs. (Your system
only plays NTSC formatted discs. PAL format is not supported.)
Ensure that the vehicle is in Park (P) for automatic transmission
vehicles, or that the parking brake is engaged for manual transmission
vehicles. This will allow you to be able to view and hear the DVD. If the
vehicle is moving, you will only be able to hear the audio.
To play a DVD:
1. Ensure that the vehicle and the system are on.
2. Insert a DVD into the system, label side up. The system will
automatically go into DVD mode.
You can then select any of the
following options on the
touchscreen:
: Press to access the previous chapter. Press and hold to reverse in
the current chapter.
Audio features
44
2012 Centerstack(ng1)
Supplement, 1st Printing
Arabic_(LHD)(gc_lhd)
Page 45 of 118
/(Play/Pause) : Press to play or pause the DVD.
: Press to access the next chapter. Press and hold to advance
within the current chapter.
(Stop): Press to stop the current track.
Title:Goes to the main title screen stored on the disc.
Menu:Goes to the main menu of the disc.
Cursor controls:Use these controls to navigate to the desired menu
selections.
Search:: Press to select and go to a specific title or chapter using the
keypad.
Settings:Allows you to adjust the certain settings of the DVD player,
such as:
•Video Display Settings:Press to adjust the brightness and contrast.
You can also choose to return to the default settings by pressing
‘Restore Default’.
•Audio Language:Press to select which language you would like the
DVD to display.
•Subtitle Display:Press to turn subtitles on/off.
•Subtitle Language:Press to select in which language you would like
the subtitles to appear.
•Aspect Ratio:Press to select from wide, full, normal and cinema
display.
•Angle Mark Notification:Some DVD discs may have more viewing
angles from which to select. Once you have made your selection, press
ENTER to confirm. This is a disc dependent feature.
Note:Some of the above settings are DVD dependent and
availability/operation will vary among DVDs.
Dolby�noise reduction is manufactured under license from Dolby�
Laboratories Licensing Corporation. “Dolby�” and the double-D symbol
are registered trademarks of Dolby�Laboratories Licensing Corporation.
Audio features
45
2012 Centerstack(ng1)
Supplement, 1st Printing
Arabic_(LHD)(gc_lhd)
Page 46 of 118
During DVD play, you can also
touch the screen to access the
‘virtual remote’ which will allow you
to ‘Move controls’ on the screen as
well as use the cursor controls,
‘Enter’ and ‘Return’ to navigate and
make selections within the menus.
DVD voice commands
While watching a DVD, press
or VOICE on the steering wheel
controls. When prompted, you may say any of the following commands:
•Play•Pause
•Menu•Menu title
•Play next title•Play previous title
•Play title <1–99>•Play next chapter
•Play previous chapter•Play chapter <1–999>
•Play next group•Play group <1–9>
•Repeat•Repeat off
•Play next track <1–512>•Play previous track
Note:If you are not watching a DVD, press
or VOICE on the
steering wheel controls. When prompted, say, “DVD” and then any of the
above commands.
Video CD voice commands
While watching a video CD, press
or VOICE on the steering wheel
controls. When prompted, you may say any of the following commands:
•Play•Pause
•Play previous track•Play next track
•Play track <1–512>•Help
Note:If you are not watching a video CD, press
or VOICE on the
steering wheel controls. When prompted, say, “video CD” and then any of
the above commands.
Audio features
46
2012 Centerstack(ng1)
Supplement, 1st Printing
Arabic_(LHD)(gc_lhd)
Page 47 of 118
Disc voice commands
While watching a disc, press
or VOICE on the steering wheel
controls. When prompted, you may say any of the following commands:
•Play•Pause
•Menu•Title menu
•Play next title•Play previous title
•Play title <1–99>•Play next chapter
•Play previous chapter•Play chapter <1–999>
•Play next group•Play previous group
•Play group <1–9>•Repeat
•Repeat off•Shuffle
•Shuffle off•Play next track
•Play previous track•Play track <1–512>
•Play folder <1–255> track
<1–512>•Play next folder
•Play previous folder•Folder mode
•Folder mode off•Help
Note:If you are not watching a disc, press
or VOICE on the steering
wheel controls. When prompted, say, “disc” and then any of the above
commands.
JUKEBOX
Your mobile media navigation system has a Jukebox which allows you to
save desired tracks or CDs to the hard drive for later access. The hard
drive can store up to 10 GB* (164 hours; approximately 2,472 tracks) of
music. The system contains a Gracenote�media database that allows for
display of song title, album title, and album cover art. After saving music
to the hard drive, you can access and play your music by specific tracks,
artists, albums or genres. You can even choose to create and access your
own playlists.
*Note:1 GB equals one billion bytes (1,000,000,000B).
Audio features
47
2012 Centerstack(ng1)
Supplement, 1st Printing
Arabic_(LHD)(gc_lhd)
Page 48 of 118
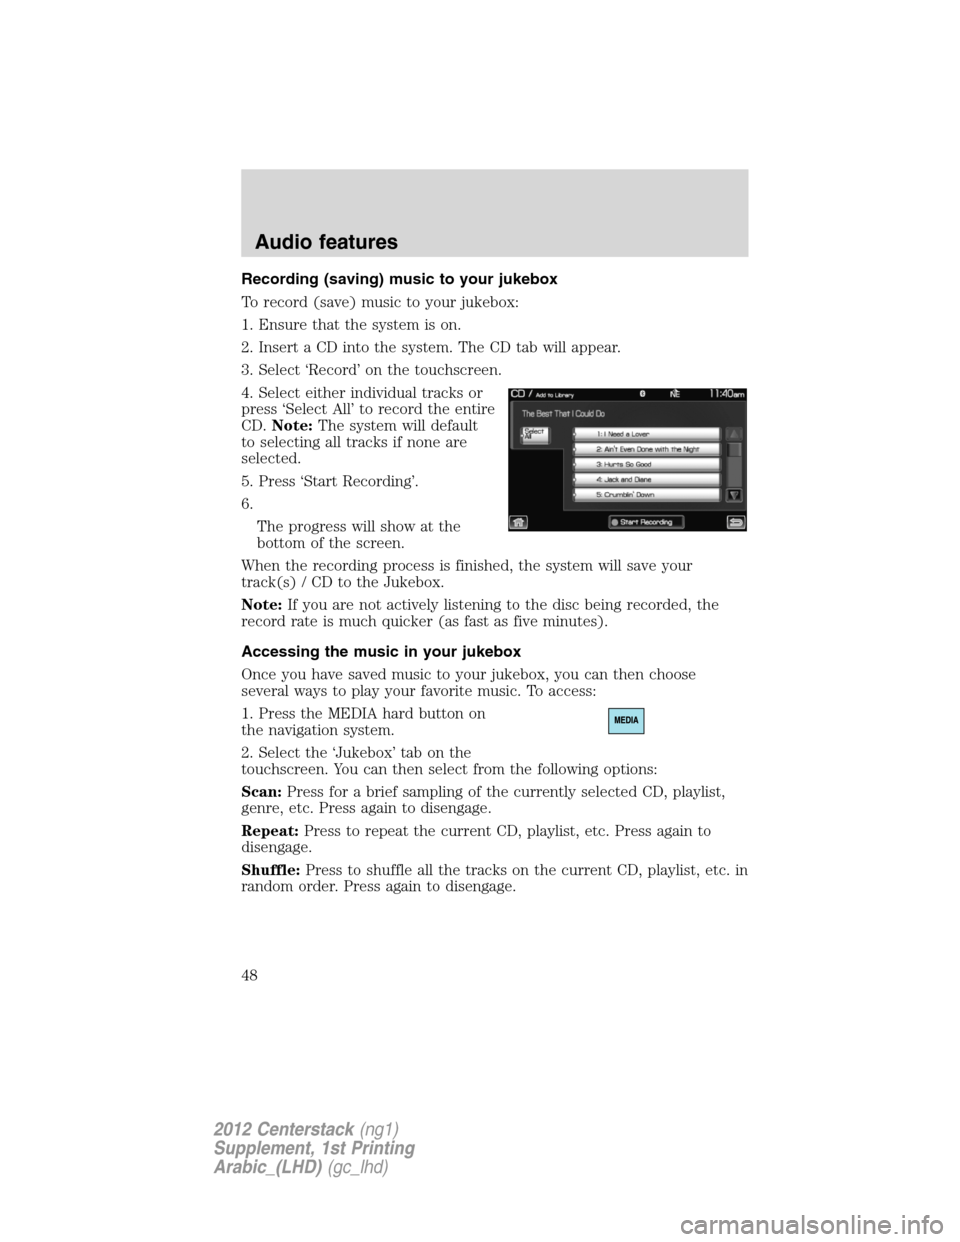
Recording (saving) music to your jukebox
To record (save) music to your jukebox:
1. Ensure that the system is on.
2. Insert a CD into the system. The CD tab will appear.
3. Select ‘Record’ on the touchscreen.
4. Select either individual tracks or
press ‘Select All’ to record the entire
CD.Note:The system will default
to selecting all tracks if none are
selected.
5. Press ‘Start Recording’.
6.
The progress will show at the
bottom of the screen.
When the recording process is finished, the system will save your
track(s) / CD to the Jukebox.
Note:If you are not actively listening to the disc being recorded, the
record rate is much quicker (as fast as five minutes).
Accessing the music in your jukebox
Once you have saved music to your jukebox, you can then choose
several ways to play your favorite music. To access:
1. Press the MEDIA hard button on
the navigation system.
2. Select the ‘Jukebox’ tab on the
touchscreen. You can then select from the following options:
Scan:Press for a brief sampling of the currently selected CD, playlist,
genre, etc. Press again to disengage.
Repeat:Press to repeat the current CD, playlist, etc. Press again to
disengage.
Shuffle:Press to shuffle all the tracks on the current CD, playlist, etc. in
random order. Press again to disengage.
Audio features
48
2012 Centerstack(ng1)
Supplement, 1st Printing
Arabic_(LHD)(gc_lhd)
Page 49 of 118
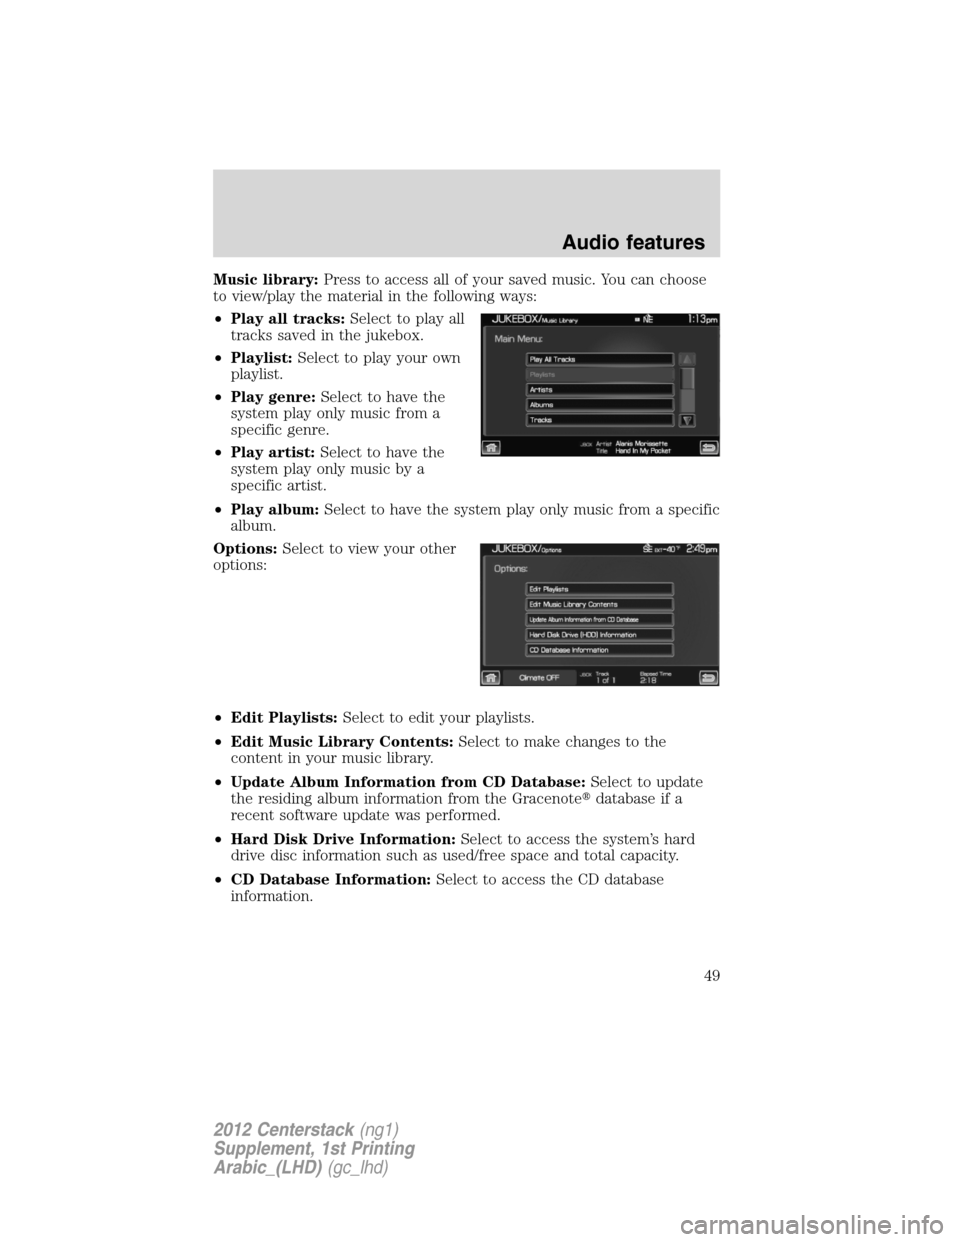
Music library:Press to access all of your saved music. You can choose
to view/play the material in the following ways:
•Play all tracks:Select to play all
tracks saved in the jukebox.
•Playlist:Select to play your own
playlist.
•Play genre:Select to have the
system play only music from a
specific genre.
•Play artist:Select to have the
system play only music by a
specific artist.
•Play album:Select to have the system play only music from a specific
album.
Options:Select to view your other
options:
•Edit Playlists:Select to edit your playlists.
•Edit Music Library Contents:Select to make changes to the
content in your music library.
•Update Album Information from CD Database:Select to update
the residing album information from the Gracenote�database if a
recent software update was performed.
•Hard Disk Drive Information:Select to access the system’s hard
drive disc information such as used/free space and total capacity.
•CD Database Information:Select to access the CD database
information.
Audio features
49
2012 Centerstack(ng1)
Supplement, 1st Printing
Arabic_(LHD)(gc_lhd)
Page 50 of 118
Creating a playlist
1. Press the MEDIA hard button.
2. Select the ‘Jukebox’ tab on the
touchscreen.
3. Select ‘Options’.
4. Select ‘Edit Playlists’.
5. Select which playlist you would
like to create.
6. Select which category you would
like to access from your saved
music.
Audio features
50
2012 Centerstack(ng1)
Supplement, 1st Printing
Arabic_(LHD)(gc_lhd)
Page 51 of 118
For example, say you chose one
saved album from which to select
songs.
7. Select the desired songs and then
press ‘Add’.
The system will show you your
currently selected songs. You can
choose to add more tracks to your
playlist, Sort the Playlist, Delete the
playlist or to edit the name of the
playlist.
8. When you are done making any
adjustment to the playlist, select
‘Edit Name’ to rename your playlist.
You can then access your playlist by
that name.
Audio features
51
2012 Centerstack(ng1)
Supplement, 1st Printing
Arabic_(LHD)(gc_lhd)