Page 126 of 216

124
IV
A
D
C
B
BATTERY LOCATION AND
ACCESS
The battery is located in the bootunder the left hand wing trim. To
access the battery, rotate the pin
on the fl ap by a 1/4.
CHANGING THE BATTERY (Contact a CITROËN dealer or a qualifi ed
workshop).
1. Release the two pins on each side at the back of the boot, and remove
the boot fl oor.2. On each side trim, release the two fi xing pinsA.3. Undo the two screws Bon each side and remove the sill embellisher.4. On the side trim close to the battery, release the pin D.5. Separate the side trim close to the battery, pulling hard to free the other fi xing points.
6. Unclip the boot lamp C.7.Disconnect both battery terminals.8. Release the battery from its support.9. Remove the battery.
Before changing or repairing the battery, open all four windows.
If you have to unlock your vehicle with the key because of a problem with the battery, any opening/closingof a door with the window closed may seriously damage the glass to the point of breaking it.
12 V BATTERY
Page 127 of 216
125
IV
STARTING THE ENGINE AFTER DISCONNECTING AND RECONNECTING THE BATTERY1. Turn the ignition key.2. Wait approximately 1 minute before operating the starter in order to allow the electronic systems to re-initialise.
After the battery has been disconnected for a lengthy period of time, it may be necessary to re-initialise the followingfunctions:The anti-pinch on the windows.
The anti-pinch on the sun roof.
The multifunction displa
y parameters (date, time, language, units of distance and of temperature).
The Radio stations.
The NaviDrive.
See NaviDrive chapter.
IMPORTANT
In the event of a battery failure, and if the boot is closed, it is then necessary to feed an electrical supply to your
vehicle. See following page.
•
•
••
•
12 V BATTERY
Page 146 of 216

144
V
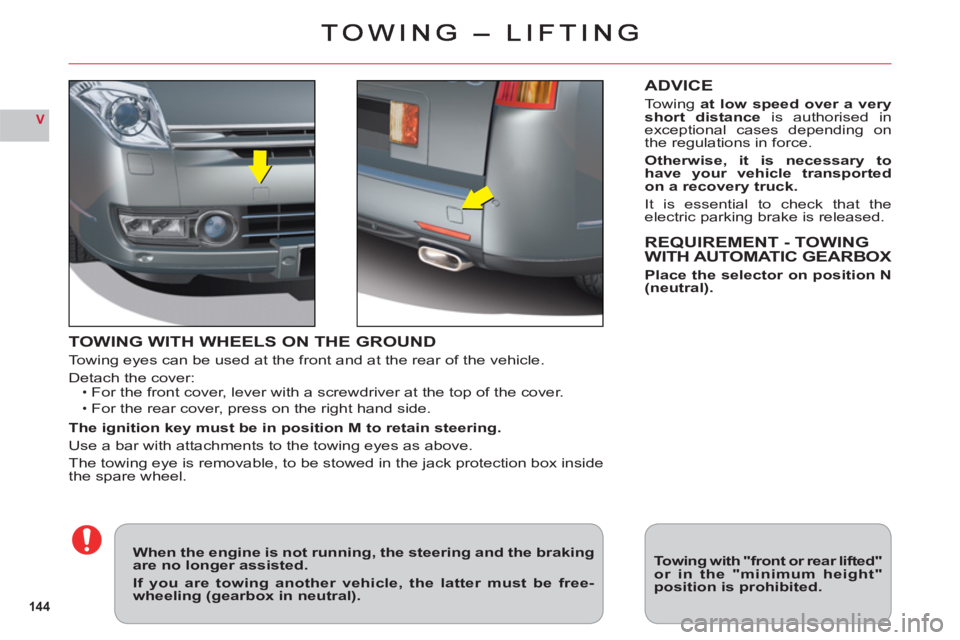
TOWING WITH WHEELS ON THE GROUND
Towing eyes can be used at the front and at the rear of the vehicle.
Detach the cover:For the front cover, lever with a screwdriver at the top of the cover.
For the rear cover, press on the right hand side.
The ignition key must be in position M to retain steering.
Use a bar with attachments to the towing eyes as above.
The towing eye is removable, to be stowed in the jack protection box inside
the spare wheel.
•
•
ADVICE
Towingat low speed over a veryshort distanceis authorised inexceptional cases depending on
the regulations in force.
Otherwise, it is necessary to
have
your vehicle transportedon a recovery truck.
It is essential to check that theelectric parking brake is released.
REQUIREMENT - TOWING
WITH AUTOMATIC GEARBOX
Place the selector on position N(neutral).
When the engine is not running, the steering and the braking are no longer assisted.
If you are towing another vehicle, the latter must be free-wheeling (gearbox in neutral).
Towing with "front or rear lifted"or in the "minimum height"position is prohibited.
Page 152 of 216

7.2
11
2020
88
99
55
44
3322
199
1661111
1001818
122
6677
1313
155
144
177
01
1. On/Off and Volume adjustment.
2. Selection of the source: radio, Jukebox, CD/DVD, CD changer and auxiliary (AUX, if activated on the Confi gurationmenu).Long press: CD copy to hard disc.
3. Audio option adjustments: front/rear, left/right balance,loudness, sound ambiences.
4. Displaying of the list of local radio stations, of the tracks onthe CD/DVD or of the MP3/USB/Jukebox directories.Long press: updating of the local radio stations.
5. Automatic search for a lower/higher frequency.Selection of the previous/next CD/DVD, MP3, USBor Jukebox track. Long press: fast forward and backward play.
6. Selection of the wavebands FM1, FM2, FMast, AM.
7. TA (Traffi c Announcement) function on/off. Long press: access to the PTY(radio Programme TYpes) mode.
8. Ejection of the CD/DVD.
9. SIM card slot.
10. Keypad for entering descriptions by successive presses.
11 . Access to the "CITROÀN" services menu.
12. Selection and confi rmation.
13. Selection of the previous/next CD/DVD. Selection of the previous/next MP3/USB/Jukebox directory.
14. Selection of a lower/higher frequency.
15. Cancellation of the current operation.Long press: return to the current application.
16. Displaying of the general menu.
17. Deletion of the last character entered or of the entire line.
18. Modifi cation of the screen display. Long press: reinitialisation of the NaviDrive system.
19. Selection of the display on the screen from the modes:TRIP, TEL, CLIM, NAV and AUDIO.
20. Long press on the SOS button: emergency call.
FIRST STEPS
Page 157 of 216
7.7
99
1111
1212
1313
1515
1010
1414
Press the dial to confi rm the selection.
Turn the dial and select the letters of the town one by one confi rming eachtime by pressing the dial.
Turn the dial and select OK.
Press the dial to confi rm the selection.
To speed up the process, the POST CODE can beentered instead of the name of the town. Use the alphanumeric keypad to enter the letters and digits and "*" to correct.
Press the dial to confi rm the selection.
Select OK on the ENTER ANADDRESS page.
Repeat steps 8 to 12 for the ROAD and N∞ functions.
OK
OK
Select the STORE function to record the address entered in adirectory record and press the dial to confi rm the selection.
The points of interest (POI) indicate all of the service locations in thevicinity (hotels, various businesses, airports, ...).
STORE
PARIS
POI
Page 170 of 216
7.20
66
77
55
2
33
44
11
JUKEBOX
RENAME
JUKEBOX MANAGEMENT
Press the MENU button.
Select AUDIO FUNCTIONS and press the dial to confi rm.
Select the JUKEBOX function and press the dial to confi rm.
Select the JUKEBOX MANAGEMENT function and press the dial to confi rm.
Select the album to be renamed and press the dial to confi rm.
Select the RENAME tab and press thedial to confi rm.
Turn the dial and select the letters of the album title one by one confi rming each time by pressing the dial.
Use the alphanumeric keypad to enter the letters of the album titleone by one.
JUKEBOX FUNCTION
RENAMING AN ALBUM
Page 172 of 216

7.22
11
22
11
33
22
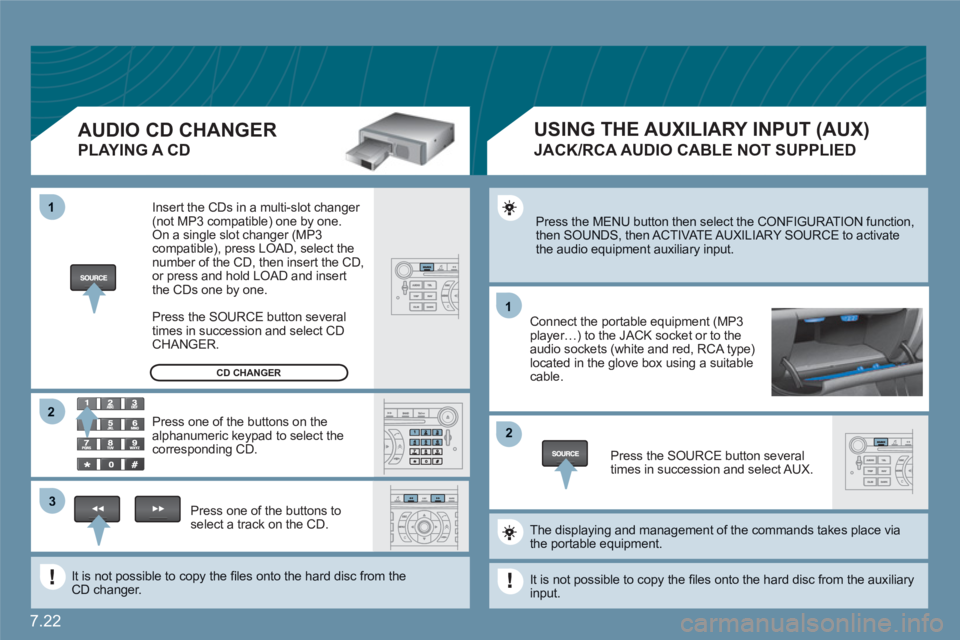
Press the MENU button then select the CONFIGURATION function, then SOUNDS, then ACTIVATE AUXILIARY SOURCE to activatethe audio equipment auxiliary input.
Connect the portable equipment (MP3player…) to the JACK socket or to the audio sockets (white and red, RCA type)located in the glove box using a suitable cable.
Press the SOURCE button severaltimes in succession and select AUX.
The displaying and management of the commands takes place viathe portable equipment.
It is not possible to copy the fi les onto the hard disc from the auxiliaryinput.
USING THE AUXILIARY INPUT (AUX)
JACK/RCA AUDIO CABLE NOT SUPPLIED
AUDIO CD CHANGER
PLAYING A CD
Insert the CDs in a multi-slot changer (not MP3 compatible) one by one. On a single slot changer (MP3compatible), press LOAD, select the number of the CD, then insert the CD,or press and hold LOAD and insert the CDs one by one.
Press the SOURCE button severaltimes in succession and select CD CHANGER.
Press one of the buttons on thealphanumeric keypad to select the corresponding CD.
Press one of the buttons toselect a track on the CD.
It is not possible to copy the fi les onto the hard disc from theCD changer.
CD CHANGER
Page 174 of 216
7.24
11
22
33
11
22
06INTERNAL TELEPHONE
ENTERING THE PIN CODE
Open the slot by pressing the buttonusing the tip of a pen.
Install the SIM card in the holder and then insert it in theslot.
To remove the SIM card, repeat step 1.
Your SIM card must be installed and removed with the NaviDrive audio and telematics system switched off and the ignition off.
Enter the PIN code on the keypad.
Confi rm the PIN code by pressing button #.
PIN CODE
When entering your PIN code, tick the STORE PIN tab for access to the telephone without having to enter this code when it is usedsubsequently.
INSTALLING YOUR SIM CARD
(NOT SUPPLIED)