Page 68 of 576
 Inflator Units
During collisions where the impact is confined to a
particular area of the side of the vehicle, the ORC may
deploy the SABIC air bag")
Supplemental Side Air Bag Inflatable Curtain
(SABIC) Inflator Units
During collisions where the impact is confined to a
particular area of the side of the vehicle, the ORC may
deploy the SABIC air bags, depending on several factors,
including the severity and type of collision. In these
events, the ORC will deploy the SABIC only on the
impact side of the vehicle.
A quantity of non-toxic gas is generated to inflate the side
curtain air bag. The inflating side curtain air bag pushes
the outside edge of the headliner out of the way and
covers the window. The air bag inflates in about 30
milliseconds (about one-quarter of the time that it takes
to blink your eyes) with enough force to injure you if you
are not belted and seated properly, or if items are
positioned in the area where the side curtain air bag
inflates. This especially applies to children. The side
curtain air bag is only about 3-1/2 in (9 cm) thick when
it is inflated.Because air bag sensors estimate deceleration over time,
vehicle speed and damage are not good indicators of
whether or not an air bag should have deployed.
Front And Side Impact Sensors
In front and side impacts, impact sensors can aid the
ORC in determining appropriate response to impact
events.
Enhanced Accident Response System
In the event of an impact causing air bag deployment, if
the communication network remains intact, and the
power remains intact, depending on the nature of the
event the ORC will determine whether to have the
Enhanced Accident Response System perform the follow-
ing functions:
•Cut off fuel to the engine.
•Flash hazard lights as long as the battery has power or
until the ignition key is turned off.
66 THINGS TO KNOW BEFORE STARTING YOUR VEHICLE
Page 69 of 576

•Turn on the interior lights, which remain on as long as
the battery has power, until the ignition key is re-
moved or the ignition switch is changed to OFF using
the Keyless Go Start/Stop button.
•Unlock the doors automatically.
In order to reset the Enhanced Accident Response System
functions after an event, the ignition switch must be
changed from IGN ON to IGN OFF.
If A Deployment Occurs
The Advanced Front Air Bags are designed to deflate
immediately after deployment.
NOTE:Front and/or side air bags will not deploy in all
collisions. This does not mean something is wrong with
the air bag system.
If you do have a collision which deploys the air bags, any
or all of the following may occur:
•The nylon air bag material may sometimes cause abra-
sions and/or skin reddening to the driver and front
passenger as the air bags deploy and unfold. The
abrasions are similar to friction rope burns or those you
might get sliding along a carpet or gymnasium floor.
They are not caused by contact with chemicals. They are
not permanent and normally heal quickly. However, if
you haven’t healed significantly within a few days, or if
you have any blistering, see your doctor immediately.
•As the air bags deflate, you may see some smoke-like
particles. The particles are a normal by-product of the
process that generates the non-toxic gas used for air bag
inflation. These airborne particles may irritate the skin,
eyes, nose, or throat. If you have skin or eye irritation,
rinse the area with cool water. For nose or throat irrita-
tion, move to fresh air. If the irritation continues, see your
doctor. If these particles settle on your clothing, follow
the garment manufacturer’s instructions for cleaning.
2
THINGS TO KNOW BEFORE STARTING YOUR VEHICLE 67
Page 90 of 576
............. 108
▫Uconnect Touch™ 8.4/8.4 NAV.......... 108
▫Operation......................... 110
▫Phone Call Features.................. 122
▫Uconnect™ Phon")
�Uconnect™ Phone (8.4/8.4N)............. 108
▫Uconnect Touch™ 8.4/8.4 NAV.......... 108
▫Operation......................... 110
▫Phone Call Features.................. 122
▫Uconnect™ Phone Features............. 126
▫Advanced Phone Connectivity........... 131
▫Things You Should Know About Your
Uconnect™ Phone.................... 131
▫General Information.................. 141
�Voice Command...................... 142
▫Uconnect Touch™ 8.4/8.4 NAV.......... 142
▫Uconnect™ Voice Commands........... 144
▫Voice Tree......................... 146�Seats.............................. 157
▫Power Seats........................ 157
▫Power Lumbar — If Equipped........... 160
▫Heated Seats — If Equipped............ 160
▫Ventilated Seats — If Equipped.......... 163
▫Head Restraints..................... 165
▫Folding Rear Seat.................... 168
�Driver Memory Seat — If Equipped........ 169
▫Programming The Memory Feature....... 170
▫Linking And Unlinking The Remote Keyless
Entry Transmitter To Memory........... 171
▫Memory Position Recall................ 171
▫Easy Entry/Exit Seat (Available With
Memory Seat Only)................... 172
88 UNDERSTANDING THE FEATURES OF YOUR VEHICLE
Page 98 of 576

Three of the LEDs are turn signal indicators, which flash
with the corresponding turn signal lights in the front and
rear of the vehicle. Turning on the Hazard Warning
flashers will also activate these LEDs.
The fourth LED supplies illuminated entry lighting,
which turns on in both mirrors when you use the Remote
Keyless Entry (RKE) transmitter or open any door. This
LED shines outward to illuminate the front and rear door
handles. It also shines downward to illuminate the area
in front of the doors.
The Illuminated Entry lighting fades to off after about
30 seconds or it will fade to off immediately once the
ignition is placed into the RUN position.
NOTE:The approach lighting will not function when
the shift lever is moved out of the PARK position.Tilt Mirrors In Reverse — If Equipped
Tilt Mirrors in Reverse provides automatic outside mirror
positioning which will aid the driver ’s view of the
ground rearward of the front doors. The outside mirrors
will move slightly downward from the present position
when the vehicle is shifted into REVERSE. The outside
mirrors will then return to the original position when the
vehicle is shifted out of the REVERSE position. Each
stored memory setting will have an associated Tilt Mir-
rors in Reverse position.
NOTE:
•The Tilt Mirrors in Reverse feature is not turned on
when delivered from the factory. The Tilt Mirrors in
Reverse feature can be turned on and off using the
Uconnect Touch™ System.
•Refer to “Uconnect Touch™ Settings” in “Understand-
ing Your Instrument Panel” for further information.
96 UNDERSTANDING THE FEATURES OF YOUR VEHICLE
Page 110 of 576

Uconnect Touch™ 8.4/8.4 Nav
Uconnect™ Phone is a voice-activated, hands-free, in-
vehicle communications system. Uconnect™ Phone allows
you to dial a phone number wi")
Uconnect™ Phone (8.4/8.4N)
Uconnect Touch™ 8.4/8.4 Nav
Uconnect™ Phone is a voice-activated, hands-free, in-
vehicle communications system. Uconnect™ Phone allows
you to dial a phone number with your mobile phone.
Uconnect™ Phone supports the following features:
Voice Activated Features:
•
Hands Free dialing via Voice (“Call John Smiths Mo-
bile” or, “Dial 248 555-1212”).
•Hands Free text to speech listening of your incoming
SMS messages.
•Hands Free text messaging (“Send a message to John
Smiths Mobile”).
•Redialing last dialed numbers (“Redial”).
•Calling Back the last incoming call number (“Call Back”).
•View Call logs on screen (“Show incoming calls”,
“Show Outgoing calls”, “Show missed Calls”, “Show
Recent Calls”).
•Searching Contacts phone number (“Search for John
Smith Mobile”).
Screen Activated Features:
•
Dialing via Keypad using touch-screen.
•Viewing and Calling contacts from Phonebooks dis-
played on the touch-screen.
•Setting Favorite Contact Phone numbers so the are
easily accessible on the Main Phone screen.
•Viewing and Calling contacts from Recent Call logs.
•Reviewing your recent Incoming SMS.
•Sending a text message via the touch-screen.
108 UNDERSTANDING THE FEATURES OF YOUR VEHICLE
Page 115 of 576
Pair (Link) Uconnect™ Phone To A Mobile Phone
To begin using your Uconnect™ Phone, you must pair
your compatible Bluetooth�enabled mobile phone.
To complete the pairing process, you will need to refer-
ence your mobile phone Owner’s Manual. The
Uconnect™ website may also provide detailed instruc-
tions for pairing.
NOTE:
•You must have Bluetooth�enabled on your phone to
complete this procedure.
•The vehicle must be in PARK.
1. Press the “Phone” soft-key on the screen to begin.2. If there is no phone currently connected with the
system, a pop-up will appear.
3
UNDERSTANDING THE FEATURES OF YOUR VEHICLE 113
Page 116 of 576
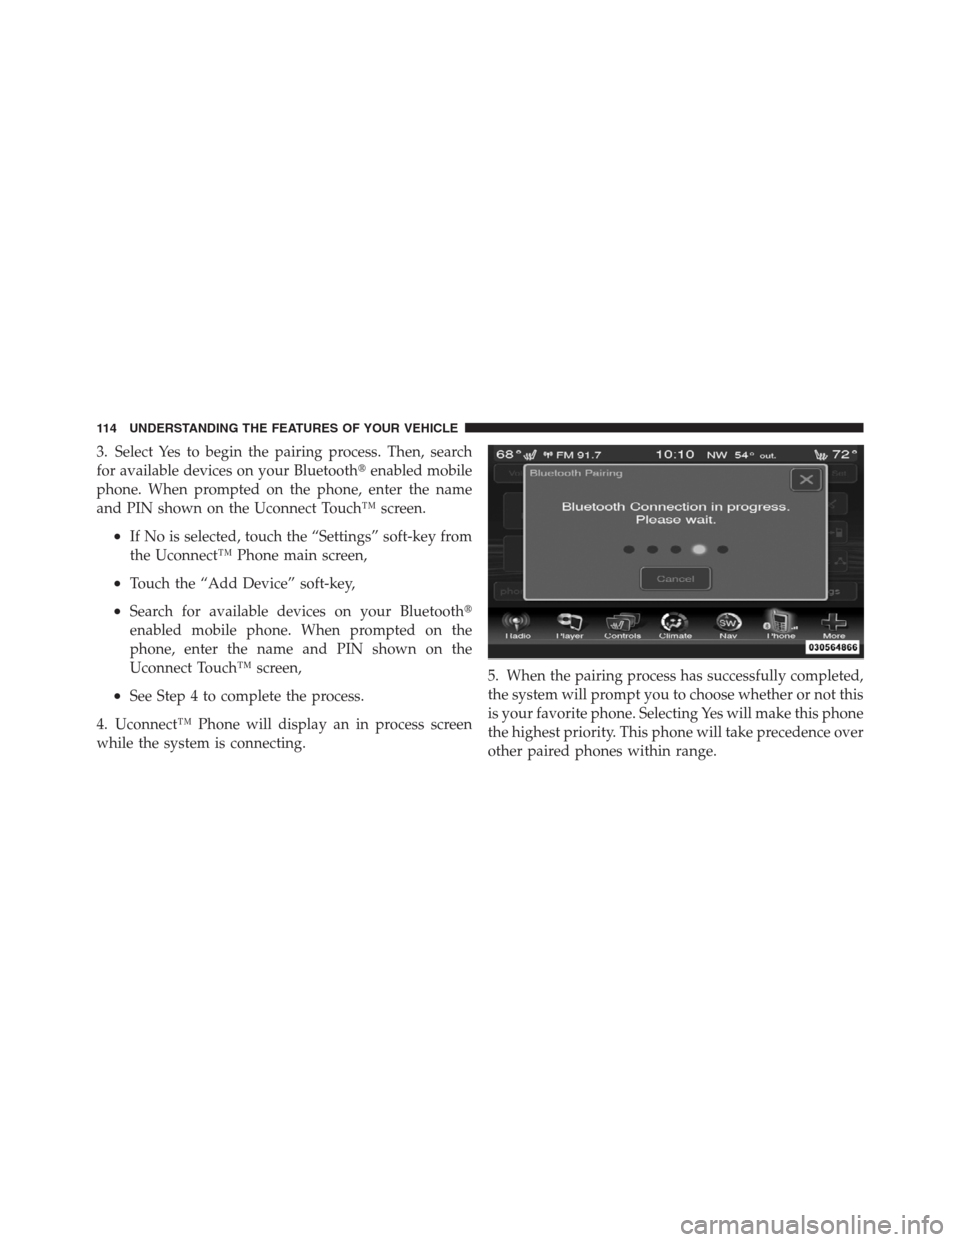
3. Select Yes to begin the pairing process. Then, search
for available devices on your Bluetooth�enabled mobile
phone. When prompted on the phone, enter the name
and PIN shown on the Uconnect Touch™ screen.
•If No is selected, touch the “Settings” soft-key from
the Uconnect™ Phone main screen,
•Touch the “Add Device” soft-key,
•Search for available devices on your Bluetooth�
enabled mobile phone. When prompted on the
phone, enter the name and PIN shown on the
Uconnect Touch™ screen,
•See Step 4 to complete the process.
4. Uconnect™ Phone will display an in process screen
while the system is connecting.5. When the pairing process has successfully completed,
the system will prompt you to choose whether or not this
is your favorite phone. Selecting Yes will make this phone
the highest priority. This phone will take precedence over
other paired phones within range.
114 UNDERSTANDING THE FEATURES OF YOUR VEHICLE
Page 117 of 576
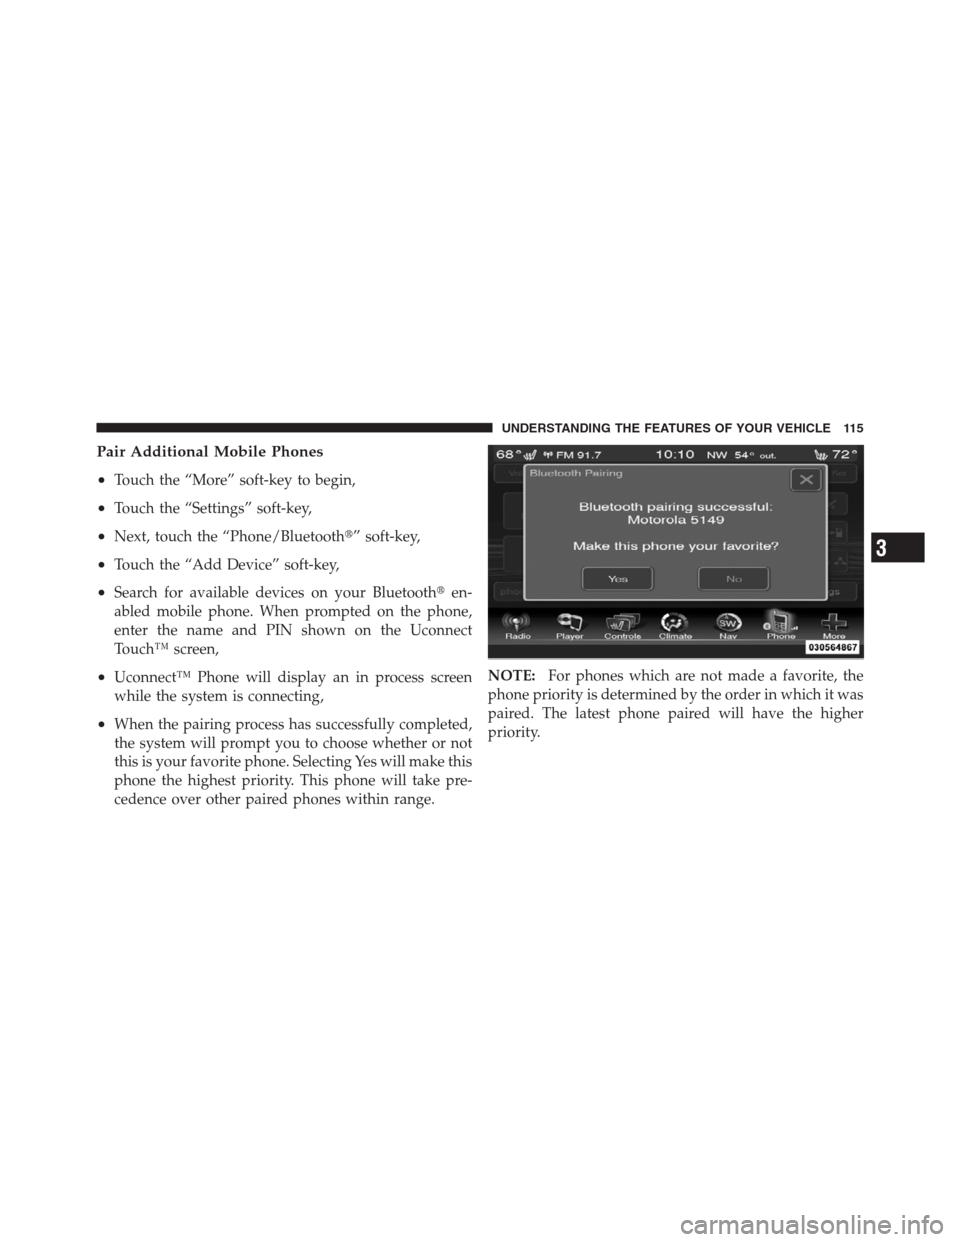
Pair Additional Mobile Phones
•
Touch the “More” soft-key to begin,
•Touch the “Settings” soft-key,
•Next, touch the “Phone/Bluetooth�” soft-key,
•Touch the “Add Device” soft-key,
•Search for available devices on your Bluetooth�en-
abled mobile phone. When prompted on the phone,
enter the name and PIN shown on the Uconnect
Touch™ screen,
•Uconnect™ Phone will display an in process screen
while the system is connecting,
•When the pairing process has successfully completed,
the system will prompt you to choose whether or not
this is your favorite phone. Selecting Yes will make this
phone the highest priority. This phone will take pre-
cedence over other paired phones within range.NOTE:For phones which are not made a favorite, the
phone priority is determined by the order in which it was
paired. The latest phone paired will have the higher
priority.
3
UNDERSTANDING THE FEATURES OF YOUR VEHICLE 115