2012 CHEVROLET SILVERADO fuel
[x] Cancel search: fuelPage 365 of 584
Black plate (79,1)Chevrolet Silverado Owner Manual - 2012
Driving and Operating 9-79
Many service stations will not have
an 85% ethanol fuel (E85) pump
available. The U.S. Department of
Energy has an alternative fuels
website (www.afdc.energy.gov/afdc/
locator/stations/) that can help you
find E85 fuel. Those stations that
do have E85 should have a label
indicating ethanol content. Do not
use the fuel if the ethanol content is
greater than 85%.
At a minimum, E85 should meet
ASTM Specification D 5798 or
CGSB Specification 3.512.
Filling the tank with fuel mixtures
that do not meet ASTM or CGSB
specifications can affect driveability
and could cause the malfunction
indicator lamp to come on. As the
outside temperature approaches
freezing, ethanol fuel distributors
should supply winter grade
ethanol, the same as with
unleaded gasoline. Winter grade
blends typically do not exceed
70% ethanol (E70).The starting characteristics of
ethanol make it more difficult to
start below 0°C (32°F), which may
lead to longer start/crank times.
Engine start on ethanol fuels down
to
−30°C (−20°F) is possible,
provided a winter grade ethanol
blend is used.
It is best not to alternate repeatedly
between gasoline and E85. If you
do switch fuels, it is recommended
that you add as much fuel as
possible —do not add less than
11 L (3 gal) when refueling.
You should drive the vehicle
immediately after refueling for at
least 11 km (7 mi) to allow the
vehicle to adapt to the change in
ethanol concentration.
E85 has less energy per liter
(gallon) than gasoline, so you will
need to refill the fuel tank more
often when using E85 than when
you are using gasoline. See Filling
the Tank on page 9‑80. Notice:
Some additives are not
compatible with E85 fuel and can
harm the vehicle's fuel system.
Do not add anything to E85.
Damage caused by additives
would not be covered by the
vehicle warranty.
Notice: This vehicle was not
designed for fuel that contains
methanol. Do not use fuel
containing methanol. It can
corrode metal parts in the fuel
system and also damage plastic
and rubber parts. That damage
would not be covered under the
vehicle warranty.
Page 366 of 584
Black plate (80,1)Chevrolet Silverado Owner Manual - 2012
9-80 Driving and Operating
Filling the Tank
If the vehicle has a diesel engine,
see the Duramax diesel supplement
for more information.
{WARNING
Fuel vapor burns violently and a
fuel fire can cause bad injuries.
To help avoid injuries to you and
others, read and follow all the
instructions on the fuel pump
island. Turn off the engine when
refueling. Do not smoke near fuel
or when refueling the vehicle.
Do not use cellular phones.
Keep sparks, flames, and
smoking materials away from fuel.
Do not leave the fuel pump
unattended when refueling the
vehicle. This is against the law in
some places. Do not re-enter the
vehicle while pumping fuel. Keep
children away from the fuel pump;
never let children pump fuel.The tethered fuel cap is located
behind a hinged fuel door on the
driver side of the vehicle. Vehicles
that have a FlexFuel badge and a
yellow fuel cap can use either
unleaded gasoline or ethanol fuel
containing up to 85% ethanol (E85).
See
Fuel E85 (85% Ethanol) on
page 9‑78.
To remove the fuel cap, turn it
slowly counterclockwise.
{WARNING
Fuel can spray out on you if you
open the fuel cap too quickly.
If you spill fuel and then
something ignites it, you could be
badly burned. This spray can
happen if the tank is nearly full,
and is more likely in hot weather.
Open the fuel cap slowly and wait
for any hiss noise to stop. Then
unscrew the cap all the way. If the vehicle is a dual fuel tank
chassis cab model, and it runs out
of fuel, refuel the front fuel tank first
to ensure a quick restart.
Be careful not to spill fuel. Do not
top off or overfill the tank and wait a
few seconds after you have finished
pumping before removing the
nozzle. Clean fuel from painted
surfaces as soon as possible.
See
Exterior Care on page 10‑102.
When replacing the fuel cap, turn it
clockwise until it clicks. It will require
more effort to turn the fuel cap on
the last turn as you tighten it.
Make sure the cap is fully installed.
The diagnostic system can
determine if the fuel cap has been
left off or improperly installed. This
would allow fuel to evaporate into
the atmosphere. See Malfunction
Indicator Lamp on page 5‑24.
Page 367 of 584
Black plate (81,1)Chevrolet Silverado Owner Manual - 2012
Driving and Operating 9-81
The TIGHTEN GAS CAP message
displays on the Driver Information
Center (DIC) if the fuel cap is not
properly installed. SeeFuel System
Messages on page 5‑46 for more
information.
{WARNING
If a fire starts while you are
refueling, do not remove the
nozzle. Shut off the flow of fuel by
shutting off the pump or by
notifying the station attendant.
Leave the area immediately.
Notice: If a new fuel cap is
needed, be sure to get the right
type of cap from your dealer.
The wrong type of fuel cap might
not fit properly, might cause the
malfunction indicator lamp to
light, and could damage the fuel
tank and emissions system.
See Malfunction Indicator Lamp
on page 5‑24.
Filling a Portable Fuel
Container
{WARNING
Never fill a portable fuel container
while it is in the vehicle. Static
electricity discharge from the
container can ignite the fuel
vapor. You can be badly burned
and the vehicle damaged if this
occurs. To help avoid injury to you
and others:
.Dispense fuel only into
approved containers.
.Do not fill a container while it
is inside a vehicle, in a
vehicle's trunk, pickup bed,
or on any surface other than
the ground.
(Continued)
WARNING (Continued)
.Bring the fill nozzle in contact
with the inside of the fill
opening before operating the
nozzle. Contact should be
maintained until the filling is
complete.
.Do not smoke while
pumping fuel.
.Do not use a cellular phone
while pumping fuel.
Page 372 of 584
Black plate (86,1)Chevrolet Silverado Owner Manual - 2012
9-86 Driving and Operating
Trailer Towing
If the vehicle has a diesel engine,
see the Duramax diesel supplement
for more information.
If the vehicle is a hybrid, see the
hybrid supplement for more
information.
Do not tow a trailer during break‐in.
SeeNew Vehicle Break-In on
page 9‑26 for more information.
{WARNING
The driver can lose control when
pulling a trailer if the correct
equipment is not used or the
vehicle is not driven properly.
For example, if the trailer is too
heavy, the brakes may not work
well or even at all. The driver and
passengers could be seriously
injured. The vehicle may also be
damaged; the resulting repairs
(Continued)
WARNING (Continued)
would not be covered by the
vehicle warranty. Pull a trailer
only if all the steps in this section
have been followed. Ask your
dealer for advice and information
about towing a trailer with the
vehicle.
Notice: Pulling a trailer
improperly can damage the
vehicle and result in costly
repairs not covered by the vehicle
warranty. To pull a trailer
correctly, follow the advice in this
section and see your dealer for
important information about
towing a trailer with the vehicle.
To identify the trailering capacity of
the vehicle, read the information in
“Weight of the Trailer” later in this
section. Trailering is different than just
driving the vehicle by itself.
Trailering means changes in
handling, acceleration, braking,
durability, and fuel economy.
Successful, safe trailering takes
correct equipment, and it has to be
used properly.
The following information has many
time-tested, important trailering tips
and safety rules. Many of these are
important for your safety and that of
your passengers. So please read
this section carefully before pulling
a trailer.
Weight of the Trailer
How heavy can a trailer safely be?
It depends on how the rig is used.
Speed, altitude, road grades,
outside temperature, and how much
the vehicle is used to pull a trailer
are all important. It can depend on
any special equipment on the
vehicle, and the amount of tongue
weight the vehicle can carry.
Page 393 of 584
Black plate (107,1)Chevrolet Silverado Owner Manual - 2012
Driving and Operating 9-107
harness. If an aftermarket trailer
brake controller is installed, the
ITBC must be disconnected. Do not
power both ITBC and aftermarket
controllers to control the trailer
brakes at the same time.
Tow/Haul Mode
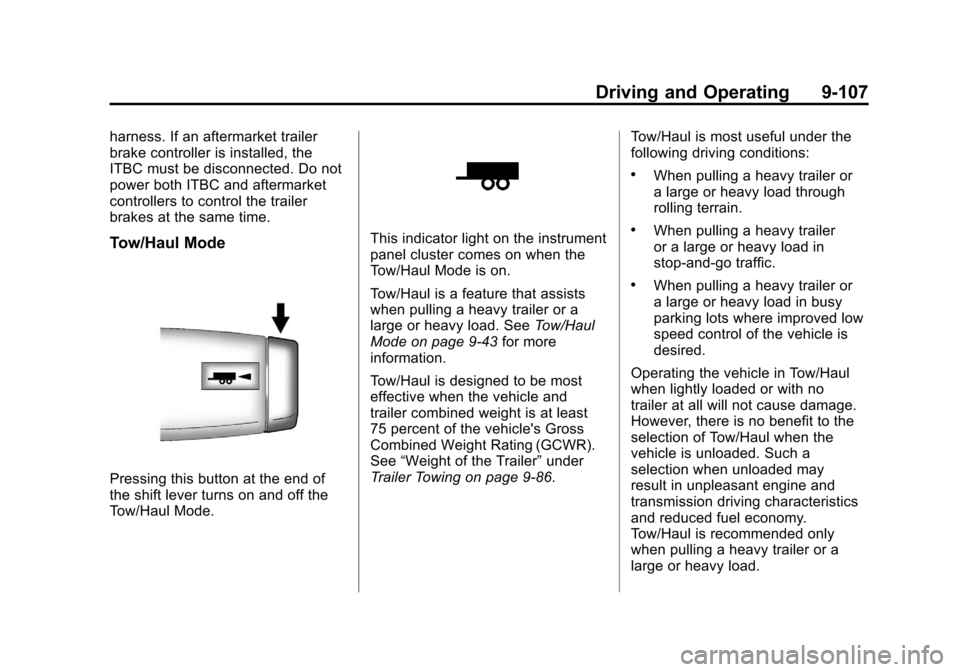
Pressing this button at the end of
the shift lever turns on and off the
Tow/Haul Mode.
This indicator light on the instrument
panel cluster comes on when the
Tow/Haul Mode is on.
Tow/Haul is a feature that assists
when pulling a heavy trailer or a
large or heavy load. SeeTow/Haul
Mode on page 9‑43 for more
information.
Tow/Haul is designed to be most
effective when the vehicle and
trailer combined weight is at least
75 percent of the vehicle's Gross
Combined Weight Rating (GCWR).
See “Weight of the Trailer” under
Trailer Towing on page 9‑86. Tow/Haul is most useful under the
following driving conditions:
.When pulling a heavy trailer or
a large or heavy load through
rolling terrain.
.When pulling a heavy trailer
or a large or heavy load in
stop-and-go traffic.
.When pulling a heavy trailer or
a large or heavy load in busy
parking lots where improved low
speed control of the vehicle is
desired.
Operating the vehicle in Tow/Haul
when lightly loaded or with no
trailer at all will not cause damage.
However, there is no benefit to the
selection of Tow/Haul when the
vehicle is unloaded. Such a
selection when unloaded may
result in unpleasant engine and
transmission driving characteristics
and reduced fuel economy.
Tow/Haul is recommended only
when pulling a heavy trailer or a
large or heavy load.
Page 402 of 584
Black plate (116,1)Chevrolet Silverado Owner Manual - 2012
9-116 Driving and Operating
Say, for example, you have a 318 kg
(700 lb) snow plow. The total weight
of all occupants and cargo inside
the cab should not exceed 135 kg
(300 lb). This means that you may
only be able to carry one passenger.
But, even this may be too much if
there is other equipment already
adding to the weight of the vehicle.
Here are some guidelines for safely
carrying a snow plow on the vehicle:
.Make sure the weight on the
front and rear axles does not
exceed the axle rating for each.
.For the front axle, if more cargo
or passengers must be carried,
appropriate counter ballast must
be installed rear of the rear axle.
Counter ballast must be properly
secured so it will not move
during driving.
.Follow the snow plow
manufacturer's
recommendations regarding
rear ballast. Rear ballast may be
required to ensure a proper front
and rear weight distribution ratio,
even though the actual weight at
the front axle may be less than
the front axle rating.
.The snow plow manufacturer
or installer can assist you in
determining the amount of rear
ballast required, to help make
sure the snowplow/vehicle
combination does not exceed
the GVW rating, the front and
rear axle ratings, and the front
and rear weight distribution ratio.
.The total vehicle must not
exceed the GVW rating.Front axle reserve capacity is the
difference between the Gross Axle
Weight Rating (GAWR) and the front
axle weight of the vehicle with full
fuel and passengers. Basically, it is
the amount of weight that can be
added to the front axle before
reaching the front GAWR.
The front axle reserve capacity
for the vehicle can be found in
the lower right corner of the
Certification/Tire label, as shown.
Page 404 of 584
Black plate (118,1)Chevrolet Silverado Owner Manual - 2012
9-118 Driving and Operating
Heavier equipment can be added on
the front of the vehicle if it is
compensated for by carrying fewer
passengers, less cargo, or by
positioning cargo toward the rear.
This has the effect of reducing the
load on the front. However, the front
GAWR, rear GAWR, and the Gross
Vehicle Weight Rating (GVWR) must
never be exceeded.
{WARNING
On some vehicles that have
certain front mounted equipment,
such as a snow plow, it may be
possible to load the front axle to
the front gross axle weight rating
(GAWR) but not have enough
weight on the rear axle to have
proper braking performance.
If the brakes cannot work
properly, you could have a crash.(Continued)
WARNING (Continued)
To help the brakes work properly
when a snow plow is installed,
always follow the snow plow
manufacturer or installer's
recommendation for rear ballast
to ensure a proper front and rear
weight distribution ratio, even
though the actual front weight
may be less than the front
GAWR, and the total vehicle
weight is less than the gross
vehicle weight rating (GVWR).
Maintaining a proper front and
rear weight distribution ratio is
necessary to provide proper
braking performance.
Total vehicle reserve capacity is the
difference between the GVWR and
the weight of the truck with full fuel
and passengers. It is the amount of
weight that can be added to the
vehicle before reaching the GVWR. Keep in mind that reserve capacity
numbers are intended as a guide
when selecting the amount of
equipment or cargo the truck can
carry. If unsure of the vehicle's front,
rear, or total weight, go to a weigh
station and weigh the vehicle.
Your dealer can also help with this.
The total vehicle reserve capacity
for the vehicle can be found in
the lower right corner of the
Certification/Tire label as shown
previously.
See your dealer for additional
advice and information about
using a snow plow on the vehicle.
Also, see
Vehicle Load Limits on
page 9‑17.
Page 414 of 584
Black plate (8,1)Chevrolet Silverado Owner Manual - 2012
10-8 Vehicle Care
Checking Engine Oil
It is a good idea to check the
engine oil level at each fuel fill. In
order to get an accurate reading,
the vehicle must be on level ground.
The engine oil dipstick handle
is a yellow loop. SeeEngine
Compartment Overview on
page 10‑6 for the location of the
engine oil dipstick.
Obtaining an accurate oil level
reading is essential:
1. If the engine has been running recently, turn off the engine and
allow several minutes for the oil
to drain back into the oil pan.
Checking the oil level too soon
after engine shutoff will not
provide an accurate oil level
reading.
2. Pull out the dipstick and clean it with a paper towel or cloth,
then push it back in all the way.
Remove it again, keeping the tip
down, and check the level.
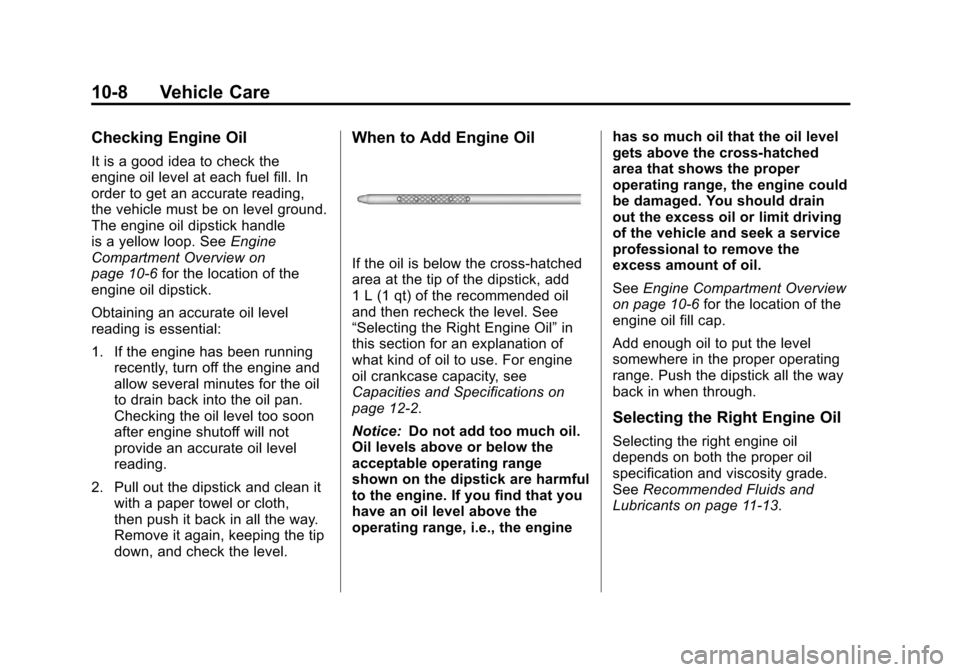
When to Add Engine Oil
If the oil is below the cross-hatched
area at the tip of the dipstick, add
1 L (1 qt) of the recommended oil
and then recheck the level. See
“Selecting the Right Engine Oil” in
this section for an explanation of
what kind of oil to use. For engine
oil crankcase capacity, see
Capacities and Specifications on
page 12‑2.
Notice: Do not add too much oil.
Oil levels above or below the
acceptable operating range
shown on the dipstick are harmful
to the engine. If you find that you
have an oil level above the
operating range, i.e., the engine has so much oil that the oil level
gets above the cross-hatched
area that shows the proper
operating range, the engine could
be damaged. You should drain
out the excess oil or limit driving
of the vehicle and seek a service
professional to remove the
excess amount of oil.
See
Engine Compartment Overview
on page 10‑6 for the location of the
engine oil fill cap.
Add enough oil to put the level
somewhere in the proper operating
range. Push the dipstick all the way
back in when through.
Selecting the Right Engine Oil
Selecting the right engine oil
depends on both the proper oil
specification and viscosity grade.
See Recommended Fluids and
Lubricants on page 11‑13.