2012 CHEVROLET ORLANDO check oil
[x] Cancel search: check oilPage 123 of 378

Black plate (19,1)Chevrolet Orlando Owner Manual - 2012
Instruments and Controls 5-19
When the Light Is On Steady
This indicates that one or more of
the tires are significantly
underinflated.
A Driver Information Center (DIC)
tire pressure message may also
display. SeeVehicle Messages
(Base Level) on page 5‑26 or
Vehicle Messages (Uplevel) on
page 5‑26 for more information.
Stop as soon as possible, and
inflate the tires to the pressure value
shown on the Tire and Loading
Information label. See Tire Pressure
on page 10‑44 for more information.
When the Light Flashes First and
Then Is On Steady
If the light flashes for about a minute
and then stays on, there may be a
problem with the TPMS. If the
problem is not corrected, the light
will come on at every ignition cycle.
See Tire Pressure Monitor
Operation on page 10‑46 for more
information.Engine Oil Pressure Light
{WARNING
Do not keep driving if the oil
pressure is low. The engine can
become so hot that it catches fire.
Someone could be burned. Check
the oil as soon as possible and
have the vehicle serviced.
Notice: Lack of proper engine oil
maintenance can damage the
engine. The repairs would not be
covered by the vehicle warranty.
Always follow the maintenance
schedule for changing engine oil.
The oil pressure light should come
on briefly as the engine is started.
If it does not come on, have the
vehicle serviced by your dealer.
If the light comes on and stays on, it
means that oil is not flowing through
the engine properly. The vehicle
could be low on oil and might have
some other system problem. See
your dealer.
Page 132 of 378

Black plate (28,1)Chevrolet Orlando Owner Manual - 2012
5-28 Instruments and Controls
To avoid added strain on a hot
engine, the air conditioning
compressor automatically turns off.
When the coolant temperature
returns to normal, the air
conditioning compressor turns back
on. You can continue to drive the
vehicle.
If this message continues to appear,
have the system repaired by your
dealer as soon as possible to avoid
damage to the engine.
ENGINE OVERHEATED—
IDLE ENGINE
This message displays when the
engine coolant temperature is too
hot. Stop and allow the vehicle to
idle until it cools down.
ENGINE OVERHEATED —
STOP ENGINE
This message displays and a
continuous chime sounds if the
engine cooling system reaches
unsafe temperatures for operation. Stop and turn off the vehicle as
soon as it is safe to do so to avoid
severe damage. This message
clears when the engine has cooled
to a safe operating temperature.
HIGH COOLANT
TEMPERATURE
This message displays if the coolant
temperature is hot. See
Engine
Overheating on page 10‑17.
Engine Oil Messages
CHANGE ENGINE OIL SOON
This message displays when the
engine oil needs to be changed.
When you change the engine oil, be
sure to reset the Oil Life System.
See Engine Oil Life System on
page 10‑9 andDriver Information
Center (DIC) on page 5‑22 for
information on how to reset the
system. See Engine Oil on
page 10‑7 andMaintenance
Schedule on page 11‑3 for more
information.
OIL PRESSURE LOW —STOP
ENGINE
This message displays if low oil
pressure levels occur. Stop the
vehicle as soon as safely possible
and do not operate it until the cause
of the low oil pressure has been
corrected. Check the oil as soon as
possible and have the vehicle
serviced by your dealer.
Engine Power Messages
ENGINE POWER IS REDUCED
This message displays when the
vehicle's engine power is reduced.
Reduced engine power can affect
the vehicle's ability to accelerate.
If this message is on, but there is
no reduction in performance,
proceed to your destination. The
performance may be reduced the
next time the vehicle is driven. The
vehicle may be driven at a reduced
speed while this message is on, but
maximum acceleration and speed
may be reduced. Anytime this
Page 225 of 378
Black plate (37,1)Chevrolet Orlando Owner Manual - 2012
Driving and Operating 9-37
Recommended Fuel
Use regular unleaded gasoline with
a posted octane rating of 87 or
higher. If the octane rating is less
than 87, an audible knocking noise,
commonly referred to as spark
knock, might be heard when driving.
If this occurs, use a gasoline rated
at 87 octane or higher as soon as
possible. If heavy knocking is heard
when using gasoline rated at
87 octane or higher, the engine
needs service.
Gasoline Specifications
At a minimum, gasoline should meet
ASTM specification D 4814 in the
United States or CAN/CGSB‐3.5
or 3.511 in Canada. Some
gasolines contain an
octane-enhancing additive called
methylcyclopentadienyl manganese
tricarbonyl (MMT). We recommend
against the use of gasolines
containing MMT. SeeFuel Additives
on page 9‑37 for additional
information.
Fuels in Foreign
Countries
Never use leaded gasoline or any
other fuel not recommended in the
previous text on fuel. Costly repairs
caused by use of improper fuel
would not be covered by the vehicle
warranty.
To check the fuel availability, ask an
auto club, or contact a major oil
company that does business in the
country where you will be driving.
Fuel Additives
To provide cleaner air, all gasolines
in the United States are now
required to contain additives that
help prevent engine and fuel system
deposits from forming, allowing the
emission control system to work
properly. In most cases, nothing
should have to be added to the fuel.
However, some gasolines contain
only the minimum amount of
additive required to meet U.S.
Environmental Protection Agency
regulations. To help keep fuel
injectors and intake valves clean
and avoid problems due to dirty
injectors or valves, look for gasoline
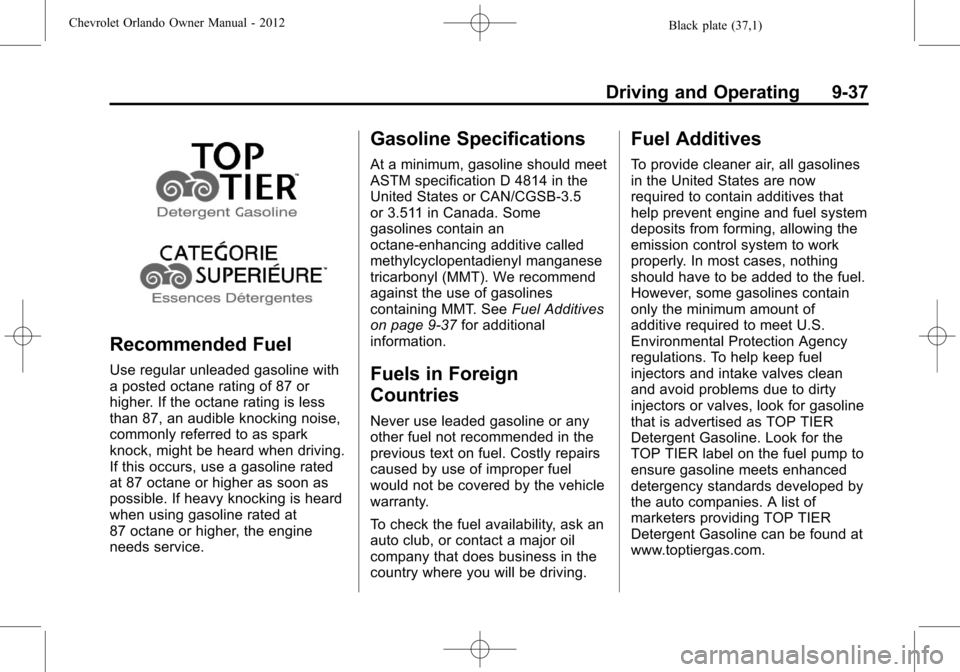
that is advertised as TOP TIER
Detergent Gasoline. Look for the
TOP TIER label on the fuel pump to
ensure gasoline meets enhanced
detergency standards developed by
the auto companies. A list of
marketers providing TOP TIER
Detergent Gasoline can be found at
www.toptiergas.com.
Page 231 of 378
Black plate (43,1)Chevrolet Orlando Owner Manual - 2012
Driving and Operating 9-43
shoulders, curbs, road signs, trees,
or other objects. Avoid jerky or
sudden maneuvers. Signal well in
advance.
Turn Signals When Towing a
Trailer
The arrows on the instrument panel
flash whenever signaling a turn or
lane change. Properly hooked up,
the trailer lamps also flash, telling
other drivers the vehicle is turning,
changing lanes, or stopping.
When towing a trailer, the arrows on
the instrument panel flash for turns
even if the bulbs on the trailer are
burned out. For this reason you may
think other drivers are seeing the
signal when they are not. It is
important to check occasionally to
be sure the trailer bulbs are still
working.
Driving On Grades
Reduce speed and shift to a lower
gear before starting down a long
or steep downgrade. If the
transmission is not shifted down, thebrakes might have to be used so
much that they would get hot and no
longer work well.
Vehicles with an automatic
transmission can tow in D (Drive)
but M (Manual Mode) is
recommended. Shift the
transmission to a lower gear if the
transmission shifts too often under
heavy loads and/or hilly conditions.
For vehicles with a manual
transmission, it is better not to use
the highest gear.
When towing at high altitude on
steep uphill grades, consider the
following: Engine coolant will boil at
a lower temperature than at normal
altitudes. If the engine is turned off
immediately after towing at high
altitude on steep uphill grades, the
vehicle may show signs similar to
engine overheating. To avoid this,
let the engine run while parked,
preferably on level ground, with the
automatic transmission in P (Park)
for a few minutes before turning the
engine off. For vehicles with manual
transmissions, let the engine runwhile parked, preferably on level
ground, with the transmission out of
gear and the parking brake applied,
for a few minutes before turning the
engine off. If the overheat warning
comes on, see
Engine Overheating
on page 10‑17.
Parking on Hills
{WARNING
Parking the vehicle on a hill with
the trailer attached can be
dangerous. If something goes
wrong, the rig could start to move.
People can be injured, and both
the vehicle and the trailer can be
damaged. When possible, always
park the rig on a flat surface.
If parking the rig on a hill:
1. Press the brake pedal, but do not shift into P (Park) yet for
vehicles with an automatic
transmission, or into gear for
vehicles with a manual
Page 232 of 378
Black plate (44,1)Chevrolet Orlando Owner Manual - 2012
9-44 Driving and Operating
transmission. Turn the wheels
into the curb if facing downhill or
into traffic if facing uphill.
2. Have someone place chocks under the trailer wheels.
3. When the wheel chocks are in place, release the brake pedal
until the chocks absorb the load.
4. Reapply the brake pedal. Then apply the parking brake and shift
into P (Park) for vehicles with an
automatic transmission or into
gear for vehicles with a manual
transmission.
5. Release the brake pedal.
Leaving After Parking on a Hill
1. Apply and hold the brake pedal while you:
1.1. Start the engine.
1.2. Shift into a gear.
1.3. Release the parking brake.
2. Let up on the brake pedal. 3. Drive slowly until the trailer is
clear of the chocks.
4. Stop and have someone pick up and store the chocks.
Maintenance When Trailer
Towing
The vehicle needs service more
often when pulling a trailer. See this
manual's Maintenance Schedule or
Index for more information. Things
that are especially important in
trailer operation are automatic
transmission fluid, engine oil, axle
lubricant, belts, cooling system, and
brake system. It is a good idea to
inspect these before and during
the trip.
Check periodically to see that all
hitch nuts and bolts are tight.
Engine Cooling When Trailer
Towing
The cooling system may temporarily
overheat during severe operating
conditions. See Engine Overheating
on page 10‑17.
Trailer Towing
Before pulling a trailer, there are
three important considerations that
have to do with weight:
.The weight of the trailer.
.The weight of the trailer tongue.
.The total weight on your
vehicle's tires.
Weight of the Trailer
How heavy can a trailer safely be?
It should never weigh more than
454 kg (1,000 lbs). But even that
can be too heavy.
It depends on how the rig is used.
For example, speed, altitude, road
grades, outside temperature and
how much the vehicle is used to pull
a trailer are all important. It can
depend on any special equipment
on the vehicle, and the amount of
tongue weight the vehicle can carry.
See “Weight of the Trailer Tongue”
later in this section for more
information.
Page 235 of 378
Black plate (1,1)Chevrolet Orlando Owner Manual - 2012
Vehicle Care 10-1
Vehicle Care
General Information
General Information . . . . . . . . . . 10-2
Accessories andModifications . . . . . . . . . . . . . . . 10-2
Vehicle Checks
Doing Your OwnService Work . . . . . . . . . . . . . . . 10-3
Hood . . . . . . . . . . . . . . . . . . . . . . . . 10-4
Engine Compartment Overview . . . . . . . . . . . . . . . . . . . 10-6
Engine Oil . . . . . . . . . . . . . . . . . . . 10-7
Engine Oil Life System . . . . . . 10-9
Automatic Transmission Fluid . . . . . . . . . . . . . . . . . . . . . . 10-10
Manual Transmission Fluid . . . . . . . . . . . . . . . . . . . . . . 10-11
Hydraulic Clutch . . . . . . . . . . . . 10-11
Engine Air Cleaner/Filter . . . . 10-11
Cooling System . . . . . . . . . . . . 10-13
Engine Coolant . . . . . . . . . . . . . 10-14
Engine Overheating . . . . . . . . 10-17
Washer Fluid . . . . . . . . . . . . . . . 10-18
Brakes . . . . . . . . . . . . . . . . . . . . . 10-19
Brake Fluid . . . . . . . . . . . . . . . . . 10-20 Battery . . . . . . . . . . . . . . . . . . . . . 10-21
Starter Switch Check . . . . . . . 10-22
Automatic Transmission Shift
Lock Control Function
Check . . . . . . . . . . . . . . . . . . . . . 10-23
Ignition Transmission Lock Check . . . . . . . . . . . . . . . . . . . . . 10-23
Park Brake and P (Park) Mechanism Check . . . . . . . . 10-23
Wiper Blade Replacement . . . . . . . . . . . . . . 10-24
Headlamp Aiming
Headlamp Aiming . . . . . . . . . . 10-25
Bulb Replacement
Bulb Replacement . . . . . . . . . . 10-25
Halogen Bulbs . . . . . . . . . . . . . . 10-25
Headlamps, Front TurnSignal, Sidemarker, and
Parking Lamps . . . . . . . . . . . . 10-26
Fog Lamps . . . . . . . . . . . . . . . . . 10-27
Taillamps, Turn Signal, Sidemarker, and
Stoplamps . . . . . . . . . . . . . . . . 10-27
Back-Up Lamps . . . . . . . . . . . . 10-29
License Plate Lamp . . . . . . . . 10-30
Replacement Bulbs . . . . . . . . . 10-30
Electrical System
Electrical System Overload . . . . . . . . . . . . . . . . . . 10-31
Fuses and Circuit Breakers . . . . . . . . . . . . . . . . . . 10-31
Engine Compartment Fuse
Block . . . . . . . . . . . . . . . . . . . . . 10-32
Instrument Panel Fuse Block . . . . . . . . . . . . . . . . . . . . . 10-35
Wheels and Tires
Tires . . . . . . . . . . . . . . . . . . . . . . . . 10-38
Winter Tires . . . . . . . . . . . . . . . . 10-38
Tire Sidewall Labeling . . . . . . 10-39
Tire Designations . . . . . . . . . . . 10-40
Tire Terminology andDefinitions . . . . . . . . . . . . . . . . 10-41
Tire Pressure . . . . . . . . . . . . . . . 10-44
Tire Pressure Monitor
System . . . . . . . . . . . . . . . . . . . 10-45
Tire Pressure Monitor Operation . . . . . . . . . . . . . . . . . 10-46
Tire Inspection . . . . . . . . . . . . . . 10-49
Tire Rotation . . . . . . . . . . . . . . . 10-49
When It Is Time for New Tires . . . . . . . . . . . . . . . . . . . . . . 10-50
Buying New Tires . . . . . . . . . . . 10-51
Page 241 of 378
Black plate (7,1)Chevrolet Orlando Owner Manual - 2012
Vehicle Care 10-7
A.Engine Air Cleaner/Filter on
page 10‑11.
B. Engine Cover.
C. Engine Cooling Fan (Out of View). See Cooling System on
page 10‑13.
D. Engine Oil Fill Cap. See Engine
Oil on page 10‑7.
E. Engine Oil Dipstick (Out of View). See Engine Oil on
page 10‑7.
F. Brake Fluid Reservoir. See Brakes on page 10‑19.
G. Engine Coolant Surge Tank and Pressure Cap. See Engine
Coolant on page 10‑14.
H. Battery on page 10‑21
(Out of View).
I. Remote Positive (+) Terminal. See Jump Starting on
page 10‑73.
J. Engine Compartment Fuse
Block on page 10‑32. K. Windshield Washer Fluid
Reservoir. See Washer Fluid on
page 10‑18.
Engine Oil
To ensure proper engine
performance and long life, careful
attention must be paid to engine oil.
Following these simple, but
important steps will help protect
your investment:
.Always use engine oil approved
to the proper specification and of
the proper viscosity grade. See
“Selecting the Right Engine Oil”
in this section.
.Check the engine oil level
regularly and maintain the
proper oil level. See “Checking
Engine Oil” and“When to Add
Engine Oil” in this section.
.Change the engine oil at the
appropriate time. See Engine Oil
Life System on page 10‑9.
.Always dispose of engine oil
properly. See “What to Do with
Used Oil” in this section.
Checking Engine Oil
It is a good idea to check the engine
oil level at each fuel fill. In order to
get an accurate reading, the vehicle
must be on level ground. The
engine oil dipstick handle is a yellow
loop. See Engine Compartment
Overview on page 10‑6 for the
location of the engine oil dipstick.
Obtaining an accurate oil level
reading is essential:
1. If the engine has been running recently, turn off the engine and
allow several minutes for the oil
to drain back into the oil pan.
Checking the oil level too soon
after engine shutoff will not
provide an accurate oil level
reading.
Page 242 of 378
Black plate (8,1)Chevrolet Orlando Owner Manual - 2012
10-8 Vehicle Care
2. Pull out the dipstick and clean itwith a paper towel or cloth, then
push it back in all the way.
Remove it again, keeping the tip
down, and check the level.
When to Add Engine Oil
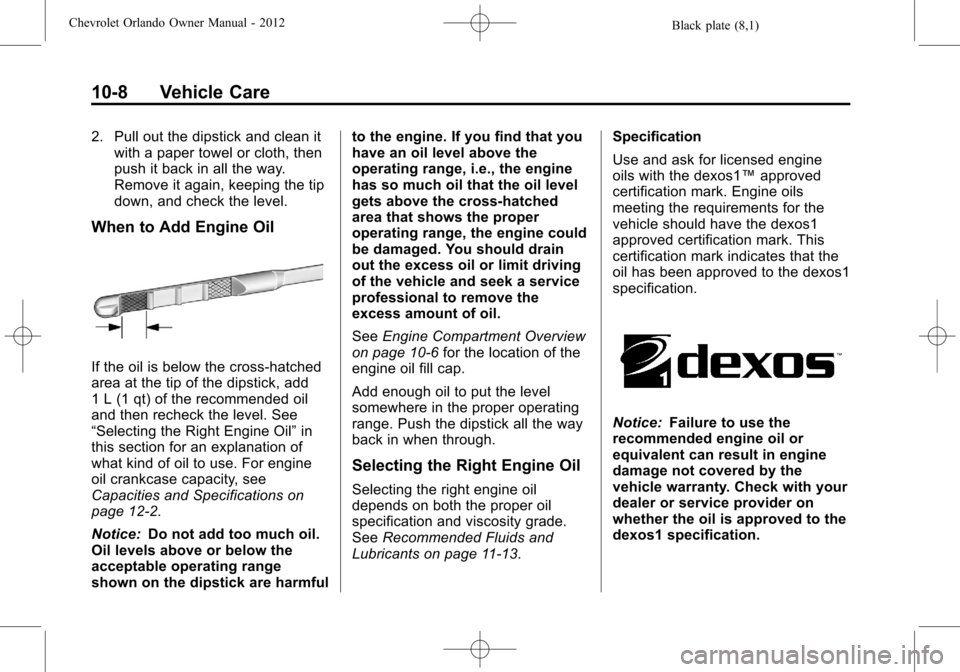
If the oil is below the cross-hatched
area at the tip of the dipstick, add
1 L (1 qt) of the recommended oil
and then recheck the level. See
“Selecting the Right Engine Oil” in
this section for an explanation of
what kind of oil to use. For engine
oil crankcase capacity, see
Capacities and Specifications on
page 12‑2.
Notice: Do not add too much oil.
Oil levels above or below the
acceptable operating range
shown on the dipstick are harmful to the engine. If you find that you
have an oil level above the
operating range, i.e., the engine
has so much oil that the oil level
gets above the cross-hatched
area that shows the proper
operating range, the engine could
be damaged. You should drain
out the excess oil or limit driving
of the vehicle and seek a service
professional to remove the
excess amount of oil.
See
Engine Compartment Overview
on page 10‑6 for the location of the
engine oil fill cap.
Add enough oil to put the level
somewhere in the proper operating
range. Push the dipstick all the way
back in when through.
Selecting the Right Engine Oil
Selecting the right engine oil
depends on both the proper oil
specification and viscosity grade.
See Recommended Fluids and
Lubricants on page 11‑13. Specification
Use and ask for licensed engine
oils with the dexos1™
approved
certification mark. Engine oils
meeting the requirements for the
vehicle should have the dexos1
approved certification mark. This
certification mark indicates that the
oil has been approved to the dexos1
specification.
Notice: Failure to use the
recommended engine oil or
equivalent can result in engine
damage not covered by the
vehicle warranty. Check with your
dealer or service provider on
whether the oil is approved to the
dexos1 specification.