Page 14 of 378
Black plate (8,1)Chevrolet Orlando Owner Manual - 2012
1-8 In Brief
To return the seatback to an upright
position:
1. Lift the lever fully withoutapplying pressure to the
seatback, and the seatback
returns to the upright position.
2. Push and pull on the seatback to make sure it is locked.
See Reclining Seatbacks on
page 3‑5 for more information.
Second Row Seats
The second row seats can be
tumbled to provide access to the
third row seat, and the seatbacks
can be reclined or folded forward.
SeeSecond Row Seats on
page 3‑8 for more information.
Third Row Seats
The third row seats can be stowed
for more cargo space. See Third
Row Seats on page 3‑12 for more
information.
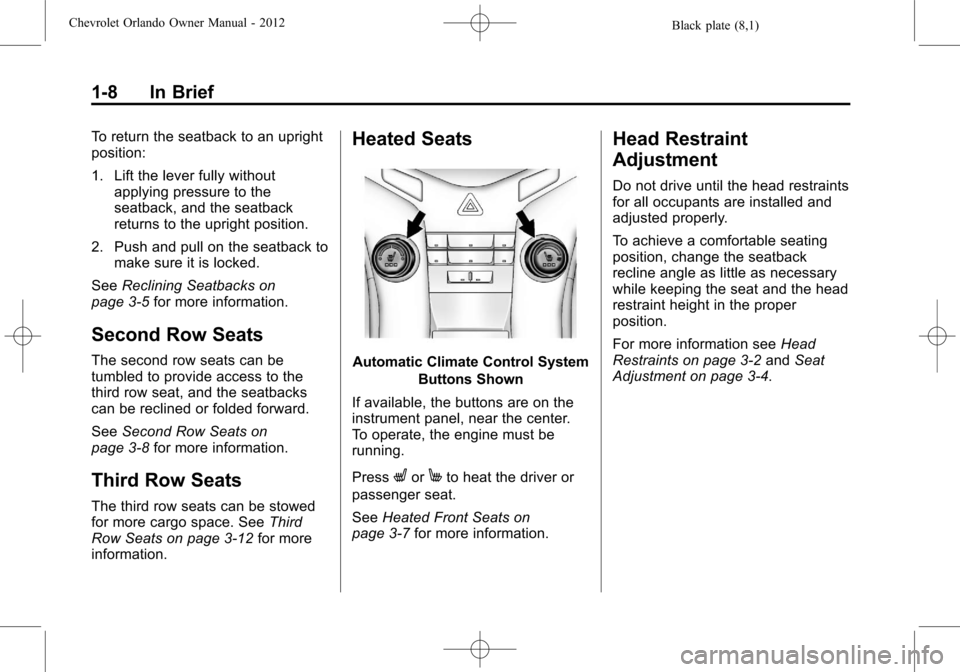
Heated Seats
Automatic Climate Control System
Buttons Shown
If available, the buttons are on the
instrument panel, near the center.
To operate, the engine must be
running.
Press
LorMto heat the driver or
passenger seat.
See Heated Front Seats on
page 3‑7 for more information.
Head Restraint
Adjustment
Do not drive until the head restraints
for all occupants are installed and
adjusted properly.
To achieve a comfortable seating
position, change the seatback
recline angle as little as necessary
while keeping the seat and the head
restraint height in the proper
position.
For more information see Head
Restraints on page 3‑2 andSeat
Adjustment on page 3‑4.
Page 55 of 378
Black plate (9,1)Chevrolet Orlando Owner Manual - 2012
Seats and Restraints 3-9
Folding the Seatbacks
Notice:Folding a rear seat with
the safety belts still fastened may
cause damage to the seat or the
safety belts. Always unbuckle the
safety belts and return them to
their normal stowed position
before folding a rear seat.
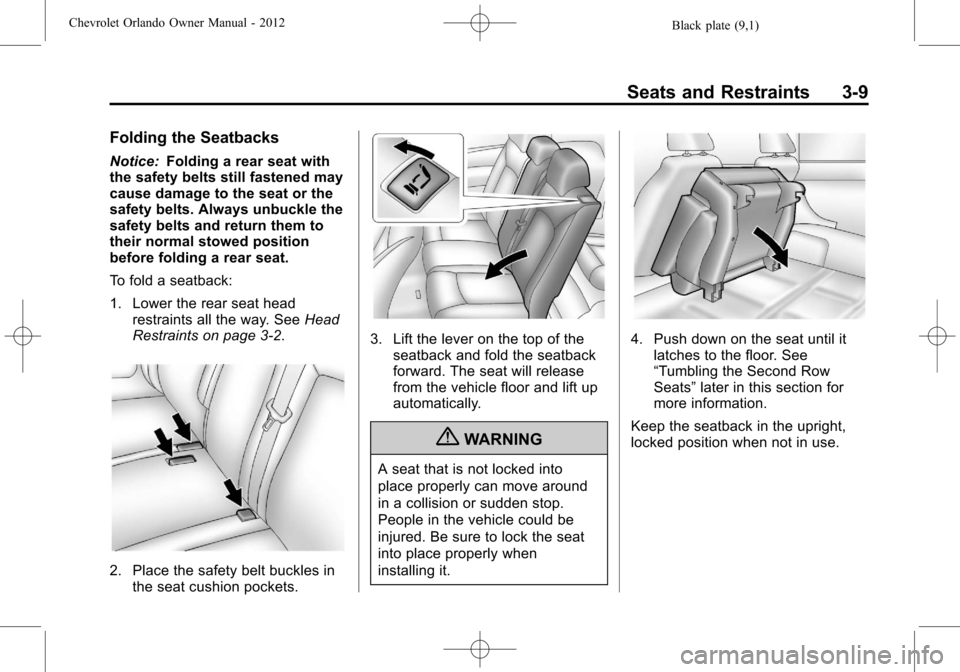
To fold a seatback:
1. Lower the rear seat head restraints all the way. See Head
Restraints on page 3‑2.
2. Place the safety belt buckles in the seat cushion pockets.
3. Lift the lever on the top of the
seatback and fold the seatback
forward. The seat will release
from the vehicle floor and lift up
automatically.
{WARNING
A seat that is not locked into
place properly can move around
in a collision or sudden stop.
People in the vehicle could be
injured. Be sure to lock the seat
into place properly when
installing it.
4. Push down on the seat until itlatches to the floor. See
“Tumbling the Second Row
Seats” later in this section for
more information.
Keep the seatback in the upright,
locked position when not in use.
Page 56 of 378
Black plate (10,1)Chevrolet Orlando Owner Manual - 2012
3-10 Seats and Restraints
Unfolding the Seatbacks
To return a seatback to the upright
position:
{WARNING
If either seatback is not locked, it
could move forward in a sudden
stop or crash. That could cause
injury to the person sitting there.
Always push and pull on the
seatbacks to be sure they are
locked.
1. Raise the seatback to the upright position.
2. Push and pull on the seatback to make sure it is locked in place.
{WARNING
A safety belt that is improperly
routed, not properly attached,
or twisted will not provide the
protection needed in a crash. The
person wearing the belt could be
seriously injured. After raising the
rear seatback, always check to
be sure that the safety belts are
properly routed and attached, and
are not twisted.
3. Remove the safety belt buckles from the seat cushion pockets.
Make sure the safety belts are
not twisted or caught between
the seat cushion and the
seatback.
Tumbling the Second Row
Seats
The second row seats can be folded
and tumbled to allow access to the
third row seats.
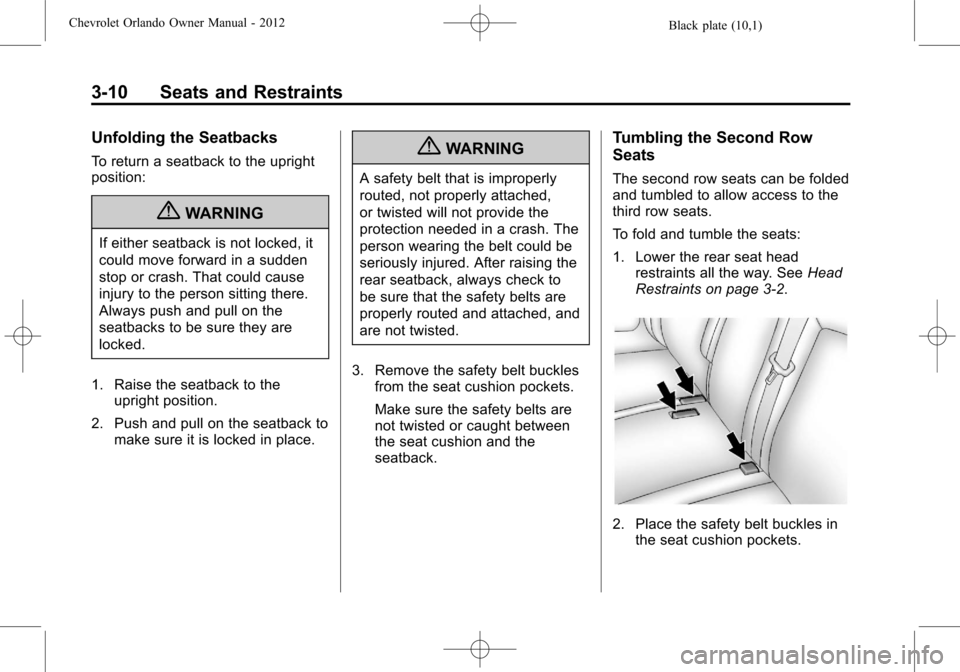
To fold and tumble the seats:
1. Lower the rear seat headrestraints all the way. See Head
Restraints on page 3‑2.
2. Place the safety belt buckles in the seat cushion pockets.
Page 57 of 378
Black plate (11,1)Chevrolet Orlando Owner Manual - 2012
Seats and Restraints 3-11
3. Lift the lever on the top of theseatback and fold the seatback
forward.
The seat will release from the
vehicle floor and lift up
automatically.4. If the seat does not liftcompletely, manually raise it to
the fully tumbled position.
Returning the Seats to the
Sitting Position
{WARNING
A seat that is not locked into
place properly can move around
in a collision or sudden stop.
(Continued)
WARNING (Continued)
People in the vehicle could be
injured. Be sure to lock the seat
into place properly when
installing it.
To return the seats to the sitting
position:
1. Push down on the seat until it latches to the floor.
Page 58 of 378
Black plate (12,1)Chevrolet Orlando Owner Manual - 2012
3-12 Seats and Restraints
2. Raise the seatback to theupright position.
{WARNING
If either seatback is not locked, it
could move forward in a sudden
stop or crash. That could cause
injury to the person sitting there.
Always push and pull on the
seatbacks to be sure they are
locked.
3. Push and pull on the seatback to make sure it is locked in place.
{WARNING
A safety belt that is improperly
routed, not properly attached,
or twisted will not provide the
protection needed in a crash. The
person wearing the belt could be
seriously injured. After raising the
rear seatback, always check to
be sure that the safety belts are
properly routed and attached, and
are not twisted.
4. Remove the safety belt buckles from the seat cushion pockets.
Make sure the safety belts are
not twisted or caught between
the seat cushion and the
seatback.
Third Row Seats
Stowing the Seats
{WARNING
Using the third row seating
position while the second row is
folded, or folded and tumbled,
could cause injury in a sudden
stop or crash. Be sure to return
the seat to the passenger seating
position. Push and pull on the
seat to make sure it is locked into
place.
{WARNING
The hinge area of the seats must
remain clear when stowing or
unstowing the seats. Keep hands
away from the seat hinges to
avoid injury.
Page 59 of 378
Black plate (13,1)Chevrolet Orlando Owner Manual - 2012
Seats and Restraints 3-13
Notice:Folding a rear seat with
the safety belts still fastened may
cause damage to the seat or the
safety belts. Always unbuckle the
safety belts and return them to
their normal stowed position
before folding a rear seat.
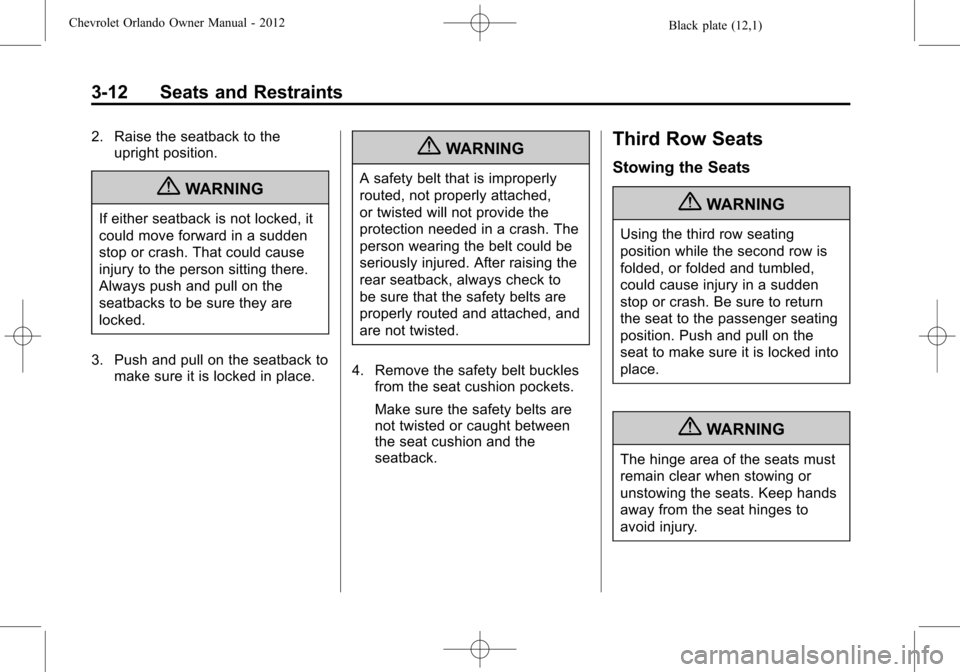
To stow the seats:
1. Unbuckle the safety belts in the
third row seats.
2. Open the liftgate.
3. Insert the outboard safety belts into the guides on the side trim
near the liftgate.4. From the rear of the vehicle, pullthe release handle on the back
of the third row seatback. The
head restraint will release and
fold forward automatically.
5. Grasping the handle, fold the seatback forward and release it.
Page 90 of 378
Black plate (44,1)Chevrolet Orlando Owner Manual - 2012
3-44 Seats and Restraints
Securing a Child Restraint
Designed for the LATCH
System
{WARNING
If a LATCH-type child restraint is
not attached to anchors, the child
restraint will not be able to protect
the child correctly. In a crash, the
child could be seriously injured or
killed. Install a LATCH-type child
restraint properly using the
anchors, or use the vehicle safety
belts to secure the restraint,
following the instructions that
came with the child restraint and
the instructions in this manual.
{WARNING
Do not attach more than one child
restraint to a single anchor.
Attaching more than one child(Continued)
WARNING (Continued)
restraint to a single anchor could
cause the anchor or attachment
to come loose or even break
during a crash. A child or others
could be injured. To reduce the
risk of serious or fatal injuries
during a crash, attach only one
child restraint per anchor.
{WARNING
Children can be seriously injured
or strangled if a shoulder belt is
wrapped around their neck and
the safety belt continues to
tighten. Buckle any unused safety
belts behind the child restraint so
children cannot reach them. Pull
the shoulder belt all the way out
of the retractor to set the lock,
if the vehicle has one, after the
child restraint has been installed. Notice:
Do not let the LATCH
attachments rub against the
vehicle’ s safety belts. This may
damage these parts. If necessary,
move buckled safety belts to
avoid rubbing the LATCH
attachments.
Do not fold the empty rear seat
with a safety belt buckled. This
could damage the safety belt or
the seat. Unbuckle and return the
safety belt to its stowed position,
before folding the seat.
Make sure to attach the child
restraint at the proper anchor
location.
If you need to secure more than one
child restraint in the rear seat, see
Where to Put the Restraint on
page 3‑40.
This system is designed to make
installation of child restraints easier.
When using lower anchors, do not
use the vehicle's safety belts.
Instead use the vehicle's anchors
and child restraint attachments to
Page 202 of 378
Black plate (14,1)Chevrolet Orlando Owner Manual - 2012
9-14 Driving and Operating
If you put things inside the
vehicle—like suitcases,
tools, packages, or anything
else —they will go as fast as
the vehicle goes. If you have to
stop or turn quickly, or if there is
a crash, they will keep going.
{WARNING
Things inside the vehicle can
strike and injure people in a
sudden stop or turn, or in a
crash.
.Put things in the cargo
area of the vehicle. In the
cargo area, put them as
far forward as possible.
Try to spread the weight
evenly.
(Continued)
WARNING (Continued)
.Never stack heavier
things, like suitcases,
inside the vehicle so that
some of them are above
the tops of the seats.
.Do not leave an
unsecured child restraint
in the vehicle.
.Secure loose items in the
vehicle.
.Do not leave a seat folded
down unless needed.
Starting and
Operating
New Vehicle Break-In
Notice: The vehicle does not
need an elaborate break-in. But it
will perform better in the long run
if you follow these guidelines:
.Do not drive at any one
constant speed, fast or slow,
for the first 805 km (500 mi).
Do not make full-throttle
starts. Avoid downshifting to
brake or slow the vehicle.
.During the first 1 000 km
(600 mi), avoid using more
than moderate acceleration
in lower gears and avoid
vehicle speeds above
110 km/h (68 mph).
.Between the first 1 000 km
(600 mi) and 5 000 km
(3,000 mi), heavy
acceleration in lower gears
can be used. Vehicle speeds