2012 CHEVROLET ORLANDO stop start
[x] Cancel search: stop startPage 26 of 378

Black plate (20,1)Chevrolet Orlando Owner Manual - 2012
1-20 In Brief
StabiliTrak®System
The StabiliTrak system assists with
directional control of the vehicle in
difficult driving conditions. The
system is on when the vehicle is
started.
.To turn off both Traction Control
and StabiliTrak, press and hold
the TCS/StabiliTrak button, until
iandgilluminate and the
appropriate DIC message
displays. See Ride Control
System Messages on page 5‑30.
The TCS/StabiliTrak button has
the
gsymbol and is located on
the instrument panel,
.Press the TCS/StabiliTrak button
again to turn on both systems.
For more information, see
StabiliTrak
®System on page 9‑31.
Tire Pressure Monitor
This vehicle may have a Tire
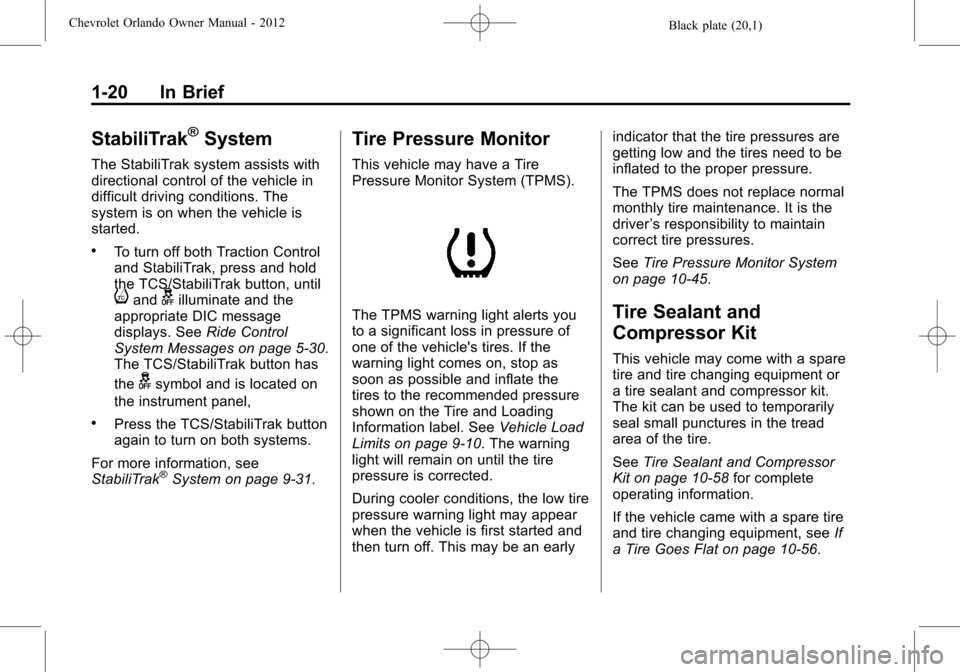
Pressure Monitor System (TPMS).
The TPMS warning light alerts you
to a significant loss in pressure of
one of the vehicle's tires. If the
warning light comes on, stop as
soon as possible and inflate the
tires to the recommended pressure
shown on the Tire and Loading
Information label. See Vehicle Load
Limits on page 9‑10. The warning
light will remain on until the tire
pressure is corrected.
During cooler conditions, the low tire
pressure warning light may appear
when the vehicle is first started and
then turn off. This may be an early indicator that the tire pressures are
getting low and the tires need to be
inflated to the proper pressure.
The TPMS does not replace normal
monthly tire maintenance. It is the
driver
’s responsibility to maintain
correct tire pressures.
See Tire Pressure Monitor System
on page 10‑45.Tire Sealant and
Compressor Kit
This vehicle may come with a spare
tire and tire changing equipment or
a tire sealant and compressor kit.
The kit can be used to temporarily
seal small punctures in the tread
area of the tire.
See Tire Sealant and Compressor
Kit on page 10‑58 for complete
operating information.
If the vehicle came with a spare tire
and tire changing equipment, see If
a Tire Goes Flat on page 10‑56.
Page 27 of 378

Black plate (21,1)Chevrolet Orlando Owner Manual - 2012
In Brief 1-21
Engine Oil Life System
The engine oil life system calculates
engine oil life based on vehicle use
and displays the CHANGE ENGINE
OIL SOON DIC message or
Code 82 DIC message when it is
time to change the engine oil and
filter. The oil life system should be
reset to 100% only following an oil
change.
Resetting the Oil Life System
1. Turn the ignition to ON/RUN withthe engine off.
2. Press the DIC MENU button on the turn signal lever to enter the
Vehicle Information Menu. Use
the thumbwheel to scroll through
the menu items until you reach
REMAINING OIL LIFE.
3. Press the SET/CLR button to reset the oil life at 100%.
4. Turn the ignition to LOCK/OFF.
See Engine Oil Life System on
page 10‑9.
Driving for Better Fuel
Economy
Driving habits can affect fuel
mileage. Here are some driving
tips to get the best fuel economy
possible.
.Avoid fast starts and accelerate
smoothly.
.Brake gradually and avoid
abrupt stops.
.Avoid idling the engine for long
periods of time.
.When road and weather
conditions are appropriate,
use cruise control.
.Always follow posted speed
limits or drive more slowly when
conditions require.
.Keep vehicle tires properly
inflated.
.Combine several trips into a
single trip.
.Replace the vehicle's tires with
the same TPC Spec number
molded into the tire's sidewall
near the size.
.Follow recommended scheduled
maintenance.
Roadside Assistance
Program
U.S.: 1-800-243-8872
TTY Users: 1-888-889-2438
Canada: 1-800-268-6800
As the owner of a new Chevrolet,
you are automatically enrolled in the
Roadside Assistance program.
See Roadside Assistance Program
on page 13‑5 for more information.
Roadside Assistance and OnStar
If you have an active OnStar
subscription, press the
Qbutton
and the current GPS location will be
sent to an OnStar advisor who will
assess your problem, contact
Page 54 of 378

Black plate (8,1)Chevrolet Orlando Owner Manual - 2012
3-8 Seats and Restraints
The passenger seat may take
longer to heat up.
Remote Start Heated Seats
When it is cold outside, the heated
seats can be programmed to turn
on automatically during a remote
vehicle start. The heated seats will
be canceled when the ignition is
turned on. Press the heated seat
button to use the heated seats after
the vehicle is started.
The heated seat button lights will
not turn on during a remote start.
The temperature of an unoccupied
seat may be reduced.
To program the heated seat feature
to enabled, seeVehicle
Personalization on page 5‑32 for
more information.
Rear Seats
Second Row Seats
Adjusting the Seatbacks
{WARNING
If either seatback is not locked, it
could move forward in a sudden
stop or crash. That could cause
injury to the person sitting there.
Always push and pull on the
seatbacks to be sure they are
locked.
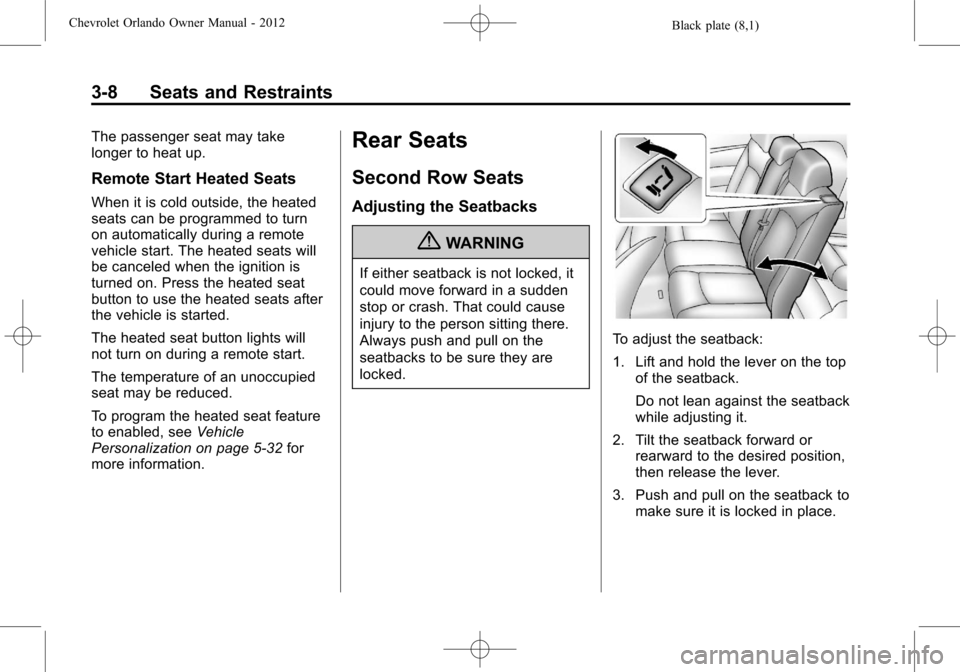
To adjust the seatback:
1. Lift and hold the lever on the top of the seatback.
Do not lean against the seatback
while adjusting it.
2. Tilt the seatback forward or rearward to the desired position,
then release the lever.
3. Push and pull on the seatback to make sure it is locked in place.
Page 64 of 378

Black plate (18,1)Chevrolet Orlando Owner Manual - 2012
3-18 Seats and Restraints
.Wear the shoulder belt over the
shoulder and across the chest.
These parts of the body are best
able to take belt restraining
forces. The shoulder belt locks if
there is a sudden stop or crash.
{WARNING
You can be seriously injured,
or even killed, by not wearing
your safety belt properly.
.Never allow the lap or
shoulder belt to become
loose or twisted.
.Never wear the shoulder belt
under both arms or behind
your back.
.Never route the lap or
shoulder belt over an
armrest.
Lap-Shoulder Belt
All seating positions in the vehicle
have a lap-shoulder belt.
The following instructions explain
how to wear a lap-shoulder belt
properly.
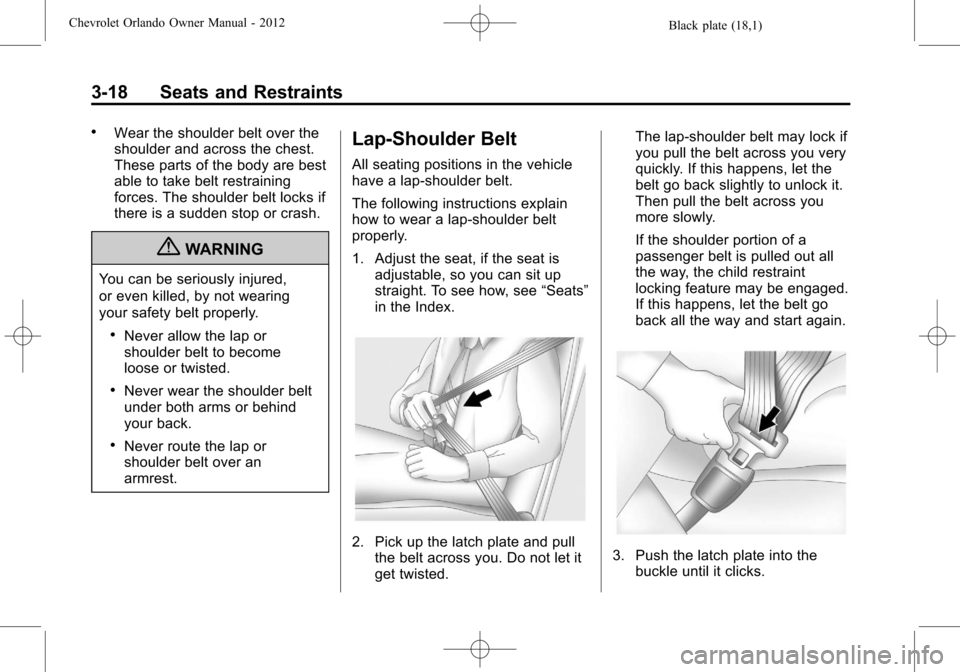
1. Adjust the seat, if the seat isadjustable, so you can sit up
straight. To see how, see “Seats”
in the Index.
2. Pick up the latch plate and pull the belt across you. Do not let it
get twisted. The lap-shoulder belt may lock if
you pull the belt across you very
quickly. If this happens, let the
belt go back slightly to unlock it.
Then pull the belt across you
more slowly.
If the shoulder portion of a
passenger belt is pulled out all
the way, the child restraint
locking feature may be engaged.
If this happens, let the belt go
back all the way and start again.3. Push the latch plate into the
buckle until it clicks.
Page 104 of 378

Black plate (6,1)Chevrolet Orlando Owner Manual - 2012
4-6 Storage
Notice:Loading cargo on the
roof rack that weighs more than
100 kg (220 lbs) or hangs over the
rear or sides of the vehicle may
damage the vehicle. Load cargo
so that it rests evenly between
the crossrails, making sure to
fasten cargo securely.
To prevent damage or loss of cargo
when driving, check to make sure
the crossrails and cargo are
securely fastened. Loading cargo on
the roof rack will make the vehicle's
center of gravity higher. Avoid
high speeds, sudden starts, sharp
turns, sudden braking, or abrupt
maneuvers; otherwise it may result
in loss of control. If driving for a long
distance, on rough roads, or at high
speeds, occasionally stop the
vehicle to make sure the cargo remains in its place. Do not exceed
the maximum vehicle capacity when
loading the vehicle. For more
information on vehicle capacity and
loading, see
Vehicle Load Limits on
page 9‑10.
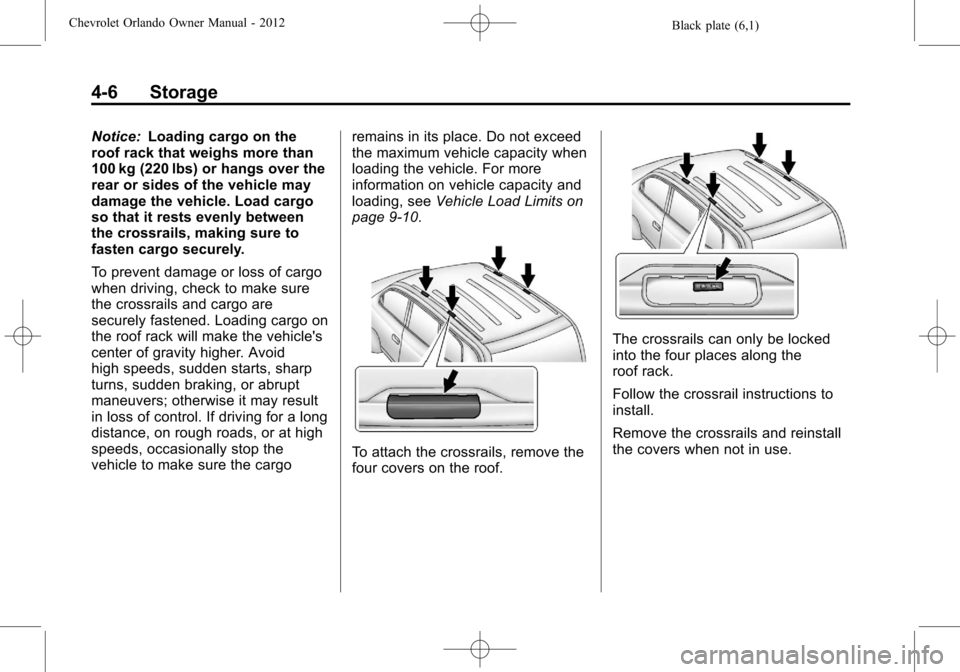
To attach the crossrails, remove the
four covers on the roof.
The crossrails can only be locked
into the four places along the
roof rack.
Follow the crossrail instructions to
install.
Remove the crossrails and reinstall
the covers when not in use.
Page 108 of 378

Black plate (4,1)Chevrolet Orlando Owner Manual - 2012
5-4 Instruments and Controls
3(Adjustable Interval Wipes):
Turn the
3band up for more
frequent wipes or down for less
frequent wipes.
1 (Low Speed): Use for slow
wipes.
2 (High Speed): Use for fast wipes.
Clear snow and ice from the wiper
blades before using them. If frozen
to the windshield, carefully loosen or
thaw them. Damaged wiper blades
should be replaced. See Wiper
Blade Replacement on page 10‑24.
Heavy snow or ice can overload the
wiper motor. A circuit breaker will
stop the motor until it cools down. Wipe Parking
If the ignition is turned to LOCK/
OFF while the wipers are on 1, 2,
or
3, they will immediately stop.
If the windshield wiper lever is then
moved to OFF before the driver
door is opened, or within
10 minutes, the wipers will restart
and move to the base of the
windshield.
If the ignition is turned to LOCK/
OFF during a windshield wash, the
wipers will stop when they reach the
base of the windshield.
Windshield Washer
Pull the windshield wiper lever
toward you to spray windshield
washer fluid and activate the wipers.
The wipers will continue until the
lever is released or the maximum
wash time is reached. When the windshield wiper lever is
released, additional wipes may
occur depending on how long the
windshield washer had been
activated. See
Washer Fluid on
page 10‑18 for information on filling
the windshield washer fluid
reservoir.
{WARNING
In freezing weather, do not use
the washer until the windshield is
warmed. Otherwise the washer
fluid can form ice on the
windshield, blocking your vision.
Page 115 of 378

Black plate (11,1)Chevrolet Orlando Owner Manual - 2012
Instruments and Controls 5-11
Here are four things that some
owners ask about. None of these
show a problem with your fuel
gauge:
.At the service station, the fuel
pump shuts off before the gauge
reads full.
.It takes a little more or less fuel
to fill up than the gauge
indicated. For example, the
gauge may have indicated the
tank was half full, but it actually
took a little more or less than
half the tank's capacity to fill
the tank.
.The gauge moves a little while
turning a corner or speeding up.
.The gauge takes a few seconds
to stabilize after the ignition is
turned on, and will go back to
empty when the ignition is
turned off.
Engine Coolant
Temperature Gauge
This gauge shows the engine
coolant temperature.
If the indicator needle moves to the
hot side of the gauge, the engine is
too hot.
If the vehicle has been operated
under normal driving conditions, pull
off the road, stop the vehicle, and
turn off the engine as soon as
possible.
Safety Belt Reminders
Driver Safety Belt Reminder
Light
There is a driver safety belt
reminder light on the instrument
panel cluster.
When the vehicle is started, this
light flashes and a chime may come
on to remind the driver to fasten
their safety belt. Then the light stays
on solid until the belt is buckled.
This cycle may continue several
times if the driver remains or
becomes unbuckled while the
vehicle is moving.
If the driver safety belt is buckled,
neither the light nor the chime
comes on.
Page 118 of 378

Black plate (14,1)Chevrolet Orlando Owner Manual - 2012
5-14 Instruments and Controls
could damage the emission control
system on the vehicle. Diagnosis
and service might be required.
To prevent more serious damage to
the vehicle:
.Reduce vehicle speed.
.Avoid hard accelerations.
.Avoid steep uphill grades.
.If towing a trailer, reduce the
amount of cargo being hauled as
soon as it is possible.
If the light continues to flash, stop
and park the vehicle. Turn the
vehicle off, wait at least 10 seconds,
and restart the engine. If the light is
still flashing, follow the previous
steps and see your dealer for
service as soon as possible.
Light On Steady: An emission
control system malfunction has
been detected on the vehicle.
Diagnosis and service might be
required. The following may correct an
emission system malfunction:
.Check that the fuel cap is fully
installed. See
Filling the Tank on
page 9‑38. The diagnostic
system can determine if the
fuel cap has been left off or
improperly installed. A loose or
missing fuel cap allows fuel to
evaporate into the atmosphere.
A few driving trips with the cap
properly installed should turn the
light off.
.Check that good quality fuel is
used. Poor fuel quality causes
the engine not to run as
efficiently as designed and may
cause stalling after start-up,
stalling when the vehicle is
changed into gear, misfiring,
hesitation on acceleration,
or stumbling on acceleration.
These conditions might go away
once the engine is warmed up. If one or more of these conditions
occurs, change the fuel brand used.
It will require at least one full tank of
the proper fuel to turn the light off.
See
Recommended Fuel on
page 9‑37.
If none of the above have made the
light turn off, your dealer can check
the vehicle. The dealer has the
proper test equipment and
diagnostic tools to fix any
mechanical or electrical problems
that might have developed.Emissions Inspection and
Maintenance Programs
Some local governments may have
programs to inspect the on-vehicle
emission control equipment. For the
inspection, the emission system test
equipment is connected to the
vehicle’s Data Link
Connector (DLC).