2012 CHEVROLET ORLANDO air condition
[x] Cancel search: air conditionPage 214 of 378
Black plate (26,1)Chevrolet Orlando Owner Manual - 2012
9-26 Driving and Operating
Notice:Do not rest your foot on
the clutch pedal while driving or
while stopped. The pressure can
cause premature wear in the
clutch. The repairs would not be
covered by the vehicle warranty.
1 (First): Press the clutch pedal
fully to the pedal stop and shift into
1 (First). Then slowly let up on the
clutch pedal as you press the
accelerator pedal.
If you come to a complete stop and
it is hard to shift into 1 (First), put
the shift lever in Neutral and let up
on the clutch. Press the clutch pedal
back down. Then shift into 1 (First).
2 (Second): Press the clutch pedal
fully to the pedal stop as you let up
on the accelerator pedal and shift
into 2 (Second). Then, slowly let up
on the clutch pedal as you press the
accelerator pedal. 3 (Third), 4 (Fourth), 5 (Fifth) and
6 (Sixth):
Shift into 3 (Third),
4 (Fourth), 5 (Fifth) and 6 (Sixth) the
same way you do for 2 (Second).
Slowly let up on the clutch pedal as
you press the accelerator pedal.
For the best fuel economy, use
6 (Sixth) gear whenever vehicle
speed and driving conditions allow.
The vehicle may have an up-shift
light in the instrument cluster.
It shows when to shift to the next
higher gear for the best fuel
economy. During normal driving, upshifts
should occur between 1,300 and
2,500 rpm, and downshifts should
occur between 1,500 and
1,000 rpm.
To stop, let up on the accelerator
pedal and press the brake pedal.
Just before the vehicle stops, press
the clutch pedal and the brake
pedal, and shift to Neutral.
Neutral:
Use this position when
you start or idle the engine. The
shift lever is in Neutral when it is
centered in the shift pattern, not in
any gear.
R (Reverse): To back up, with the
vehicle at a complete stop, press
down the clutch pedal. Then pull up
the ring on the shift lever, and shift
into R (Reverse). Let up on the
clutch pedal slowly while pressing
the accelerator pedal.
Page 224 of 378
Black plate (36,1)Chevrolet Orlando Owner Manual - 2012
9-36 Driving and Operating
PARK ASSIST OFF:If the URPA
system does not activate due to a
temporary condition, the message
displays on the DIC. This can occur
under the following conditions:
.The driver has disabled the
system.
.The ultrasonic sensors are not
clean. Keep the vehicle's rear
bumper free of mud, dirt, snow,
ice, and slush. For cleaning
instructions, see Exterior Care
on page 10‑79.
.The park assist sensors are
covered by frost or ice. Frost or
ice can form around and behind
the sensors and may not always
be seen; this can occur after
washing the vehicle in cold
weather. The message may not
clear until the frost or ice has
melted.
.A trailer was attached to the
vehicle, or an object was
hanging out of the liftgate during
the last drive cycle. Once the
object is removed, URPA will
return to normal operation.
.A tow bar is attached to the
vehicle.
.The bumper is damaged. Take
the vehicle to your dealer to
repair the system.
.Other conditions, such as
vibrations from a jackhammer or
the compression of air brakes on
a very large truck, are affecting
system performance.
Fuel
Use of the recommended fuel is
an important part of the proper
maintenance of this vehicle. To help
keep the engine clean and maintain
optimum vehicle performance, we
recommend the use of gasoline
advertised as TOP TIER Detergent
Gasoline.
Look for the TOP TIER label on the
fuel pump to ensure gasoline meets
enhanced detergency standards
developed by auto companies. A list
of marketers providing TOP TIER
Detergent Gasoline can be found at
www.toptiergas.com.
Page 245 of 378
Black plate (11,1)Chevrolet Orlando Owner Manual - 2012
Vehicle Care 10-11
Change the fluid and filter at the
intervals listed inMaintenance
Schedule on page 11‑3, and be
sure to use the fluid listed in
Recommended Fluids and
Lubricants on page 11‑13.
Manual Transmission
Fluid
How to Check Manual
Transmission Fluid
It is not necessary to check the
manual transmission fluid level.
A transmission fluid leak is the only
reason for fluid loss. If a leak
occurs, take the vehicle to your
dealer and have it repaired as soon
as possible. See Recommended
Fluids and Lubricants on page 11‑13
for the proper fluid to use.
Hydraulic Clutch
For vehicles with a manual
transmission, it is not necessary to
regularly check brake/clutch fluid
unless there is a leak suspected. Adding fluid will not correct a leak.
A fluid loss in this system could
indicate a problem. Have the
system inspected and repaired.
When to Check and What
to Use
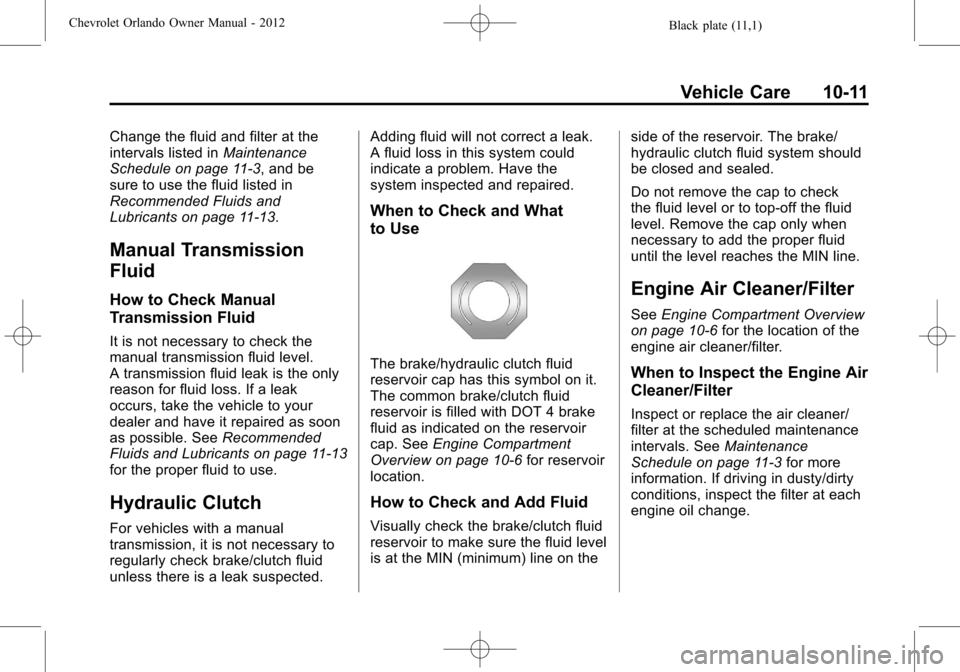
The brake/hydraulic clutch fluid
reservoir cap has this symbol on it.
The common brake/clutch fluid
reservoir is filled with DOT 4 brake
fluid as indicated on the reservoir
cap. See
Engine Compartment
Overview on page 10‑6 for reservoir
location.
How to Check and Add Fluid
Visually check the brake/clutch fluid
reservoir to make sure the fluid level
is at the MIN (minimum) line on the side of the reservoir. The brake/
hydraulic clutch fluid system should
be closed and sealed.
Do not remove the cap to check
the fluid level or to top‐off the fluid
level. Remove the cap only when
necessary to add the proper fluid
until the level reaches the MIN line.
Engine Air Cleaner/Filter
See
Engine Compartment Overview
on page 10‑6 for the location of the
engine air cleaner/filter.
When to Inspect the Engine Air
Cleaner/Filter
Inspect or replace the air cleaner/
filter at the scheduled maintenance
intervals. See Maintenance
Schedule on page 11‑3 for more
information. If driving in dusty/dirty
conditions, inspect the filter at each
engine oil change.
Page 252 of 378
Black plate (18,1)Chevrolet Orlando Owner Manual - 2012
10-18 Vehicle Care
.Idles for long periods in traffic.
.Tows a trailer.
If the engine coolant temperature
gauge is in the overheat zone with
no sign of steam:
1. Turn the air conditioning off.
2. Turn the heater on to the highest temperature and to the highest
fan speed. Open the windows as
necessary.
3. In heavy traffic, let the engine idle in N (Neutral) while stopped.
If it is safe to do so, pull off the
road, shift to P (Park) or
N (Neutral) and let the
engine idle.
If the engine coolant temperature
gauge is no longer in the overheat
zone, the vehicle can be driven.
Continue to drive the vehicle slowly
for about 10 minutes. Keep a safe
vehicle distance from the vehicle in
front. If the engine coolant
temperature gauge does not go into
the overheat zone, continue to drive
normally. If the engine coolant temperature
gauge is still in the overheat zone,
pull over, stop, and park the vehicle
right away.
If there is no sign of steam, idle the
engine for three minutes while
parked. If the engine coolant
temperature gauge is still in the
overheat zone, turn off the engine
until it cools down.
Washer Fluid
What to Use
Read the manufacturer's
instructions before refilling the
windshield washer fluid. If operating
the vehicle in an area where the
temperature may fall below freezing,
use a fluid that has sufficient
protection against freezing.
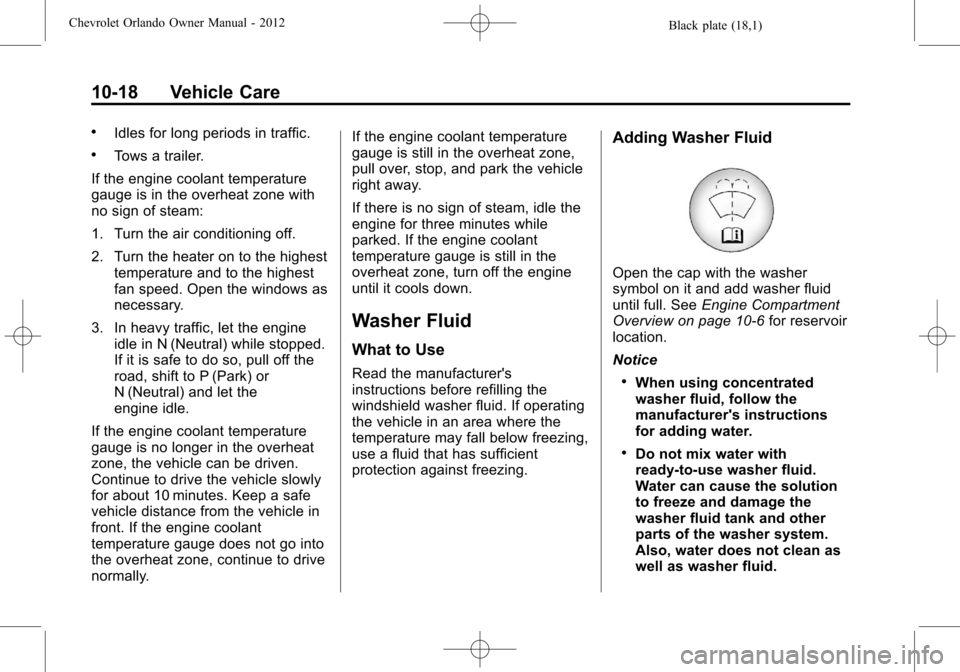
Adding Washer Fluid
Open the cap with the washer
symbol on it and add washer fluid
until full. See
Engine Compartment
Overview on page 10‑6 for reservoir
location.
Notice
.When using concentrated
washer fluid, follow the
manufacturer's instructions
for adding water.
.Do not mix water with
ready-to-use washer fluid.
Water can cause the solution
to freeze and damage the
washer fluid tank and other
parts of the washer system.
Also, water does not clean as
well as washer fluid.
Page 253 of 378
Black plate (19,1)Chevrolet Orlando Owner Manual - 2012
Vehicle Care 10-19
.Fill the washer fluid tank only
three-quarters full when it is
very cold. This allows for
fluid expansion if freezing
occurs, which could damage
the tank if it is
completely full.
.Do not use engine coolant
(antifreeze) in the windshield
washer. It can damage the
windshield washer system
and paint.
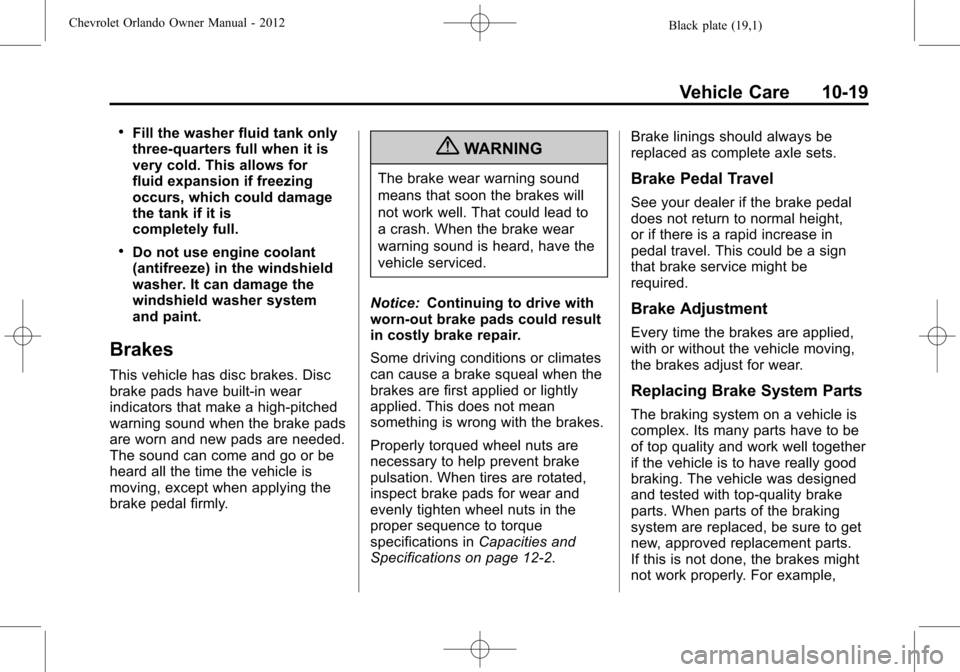
Brakes
This vehicle has disc brakes. Disc
brake pads have built-in wear
indicators that make a high-pitched
warning sound when the brake pads
are worn and new pads are needed.
The sound can come and go or be
heard all the time the vehicle is
moving, except when applying the
brake pedal firmly.
{WARNING
The brake wear warning sound
means that soon the brakes will
not work well. That could lead to
a crash. When the brake wear
warning sound is heard, have the
vehicle serviced.
Notice: Continuing to drive with
worn-out brake pads could result
in costly brake repair.
Some driving conditions or climates
can cause a brake squeal when the
brakes are first applied or lightly
applied. This does not mean
something is wrong with the brakes.
Properly torqued wheel nuts are
necessary to help prevent brake
pulsation. When tires are rotated,
inspect brake pads for wear and
evenly tighten wheel nuts in the
proper sequence to torque
specifications in Capacities and
Specifications on page 12‑2. Brake linings should always be
replaced as complete axle sets.Brake Pedal Travel
See your dealer if the brake pedal
does not return to normal height,
or if there is a rapid increase in
pedal travel. This could be a sign
that brake service might be
required.
Brake Adjustment
Every time the brakes are applied,
with or without the vehicle moving,
the brakes adjust for wear.
Replacing Brake System Parts
The braking system on a vehicle is
complex. Its many parts have to be
of top quality and work well together
if the vehicle is to have really good
braking. The vehicle was designed
and tested with top-quality brake
parts. When parts of the braking
system are replaced, be sure to get
new, approved replacement parts.
If this is not done, the brakes might
not work properly. For example,
Page 268 of 378
Black plate (34,1)Chevrolet Orlando Owner Manual - 2012
10-34 Vehicle Care
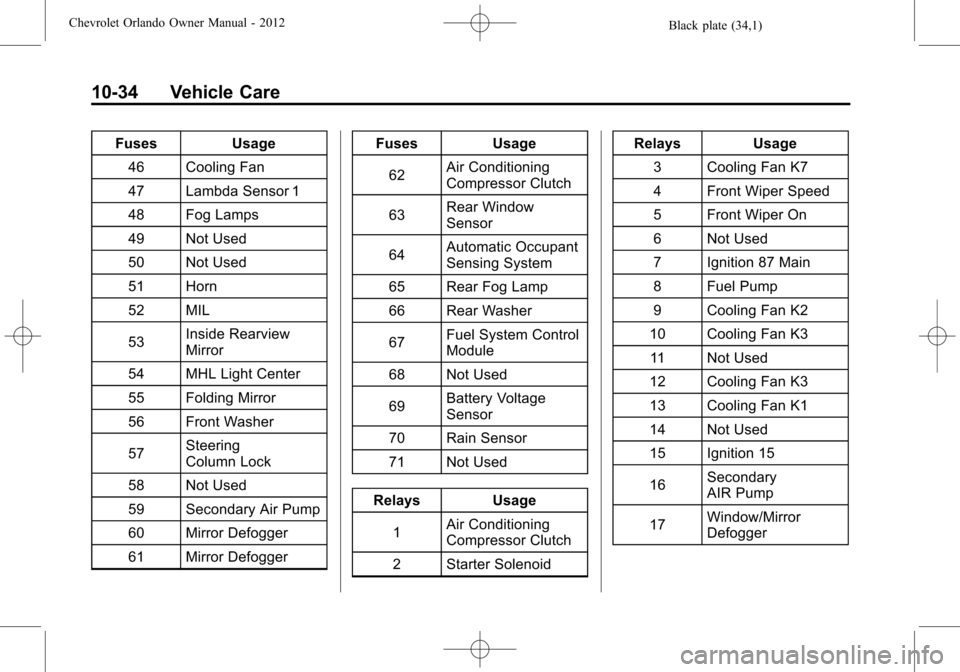
FusesUsage
46 Cooling Fan
47 Lambda Sensor 1
48 Fog Lamps
49 Not Used
50 Not Used
51 Horn
52 MIL
53 Inside Rearview
Mirror
54 MHL Light Center
55 Folding Mirror
56 Front Washer
57 Steering
Column Lock
58 Not Used
59 Secondary Air Pump
60 Mirror Defogger
61 Mirror Defogger Fuses
Usage
62 Air Conditioning
Compressor Clutch
63 Rear Window
Sensor
64 Automatic Occupant
Sensing System
65 Rear Fog Lamp
66 Rear Washer
67 Fuel System Control
Module
68 Not Used
69 Battery Voltage
Sensor
70 Rain Sensor
71 Not Used
Relays Usage 1 Air Conditioning
Compressor Clutch
2 Starter Solenoid Relays Usage
3 Cooling Fan K7
4 Front Wiper Speed
5 Front Wiper On
6 Not Used
7 Ignition 87 Main
8 Fuel Pump
9 Cooling Fan K2
10 Cooling Fan K3 11 Not Used
12 Cooling Fan K3
13 Cooling Fan K1
14 Not Used
15 Ignition 15
16 Secondary
AIR Pump
17 Window/Mirror
Defogger
Page 270 of 378
Black plate (36,1)Chevrolet Orlando Owner Manual - 2012
10-36 Vehicle Care
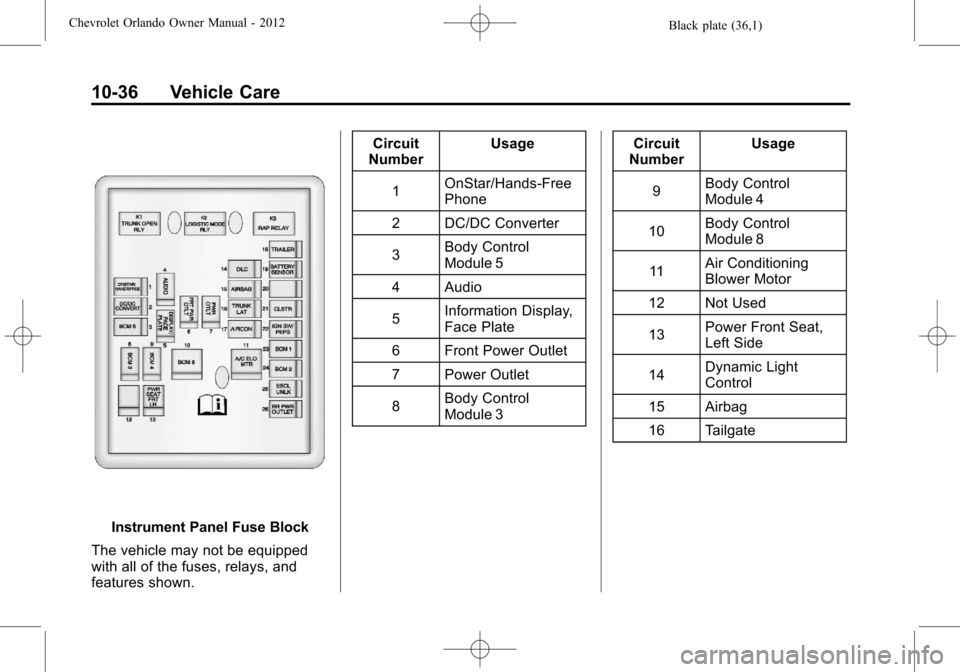
Instrument Panel Fuse Block
The vehicle may not be equipped
with all of the fuses, relays, and
features shown. Circuit
Number Usage
1 OnStar/Hands‐Free
Phone
2 DC/DC Converter
3 Body Control
Module 5
4 Audio
5 Information Display,
Face Plate
6 Front Power Outlet
7 Power Outlet
8 Body Control
Module 3 Circuit
Number Usage
9 Body Control
Module 4
10 Body Control
Module 8
11 Air Conditioning
Blower Motor
12 Not Used
13 Power Front Seat,
Left Side
14 Dynamic Light
Control
15 Airbag
16 Tailgate
Page 271 of 378
Black plate (37,1)Chevrolet Orlando Owner Manual - 2012
Vehicle Care 10-37
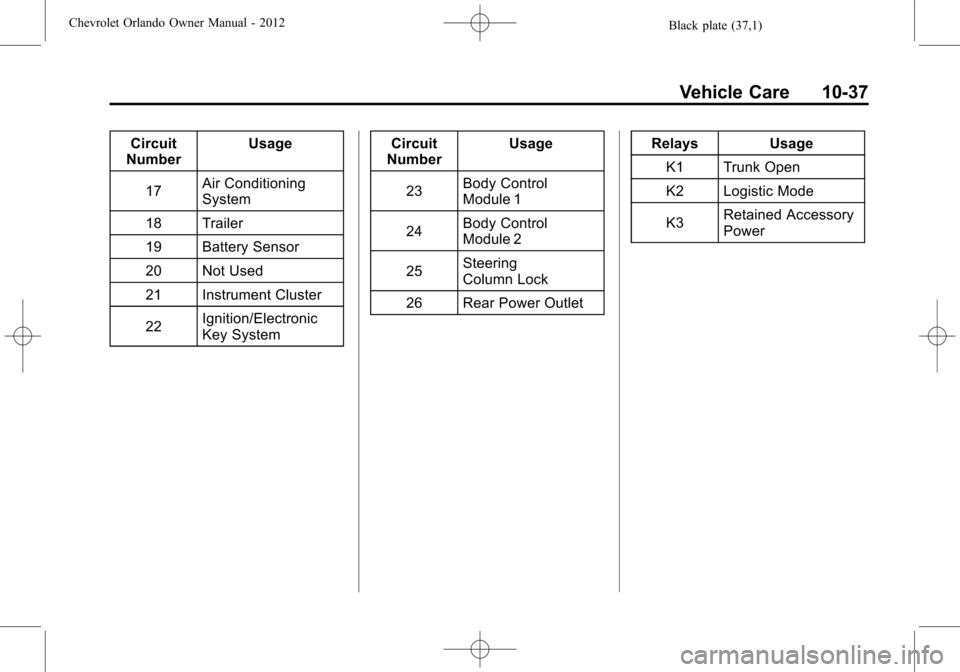
Circuit
Number Usage
17 Air Conditioning
System
18 Trailer
19 Battery Sensor
20 Not Used
21 Instrument Cluster
22 Ignition/Electronic
Key System Circuit
Number Usage
23 Body Control
Module 1
24 Body Control
Module 2
25 Steering
Column Lock
26 Rear Power Outlet Relays Usage
K1 Trunk Open
K2 Logistic Mode
K3 Retained Accessory
Power