2012 CHEVROLET ORLANDO center console
[x] Cancel search: center consolePage 22 of 378
Black plate (16,1)Chevrolet Orlando Owner Manual - 2012
1-16 In Brief
5. To save the time and return tothe Time Settings menu, press
the BACK button at any time or
press the MENU knob after
adjusting the minutes.
Setting the 12/24 Hour Format
1. Press the CONFIG button and select Time Settings.
2. Highlight 12/24 Hour Format.
3. Press the MENU knob to select the 12 hour or 24 hour display
format.
For more information, see Clock on
page 5‑5.
Satellite Radio
Vehicles with an XM™ satellite radio
tuner and a valid XM satellite radio
subscription can receive XM
programming.
XM Satellite Radio Service
XM is a satellite radio service based
in the 48 contiguous United States
and 10 Canadian provinces. XM
satellite radio has a wide variety of programming and commercial-free
music, coast to coast, and in
digital-quality sound. A fee is
required to receive the XM service.
For more information refer to:
.www.xmradio.com or call
1-800-929-2100 (U.S.).
.www.xmradio.ca or call
1-877-438-9677 (Canada).
For more information, see Satellite
Radio on page 7‑12.
Portable Audio Devices
Some vehicles have a 3.5 mm
(1/8 in) auxiliary input and a USB
port located in the center console.
External devices such as iPods®,
laptop computers, MP3 players, CD
changers, and USB drives may be
connected, depending on the audio
system.
For more information, see Auxiliary
Devices on page 7‑18.
Bluetooth®
The Bluetooth system allows users
with a Bluetooth-enabled cell phone
to make and receive hands-free
calls using the vehicle audio system
and controls.
The Bluetooth-enabled cell phone
must be paired with the in-vehicle
Bluetooth system before it can be
used in the vehicle. Not all phones
will support all functions.
See Bluetooth (Voice Recognition)
on page 7‑26 orBluetooth
(Infotainment Controls) on
page 7‑23 orBluetooth (Overview)
on page 7‑21.
Page 25 of 378
Black plate (19,1)Chevrolet Orlando Owner Manual - 2012
In Brief 1-19
Storage Compartments
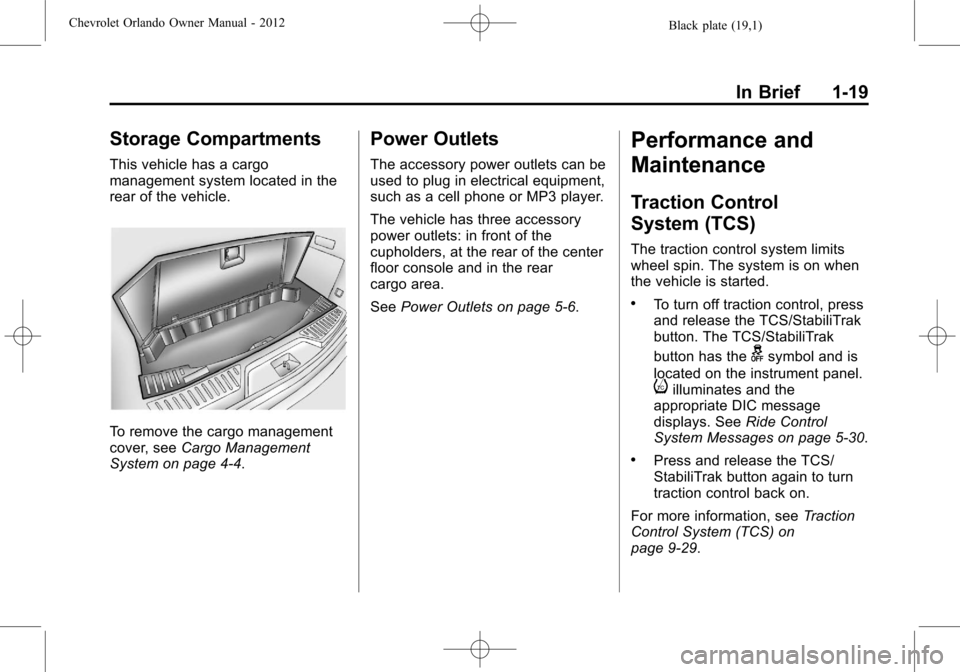
This vehicle has a cargo
management system located in the
rear of the vehicle.
To remove the cargo management
cover, seeCargo Management
System on page 4‑4.
Power Outlets
The accessory power outlets can be
used to plug in electrical equipment,
such as a cell phone or MP3 player.
The vehicle has three accessory
power outlets: in front of the
cupholders, at the rear of the center
floor console and in the rear
cargo area.
See Power Outlets on page 5‑6.
Performance and
Maintenance
Traction Control
System (TCS)
The traction control system limits
wheel spin. The system is on when
the vehicle is started.
.To turn off traction control, press
and release the TCS/StabiliTrak
button. The TCS/StabiliTrak
button has the
gsymbol and is
located on the instrument panel.
iilluminates and the
appropriate DIC message
displays. See Ride Control
System Messages on page 5‑30.
.Press and release the TCS/
StabiliTrak button again to turn
traction control back on.
For more information, see Traction
Control System (TCS) on
page 9‑29.
Page 45 of 378
Black plate (17,1)Chevrolet Orlando Owner Manual - 2012
Keys, Doors, and Windows 2-17
Sun Visors
Pull the sun visor down to block
glare. Detach the sun visor from the
center mount to pivot to the side
window, or to extend along the rod,
if available.
Lighted Visor Vanity Mirror
Pull the visor down and lift the cover
to access the mirror. A light comes
on when the cover is lifted and goes
out when it is closed.
Roof
Sunroof
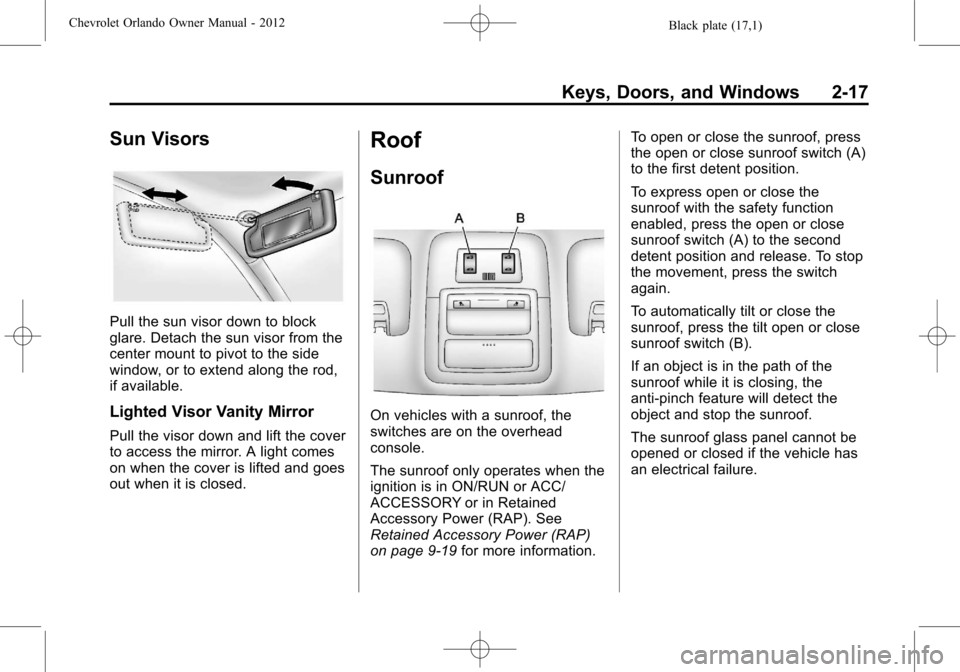
On vehicles with a sunroof, the
switches are on the overhead
console.
The sunroof only operates when the
ignition is in ON/RUN or ACC/
ACCESSORY or in Retained
Accessory Power (RAP). See
Retained Accessory Power (RAP)
on page 9‑19for more information. To open or close the sunroof, press
the open or close sunroof switch (A)
to the first detent position.
To express open or close the
sunroof with the safety function
enabled, press the open or close
sunroof switch (A) to the second
detent position and release. To stop
the movement, press the switch
again.
To automatically tilt or close the
sunroof, press the tilt open or close
sunroof switch (B).
If an object is in the path of the
sunroof while it is closing, the
anti-pinch feature will detect the
object and stop the sunroof.
The sunroof glass panel cannot be
opened or closed if the vehicle has
an electrical failure.
Page 99 of 378
Black plate (1,1)Chevrolet Orlando Owner Manual - 2012
Storage 4-1
Storage
Storage Compartments
Instrument Panel Storage . . . . . 4-1
Glove Box . . . . . . . . . . . . . . . . . . . . 4-1
Front Storage . . . . . . . . . . . . . . . . . 4-1
Center Console Storage . . . . . . 4-2
Additional Storage Features
Cargo Cover . . . . . . . . . . . . . . . . . . 4-2
Lashing Eyes . . . . . . . . . . . . . . . . . 4-4
Cargo ManagementSystem . . . . . . . . . . . . . . . . . . . . . . 4-4
Convenience Net . . . . . . . . . . . . . 4-5
Roof Rack System
Roof Rack System . . . . . . . . . . . . 4-5
Storage
Compartments
Instrument Panel Storage
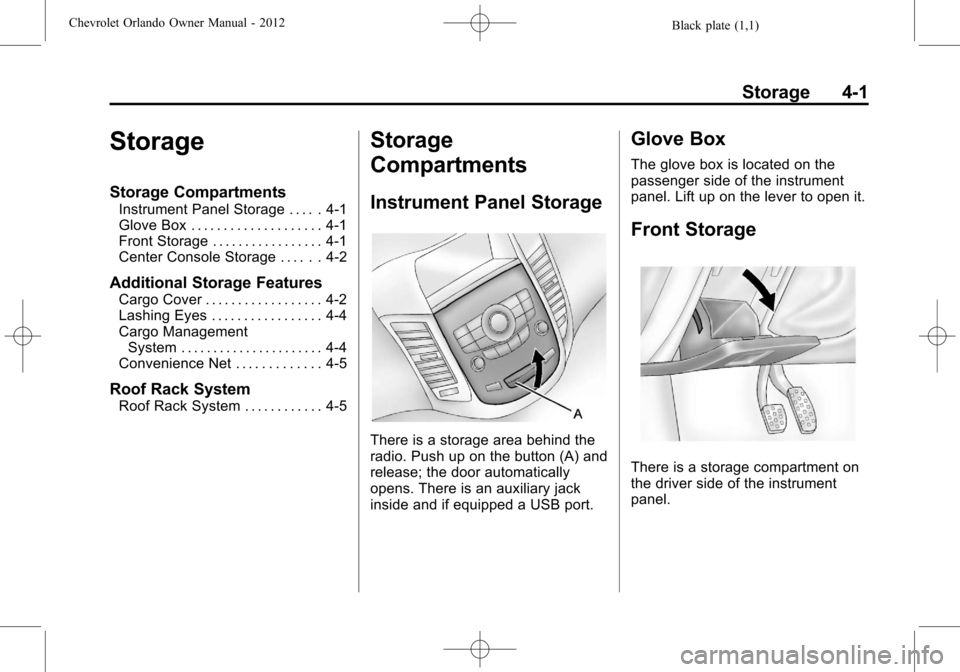
There is a storage area behind the
radio. Push up on the button (A) and
release; the door automatically
opens. There is an auxiliary jack
inside and if equipped a USB port.
Glove Box
The glove box is located on the
passenger side of the instrument
panel. Lift up on the lever to open it.
Front Storage
There is a storage compartment on
the driver side of the instrument
panel.
Page 100 of 378
Black plate (2,1)Chevrolet Orlando Owner Manual - 2012
4-2 Storage
Center Console Storage
Open Storage
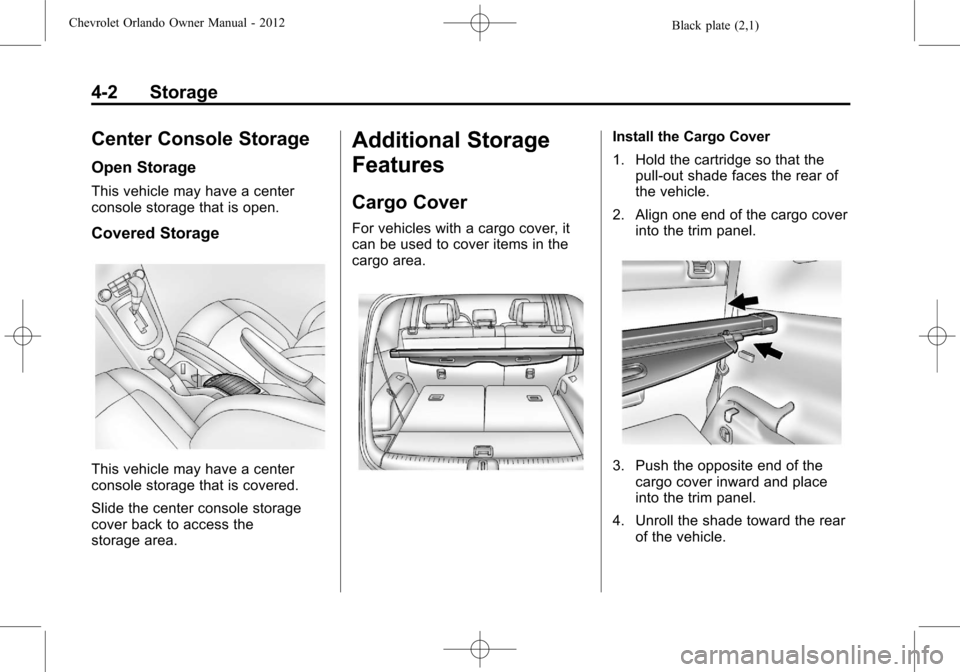
This vehicle may have a center
console storage that is open.
Covered Storage
This vehicle may have a center
console storage that is covered.
Slide the center console storage
cover back to access the
storage area.
Additional Storage
Features
Cargo Cover
For vehicles with a cargo cover, it
can be used to cover items in the
cargo area.
Install the Cargo Cover
1. Hold the cartridge so that thepull-out shade faces the rear of
the vehicle.
2. Align one end of the cargo cover into the trim panel.
3. Push the opposite end of thecargo cover inward and place
into the trim panel.
4. Unroll the shade toward the rear of the vehicle.
Page 110 of 378

Black plate (6,1)Chevrolet Orlando Owner Manual - 2012
5-6 Instruments and Controls
Setting the Time
1. Press the CONFIG button andselect Time Settings.
2. Select Set Time.
3. Turn the MENU knob to adjust the highlighted number.
4. Press the MENU knob to select the next number.
5. To save the time and return to the Time Settings menu, press
the BACK button at any time or
press the MENU knob after
adjusting the minutes.
Setting the 12/24 Hour Format
1. Press the CONFIG button andselect Time Settings.
2. Highlight 12/24 Hour Format.
3. Press the MENU knob to select the 12 hour or 24 hour display
format.
Power Outlets
The accessory power outlets can be
used to plug in electrical equipment,
such as a cell phone or MP3 player.
The vehicle has three accessory
power outlets: in front of the
cupholders, at the rear of the center
floor console and in the rear
cargo area.
Remove the cover to access, and
replace when not in use.
{WARNING
Power is always supplied to the
outlets. Do not leave electrical
equipment plugged in when the
vehicle is not in use because the
vehicle could catch fire and cause
injury or death. Notice:
Leaving electrical
equipment plugged in for an
extended period of time while the
vehicle is off will drain the
battery. Always unplug electrical
equipment when not in use and
do not plug in equipment that
exceeds the maximum 20 ampere
rating.
Certain accessory power plugs
may not be compatible with the
accessory power outlet and could
overload vehicle or adapter fuses.
If a problem is experienced, see
your dealer.
When adding electrical equipment,
be sure to follow the proper
installation instructions included
with the equipment. See Add-On
Electrical Equipment on page 9‑46.
Notice: Hanging heavy
equipment from the power outlet
can cause damage not covered
by the vehicle warranty. The
power outlets are designed for
accessory power plugs only, such
as cell phone charge cords.
Page 111 of 378

Black plate (7,1)Chevrolet Orlando Owner Manual - 2012
Instruments and Controls 5-7
Cigarette Lighter
For vehicles with a cigarette lighter,
it is located in the center floor
console.
The ignition must be turned to ACC/
ACCESSORY or ON/RUN.
To activate the cigarette lighter,
push it into the heating element and
let go. When the lighter is ready it
will pop back out.
Notice:Holding a cigarette lighter
in while it is heating does not let
the lighter back away from the
heating element when it is hot.
Damage from overheating can
occur to the lighter or heating
element, or a fuse could be
blown. Do not hold a cigarette
lighter in while it is heating.
Ashtrays
The vehicle may have a removable
ashtray.
The removable ashtray can be
placed in the front cupholders. To
open the removable ashtray, lift the
lid of the ashtray. After using, close
the lid.
Notice: If papers, pins, or other
flammable items are put in the
ashtray, hot cigarettes or other
smoking materials could ignite
them and possibly damage the
vehicle. Never put flammable
items in the ashtray.
Warning Lights,
Gauges, and
Indicators
Warning lights and gauges can
signal that something is wrong
before it becomes serious enough
to cause an expensive repair or
replacement. Paying attention to the
warning lights and gauges could
prevent injury.
Warning lights come on when there
could be a problem with a vehicle
function. Some warning lights come
on briefly when the engine is started
to indicate they are working.
Page 368 of 378

Black plate (2,1)Chevrolet Orlando Owner Manual - 2012
i-2 INDEX
Blade Replacement, Wiper . . . 10-24
Bluetooth . . . . . . . . . . 7-21, 7-23, 7-26
BrakeSystem Warning Light . . . . . . . . 5-15
Brakes . . . . . . . . . . . . . . . . . . . . . . . . 10-19 Antilock . . . . . . . . . . . . . . . . . . . . . . . 9-27
Assist . . . . . . . . . . . . . . . . . . . . . . . . . 9-29
Fluid . . . . . . . . . . . . . . . . . . . . . . . . 10-20
Parking . . . . . . . . . . . . . . . . . . . . . . . 9-28
System Messages . . . . . . . . . . . . 5-27
Braking . . . . . . . . . . . . . . . . . . . . . . . . . 9-3
Break-In, New Vehicle . . . . . . . . . 9-14
Bulb Replacement . . . . . . . . . . . . 10-30
Back-up Lamps . . . . . . . . . . . . . 10-29
Fog Lamps . . . . . . . . . . . . . . . . . 10-27
Halogen Bulbs . . . . . . . . . . . . . . 10-25
Headlamp Aiming . . . . . . . . . . . 10-25
Headlamps . . . . . . . . . . . . . . . . . 10-25
Headlamps, Front TurnSignal, Sidemarker, and
Parking Lamps . . . . . . . . . . . . 10-26
License Plate Lamps . . . . . . . 10-30
Taillamps, Turn Signal, Sidemarker, and
Stoplamps . . . . . . . . . . . . . . . . 10-27
Buying New Tires . . . . . . . . . . . . . 10-51C
Calibration . . . . . . . . . . . . . . . . . . . . . . 5-5
Capacities and Specifications . . . . . . . . . . . . . . . . 12-2
Carbon Monoxide Engine Exhaust . . . . . . . . . . . . . . . 9-21
Liftgate . . . . . . . . . . . . . . . . . . . . . . . . 2-8
Winter Driving . . . . . . . . . . . . . . . . . 9-8
Cargo Cover . . . . . . . . . . . . . . . . . . . . . . . . . . 4-2
Management System . . . . . . . . . . 4-4
Cautions, Danger, and Warnings . . . . . . . . . . . . . . . . . . . . . . . . iv
CD Player . . . . . . . . . . . . . . . . . . . . . 7-16
Center Console Storage . . . . . . . . 4-2
Chains, Tire . . . . . . . . . . . . . . . . . . 10-56
Charging System Light . . . . . . . . 5-12
Check Engine Light . . . . . . . . . . . . . . . . . . 5-13
IgnitionTransmission Lock . . . . . . . . 10-23 Child Restraints
Infants and Young
Children . . . . . . . . . . . . . . . . . . . . . 3-35
Lower Anchors and Tethers for Children . . . . . . . . . 3-41
Older Children . . . . . . . . . . . . . . . . 3-33
Securing . . . . . . . . . . . . . . . . 3-46, 3-49
Systems . . . . . . . . . . . . . . . . . . . . . . 3-38
Child-View Mirror . . . . . . . . . . . . . . 2-13
Cigarette Lighter . . . . . . . . . . . . . . . . 5-7
Circuit Breakers . . . . . . . . . . . . . . 10-31
Cleaning Exterior Care . . . . . . . . . . . . . . . 10-79
Interior Care . . . . . . . . . . . . . . . . 10-82
Climate Control Systems . . . . . . . 8-1 Air Conditioning . . . . . . . . . . . . . . . 8-1
Automatic . . . . . . . . . . . . . . . . . . . . . . 8-3
Heating . . . . . . . . . . . . . . . . . . . . . . . . 8-1
Clock . . . . . . . . . . . . . . . . . . . . . . . . . . . 5-5
Cluster, Instrument . . . . . . . . . . . . . 5-9
Clutch, Hydraulic . . . . . . . . . . . . . 10-11
Collision Damage Repair . . . . . . 13-9