2012 CHEVROLET MALIBU warning light
[x] Cancel search: warning lightPage 265 of 398
Black plate (25,1)Chevrolet Malibu Owner Manual - 2012
Vehicle Care 10-25
Brake Fluid
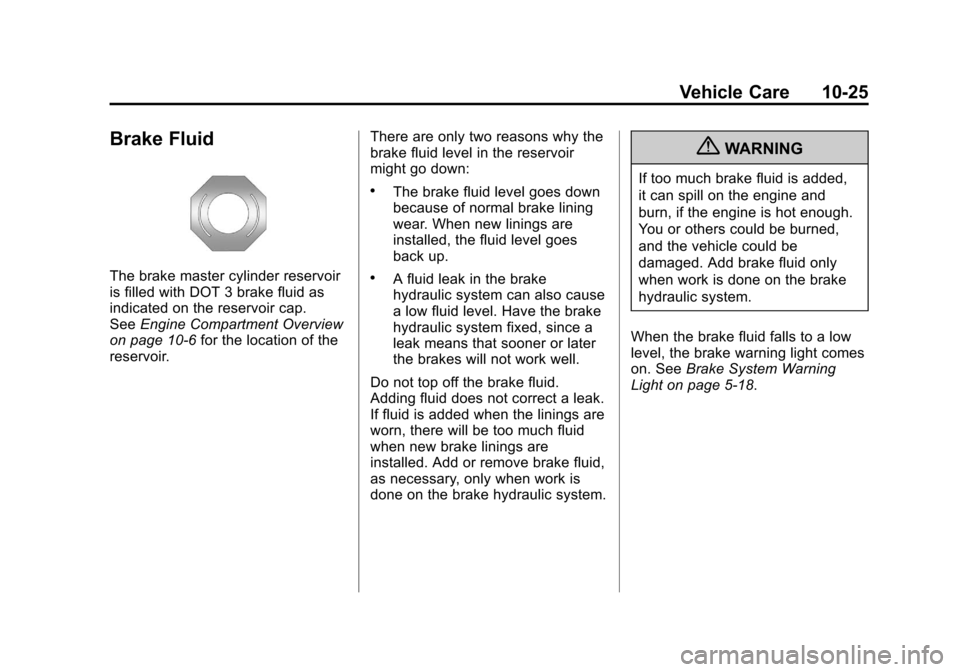
The brake master cylinder reservoir
is filled with DOT 3 brake fluid as
indicated on the reservoir cap.
SeeEngine Compartment Overview
on page 10‑6 for the location of the
reservoir. There are only two reasons why the
brake fluid level in the reservoir
might go down:
.The brake fluid level goes down
because of normal brake lining
wear. When new linings are
installed, the fluid level goes
back up.
.A fluid leak in the brake
hydraulic system can also cause
a low fluid level. Have the brake
hydraulic system fixed, since a
leak means that sooner or later
the brakes will not work well.
Do not top off the brake fluid.
Adding fluid does not correct a leak.
If fluid is added when the linings are
worn, there will be too much fluid
when new brake linings are
installed. Add or remove brake fluid,
as necessary, only when work is
done on the brake hydraulic system.
{WARNING
If too much brake fluid is added,
it can spill on the engine and
burn, if the engine is hot enough.
You or others could be burned,
and the vehicle could be
damaged. Add brake fluid only
when work is done on the brake
hydraulic system.
When the brake fluid falls to a low
level, the brake warning light comes
on. See Brake System Warning
Light on page 5‑18.
Page 293 of 398
Black plate (53,1)Chevrolet Malibu Owner Manual - 2012
Vehicle Care 10-53
Always check the TPMS malfunction
telltale after replacing one or more
tires or wheels on your vehicle to
ensure that the replacement or
alternate tires and wheels allow the
TPMS to continue to function
properly.
SeeTire Pressure Monitor
Operation on page 10‑53 for
additional information.
Federal Communications
Commission (FCC) Rules
and with Industry Canada
Standards
See Radio Frequency Statement on
page 13‑22 for information
regarding Part 15 of the Federal
Communications Commission (FCC)
Rules and with Industry Canada
Standards RSS-GEN/210/220/310.
Tire Pressure Monitor
Operation
This vehicle may have a Tire
Pressure Monitor System (TPMS).
The TPMS is designed to warn the
driver when a low tire pressure
condition exists. TPMS sensors are
mounted onto each tire and wheel
assembly, excluding the spare tire
and wheel assembly. The TPMS
sensors monitor the air pressure in
the tires and transmits the tire
pressure readings to a receiver
located in the vehicle.
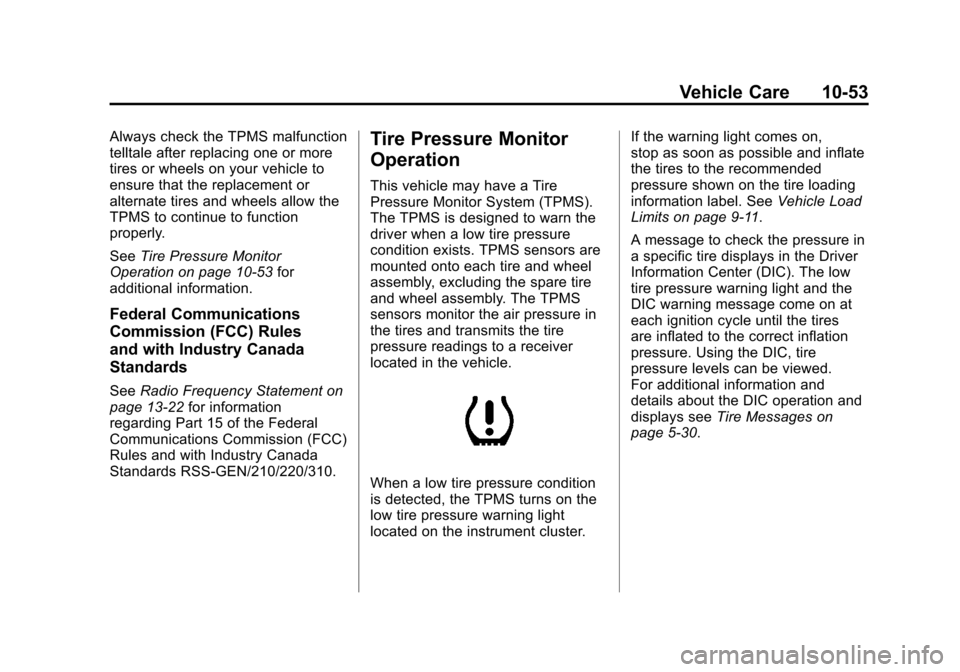
When a low tire pressure condition
is detected, the TPMS turns on the
low tire pressure warning light
located on the instrument cluster. If the warning light comes on,
stop as soon as possible and inflate
the tires to the recommended
pressure shown on the tire loading
information label. See
Vehicle Load
Limits on page 9‑11.
A message to check the pressure in
a specific tire displays in the Driver
Information Center (DIC). The low
tire pressure warning light and the
DIC warning message come on at
each ignition cycle until the tires
are inflated to the correct inflation
pressure. Using the DIC, tire
pressure levels can be viewed.
For additional information and
details about the DIC operation and
displays see Tire Messages on
page 5‑30.
Page 294 of 398
Black plate (54,1)Chevrolet Malibu Owner Manual - 2012
10-54 Vehicle Care
The low tire pressure warning light
may come on in cool weather when
the vehicle is first started, and then
turn off as the vehicle is driven.
This could be an early indicator that
the air pressure is getting low and
needs to be inflated to the proper
pressure.
A Tire and Loading Information label
shows the size of the original
equipment tires and the correct
inflation pressure for the tires when
they are cold. SeeVehicle Load
Limits on page 9‑11, for an example
of the Tire and Loading Information
label and its location. Also see Tire
Pressure on page 10‑50.
The TPMS system can warn about
a low tire pressure condition but
it does not replace normal tire
maintenance. See Tire Inspection
on page 10‑57, Tire Rotation on
page 10‑57 andTires on
page 10‑42. Notice:
Tire sealant materials are
not all the same. A non-approved
tire sealant could damage the
TPMS sensors. TPMS sensor
damage caused by using an
incorrect tire sealant is not
covered by the vehicle
warranty. Always use only the
GM-approved tire sealant
available through your dealer or
included in the vehicle.
Factory-installed Tire Inflator Kits
use a GM approved liquid tire
sealant. Using non-approved tire
sealants could damage the TPMS
sensors. See Tire Sealant and
Compressor Kit on page 10‑67 for
information regarding the inflator kit
materials and instructions.TPMS Malfunction Light and
Message
The TPMS will not function properly
if one or more of the TPMS sensors
are missing or inoperable. When the
system detects a malfunction, the
low tire pressure warning light
flashes for about one minute and
then stays on for the remainder of
the ignition cycle. A DIC warning
message also displays. The
malfunction light and DIC warning
message come on at each ignition
cycle until the problem is corrected.
Some of the conditions that can
cause these to come on are:
.One of the road tires has been
replaced with the spare tire.
The spare tire does not have a
TPMS sensor. The malfunction
light and the DIC message
should go off after the road tire
is replaced and the sensor
matching process is performed
successfully. See "TPMS Sensor
Matching Process" later in this
section.
Page 298 of 398
Black plate (58,1)Chevrolet Malibu Owner Manual - 2012
10-58 Vehicle Care
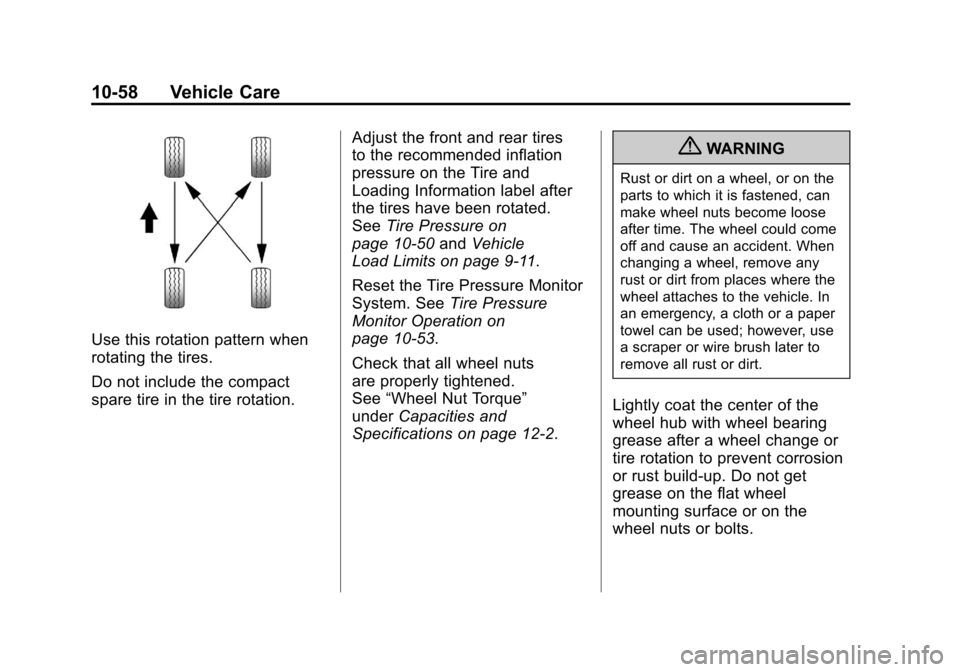
Use this rotation pattern when
rotating the tires.
Do not include the compact
spare tire in the tire rotation.Adjust the front and rear tires
to the recommended inflation
pressure on the Tire and
Loading Information label after
the tires have been rotated.
See
Tire Pressure on
page 10‑50 andVehicle
Load Limits on page 9‑11.
Reset the Tire Pressure Monitor
System. See Tire Pressure
Monitor Operation on
page 10‑53.
Check that all wheel nuts
are properly tightened.
See “Wheel Nut Torque”
under Capacities and
Specifications on page 12‑2.
{WARNING
Rust or dirt on a wheel, or on the
parts to which it is fastened, can
make wheel nuts become loose
after time. The wheel could come
off and cause an accident. When
changing a wheel, remove any
rust or dirt from places where the
wheel attaches to the vehicle. In
an emergency, a cloth or a paper
towel can be used; however, use
a scraper or wire brush later to
remove all rust or dirt.
Lightly coat the center of the
wheel hub with wheel bearing
grease after a wheel change or
tire rotation to prevent corrosion
or rust build-up. Do not get
grease on the flat wheel
mounting surface or on the
wheel nuts or bolts.
Page 309 of 398
Black plate (69,1)Chevrolet Malibu Owner Manual - 2012
Vehicle Care 10-69
If a tire goes flat, avoid further tire
and wheel damage by driving slowly
to a level place. Turn on the hazard
warning flashers. SeeHazard
Warning Flashers on page 6‑4.
See If a Tire Goes Flat on
page 10‑65 for other important
safety warnings.
Do not remove any objects that
have penetrated the tire.
1. Remove the tire sealant and compressor kit from its storage
location. See Storing the Tire
Sealant and Compressor Kit on
page 10‑73.
2. Unwrap the sealant/air hose (F) and the power plug (G).
3. Place the kit on the ground. Make sure the tire valve stem is
positioned close to the ground
so the hose will reach it.
4. Remove the valve stem cap from the flat tire by turning it
counterclockwise. 5. Attach the sealant/air hose (F)
onto the tire valve stem. Turn it
clockwise until it is tight.
6. Plug the power plug (G) into the accessory power outlet in the
vehicle. Unplug all items from
other accessory power outlets.
See Power Outlets on page 5‑7.
If the vehicle has an accessory
power outlet, do not use the
cigarette lighter.
If the vehicle only has a cigarette
lighter, use the cigarette lighter.
Do not pinch the power plug
cord in the door or window.
7. Start the vehicle. The vehicle must be running while using the
air compressor.
8. Turn the selector switch (B) clockwise to the Sealant + Air
position.
9. Press the on/off (A) button to turn the tire sealant and
compressor kit on. The compressor will inject
sealant and air into the tire.
The pressure gauge (D) will
initially show a high pressure
while the compressor pushes the
sealant into the tire. Once the
sealant is completely dispersed
into the tire, the pressure will
quickly drop and start to rise
again as the tire inflates with
air only.
10. Inflate the tire to the recommended inflation
pressure using the pressure
gauge (D). The recommended
inflation pressure can be found
on the Tire and Loading
Information label. See Tire
Pressure on page 10‑50.
The pressure gauge (D) may
read higher than the actual tire
pressure while the compressor
is on. Turn the compressor off
to get an accurate pressure
reading. The compressor may
be turned on/off until the
correct pressure is reached.
Page 324 of 398
Black plate (84,1)Chevrolet Malibu Owner Manual - 2012
10-84 Vehicle Care
2. Get the vehicles close enoughso the jumper cables can reach,
but be sure the vehicles are not
touching each other. If they are,
it could cause a ground
connection you do not want.
You would not be able to start
your vehicle, and the bad
grounding could damage the
electrical systems.
To avoid the possibility of the
vehicles rolling, set the parking
brake firmly on both vehicles
involved in the jump start
procedure. Put an automatic
transmission in P (Park) or
a manual transmission in
N (Neutral) before setting the
parking brake. Notice:
If the radio or other
accessories are left on during the
jump starting procedure, they
could be damaged. The repairs
would not be covered by the
warranty. Always turn off the
radio and other accessories when
jump starting the vehicle.
3. Turn off the ignition on both
vehicles. Unplug unnecessary
accessories plugged into the
cigarette lighter or the accessory
power outlet. Turn off the radio
and all lamps that are not
needed. This will avoid sparks
and help save both batteries.
And it could save the radio!
4. Open the hoods and locate the batteries. Find the positive (+)
and negative (−) terminal
locations on each vehicle.
Your vehicle's positive (+)
terminal and negative (–)
terminal are located under a
black cover on the battery. See
Engine Compartment
Overview on page 10‑6 for
more information on location.
Remove the cover to access the
positive (+) and negative (–)
terminals.
{WARNING
An electric fan can start up even
when the engine is not running
and can injure you. Keep hands,
clothing and tools away from any
underhood electric fan.
{WARNING
Using a match near a battery can
cause battery gas to explode.
People have been hurt doing this,
and some have been blinded.
Use a flashlight if you need
more light.
(Continued)
Page 387 of 398

Black plate (1,1)Chevrolet Malibu Owner Manual - 2012
INDEX i-1
A
Accessories andModifications . . . . . . . . . . . . . . . . . 10-3
Accessory Power . . . . . . . . . . . . . . 9-21
Add-On Electrical Equipment . . . . . . . . . . . . . . . . . . . 9-48
Additional Information,
OnStar
®. . . . . . . . . . . . . . . . . . . . . . 14-5
Adjustments Lumbar, Front Seats . . . . . . . . . . . 3-4
Air Cleaner/Filter, Engine . . . . . 10-14
Air Conditioning . . . . . . . . . . . . . . . . 8-5
Air Vents . . . . . . . . . . . . . . . . . . . . . . . 8-9
Airbag
Adding Equipment to theVehicle . . . . . . . . . . . . . . . . . . . . . . 3-31
Airbag System Check . . . . . . . . . . . . . . . . . . . . . . . . 3-32
How Does an AirbagRestrain? . . . . . . . . . . . . . . . . . . . 3-24
Passenger Sensing System . . . . . . . . . . . . . . . . . . . . . . 3-26 Airbag System (cont.)
What Makes an Airbag
Inflate? . . . . . . . . . . . . . . . . . . . . . . 3-23
What Will You See after an
Airbag Inflates? . . . . . . . . . . . . . 3-24
When Should an Airbag Inflate? . . . . . . . . . . . . . . . . . . . . . . 3-22
Where Are the Airbags? . . . . . . 3-21
Airbags
Passenger Status Indicator . . . 5-15
Readiness Light . . . . . . . . . . . . . . 5-14
Servicing Airbag-EquippedVehicles . . . . . . . . . . . . . . . . . . . . . 3-30
System Check . . . . . . . . . . . . . . . . 3-19
Alarm System Anti-theft . . . . . . . . . . . . . . . . . . . . . . 2-11
AM-FM Radio . . . . . . . . . . . . . . . . . . . 7-6
Antenna Satellite Radio . . . . . . . . . . . . . . . . 7-14
Anti-theft Alarm System . . . . . . . . . . . . . . . . 2-11
Antilock Brake System (ABS) . . . . . . . . . . . . . . . . 9-28
Warning Light . . . . . . . . . . . . . . . . . 5-19 Appearance Care
Exterior . . . . . . . . . . . . . . . . . . . . . 10-90
Interior . . . . . . . . . . . . . . . . . . . . . . 10-93
Assistance Program, Roadside . . . . . . . . . . . . . . 13-7, 13-10
Audio Players . . . . . . . . . . . . . . . . . 7-15 CD . . . . . . . . . . . . . . . . . . . . . . . . . . . 7-15
Audio System Backglass Antenna . . . . . . . . . . . 7-14
Radio Reception . . . . . . . . . . . . . . 7-13
Theft-Deterrent Feature . . . . . . . . 7-2
Automatic Climate Control System . . . . . . . . 8-5
Door Locks . . . . . . . . . . . . . . . . . . . . 2-8
Headlamp System . . . . . . . . . . . . . 6-3
Automatic Transmission . . . . . . . 9-24
Fluid . . . . . . . . . . . . . . . . . . . . . . . . 10-14
Manual Mode . . . . . . . . . . . . . . . . . 9-26
Shift Lock ControlFunction Check . . . . . . . . . . . 10-28
Auxiliary Devices . . . . . . . . . . . . . . 7-20
Page 388 of 398

Black plate (2,1)Chevrolet Malibu Owner Manual - 2012
i-2 INDEX
B
Battery . . . . . . . . . . . . . . . . . . . . . . . 10-26Jump Starting . . . . . . . . . . . . . . . 10-83
Load Management . . . . . . . . . . . . . 6-6
Power Protection . . . . . . . . . . . . . . 6-7
Blade Replacement, Wiper . . . . . . . . . . . . . . . . . . . . . . . 10-29
Bluetooth . . . . . . . . . . . . . . . . . . . . . . 7-25
Brake System Warning Light . . . . . . . . . . . . . . . . . . . . . . . . . 5-18
Brakes . . . . . . . . . . . . . . . . . . . . . . . . 10-24
Antilock . . . . . . . . . . . . . . . . . . . . . . . 9-28
Assist . . . . . . . . . . . . . . . . . . . . . . . . . 9-29
Fluid . . . . . . . . . . . . . . . . . . . . . . . . 10-25
Parking . . . . . . . . . . . . . . . . . . . . . . . 9-29
System Messages . . . . . . . . . . . . 5-27
Braking . . . . . . . . . . . . . . . . . . . . . . . . . 9-3
Break-In, New Vehicle . . . . . . . . . 9-16
Bulb Replacement . . . . . . . . . . . . 10-33 Back-up Lamps . . . . . . . . . . . . . 10-32
Fog Lamps . . . . . . . . . . . . . . . . . . . . 6-5
Halogen Bulbs . . . . . . . . . . . . . . 10-30
Headlamp Aiming . . . . . . . . . . . 10-30 Bulb Replacement (cont.)
Headlamps . . . . . . . . . . . . . . . . . 10-30
License Plate Lamps . . . . . . . 10-33
Taillamps, Turn Signal,
and Stoplamps . . . . . . . . . . . . 10-30
Buying New Tires . . . . . . . . . . . . . 10-60
C
Calibration . . . . . . . . . . . . . . . . . . . . . . 5-5
California Fuel Requirements . . . . . . . . . . . 9-37
Perchlorate Materials
Requirements . . . . . . . . . . . . . . . 10-3
Warning . . . . . . . . . . . . . . . . . . . . . . 10-3
Canadian Vehicle Owners . . . . . . . . iii
Capacities and Specifications . . . . . . . . . . . . . . . . 12-2
Carbon Monoxide Engine Exhaust . . . . . . . . . . . . . . . 9-23
Trunk . . . . . . . . . . . . . . . . . . . . . . . . . . 2-9
Winter Driving . . . . . . . . . . . . . . . . . 9-8
Cautions, Danger, and Warnings . . . . . . . . . . . . . . . . . . . . . . . . iv
CD Player . . . . . . . . . . . . . . . . . . . . . 7-15 Center Console Storage . . . . . . . . 4-3
Chains, Tire . . . . . . . . . . . . . . . . . . 10-64
Charging System Light . . . . . . . . 5-16
Check
Engine Light . . . . . . . . . . . . . . . . . . 5-16
IgnitionTransmission Lock . . . . . . . . 10-28
Child Restraints Infants and YoungChildren . . . . . . . . . . . . . . . . . . . . . 3-35
Lower Anchors and
Tethers for Children . . . . . . . . . 3-42
Older Children . . . . . . . . . . . . . . . . 3-33
Securing . . . . . . . . . . . . . . . . 3-49, 3-51
Systems . . . . . . . . . . . . . . . . . . . . . . 3-37
Cleaning
Exterior Care . . . . . . . . . . . . . . . 10-90
Interior Care . . . . . . . . . . . . . . . . 10-93
Climate Control Systems . . . . . . . 8-1 Air Conditioning . . . . . . . . . . . . . . . 8-1
Automatic . . . . . . . . . . . . . . . . . . . . . . 8-5
Heating . . . . . . . . . . . . . . . . . . . . . . . . 8-1
Clock . . . . . . . . . . . . . . . . . . . . . . . . . . . 5-6
Cluster, Instrument . . . . . . . . . . . . 5-10