2012 CHEVROLET MALIBU brake sensor
[x] Cancel search: brake sensorPage 145 of 398
Black plate (3,1)Chevrolet Malibu Owner Manual - 2012
Lighting 6-3
.The light sensor detects
daytime light.
.The parking brake is released or
the vehicle is not in P (Park).
When the DRL system is on, the
taillamps, sidemarker lamps,
parking lamps, and instrument panel
lights are not on unless you turn the
exterior lamps control to the parking
lamp position.
The regular headlamp system
should be turned on when they are
needed.
Automatic Headlamp
System
When it is dark enough outside, the
automatic headlamp system turns
on the headlamps at the normal
brightness along with other lamps
such as the taillamps, sidemarker,
parking lamps, and the instrument
panel lights. The radio lights will
also be dim.
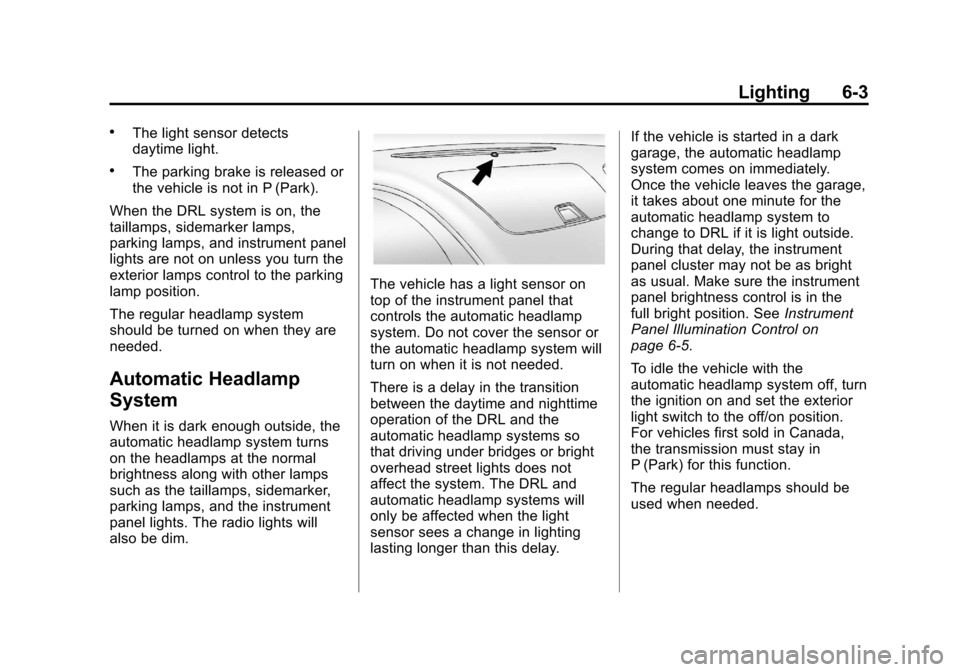
The vehicle has a light sensor on
top of the instrument panel that
controls the automatic headlamp
system. Do not cover the sensor or
the automatic headlamp system will
turn on when it is not needed.
There is a delay in the transition
between the daytime and nighttime
operation of the DRL and the
automatic headlamp systems so
that driving under bridges or bright
overhead street lights does not
affect the system. The DRL and
automatic headlamp systems will
only be affected when the light
sensor sees a change in lighting
lasting longer than this delay. If the vehicle is started in a dark
garage, the automatic headlamp
system comes on immediately.
Once the vehicle leaves the garage,
it takes about one minute for the
automatic headlamp system to
change to DRL if it is light outside.
During that delay, the instrument
panel cluster may not be as bright
as usual. Make sure the instrument
panel brightness control is in the
full bright position. See
Instrument
Panel Illumination Control on
page 6‑5.
To idle the vehicle with the
automatic headlamp system off, turn
the ignition on and set the exterior
light switch to the off/on position.
For vehicles first sold in Canada,
the transmission must stay in
P (Park) for this function.
The regular headlamps should be
used when needed.
Page 276 of 398
Black plate (36,1)Chevrolet Malibu Owner Manual - 2012
10-36 Vehicle Care
FusesUsage
4 Transmission Control
Module Ignition 1
5 Mass Airflow
Sensor (LY7)
6 Emission
7 Left Headlamp
Low-Beam
8 Horn
9 Right Headlamp
Low-Beam
10 Front Fog Lamps
11 Left Headlamp
High-Beam
12 Right Headlamp
High-Beam
13 Engine Control
Module BATT
14 Windshield Wiper
15 Antilock Brake
System (IGN 1) Fuses
Usage
16 Engine Control
Module IGN 1
17 Cooling Fan 1
18 Cooling Fan 2
19 Run Relay, Heating,
Ventilation, Air
Conditioning Blower
20 Body Control
Module 1
21 Body Control Module
Run/Crank
22 Rear Electrical
Center 1
23 Rear Electrical
Center 2
24 Antilock Brake
System
25 Body Control
Module 2
26 Starter Fuses
Usage
41 Electric Power
Steering
42 Transmission Control
Module Battery
43 Ignition Module
(LE9 & LE5);
Injectors, Ignition
Coils Odd (LY7)
44 Injectors (LE9 & LE5);
Injectors, Ignition
Coils Even (LY7)
45 Post Cat 02 Sensor
Heaters (LY7)
46 Daytime Running
Lamps
47 Center High-Mounted
Stoplamp
50 Driver Power Window
51 Not Used
52 AIR Solenoid
Page 296 of 398
Black plate (56,1)Chevrolet Malibu Owner Manual - 2012
10-56 Vehicle Care
There are two minutes to match
the first tire/wheel position, and
five minutes overall to match all
four tire/wheel positions. If it takes
longer, the matching process stops
and must be restarted.
The TPMS matching process is:
1. Set the parking brake.
2. Turn the ignition to ON/RUN withthe engine off.
3. Press and hold the Remote Keyless Entry (RKE)
transmitter's LOCK and
UNLOCK buttons, at the same
time, for about five seconds to
start the TPMS learn mode.
The horn sounds twice indicating
the TPMS receiver is ready and
in learn mode.
4. Start with the driver side front tire. The driver side front turn
signal also comes on to indicate
that corner's sensor is ready to
be learned. 5. Place the relearn tool against
the tire sidewall, near the valve
stem. Then press the button to
activate the TPMS sensor.
A horn chirp confirms that the
sensor identification code has
been matched to this tire and
wheel position.
6. The passenger side front turn signal comes on to indicate that
corner sensor is ready to be
learned. Proceed to the
passenger side front tire and
repeat the procedure in Step 5.
7. The passenger side rear turn signal comes on to indicate that
corner sensor is ready to be
learned. Proceed to the
passenger side rear tire and
repeat the procedure in Step 5.
8. The driver side rear turn signal comes on to indicate that corner
sensor is ready to be learned.
Proceed to the driver side rear
tire, and repeat the procedure
in Step 5. 9. After hearing the single horn
chirp for the driver side rear tire,
two additional horn chirps sound
to indicate the tire learning
process is done. Turn the
ignition switch to LOCK/OFF.
If no tires are learned after
entering the TPMS learn mode,
or if communication with the
receiver stops, or if the time limit
has expired, turn the ignition
switch to LOCK/OFF and start
over beginning with Step 2.
10. Set all four tires to the recommended air pressure
level as indicated on the Tire
and Loading Information label.
Page 304 of 398
Black plate (64,1)Chevrolet Malibu Owner Manual - 2012
10-64 Vehicle Care
Wheel Replacement
Replace any wheel that is bent,
cracked, or badly rusted or
corroded. If wheel nuts keep coming
loose, the wheel, wheel bolts, and
wheel nuts should be replaced.
If the wheel leaks air, replace it.
Some aluminum wheels can be
repaired. See your dealer if any of
these conditions exist.
Your dealer will know the kind of
wheel that is needed.
Each new wheel should have the
same load-carrying capacity,
diameter, width, offset, and be
mounted the same way as the
one it replaces.
Replace wheels, wheel bolts, wheel
nuts, or Tire Pressure Monitor
System (TPMS) sensors with new
GM original equipment parts.{WARNING
Using the wrong replacement
wheels, wheel bolts, or wheel
nuts can be dangerous. It could
affect the braking and handling of
the vehicle. Tires can lose air,
and cause loss of control, causing
a crash. Always use the correct
wheel, wheel bolts, and wheel
nuts for replacement.
Notice: The wrong wheel can
also cause problems with
bearing life, brake cooling,
speedometer or odometer
calibration, headlamp aim,
bumper height, vehicle ground
clearance, and tire or tire chain
clearance to the body and
chassis.
See If a Tire Goes Flat on
page 10‑65 for more information.
Used Replacement Wheels
{WARNING
Replacing a wheel with a used
one is dangerous. How it has
been used or how far it has been
driven may be unknown. It could
fail suddenly and cause a crash.
When replacing wheels, use a
new GM original equipment
wheel.
Tire Chains
{WARNING
Do not use tire chains. There is
not enough clearance. Tire chains
used on a vehicle without the
proper amount of clearance can
cause damage to the brakes,
(Continued)
Page 328 of 398
Black plate (88,1)Chevrolet Malibu Owner Manual - 2012
10-88 Vehicle Care
Here are some important things to
consider before recreational vehicle
towing:
.What's the towing capacity of the
towing vehicle? Be sure to read
the tow vehicle manufacturer's
recommendations.
.How far will the vehicle be
towed? Some vehicles have
restrictions on how far and
how long they can tow.
.Does the vehicle have the
proper towing equipment?
See your dealer or trailering
professional for additional
advice and equipment
recommendations.
.Is the vehicle ready to be
towed? Just as preparing the
vehicle for a long trip, make sure
the vehicle is prepared to be
towed.
Dinghy Towing
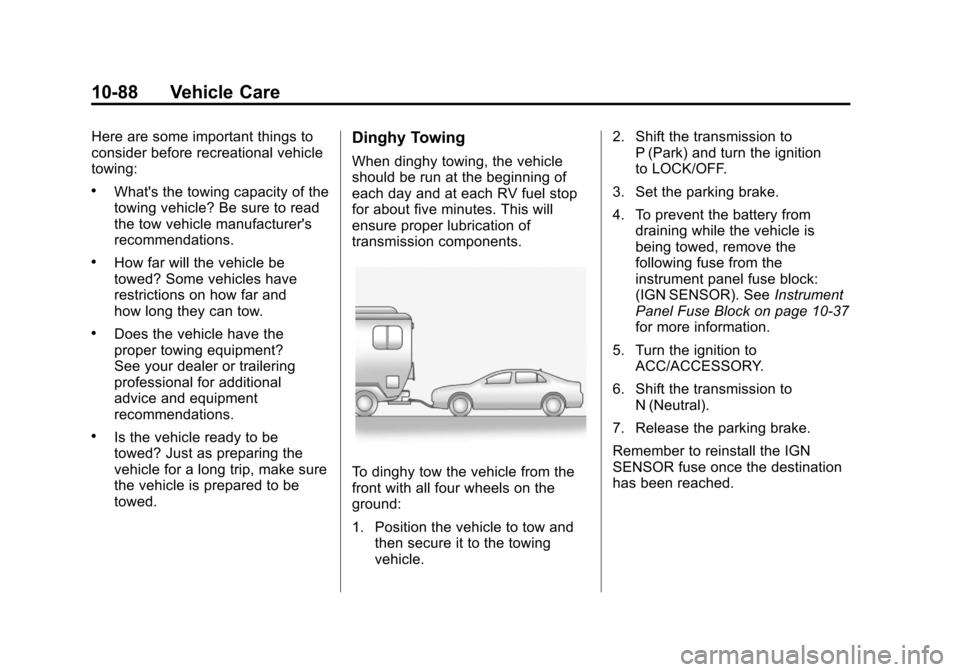
When dinghy towing, the vehicle
should be run at the beginning of
each day and at each RV fuel stop
for about five minutes. This will
ensure proper lubrication of
transmission components.
To dinghy tow the vehicle from the
front with all four wheels on the
ground:
1. Position the vehicle to tow andthen secure it to the towing
vehicle. 2. Shift the transmission to
P (Park) and turn the ignition
to LOCK/OFF.
3. Set the parking brake.
4. To prevent the battery from draining while the vehicle is
being towed, remove the
following fuse from the
instrument panel fuse block:
(IGN SENSOR). See Instrument
Panel Fuse Block on page 10‑37
for more information.
5. Turn the ignition to ACC/ACCESSORY.
6. Shift the transmission to N (Neutral).
7. Release the parking brake.
Remember to reinstall the IGN
SENSOR fuse once the destination
has been reached.