Page 298 of 398
Black plate (58,1)Chevrolet Malibu Owner Manual - 2012
10-58 Vehicle Care
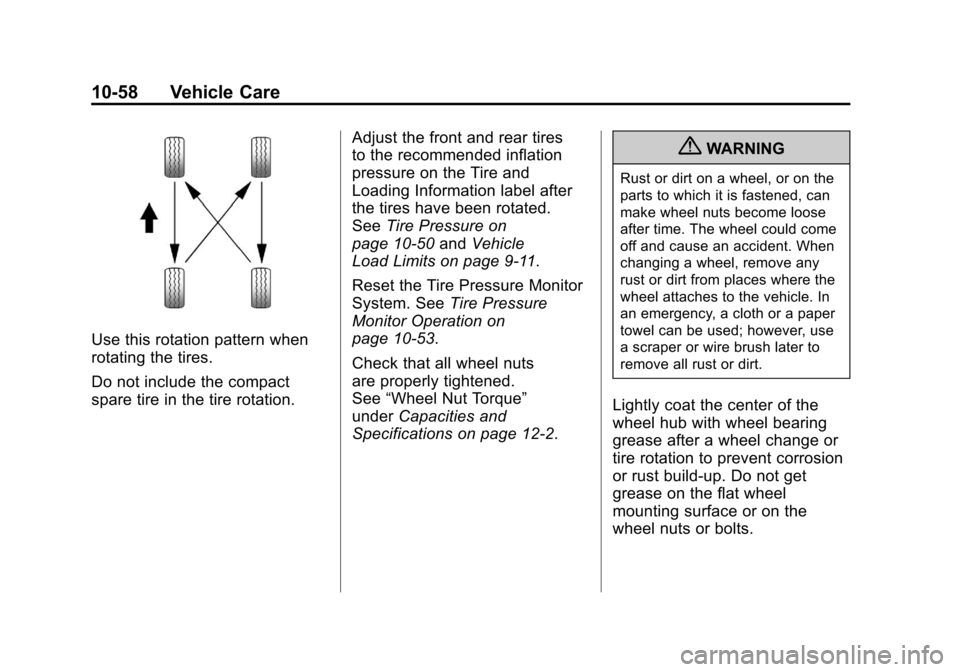
Use this rotation pattern when
rotating the tires.
Do not include the compact
spare tire in the tire rotation.Adjust the front and rear tires
to the recommended inflation
pressure on the Tire and
Loading Information label after
the tires have been rotated.
See
Tire Pressure on
page 10‑50 andVehicle
Load Limits on page 9‑11.
Reset the Tire Pressure Monitor
System. See Tire Pressure
Monitor Operation on
page 10‑53.
Check that all wheel nuts
are properly tightened.
See “Wheel Nut Torque”
under Capacities and
Specifications on page 12‑2.
{WARNING
Rust or dirt on a wheel, or on the
parts to which it is fastened, can
make wheel nuts become loose
after time. The wheel could come
off and cause an accident. When
changing a wheel, remove any
rust or dirt from places where the
wheel attaches to the vehicle. In
an emergency, a cloth or a paper
towel can be used; however, use
a scraper or wire brush later to
remove all rust or dirt.
Lightly coat the center of the
wheel hub with wheel bearing
grease after a wheel change or
tire rotation to prevent corrosion
or rust build-up. Do not get
grease on the flat wheel
mounting surface or on the
wheel nuts or bolts.
Page 305 of 398
Black plate (65,1)Chevrolet Malibu Owner Manual - 2012
Vehicle Care 10-65
WARNING (Continued)
suspension, or other vehicle
parts. The area damaged by the
tire chains could cause loss of
control and a crash.
Use another type of traction
device only if its manufacturer
recommends it for the vehicle's
tire size combination and road
conditions. Follow that
manufacturer's instructions.
To avoid vehicle damage, drive
slow and readjust or remove the
traction device if it contacts the
vehicle. Do not spin the wheels.
If traction devices are used,
install them on the front tires.
If a Tire Goes Flat
It is unusual for a tire to blow out,
especially if the tires are maintained
properly. SeeTires on page 10‑42.
If air goes out of a tire, it is much
more likely to leak out slowly. But if
there is ever a blowout, here are a
few tips about what to expect and
what to do:
If a front tire fails, the flat tire
creates a drag that pulls the vehicle
toward that side. Take your foot off
the accelerator pedal and grip the
steering wheel firmly. Steer to
maintain lane position, and then
gently brake to a stop, well off the
road, if possible.
A rear blowout, particularly on a
curve, acts much like a skid and
may require the same correction as
used in a skid. Stop pressing the
accelerator pedal and steer to straighten the vehicle. It may be
very bumpy and noisy. Gently
brake to a stop, well off the road,
if possible.
{WARNING
Driving on a flat tire will cause
permanent damage to the tire.
Re-inflating a tire after it has
been driven on while severely
underinflated or flat may cause a
blowout and a serious crash.
Never attempt to re-inflate a tire
that has been driven on while
severely underinflated or flat.
Have your dealer or an authorized
tire service center repair or
replace the flat tire as soon as
possible.
Page 317 of 398
Black plate (77,1)Chevrolet Malibu Owner Manual - 2012
Vehicle Care 10-77
8. Remove all of the wheel nuts.
9. Remove the flat tire.
{WARNING
Rust or dirt on a wheel, or on the
parts to which it is fastened, can
make wheel nuts become loose
after time. The wheel could come
off and cause an accident. When
changing a wheel, remove any
rust or dirt from places where the
wheel attaches to the vehicle.
In an emergency, a cloth or a
paper towel can be used;
however, use a scraper or wire
brush later to remove all rust
or dirt.
10. Remove any rust or dirt fromthe wheel bolts, mounting
surfaces and spare wheel.
11. Install the compact spare tire.
{WARNING
Never use oil or grease on bolts
or nuts because the nuts might
come loose. The vehicle's wheel
could fall off, causing a crash.
Page 318 of 398
Black plate (78,1)Chevrolet Malibu Owner Manual - 2012
10-78 Vehicle Care
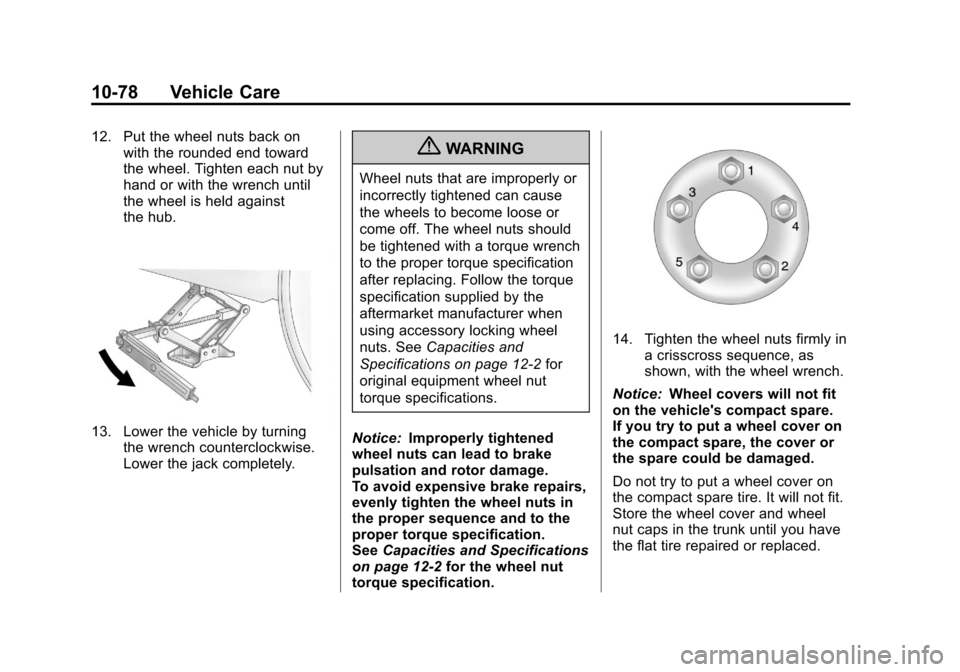
12. Put the wheel nuts back onwith the rounded end toward
the wheel. Tighten each nut by
hand or with the wrench until
the wheel is held against
the hub.
13. Lower the vehicle by turningthe wrench counterclockwise.
Lower the jack completely.
{WARNING
Wheel nuts that are improperly or
incorrectly tightened can cause
the wheels to become loose or
come off. The wheel nuts should
be tightened with a torque wrench
to the proper torque specification
after replacing. Follow the torque
specification supplied by the
aftermarket manufacturer when
using accessory locking wheel
nuts. See Capacities and
Specifications on page 12‑2 for
original equipment wheel nut
torque specifications.
Notice: Improperly tightened
wheel nuts can lead to brake
pulsation and rotor damage.
To avoid expensive brake repairs,
evenly tighten the wheel nuts in
the proper sequence and to the
proper torque specification.
See Capacities and Specifications
on page 12‑2 for the wheel nut
torque specification.
14. Tighten the wheel nuts firmly in a crisscross sequence, as
shown, with the wheel wrench.
Notice: Wheel covers will not fit
on the vehicle's compact spare.
If you try to put a wheel cover on
the compact spare, the cover or
the spare could be damaged.
Do not try to put a wheel cover on
the compact spare tire. It will not fit.
Store the wheel cover and wheel
nut caps in the trunk until you have
the flat tire repaired or replaced.
Page 322 of 398
Black plate (82,1)Chevrolet Malibu Owner Manual - 2012
10-82 Vehicle Care
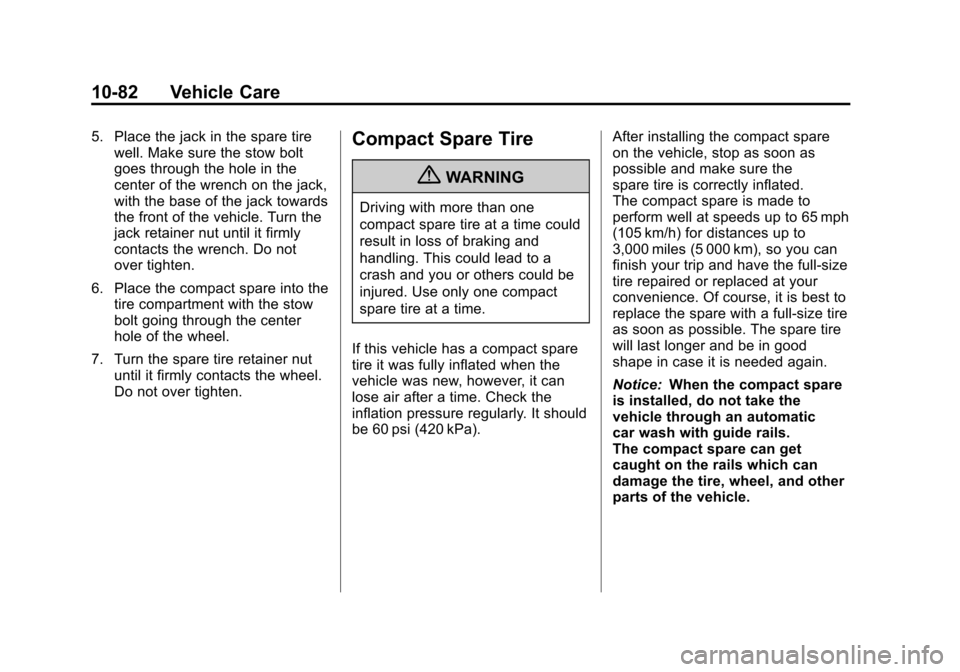
5. Place the jack in the spare tirewell. Make sure the stow bolt
goes through the hole in the
center of the wrench on the jack,
with the base of the jack towards
the front of the vehicle. Turn the
jack retainer nut until it firmly
contacts the wrench. Do not
over tighten.
6. Place the compact spare into the tire compartment with the stow
bolt going through the center
hole of the wheel.
7. Turn the spare tire retainer nut until it firmly contacts the wheel.
Do not over tighten.Compact Spare Tire
{WARNING
Driving with more than one
compact spare tire at a time could
result in loss of braking and
handling. This could lead to a
crash and you or others could be
injured. Use only one compact
spare tire at a time.
If this vehicle has a compact spare
tire it was fully inflated when the
vehicle was new, however, it can
lose air after a time. Check the
inflation pressure regularly. It should
be 60 psi (420 kPa). After installing the compact spare
on the vehicle, stop as soon as
possible and make sure the
spare tire is correctly inflated.
The compact spare is made to
perform well at speeds up to 65 mph
(105 km/h) for distances up to
3,000 miles (5 000 km), so you can
finish your trip and have the full-size
tire repaired or replaced at your
convenience. Of course, it is best to
replace the spare with a full-size tire
as soon as possible. The spare tire
will last longer and be in good
shape in case it is needed again.
Notice:
When the compact spare
is installed, do not take the
vehicle through an automatic
car wash with guide rails.
The compact spare can get
caught on the rails which can
damage the tire, wheel, and other
parts of the vehicle.
Page 327 of 398
Black plate (87,1)Chevrolet Malibu Owner Manual - 2012
Vehicle Care 10-87
To disconnect the jumper cables
from both vehicles, do the following:
1. Disconnect the blacknegative (−) cable from the
vehicle that had the dead
battery.
2. Disconnect the black negative (−) cable from the
vehicle with the good battery.
3. Disconnect the red positive (+) cable from the vehicle with the
good battery.
4. Disconnect the red positive (+) cable from the other vehicle.
5. Return the caps over the positive (+) and negative (−)
terminals to their original
positions.Towing
Towing the Vehicle
Notice: To avoid damage, the
disabled vehicle should be towed
with all four wheels off the
ground. Care must be taken
with vehicles that have low
ground clearance and/or special
equipment. Always flatbed on a
car carrier.
Consult your dealer or a
professional towing service if the
disabled vehicle must be towed.
See Roadside Assistance Program
(U.S. and Canada) on page 13‑7 or
Roadside Assistance Program
(Mexico) on page 13‑10.
To tow the vehicle behind another
vehicle for recreational purposes,
such as behind a motor home,
see “Recreational Vehicle Towing”
in this section.
Recreational Vehicle
Towing
Recreational vehicle towing means
towing the vehicle behind another
vehicle –such as behind a motor
home. The two most common types
of recreational vehicle towing are
known as dinghy towing and dolly
towing. Dinghy towing is towing the
vehicle with all four wheels on the
ground. Dolly towing is towing the
vehicle with two wheels on the
ground and two wheels up on a
device known as a dolly.
Page 328 of 398
Black plate (88,1)Chevrolet Malibu Owner Manual - 2012
10-88 Vehicle Care
Here are some important things to
consider before recreational vehicle
towing:
.What's the towing capacity of the
towing vehicle? Be sure to read
the tow vehicle manufacturer's
recommendations.
.How far will the vehicle be
towed? Some vehicles have
restrictions on how far and
how long they can tow.
.Does the vehicle have the
proper towing equipment?
See your dealer or trailering
professional for additional
advice and equipment
recommendations.
.Is the vehicle ready to be
towed? Just as preparing the
vehicle for a long trip, make sure
the vehicle is prepared to be
towed.
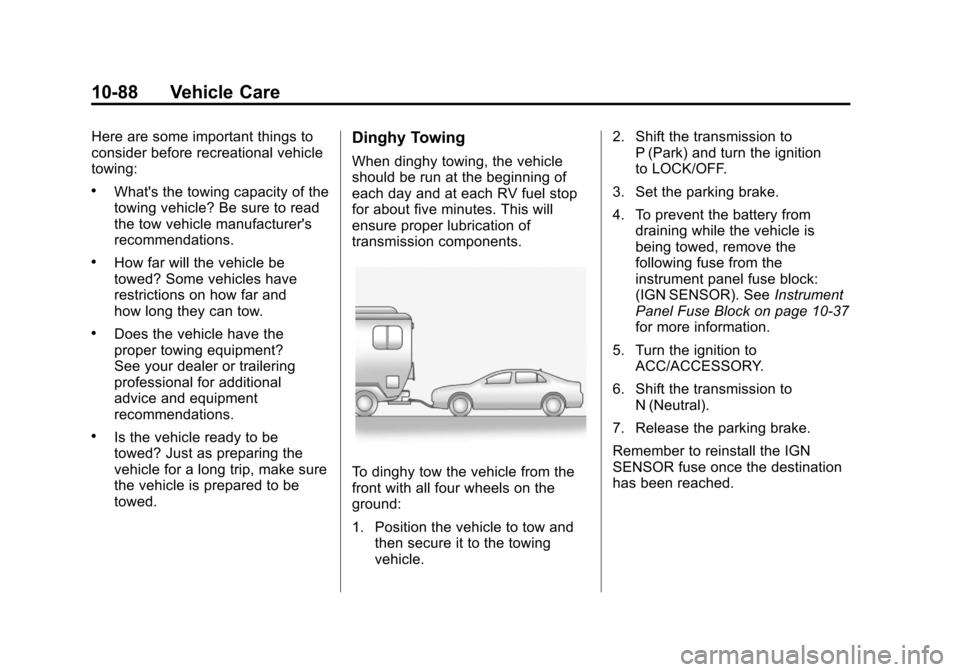
Dinghy Towing
When dinghy towing, the vehicle
should be run at the beginning of
each day and at each RV fuel stop
for about five minutes. This will
ensure proper lubrication of
transmission components.
To dinghy tow the vehicle from the
front with all four wheels on the
ground:
1. Position the vehicle to tow andthen secure it to the towing
vehicle. 2. Shift the transmission to
P (Park) and turn the ignition
to LOCK/OFF.
3. Set the parking brake.
4. To prevent the battery from draining while the vehicle is
being towed, remove the
following fuse from the
instrument panel fuse block:
(IGN SENSOR). See Instrument
Panel Fuse Block on page 10‑37
for more information.
5. Turn the ignition to ACC/ACCESSORY.
6. Shift the transmission to N (Neutral).
7. Release the parking brake.
Remember to reinstall the IGN
SENSOR fuse once the destination
has been reached.
Page 329 of 398
Black plate (89,1)Chevrolet Malibu Owner Manual - 2012
Vehicle Care 10-89
Notice:If 105 km/h (65 mph) is
exceeded while towing the
vehicle, it could be damaged.
Never exceed 105 km/h (65 mph)
while towing the vehicle.
Notice: Towing the vehicle from
the rear could damage it. Also,
repairs would not be covered by
the vehicle warranty. Never have
the vehicle towed from the rear.
Dolly Towing
Tow the vehicle with the two rear
wheels on the ground and the front
wheels on a dolly:
To tow the vehicle with two wheels
on the ground and a dolly:
1. Put the front wheels on a dolly.
2. Put the gear shift lever in P (Park). 3. Set the parking brake.
4. Remove the key from the
ignition.
5. Secure the vehicle to the dolly.
6. Release the parking brake.
Notice: Towing the vehicle from
the rear could damage it. Also,
repairs would not be covered by
the vehicle warranty. Never have
the vehicle towed from the rear.