2012 CHEVROLET MALIBU tow
[x] Cancel search: towPage 125 of 398
Black plate (19,1)Chevrolet Malibu Owner Manual - 2012
Instruments and Controls 5-19
When the ignition is on, the brake
system warning light also comes on
when the parking brake is set.
The light stays on if the parking
brake does not fully release . If it
stays on after the parking brake is
fully released, it means there is a
brake problem.
The Driver Information Center (DIC)
may display a BRAKE FLUID
message. SeeBrake System
Messages on page 5‑27 for more
information.
If the light comes on while driving,
pull off the road and carefully stop.
The brake pedal may be harder to
push or the pedal may go closer to
the floor. It may take longer to stop.
Try turning off and restarting the
vehicle one or two times, if the light
is still on, have the vehicle towed for
service. See Towing the Vehicle on
page 10‑87{WARNING
The brake system might not be
working properly if the brake
system warning light is on.
Driving with the brake system
warning light on can lead to a
crash. If the light is still on after
the vehicle has been pulled off
the road and carefully stopped,
have the vehicle towed for
service.
Antilock Brake System
(ABS) Warning Light
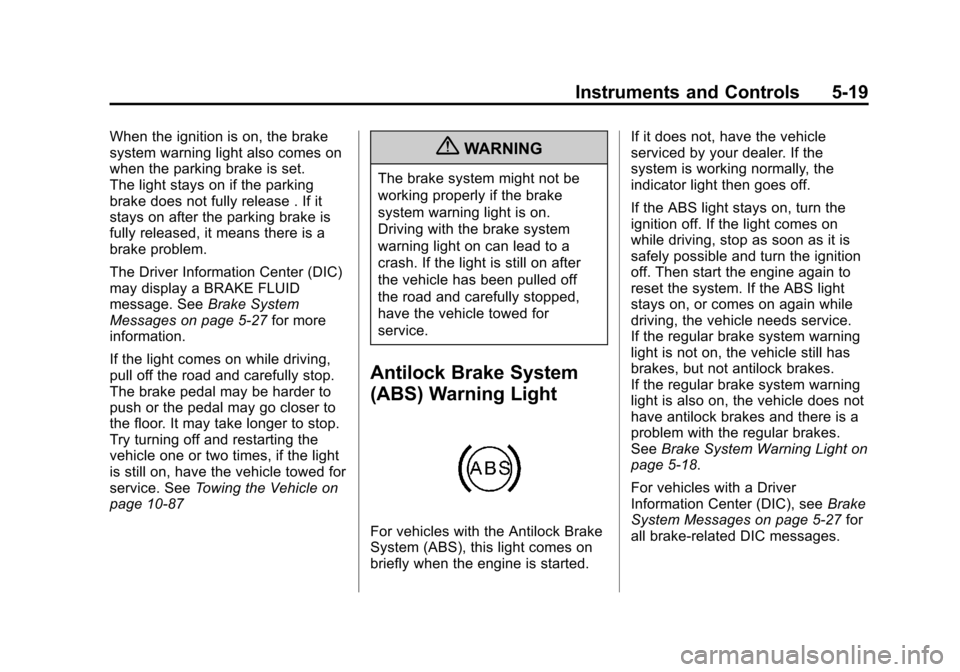
For vehicles with the Antilock Brake
System (ABS), this light comes on
briefly when the engine is started. If it does not, have the vehicle
serviced by your dealer. If the
system is working normally, the
indicator light then goes off.
If the ABS light stays on, turn the
ignition off. If the light comes on
while driving, stop as soon as it is
safely possible and turn the ignition
off. Then start the engine again to
reset the system. If the ABS light
stays on, or comes on again while
driving, the vehicle needs service.
If the regular brake system warning
light is not on, the vehicle still has
brakes, but not antilock brakes.
If the regular brake system warning
light is also on, the vehicle does not
have antilock brakes and there is a
problem with the regular brakes.
See
Brake System Warning Light on
page 5‑18.
For vehicles with a Driver
Information Center (DIC), see Brake
System Messages on page 5‑27 for
all brake-related DIC messages.
Page 144 of 398
Black plate (2,1)Chevrolet Malibu Owner Manual - 2012
6-2 Lighting
P(Off/On):Turn the band to this
position to turn on the Automatic
Headlamp System. In Canada,
this position only works when a
vehicle is in the P (Park) position.
To turn on the Automatic Headlamp
System, turn the switch to off/on.
To turn them off, turn the switch to
off/on again. This is a momentary
control switch that springs back
when released. The Automatic
Headlamp System always turns on
at the beginning of an ignition cycle.
Exterior Lamps Off
Reminder
If the drivers door is opened and the
ignition is turned off while leaving
the lamps on, a warning chime will
sound.
Headlamp High/
Low-Beam Changer
To change the headlamps from low
beam to high beam, push the turn
signal/multifunction lever away
from you.
This instrument panel cluster
light
3comes on if the high beam
lamps are turned on while the
ignition is in ON/RUN.
To change the headlamps from
high beam to low beam, pull the
turn signal lever toward you.
Flash-to-Pass
This feature lets the high-beam
headlamps be used to signal a
driver in front of you that you want
to pass.
Pull the turn signal/multifunction
lever toward you until the high-beam
headlamps come on, then release
the lever to turn them off.
Daytime Running
Lamps (DRL)
Daytime Running Lamps (DRL) can
make it easier for others to see the
front of your vehicle during the day.
Fully functional DRL are required on
all vehicles first sold in Canada.
The vehicle has a light sensor on
top of the instrument panel that
controls the DRL. Do not cover this
sensor or the head lamps will be on
when they are not needed.
The DRL system makes the
low-beam headlamps come on at
a reduced brightness when the
following conditions are met:
.The ignition is on.
.The exterior lamps control is
in AUTO.
.The exterior lamps control is in
the parking lamps only position
(This applies only to vehicles
that are first sold in Canada).
Page 184 of 398
Black plate (2,1)Chevrolet Malibu Owner Manual - 2012
8-2 Climate Controls
Operation
Temperature Control:Turn
clockwise or counterclockwise to
increase or decrease the
temperature inside the vehicle.
When it is cold outside −18°C (0°F)
or lower, use the engine coolant
heater, if vehicle has one, to provide
warmer air faster to the vehicle.
An engine coolant heater warms
the coolant the engine uses that
provides heat to warm the inside of
the vehicle. For more information,
see Engine Heater on page 9‑20.
9(Fan Control): Turn clockwise
or counterclockwise to increase or
decrease the fan speed. The fan
must be on to run the
air-conditioning compressor.
Air Delivery Mode Control:
Turn clockwise or counterclockwise
to change the current airflow mode. Select from the following:
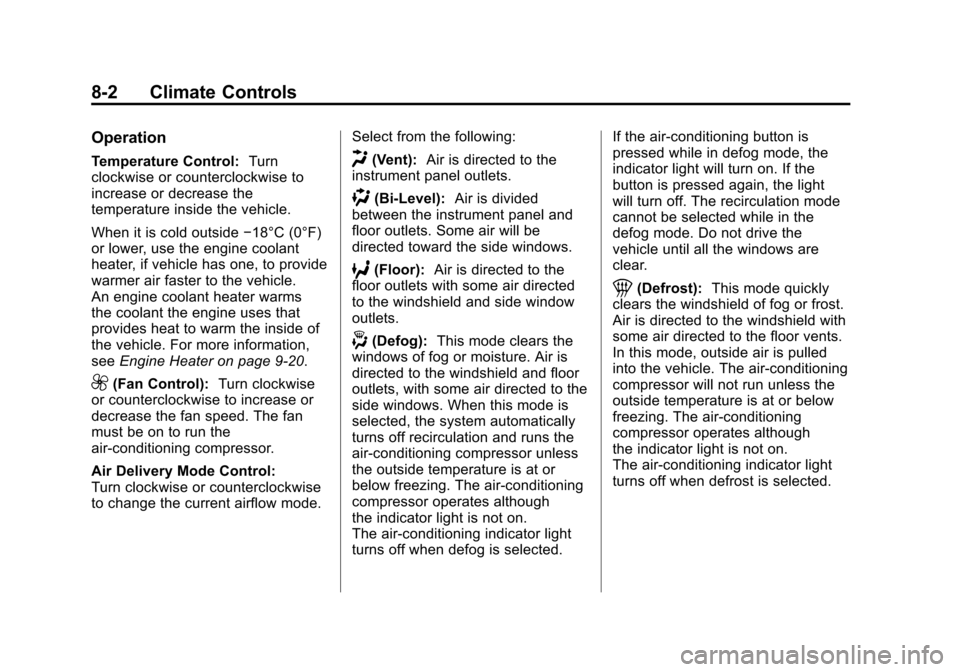
H(Vent):
Air is directed to the
instrument panel outlets.
)(Bi-Level): Air is divided
between the instrument panel and
floor outlets. Some air will be
directed toward the side windows.
6(Floor): Air is directed to the
floor outlets with some air directed
to the windshield and side window
outlets.
-(Defog): This mode clears the
windows of fog or moisture. Air is
directed to the windshield and floor
outlets, with some air directed to the
side windows. When this mode is
selected, the system automatically
turns off recirculation and runs the
air-conditioning compressor unless
the outside temperature is at or
below freezing. The air-conditioning
compressor operates although
the indicator light is not on.
The air-conditioning indicator light
turns off when defog is selected. If the air-conditioning button is
pressed while in defog mode, the
indicator light will turn on. If the
button is pressed again, the light
will turn off. The recirculation mode
cannot be selected while in the
defog mode. Do not drive the
vehicle until all the windows are
clear.
1(Defrost):
This mode quickly
clears the windshield of fog or frost.
Air is directed to the windshield with
some air directed to the floor vents.
In this mode, outside air is pulled
into the vehicle. The air-conditioning
compressor will not run unless the
outside temperature is at or below
freezing. The air-conditioning
compressor operates although
the indicator light is not on.
The air-conditioning indicator light
turns off when defrost is selected.
Page 193 of 398
Black plate (1,1)Chevrolet Malibu Owner Manual - 2012
Driving and Operating 9-1
Driving and
Operating
Driving Information
Distracted Driving . . . . . . . . . . . . . 9-2
Defensive Driving . . . . . . . . . . . . . 9-3
Drunk Driving . . . . . . . . . . . . . . . . . 9-3
Control of a Vehicle . . . . . . . . . . . 9-3
Braking . . . . . . . . . . . . . . . . . . . . . . . 9-3
Steering . . . . . . . . . . . . . . . . . . . . . . . 9-4
Off-Road Recovery . . . . . . . . . . . . 9-5
Loss of Control . . . . . . . . . . . . . . . . 9-6
Driving on Wet Roads . . . . . . . . . 9-6
Highway Hypnosis . . . . . . . . . . . . 9-7
Hill and Mountain Roads . . . . . . 9-8
Winter Driving . . . . . . . . . . . . . . . . . 9-8
If the Vehicle Is Stuck . . . . . . . . 9-10
Vehicle Load Limits . . . . . . . . . . 9-11
Starting and Operating
New Vehicle Break-In . . . . . . . . 9-16
Ignition Positions . . . . . . . . . . . . 9-16
Starting the Engine . . . . . . . . . . 9-18
Engine Heater . . . . . . . . . . . . . . . 9-20
Retained AccessoryPower (RAP) . . . . . . . . . . . . . . . 9-21 Shifting Into Park . . . . . . . . . . . . 9-21
Shifting out of Park . . . . . . . . . . 9-22
Parking over Things
That Burn . . . . . . . . . . . . . . . . . . 9-23
Engine Exhaust
Engine Exhaust . . . . . . . . . . . . . . 9-23
Running the Vehicle WhileParked . . . . . . . . . . . . . . . . . . . . . 9-24
Automatic Transmission
Automatic Transmission . . . . . 9-24
Manual Mode . . . . . . . . . . . . . . . . 9-26
Brakes
Antilock BrakeSystem (ABS) . . . . . . . . . . . . . . 9-28
Parking Brake . . . . . . . . . . . . . . . 9-29
Brake Assist . . . . . . . . . . . . . . . . . 9-29
Ride Control Systems
Traction Control System (TCS) . . . . . . . . . . . . . . 9-30
Electronic Stability Control (ESC) . . . . . . . . . . . . . . 9-32
Cruise Control
Cruise Control . . . . . . . . . . . . . . . 9-33
Fuel
Fuel . . . . . . . . . . . . . . . . . . . . . . . . . 9-36
Recommended Fuel . . . . . . . . . 9-36
Gasoline Specifications(U.S. and Canada Only) . . . . 9-37
California Fuel
Requirements . . . . . . . . . . . . . . 9-37
Fuels in Foreign Countries . . . 9-37
Fuel Additives . . . . . . . . . . . . . . . 9-37
Fuel E85 (85% Ethanol) . . . . . 9-39
Filling the Tank . . . . . . . . . . . . . . 9-40
Filling a Portable Fuel Container . . . . . . . . . . . . . . . . . . . 9-41
Towing
General TowingInformation . . . . . . . . . . . . . . . . . 9-42
Driving Characteristics and
Towing Tips . . . . . . . . . . . . . . . . 9-42
Trailer Towing . . . . . . . . . . . . . . . . 9-46
Towing Equipment . . . . . . . . . . . 9-47
Conversions and Add-Ons
Add-On Electrical Equipment . . . . . . . . . . . . . . . . . 9-48
Page 203 of 398
Black plate (11,1)Chevrolet Malibu Owner Manual - 2012
Driving and Operating 9-11
Rocking the Vehicle to
Get it Out
Turn the steering wheel left and
right to clear the area around the
front wheels. Turn off any traction or
stability system. Shift back and forth
between R (Reverse) and a forward
gear, spinning the wheels as little as
possible. To prevent transmission
wear, wait until the wheels stop
spinning before shifting gears.
Release the accelerator pedal while
shifting, and press lightly on the
accelerator pedal when the
transmission is in gear. Slowly
spinning the wheels in the forward
and reverse directions causes a
rocking motion that could free the
vehicle. If that does not get the
vehicle out after a few tries, it might
need to be towed out. If the vehicle
does need to be towed out, see
Towing the Vehicle on page 10‑87.
Vehicle Load Limits
It is very important to know how
much weight the vehicle can
carry. This weight is called the
vehicle capacity weight and
includes the weight of all
occupants, cargo and all
nonfactory‐installed options.
Two labels on the vehicle
show how much weight it may
properly carry, the Tire and
Loading Information label and
the Certification label.{WARNING
Do not load the vehicle any
heavier than the Gross
Vehicle Weight Rating
(GVWR), or either the
maximum front or rear Gross
Axle Weight Rating (GAWR).
This can cause systems to
break and change the way the
vehicle handles. This could
cause loss of control and a
crash. Overloading can also
shorten the life of the vehicle.
Page 205 of 398
Black plate (13,1)Chevrolet Malibu Owner Manual - 2012
Driving and Operating 9-13
the amount of available cargo
and luggage load capacity is
650 lbs (1400−750 (5 x 150)
= 650 lbs).
5.Determine the combined
weight of luggage and cargo
being loaded on the vehicle.
That weight may not safely
exceed the available cargo
and luggage load capacity
calculated in Step 4.
6.If your vehicle will be towing
a trailer, the load from your
trailer will be transferred to
your vehicle. Consult this
manual to determine how this
reduces the available cargo
and luggage load capacity of
your vehicle.
See Trailer Towing on page 9‑46
for important information on
towing a trailer, towing safety
rules, and trailering tips.Example 1
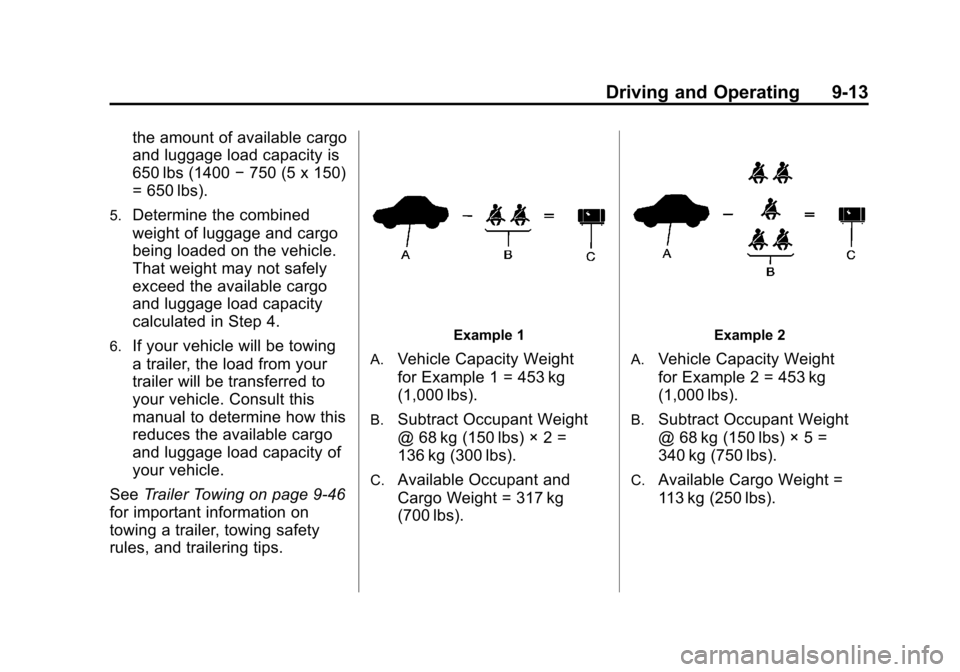
A.
Vehicle Capacity Weight
for Example 1 = 453 kg
(1,000 lbs).
B.Subtract Occupant Weight
@ 68 kg (150 lbs) × 2 =
136 kg (300 lbs).
C.Available Occupant and
Cargo Weight = 317 kg
(700 lbs).
Example 2
A.
Vehicle Capacity Weight
for Example 2 = 453 kg
(1,000 lbs).
B.Subtract Occupant Weight
@ 68 kg (150 lbs) × 5 =
340 kg (750 lbs).
C.Available Cargo Weight =
113 kg (250 lbs).
Page 208 of 398
Black plate (16,1)Chevrolet Malibu Owner Manual - 2012
9-16 Driving and Operating
Starting and
Operating
New Vehicle Break-In
Notice:The vehicle does not
need an elaborate break-in.
But it will perform better in the
long run if you follow these
guidelines:
.Do not drive at any one
constant speed, fast or
slow, for the first 805 km
(500 miles). Do not make
full-throttle starts. Avoid
downshifting to brake or
slow the vehicle.
.Avoid making hard stops for
the first 322 km (200 miles) or
so. During this time the new
brake linings are not yet
broken in. Hard stops with
new linings can mean
premature wear and earlier
replacement. Follow this
breaking-in guideline every
time you get new brake
linings.
.Do not tow a trailer during
break-in. See Trailer Towing
on page 9‑46 for the trailer
towing capabilities of
the vehicle and more
information.
Following break‐in, engine speed
and load can be gradually
increased.
Ignition Positions
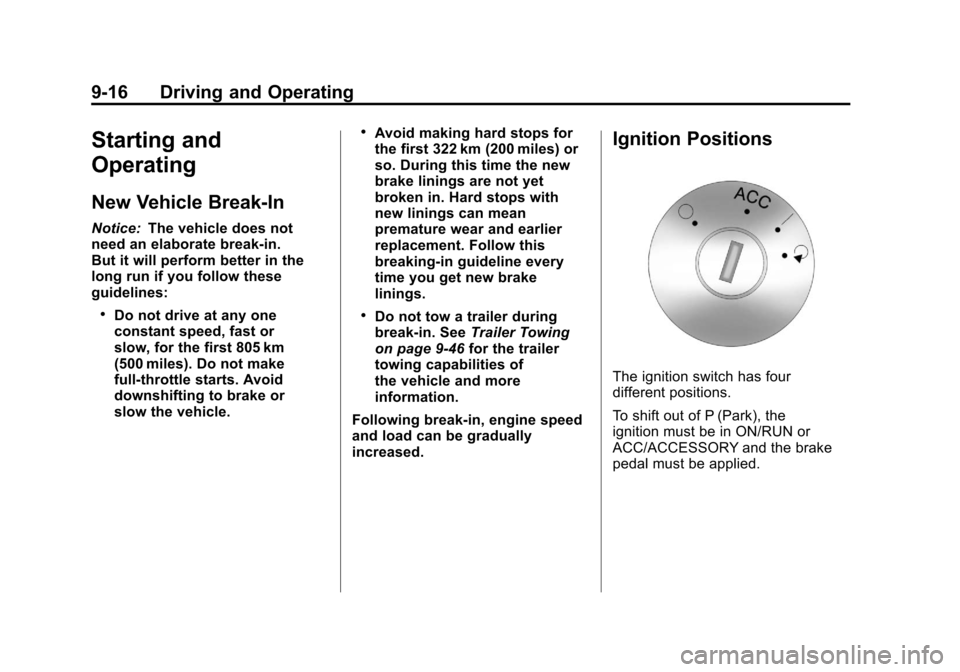
The ignition switch has four
different positions.
To shift out of P (Park), the
ignition must be in ON/RUN or
ACC/ACCESSORY and the brake
pedal must be applied.
Page 213 of 398
Black plate (21,1)Chevrolet Malibu Owner Manual - 2012
Driving and Operating 9-21
Retained Accessory
Power (RAP)
These vehicle accessories can be
used for up to 10 minutes after the
engine is turned off:
.Audio System
.Power Windows
.Heated Seats (if equipped)
.Sunroof (if equipped)
These features continue to work up
to 10 minutes after the ignition is
turned to LOCK/OFF.
The power windows, heated seats,
and sunroof will work until any door
is opened.
The radio continues to work until
the driver door is opened.
All these features operate when
the key is in the ON/RUN or
ACC/ACCESSORY.
Shifting Into Park
{WARNING
It can be dangerous to get out of
the vehicle if the shift lever is not
fully in P (Park) with the parking
brake firmly set. The vehicle can
roll. If you have left the engine
running, the vehicle can move
suddenly. You or others could be
injured. To be sure the vehicle will
not move, even when you are on
fairly level ground, use the steps
that follow. If you are pulling a
trailer, see Driving Characteristics
and Towing Tips on page 9‑42. 1. Hold the brake pedal down
and set the parking brake.
See Parking Brake on page 9‑29
for more information.
2. Move the shift lever into P (Park) by holding in the button on the
shift lever and pushing the shift
lever all the way toward the front
of the vehicle.
3. Turn the ignition key to LOCK/OFF.
4. Remove the key and take it with you. If you can leave the vehicle
with the ignition key in your
hand, the vehicle is in P (Park).