2012 CHEVROLET MALIBU headlamp
[x] Cancel search: headlampPage 2 of 398

Black plate (2,1)Chevrolet Malibu Owner Manual - 2012
2012 Chevrolet Malibu Owner ManualM
Vehicle Care. . . . . . . . . . . . . . . . . 10-1
General Information . . . . . . . . . . 10-2
Vehicle Checks . . . . . . . . . . . . . . . 10-4
Headlamp Aiming . . . . . . . . . . . 10-30
Bulb Replacement . . . . . . . . . . 10-30
Electrical System . . . . . . . . . . . . 10-33
Wheels and Tires . . . . . . . . . . . 10-42
Jump Starting . . . . . . . . . . . . . . . 10-83
Towing . . . . . . . . . . . . . . . . . . . . . . 10-87
Appearance Care . . . . . . . . . . . 10-90
Service and Maintenance . . . 11-1
General Information . . . . . . . . . . 11-1
Maintenance Schedule . . . . . . . 11-2
Special Application
Services . . . . . . . . . . . . . . . . . . . . 11-8
Additional Maintenance
and Care . . . . . . . . . . . . . . . . . . . . 11-8
Recommended Fluids, Lubricants, and Parts . . . . . . 11-12
Maintenance Records . . . . . . . 11-14 Technical Data
. . . . . . . . . . . . . . . 12-1
Vehicle Identification . . . . . . . . . 12-1
Vehicle Data . . . . . . . . . . . . . . . . . . 12-2
Customer Information . . . . . . . 13-1
Customer Information . . . . . . . . 13-2
Reporting Safety Defects . . . . 13-19
Vehicle Data Recording and
Privacy . . . . . . . . . . . . . . . . . . . . 13-20
OnStar . . . . . . . . . . . . . . . . . . . . . . . 14-1
OnStar Overview . . . . . . . . . . . . . 14-1
OnStar Services . . . . . . . . . . . . . . 14-2
OnStar Additional Information . . . . . . . . . . . . . . . . . . 14-5
Index . . . . . . . . . . . . . . . . . . . . . i-1
Page 5 of 398

Black plate (5,1)Chevrolet Malibu Owner Manual - 2012
Introduction v
Vehicle Symbol Chart
Here are some additional symbols
that may be found on the vehicle
and what they mean. For more
information on the symbol, refer to
the Index.
9:Airbag Readiness Light
#:Air Conditioning
!:Antilock Brake System (ABS)
%:Audio Steering Wheel Controls
or OnStar®
$: Brake System Warning Light
":Charging System
I:Cruise Control
B: Engine Coolant Temperature
O:Exterior Lamps
#:Fog Lamps
.: Fuel Gauge
+:Fuses
3: Headlamp High/Low-Beam
Changer
j: LATCH System Child
Restraints
*: Malfunction Indicator Lamp
::Oil Pressure
}:Power
/:Remote Vehicle Start
>:Safety Belt Reminders
7:Tire Pressure Monitor
d:Traction Control/Electronic
Stability Control (ESC)
M: Windshield Washer Fluid
Page 17 of 398
Black plate (11,1)Chevrolet Malibu Owner Manual - 2012
In Brief 1-11
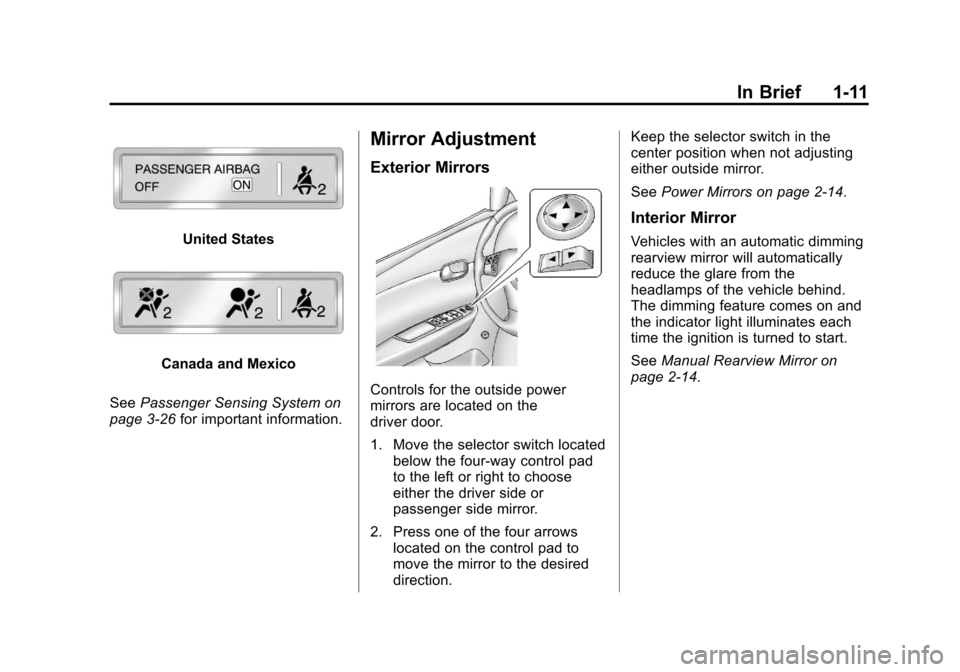
United States
Canada and Mexico
See Passenger Sensing System on
page 3‑26 for important information.
Mirror Adjustment
Exterior Mirrors
Controls for the outside power
mirrors are located on the
driver door.
1. Move the selector switch located
below the four-way control pad
to the left or right to choose
either the driver side or
passenger side mirror.
2. Press one of the four arrows located on the control pad to
move the mirror to the desired
direction. Keep the selector switch in the
center position when not adjusting
either outside mirror.
See
Power Mirrors on page 2‑14.
Interior Mirror
Vehicles with an automatic dimming
rearview mirror will automatically
reduce the glare from the
headlamps of the vehicle behind.
The dimming feature comes on and
the indicator light illuminates each
time the ignition is turned to start.
SeeManual Rearview Mirror on
page 2‑14.
Page 19 of 398
Black plate (13,1)Chevrolet Malibu Owner Manual - 2012
In Brief 1-13
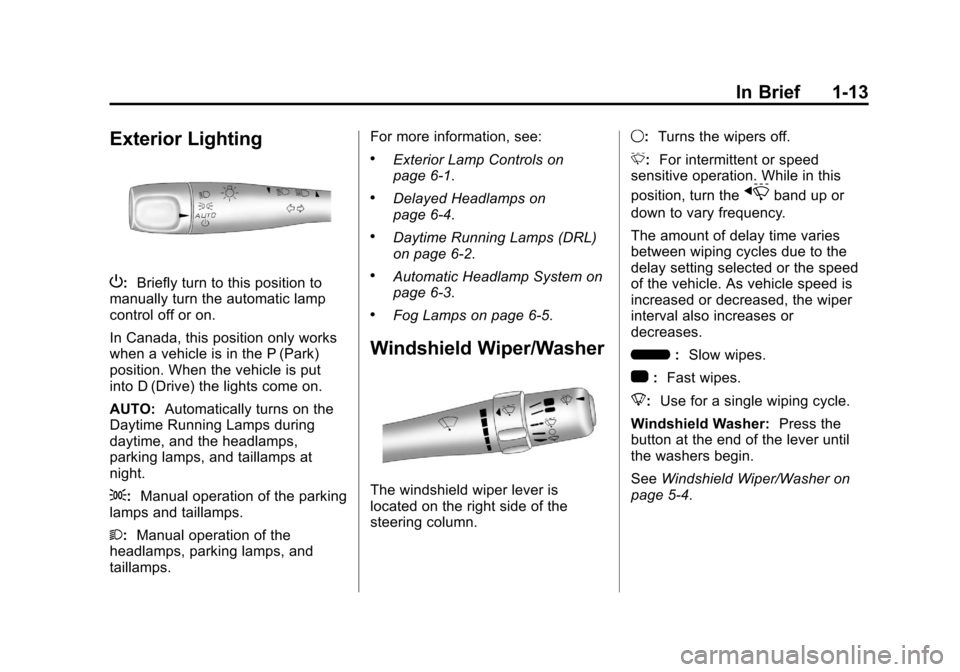
Exterior Lighting
P:Briefly turn to this position to
manually turn the automatic lamp
control off or on.
In Canada, this position only works
when a vehicle is in the P (Park)
position. When the vehicle is put
into D (Drive) the lights come on.
AUTO: Automatically turns on the
Daytime Running Lamps during
daytime, and the headlamps,
parking lamps, and taillamps at
night.
;: Manual operation of the parking
lamps and taillamps.
2: Manual operation of the
headlamps, parking lamps, and
taillamps. For more information, see:
.Exterior Lamp Controls on
page 6‑1.
.Delayed Headlamps on
page 6‑4.
.Daytime Running Lamps (DRL)
on page 6‑2.
.Automatic Headlamp System on
page 6‑3.
.Fog Lamps on page 6‑5.
Windshield Wiper/Washer
The windshield wiper lever is
located on the right side of the
steering column.
9:
Turns the wipers off.
3: For intermittent or speed
sensitive operation. While in this
position, turn the
xband up or
down to vary frequency.
The amount of delay time varies
between wiping cycles due to the
delay setting selected or the speed
of the vehicle. As vehicle speed is
increased or decreased, the wiper
interval also increases or
decreases.
6 :Slow wipes.
1 :Fast wipes.
8: Use for a single wiping cycle.
Windshield Washer: Press the
button at the end of the lever until
the washers begin.
See Windshield Wiper/Washer on
page 5‑4.
Page 33 of 398
Black plate (3,1)Chevrolet Malibu Owner Manual - 2012
Keys, Doors, and Windows 2-3
.Check the transmitter's battery.
See“Battery Replacement” later
in this section.
.If the transmitter is still not
working correctly, see your
dealer or a qualified technician
for service.
Remote Keyless Entry
(RKE) System Operation
The Remote Keyless Entry (RKE)
transmitter functions work up to
60 m (195 feet) away from the
vehicle.
Keep in mind that other conditions,
such as those previously stated, can
impact the performance of the
transmitter.
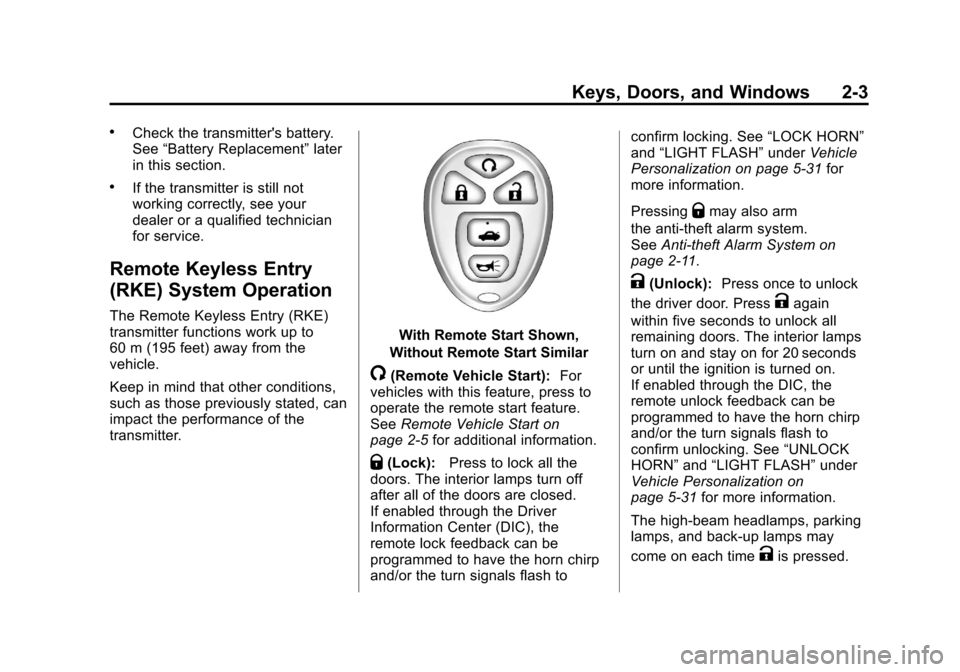
With Remote Start Shown,
Without Remote Start Similar
/(Remote Vehicle Start): For
vehicles with this feature, press to
operate the remote start feature.
See Remote Vehicle Start on
page 2‑5 for additional information.
Q(Lock):Press to lock all the
doors. The interior lamps turn off
after all of the doors are closed.
If enabled through the Driver
Information Center (DIC), the
remote lock feedback can be
programmed to have the horn chirp
and/or the turn signals flash to confirm locking. See
“LOCK HORN”
and “LIGHT FLASH” underVehicle
Personalization on page 5‑31 for
more information.
Pressing
Qmay also arm
the anti-theft alarm system.
See Anti-theft Alarm System on
page 2‑11.
K(Unlock): Press once to unlock
the driver door. Press
Kagain
within five seconds to unlock all
remaining doors. The interior lamps
turn on and stay on for 20 seconds
or until the ignition is turned on.
If enabled through the DIC, the
remote unlock feedback can be
programmed to have the horn chirp
and/or the turn signals flash to
confirm unlocking. See “UNLOCK
HORN” and“LIGHT FLASH” under
Vehicle Personalization on
page 5‑31 for more information.
The high‐beam headlamps, parking
lamps, and back‐up lamps may
come on each time
Kis pressed.
Page 34 of 398
Black plate (4,1)Chevrolet Malibu Owner Manual - 2012
2-4 Keys, Doors, and Windows
See“EXT (Exterior) LIGHTS” under
Vehicle Personalization on
page 5‑31 for additional information.
Pressing
Kon the RKE transmitter
disarms the anti-theft alarm system.
See Anti-theft Alarm System on
page 2‑11.
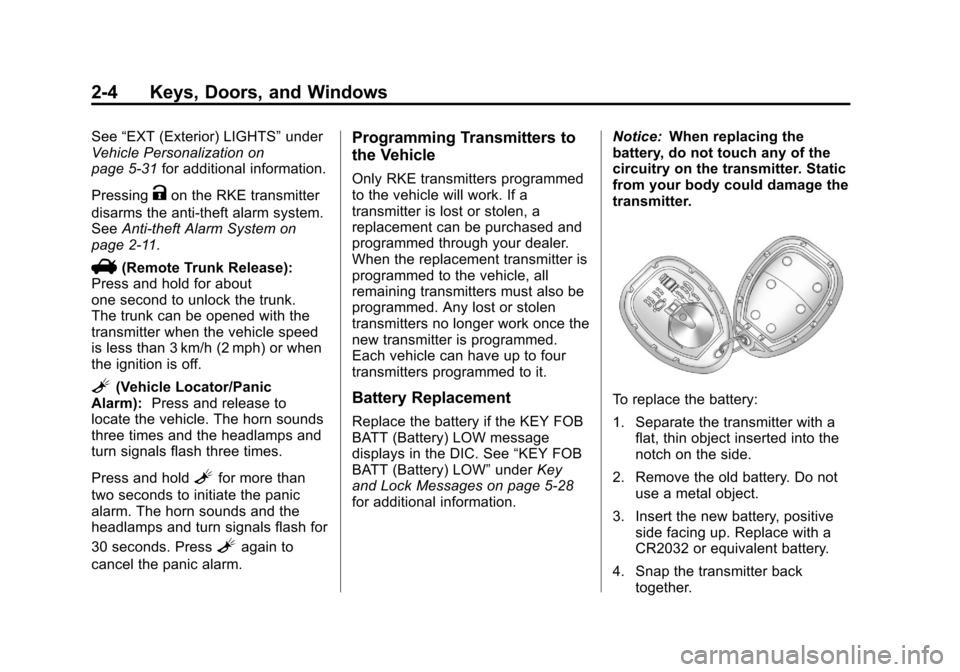
V(Remote Trunk Release):
Press and hold for about
one second to unlock the trunk.
The trunk can be opened with the
transmitter when the vehicle speed
is less than 3 km/h (2 mph) or when
the ignition is off.
L(Vehicle Locator/Panic
Alarm): Press and release to
locate the vehicle. The horn sounds
three times and the headlamps and
turn signals flash three times.
Press and hold
Lfor more than
two seconds to initiate the panic
alarm. The horn sounds and the
headlamps and turn signals flash for
30 seconds. Press
Lagain to
cancel the panic alarm.
Programming Transmitters to
the Vehicle
Only RKE transmitters programmed
to the vehicle will work. If a
transmitter is lost or stolen, a
replacement can be purchased and
programmed through your dealer.
When the replacement transmitter is
programmed to the vehicle, all
remaining transmitters must also be
programmed. Any lost or stolen
transmitters no longer work once the
new transmitter is programmed.
Each vehicle can have up to four
transmitters programmed to it.
Battery Replacement
Replace the battery if the KEY FOB
BATT (Battery) LOW message
displays in the DIC. See “KEY FOB
BATT (Battery) LOW” underKey
and Lock Messages on page 5‑28
for additional information. Notice:
When replacing the
battery, do not touch any of the
circuitry on the transmitter. Static
from your body could damage the
transmitter.
To replace the battery:
1. Separate the transmitter with a flat, thin object inserted into the
notch on the side.
2. Remove the old battery. Do not use a metal object.
3. Insert the new battery, positive side facing up. Replace with a
CR2032 or equivalent battery.
4. Snap the transmitter back together.
Page 44 of 398
Black plate (14,1)Chevrolet Malibu Owner Manual - 2012
2-14 Keys, Doors, and Windows
Power Mirrors
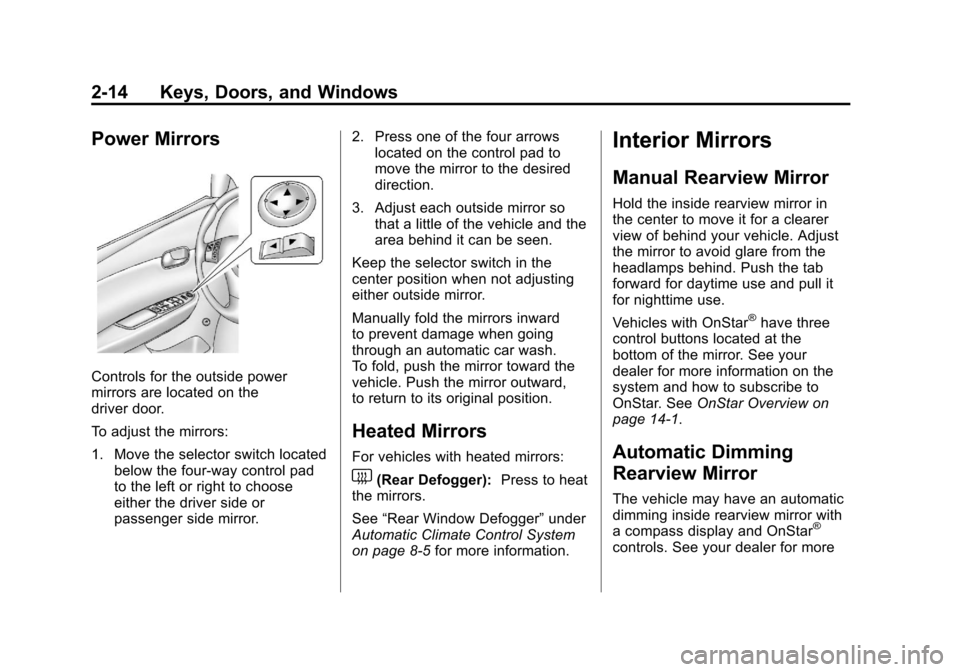
Controls for the outside power
mirrors are located on the
driver door.
To adjust the mirrors:
1. Move the selector switch locatedbelow the four-way control pad
to the left or right to choose
either the driver side or
passenger side mirror. 2. Press one of the four arrows
located on the control pad to
move the mirror to the desired
direction.
3. Adjust each outside mirror so that a little of the vehicle and the
area behind it can be seen.
Keep the selector switch in the
center position when not adjusting
either outside mirror.
Manually fold the mirrors inward
to prevent damage when going
through an automatic car wash.
To fold, push the mirror toward the
vehicle. Push the mirror outward,
to return to its original position.
Heated Mirrors
For vehicles with heated mirrors:
1(Rear Defogger): Press to heat
the mirrors.
See “Rear Window Defogger” under
Automatic Climate Control System
on page 8‑5 for more information.
Interior Mirrors
Manual Rearview Mirror
Hold the inside rearview mirror in
the center to move it for a clearer
view of behind your vehicle. Adjust
the mirror to avoid glare from the
headlamps behind. Push the tab
forward for daytime use and pull it
for nighttime use.
Vehicles with OnStar
®have three
control buttons located at the
bottom of the mirror. See your
dealer for more information on the
system and how to subscribe to
OnStar. See OnStar Overview on
page 14‑1.
Automatic Dimming
Rearview Mirror
The vehicle may have an automatic
dimming inside rearview mirror with
a compass display and OnStar
®
controls. See your dealer for more
Page 110 of 398
Black plate (4,1)Chevrolet Malibu Owner Manual - 2012
5-4 Instruments and Controls
Windshield Wiper/Washer
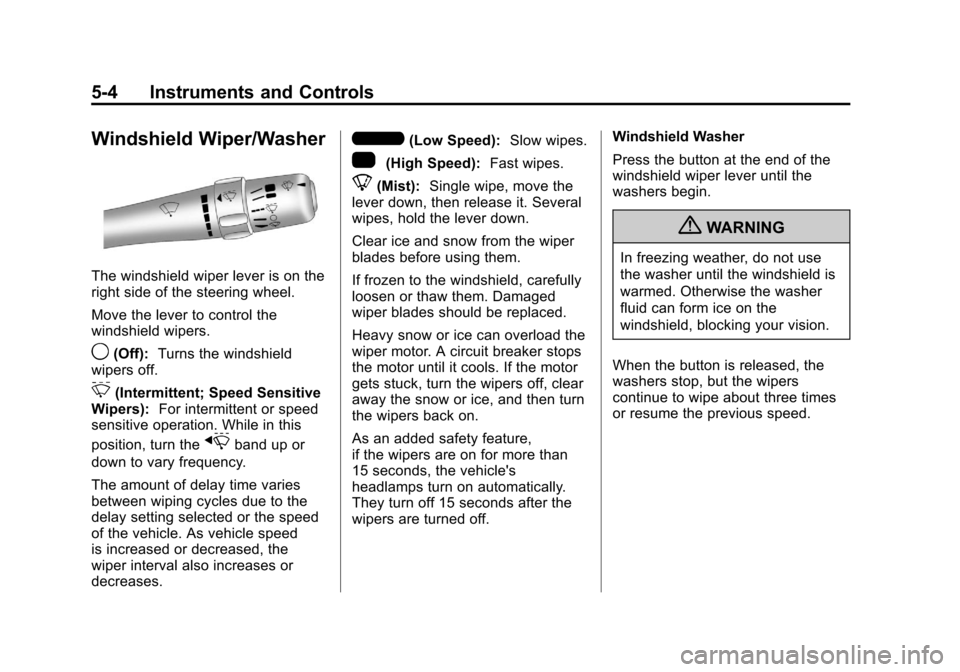
The windshield wiper lever is on the
right side of the steering wheel.
Move the lever to control the
windshield wipers.
9(Off):Turns the windshield
wipers off.
3(Intermittent; Speed Sensitive
Wipers): For intermittent or speed
sensitive operation. While in this
position, turn the
xband up or
down to vary frequency.
The amount of delay time varies
between wiping cycles due to the
delay setting selected or the speed
of the vehicle. As vehicle speed
is increased or decreased, the
wiper interval also increases or
decreases.
6(Low Speed): Slow wipes.
1(High Speed): Fast wipes.
8(Mist):Single wipe, move the
lever down, then release it. Several
wipes, hold the lever down.
Clear ice and snow from the wiper
blades before using them.
If frozen to the windshield, carefully
loosen or thaw them. Damaged
wiper blades should be replaced.
Heavy snow or ice can overload the
wiper motor. A circuit breaker stops
the motor until it cools. If the motor
gets stuck, turn the wipers off, clear
away the snow or ice, and then turn
the wipers back on.
As an added safety feature,
if the wipers are on for more than
15 seconds, the vehicle's
headlamps turn on automatically.
They turn off 15 seconds after the
wipers are turned off. Windshield Washer
Press the button at the end of the
windshield wiper lever until the
washers begin.
{WARNING
In freezing weather, do not use
the washer until the windshield is
warmed. Otherwise the washer
fluid can form ice on the
windshield, blocking your vision.
When the button is released, the
washers stop, but the wipers
continue to wipe about three times
or resume the previous speed.