2012 BMW Z4 SDRIVE35I engine
[x] Cancel search: enginePage 87 of 220

More information, refer to page 186.
Park Distance Control PDC
The concept
PDC supports you when parking.
Objects in front of or behind your vehicle that
you are approaching slowly are indicated by
acoustic signals.
Measurement
Measurements are made by ultrasound sensors
in the bumpers.
The range is approx. 6 ft/2 m.
An acoustic warning is first given:▷By the front sensors and two rear corner
sensors at approx. 24 in/60 cm.▷By the rear middle sensors at approx. 5 ft/
1.50 m.
System limits
Check the traffic situation as well
PDC cannot serve as a substitute for the
driver's personal judgment of the traffic situa‐
tion. Check the traffic situation around the vehi‐
cle with your own eyes. Otherwise, an accident
could result from road users or objects located
outside of the PDC detection range.
Loud noises from outside and inside the vehicle
may prevent you from hearing the PDC's signal
tone.◀
Avoid driving quickly with PDC
Avoid approaching an object quickly.
Avoid driving away quickly while PDC is not yet
active.
For technical reasons, the system may other‐
wise be too late in issuing a warning.◀
Limits of ultrasonic measurement
The detection of objects can reach the physical
limits of ultrasonic measurement, for instance:▷With tow bars and trailer hitches.▷With thin or wedge-shaped objects.▷With low objects.▷With objects with corners and sharp edges.
Low objects already displayed, e.g., curbs, can
move into the blind area of the sensors before or
after a continuous tone sounds.
High, protruding objects such as ledges may not
be detected.
False warnings
PDC may issue a warning under the following
conditions even though there is no obstacle
within the detection range:
▷In heavy rain.▷When sensors are very dirty or covered in
ice.▷When sensors are covered in snow.▷On rough road surfaces.▷In large buildings with right angles and
smooth walls, e.g., in underground garages.▷In heavy exhaust.▷Due to other ultrasound sources, e.g.,
sweeping machines, high pressure steam
cleaners or neon lights.
Switching on automatically
Engage reverse gear with the engine running or
the ignition switched on.
Switching off automatically when
driving forward
The system switches off when a certain distance
or speed is exceeded.
Switch on the system again if necessary.
Seite 87Driving comfortControls87
Online Edition for Part no. 01 40 2 609 184 - 09 11 500
Page 91 of 220

To switch on the air conditioner, set the desired
air flow rate.
Switching cooling function on/off The cooling function cools and de‐
humidifies the incoming air before
reheating it as required, according to the tem‐
perature setting. This function is only available
while the engine is running.
The cooling function helps to prevent conden‐
sation on the windows or to remove it quickly.
Depending on the weather, the windshield may
fog over briefly when the engine is started.
Rear window defroster The defroster switches off auto‐
matically after a certain time or
when the hardtop is opened.
Temperature To increase the temperature, turn
the rotary switch clockwise to‐
wards red. For a lower temperature,
turn the rotary switch counter‐
clockwise towards blue.
Defrosting windows and removing
condensation1Air distribution 1 in position .2Deactivate recirculated air mode 2.3Switch on cooling function 3.4Temperature 4 to the right, red.5Set the air flow rate 5 to the maximum level.6Switch on the rear window defroster 6 to
defrost the rear window
.
Ventilation
1Use the lever to change the direction of the
air flow2Use the thumbwheels to smoothly open and
close the air vents
Ventilation for cooling
Adjust the vents to direct the flow of cool air in
your direction, for instance if the interior has be‐
come too warm.
Draft-free ventilation
Adjust the vents to let the air flow past you.
Microfilter
The microfilter removes dust and pollen from
the incoming air. The microfilter is changed by
your service center during routine maintenance
work.
Seite 91ClimateControls91
Online Edition for Part no. 01 40 2 609 184 - 09 11 500
Page 93 of 220

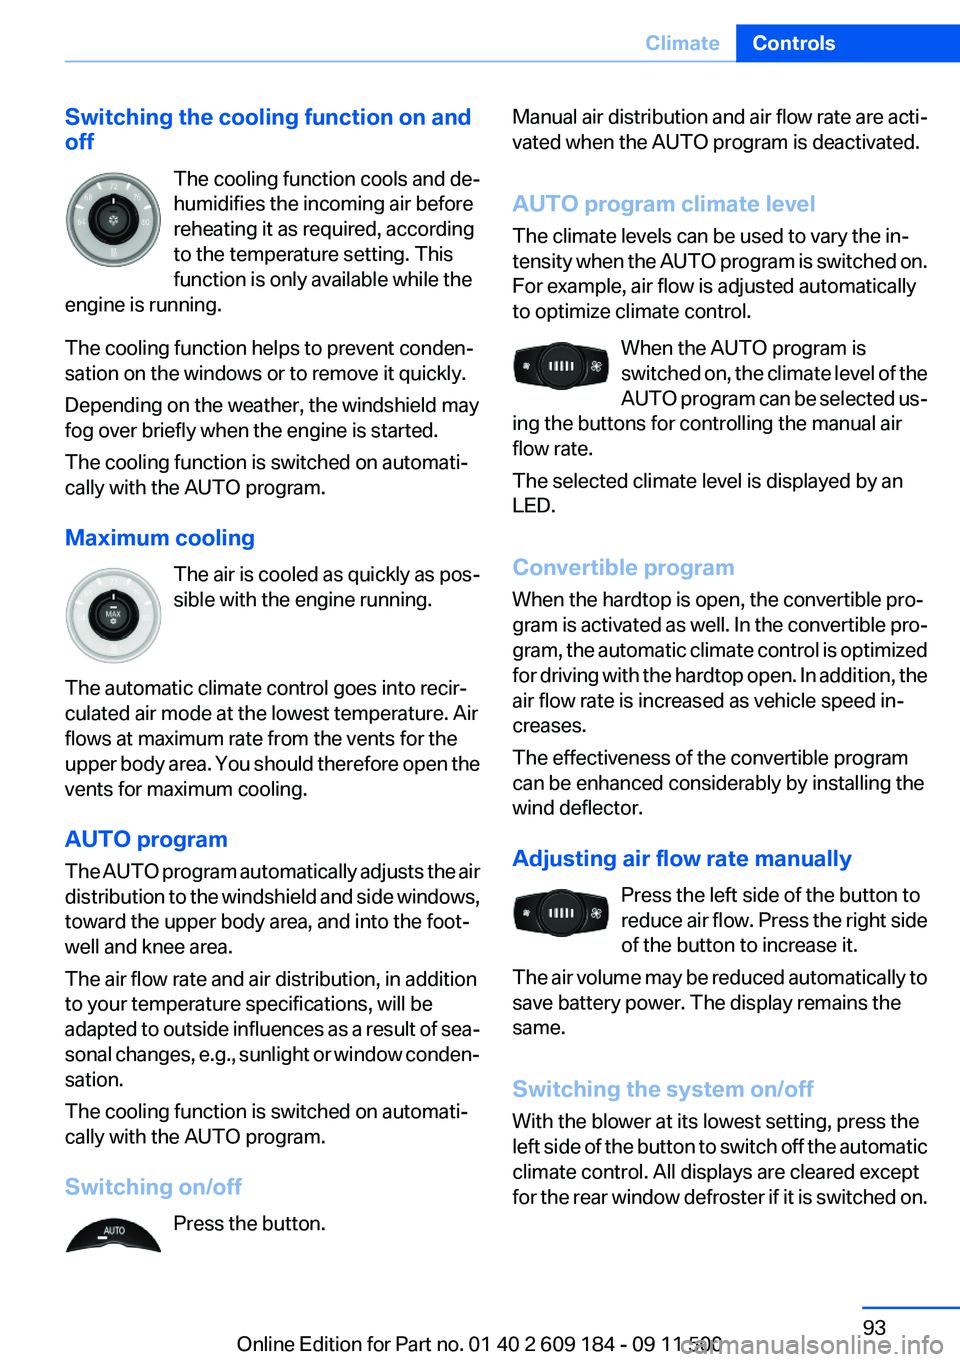
Switching the cooling function on and
off
The cooling function cools and de‐
humidifies the incoming air before
reheating it as required, according
to the temperature setting. This
function is only available while the
engine is running.
The cooling function helps to prevent conden‐
sation on the windows or to remove it quickly.
Depending on the weather, the windshield may
fog over briefly when the engine is started.
The cooling function is switched on automati‐
cally with the AUTO program.
Maximum cooling The air is cooled as quickly as pos‐
sible with the engine running.
The automatic climate control goes into recir‐
culated air mode at the lowest temperature. Air
flows at maximum rate from the vents for the
upper body area. You should therefore open the
vents for maximum cooling.
AUTO program
The AUTO program automatically adjusts the air
distribution to the windshield and side windows,
toward the upper body area, and into the foot‐
well and knee area.
The air flow rate and air distribution, in addition
to your temperature specifications, will be
adapted to outside influences as a result of sea‐
sonal changes, e.g., sunlight or window conden‐
sation.
The cooling function is switched on automati‐
cally with the AUTO program.
Switching on/off Press the button.Manual air distribution and air flow rate are acti‐
vated when the AUTO program is deactivated.
AUTO program climate level
The climate levels can be used to vary the in‐
tensity when the AUTO program is switched on.
For example, air flow is adjusted automatically
to optimize climate control.
When the AUTO program is
switched on, the climate level of the
AUTO program can be selected us‐
ing the buttons for controlling the manual air
flow rate.
The selected climate level is displayed by an
LED.
Convertible program
When the hardtop is open, the convertible pro‐
gram is activated as well. In the convertible pro‐
gram, the automatic climate control is optimized
for driving with the hardtop open. In addition, the
air flow rate is increased as vehicle speed in‐
creases.
The effectiveness of the convertible program
can be enhanced considerably by installing the
wind deflector.
Adjusting air flow rate manually Press the left side of the button to
reduce air flow. Press the right side
of the button to increase it.
The air volume may be reduced automatically to
save battery power. The display remains the
same.
Switching the system on/off
With the blower at its lowest setting, press the
left side of the button to switch off the automatic
climate control. All displays are cleared except
for the rear window defroster if it is switched on.Seite 93ClimateControls93
Online Edition for Part no. 01 40 2 609 184 - 09 11 500
Page 94 of 220

Press any button except the rear window de‐
froster to reactivate the automatic climate con‐
trol.
Residual heat
The heat stored in the engine is used to heat the
interior.
This function can be switched on
using the right-hand button under
the following conditions:▷Up to 15 minutes after switching off the en‐
gine.▷When the engine is warm.▷With sufficient battery voltage.▷At an external temperature under 77 ℉/
25 ℃.
The middle LED is lit when the function is on.
Automatic recirculated air mode/
recirculated air mode
Switch on the desired operating
mode by pressing this button re‐
peatedly:
▷LED off: outside air flows in
continuously.▷Left LED on, automatic recirculated air con‐
trol: a sensor detects pollutants in the out‐
side air. If necessary, the system blocks the
supply of outside air and recirculates the in‐
side air. As soon as the concentration of pol‐
lutants in the outside air has decreased suf‐
ficiently, the system automatically switches
back to outside air supply.▷Right LED on, recirculated air mode: the
supply of outside air into the vehicle is per‐
manently blocked. The system then recir‐
culates the air currently within the vehicle.
Only use recirculated air mode for a limited
period
If condensation starts to form on the inside win‐
dow surfaces during operation in the recircu‐
lated air mode, you should switch it off while also
increasing the air flow rate as required. The re‐
circulated air mode should not be used for an
extended period of time, as the air quality inside
the vehicle deteriorates steadily.◀
Defrosting and defogging windows Quickly removes ice and conden‐
sation from the windshield and
front side windows.
For this purpose, also switch on the cooling
function.
Rear window defroster The defroster switches off auto‐
matically after a certain time or
when the hardtop is opened.
Ventilation1Use the lever to change the direction of the
air flow2Use the thumbwheels to smoothly open and
close the air vents3Thumbwheel for adjusting the amount of
cool air from the vents to the upper body
area. This can be used to adjust the air tem‐
perature for the upper body area.
Ventilation for cooling
Adjust the vents to direct the flow of cool air in
your direction, for instance if the interior has be‐
come too warm.
Seite 94ControlsClimate94
Online Edition for Part no. 01 40 2 609 184 - 09 11 500
Page 98 of 220

Canada: if the LED does not flash rapidly af‐
ter approx. 60 seconds, change the distance
and repeat the step. If programming was
aborted by the hand-held transmitter, hold
down the memory button and press and re‐
lease the button on the hand-held transmit‐
ter several times for 2 seconds.
Controls
Prior to operation
Before operating a unit with the Universal
Garage Door Opener, ensure that there are no
people, animals, or objects in the range of move‐
ment of the system; otherwise, there is a risk of
injury or damage.
Also follow the safety instructions of the hand-
held transmitter.◀
The system, such as the garage door, can be
operated using the button on the interior rear‐
view mirror with the engine running or the igni‐
tion switched on. When you are within the re‐
ception range of the system, press and hold the
button until the function is initiated. The LED on
the interior rearview mirror lights up continu‐
ously while the radio signal is being transmitted.
Deleting stored functions
Press the right and left buttons on the interior
rearview mirror simultaneously for approx.
20 seconds until the LED flashes rapidly. All
stored functions are deleted. The functions can‐
not be deleted individually.
Digital compass
1Adjustment button2Display
The display shows you the main or secondary
compass direction in which you are driving.
Operating concept
You can call up a number of functions by press‐
ing the adjustment button with a pointed object
such as a ball-point pen. The following adjust‐
ment options are displayed one after the other,
depending on how long you keep the adjust‐
ment button pressed:▷Press briefly: switch the display on/off.▷3 to 6 seconds: set the compass zone.▷6 to 9 seconds: calibrate the compass.▷9 to 12 seconds: set left-hand/right hand
steering.▷12 to 15 seconds: set the language.
Setting compass zones
Set the compass zone corresponding to your
vehicle's geographic location so that the com‐
pass can function correctly; refer to the world
map with compass zones.
Seite 98ControlsInterior equipment98
Online Edition for Part no. 01 40 2 609 184 - 09 11 500
Page 100 of 220

The setting is automatically saved after approx.
10 seconds.
Connecting electrical devices
Note Do not connect the charger to the socket
Do not connect the battery charger to the
socket installed in the vehicle at the factory as
this could damage the vehicle.◀
Sockets
In your BMW, when the engine is running or the
ignition is switched on, you can use electrical
devices such as a hand lamp, car vacuum
cleaner, etc., as long as one of the following
sockets is available. The total load of all sockets
must not exceed 140 Watt at 12 V. Avoid dam‐
aging the sockets by attempting to insert plugs
of unsuitable shape or size.
Cigarette lighter socket
Access to socket: remove the lighter from the
socket.
Under the center armrest
External audio device, refer to page 103.
In the passenger footwell
A socket is located on the left below the glove
compartment.
Trunk
Depending on your vehicle's equipment, the fol‐
lowing storage spaces can be found in the cargo
area:▷Rubber band for securing light objects▷Storage compartment.
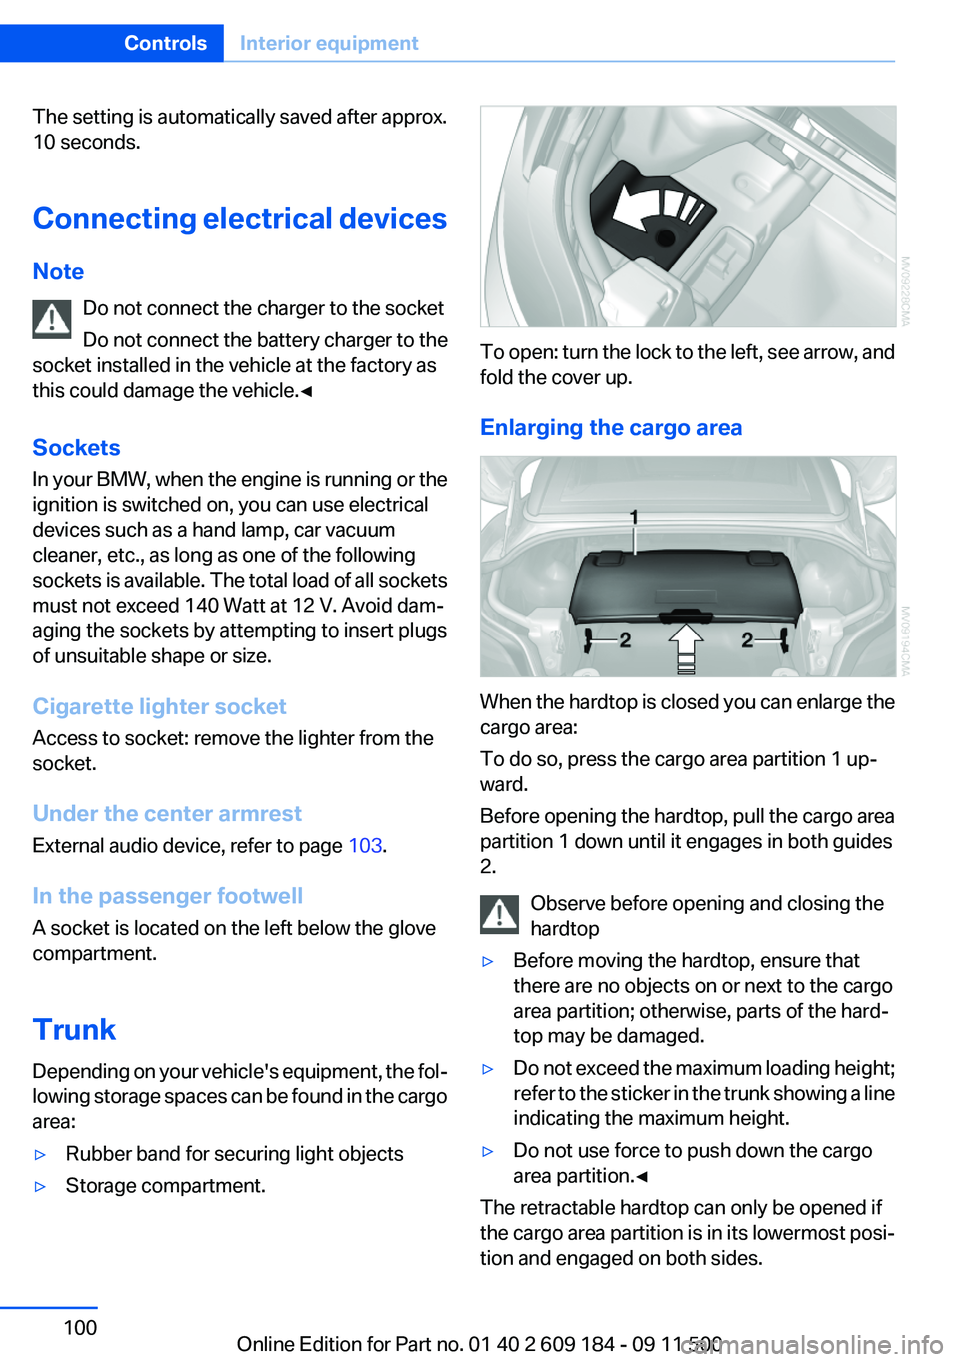
To open: turn the lock to the left, see arrow, and
fold the cover up.
Enlarging the cargo area
When the hardtop is closed you can enlarge the
cargo area:
To do so, press the cargo area partition 1 up‐
ward.
Before opening the hardtop, pull the cargo area
partition 1 down until it engages in both guides
2.
Observe before opening and closing the
hardtop
▷Before moving the hardtop, ensure that
there are no objects on or next to the cargo
area partition; otherwise, parts of the hard‐
top may be damaged.▷Do not exceed the maximum loading height;
refer to the sticker in the trunk showing a line
indicating the maximum height.▷Do not use force to push down the cargo
area partition.◀
The retractable hardtop can only be opened if
the cargo area partition is in its lowermost posi‐
tion and engaged on both sides.
Seite 100ControlsInterior equipment100
Online Edition for Part no. 01 40 2 609 184 - 09 11 500
Page 108 of 220

Things to remember when drivingVehicle equipment
This chapter describes all series equipment as
well as country-specific and special equipment
offered for this model series.Therefore, it also
describes equipment that may not be found in
your vehicle, for instance due to the selected
special equipment or the country version. This
also applies to safety-related functions and sys‐
tems.
Breaking-in period
General information
Moving parts need to be broken in to adjust to
each other.
The following instructions will help achieve a
long vehicle life and good economy.
Engine and differential
Always obey the official speed limits.
Up to 1,200 miles/2,000 km
Do not exceed the maximum engine and road
speeds:▷4,500 rpm and 100 mph/160 km/h.
Do not drive with full-throttle operation, and do
not use the transmission's kickdown mode or
Launch Control.
From 1,200 miles/2,000 km
The engine and vehicle speed can gradually be
increased.
Tires
Due to technical factors associated with their
manufacture, tires do not achieve their full trac‐
tion potential until after an initial breaking-in pe‐
riod.
Drive conservatively for the first 200 miles/
300 km.
Brake system
Brakes require an initial break-in period of ap‐
prox. 300 miles/500 km to achieve optimized
contact and wear patterns between brake pads
and rotors. Drive cautiously during this break-in
period.
Clutch
The clutch requires an initial break-in period of
approx. 300 miles/500 km to function at an op‐
timal level.
During this break-in period, engage the clutch
gently.
Following part replacement
The same breaking in procedures should be ob‐
served if any of the components mentioned
above have to be renewed in the course of the
vehicle's operating life.
General driving notes
Ground clearance Limited ground clearance
Note that the Z4 sDrive35 has limited
ground clearance, for instance when driving into
underground parking garages or over obstacles.
Otherwise, the vehicle may be damaged.◀
Closing the trunk lid Drive with the trunk lid closed
Only operate the vehicle with the trunk lid
closed; otherwise, exhaust fumes could enter
the passenger compartment.◀Seite 108Driving tipsThings to remember when driving108
Online Edition for Part no. 01 40 2 609 184 - 09 11 500
Page 109 of 220

If the vehicle must be driven with the trunk lid
open:1.Close all windows.2.Greatly increase the air flow rate of the air
conditioner or automatic climate control.
Hot exhaust system
Hot exhaust system
High temperatures are generated in the
exhaust system.
Do not remove the heat shields installed and
never apply undercoating to them. Make sure
that flammable materials, e. g. hay, leaves, grass,
etc. do not come in contact with the hot exhaust
system during driving, while in idle position
mode, or when parked. Such contact could lead
to a fire, and with it the risk of serious personal
injury as well as property damage.
Do not touch hot exhaust pipes; otherwise, there
is the danger of getting burned.◀
Mobile communication devices in the
vehicle
Mobile communication devices in the ve‐
hicle
It is not recommended to use mobile phones,
such as mobile phones without a direct connec‐
tion to an external aerial in the vehicle's passen‐
ger compartment. Otherwise, the vehicle elec‐
tronics and mobile communication devices can
interfere with each other. In addition, there is no
assurance that the radiation generated during
transmission will be discharged from the vehicle
interior.◀
Hydroplaning
On wet or slushy roads, a wedge of water can
form between the tires and road surface.
This phenomenon is referred to as hydroplan‐
ing. It is characterized by a partial or complete
loss of contact between the tires and the road
surface, ultimately undermining your ability to
steer and brake the vehicle.
Hydroplaning
When driving on wet or slushy roads, re‐
duce your speed to prevent hydroplaning.◀
Driving through water
Drive though calm water only if it is not deeper
than 9.8 inches/25 cm and at this height, no
faster than walking speed, up to 6 mph/10 km/h.
Adhere to water depth and speed limita‐
tions
Do not exceed this water depth and walking
speed; otherwise, the vehicle's engine, the elec‐
trical systems and the transmission may be
damaged.◀
Braking safely
Your vehicle is equipped with ABS as a standard
feature.
Applying the brakes fully is the most effective
way of braking in situations when this is neces‐
sary.
The vehicle maintains steering responsiveness.
You can still avoid any obstacles with a minimum
of steering effort.
Pulsation of the brake pedal and sounds from
the hydraulic circuits indicate that ABS is in its
active mode.
Objects in the area around the pedals No objects in the area around the pedals
Keep floor mats, carpets, and any other
objects out of the area of motion of the pedals;
otherwise, the function of the pedals could be
impeded while driving
Do not place additional floor mats over existing
mats or other objects.
Only use floor mats that have been approved for
the vehicle and can be properly fixed in place.Seite 109Things to remember when drivingDriving tips109
Online Edition for Part no. 01 40 2 609 184 - 09 11 500