2012 BMW Z4 SDRIVE35I radio
[x] Cancel search: radioPage 97 of 220

distance depends on the particular hand-
held transmitter.4.Press the button of the desired function on
the hand-held transmitter and the button
being programmed on the interior rearview
mirror simultaneously and hold. The LED on
the interior rearview mirror flashes slowly at
first.5.When the LED flashes more rapidly, release
both buttons. Rapid flashing indicates that
the button on the interior rearview mirror has
been programmed.
If the LED does not flash faster after 60 sec‐
onds, change the distance between the in‐
terior rearview mirror and the hand-held
transmitter and repeat the step. Multiple tri‐
als at different distances may be necessary.
Wait at least 15 seconds between trials.
Canada: If the programming procedure with
the hand-held transmitter was interrupted,
press and hold the button on the interior
rearview mirror and press the button on the
hand-held transmitter multiple times for
2 seconds each and release.6.To program additional functions on other
buttons, repeat steps 3 to 5.
The systems can be operated with the buttons
on the interior rearview mirror.
Special characteristics of alternating-
code radio systems
If the system cannot be operated after repeated
programming, check whether the system to be
operated uses an alternating-code system.
Read the operating instructions of the system or
press and hold the programmed button on the
interior rearview mirror. If the LED on the interior
rearview mirror flashes rapidly at first and then
lights up continuously for 2 seconds, the system
is equipped with an alternating-code system.
This flashing LED pattern repeats itself for ap‐
prox. 20 seconds.
In systems with an alternating-code system, the
Universal Garage Door Opener and the system
must be additionally synchronized.
Please obtain additional information on syn‐
chronization in the operating instructions of the
system being set up.
The systems will be easier to synchronize with
the aid of a second person.
Synchronization:1.Park the vehicle within range of the remote-
controlled system.2.Program the corresponding button on the
interior rearview mirror as described.3.Identify and press the synchronization but‐
ton on the system being set up. You have
approx. 30 seconds for the next step.4.Press and hold the button on the interior
rearview mirror for approx. 3 seconds and
then release it. Repeat this step up to three
times if necessary to complete the synchro‐
nization procedure. When synchronization
is completed, the programmed function is
executed.
Reprogramming individual buttons
1.Switch on the ignition.2.Hold the hand-held transmitter at a distance
of approx. 1 to 3 in/2.5 to 8 cm from the
memory buttons.
The required distance depends on the par‐
ticular hand-held transmitter.3.Press the memory button of the Universal
Garage Door Opener.4.If the LED flashes slowly after approx.
20 seconds, press the transmit button on
the hand-held transmitter.5.Release both buttons when the LED flashes
rapidly.
If the LED does not flash rapidly after approx.
60 seconds, change the distance and repeat
the step.Seite 97Interior equipmentControls97
Online Edition for Part no. 01 40 2 609 184 - 09 11 500
Page 98 of 220

Canada: if the LED does not flash rapidly af‐
ter approx. 60 seconds, change the distance
and repeat the step. If programming was
aborted by the hand-held transmitter, hold
down the memory button and press and re‐
lease the button on the hand-held transmit‐
ter several times for 2 seconds.
Controls
Prior to operation
Before operating a unit with the Universal
Garage Door Opener, ensure that there are no
people, animals, or objects in the range of move‐
ment of the system; otherwise, there is a risk of
injury or damage.
Also follow the safety instructions of the hand-
held transmitter.◀
The system, such as the garage door, can be
operated using the button on the interior rear‐
view mirror with the engine running or the igni‐
tion switched on. When you are within the re‐
ception range of the system, press and hold the
button until the function is initiated. The LED on
the interior rearview mirror lights up continu‐
ously while the radio signal is being transmitted.
Deleting stored functions
Press the right and left buttons on the interior
rearview mirror simultaneously for approx.
20 seconds until the LED flashes rapidly. All
stored functions are deleted. The functions can‐
not be deleted individually.
Digital compass
1Adjustment button2Display
The display shows you the main or secondary
compass direction in which you are driving.
Operating concept
You can call up a number of functions by press‐
ing the adjustment button with a pointed object
such as a ball-point pen. The following adjust‐
ment options are displayed one after the other,
depending on how long you keep the adjust‐
ment button pressed:▷Press briefly: switch the display on/off.▷3 to 6 seconds: set the compass zone.▷6 to 9 seconds: calibrate the compass.▷9 to 12 seconds: set left-hand/right hand
steering.▷12 to 15 seconds: set the language.
Setting compass zones
Set the compass zone corresponding to your
vehicle's geographic location so that the com‐
pass can function correctly; refer to the world
map with compass zones.
Seite 98ControlsInterior equipment98
Online Edition for Part no. 01 40 2 609 184 - 09 11 500
Page 103 of 220
Storage compartmentsVehicle equipment
This chapter describes all series equipment as
well as country-specific and special equipment
offered for this model series.Therefore, it also
describes equipment that may not be found in
your vehicle, for instance due to the selected
special equipment or the country version. This
also applies to safety-related functions and sys‐
tems.
Glove compartment
Opening
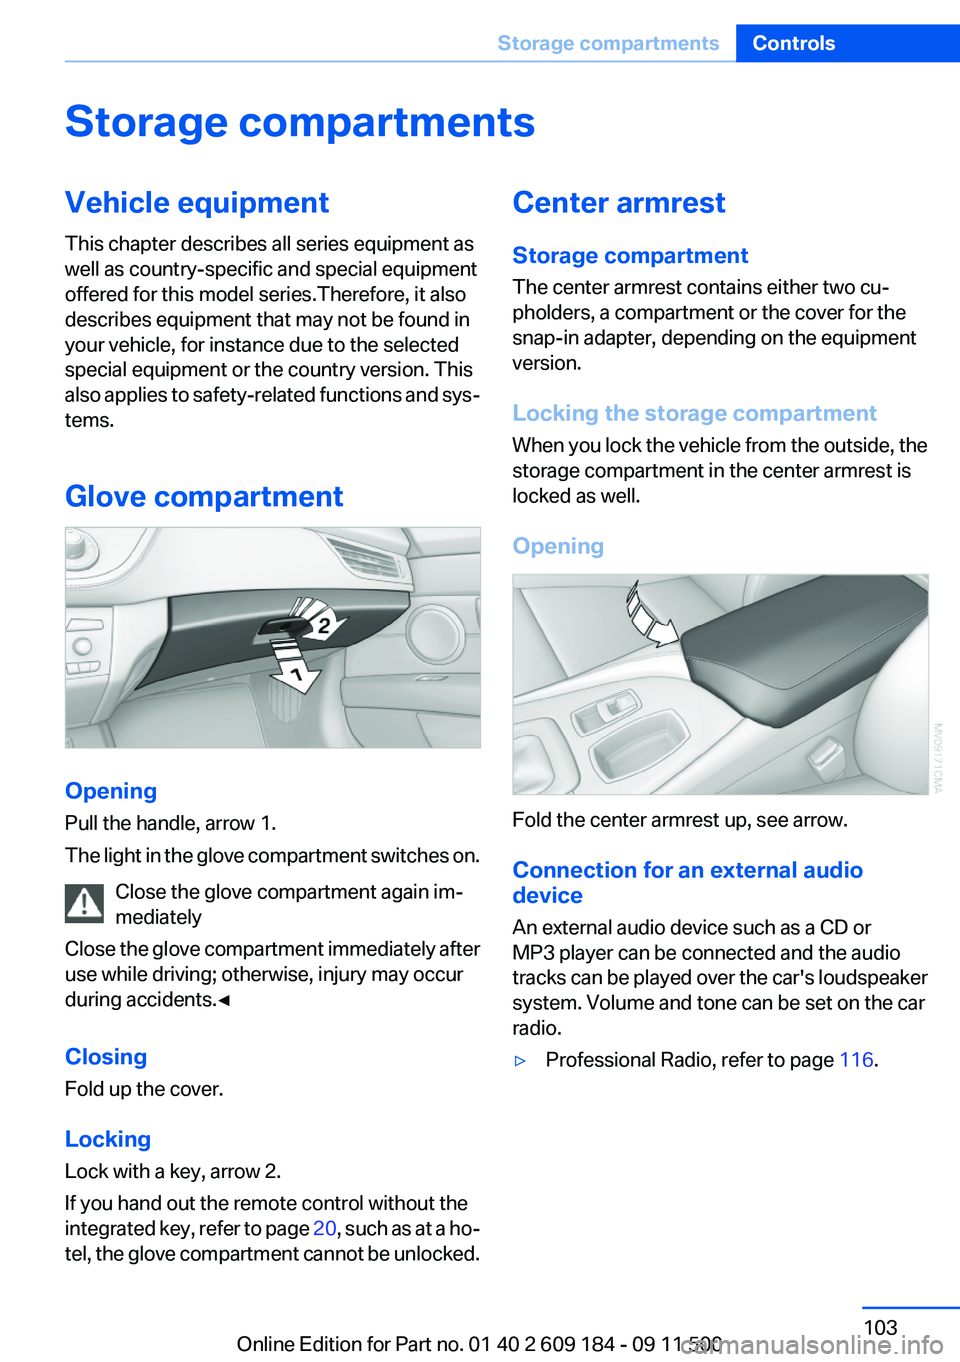
Pull the handle, arrow 1.
The light in the glove compartment switches on.
Close the glove compartment again im‐
mediately
Close the glove compartment immediately after
use while driving; otherwise, injury may occur
during accidents.◀
Closing
Fold up the cover.
Locking
Lock with a key, arrow 2.
If you hand out the remote control without the
integrated key, refer to page 20, such as at a ho‐
tel, the glove compartment cannot be unlocked.
Center armrest
Storage compartment
The center armrest contains either two cu‐
pholders, a compartment or the cover for the
snap-in adapter, depending on the equipment
version.
Locking the storage compartment
When you lock the vehicle from the outside, the
storage compartment in the center armrest is
locked as well.
Opening
Fold the center armrest up, see arrow.
Connection for an external audio
device
An external audio device such as a CD or
MP3 player can be connected and the audio
tracks can be played over the car's loudspeaker
system. Volume and tone can be set on the car
radio.
▷Professional Radio, refer to page 116.Seite 103Storage compartmentsControls103
Online Edition for Part no. 01 40 2 609 184 - 09 11 500
Page 115 of 220

Entertainment
This chapter helps assure your enjoyment when receiving radio stations and playing CDs.Online Edition for Part no. 01 40 2 609 184 - 09 11 500
Page 116 of 220
Professional RadioVehicle equipment
This chapter describes all series equipment as
well as country-specific and special equipment
offered for this model series.Therefore, it alsodescribes equipment that may not be found in
your vehicle, for instance due to the selected
special equipment or the country version. This
also applies to safety-related functions and sys‐
tems.
General information
At a glance
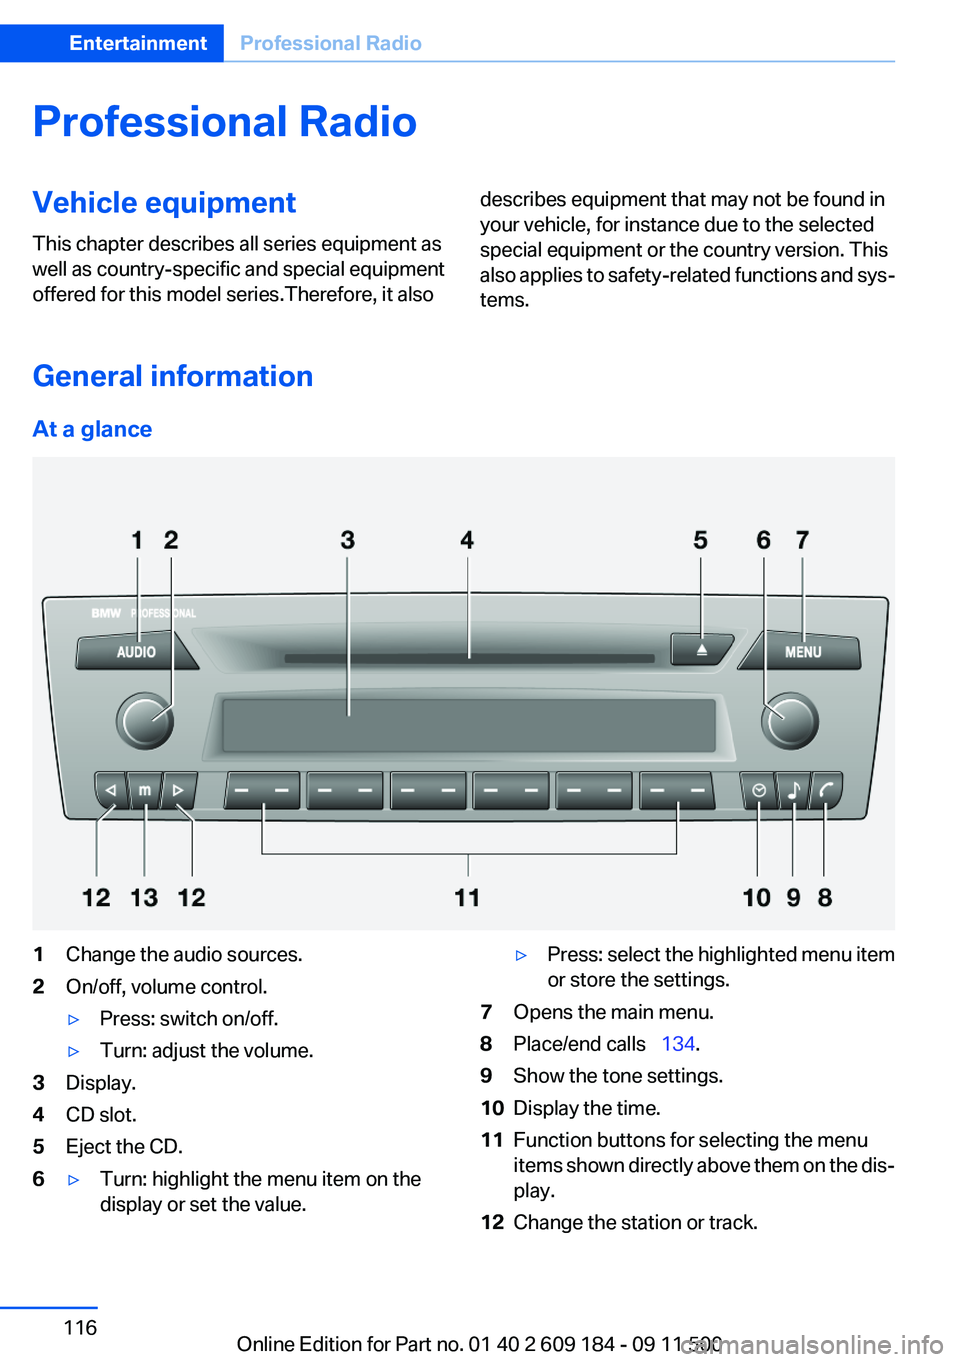
1Change the audio sources.2On/off, volume control.▷Press: switch on/off.▷Turn: adjust the volume.3Display.4CD slot.5Eject the CD.6▷Turn: highlight the menu item on the
display or set the value.▷Press: select the highlighted menu item
or store the settings.7Opens the main menu.8Place/end calls 134.9Show the tone settings.10Display the time.11Function buttons for selecting the menu
items shown directly above them on the dis‐
play.12Change the station or track.Seite 116EntertainmentProfessional Radio116
Online Edition for Part no. 01 40 2 609 184 - 09 11 500
Page 117 of 220
13Manually select the frequency.Representation in the Owner's Manual
"..." Identifies radio display texts used to select
individual functions.
Menu navigation
Opening menu items
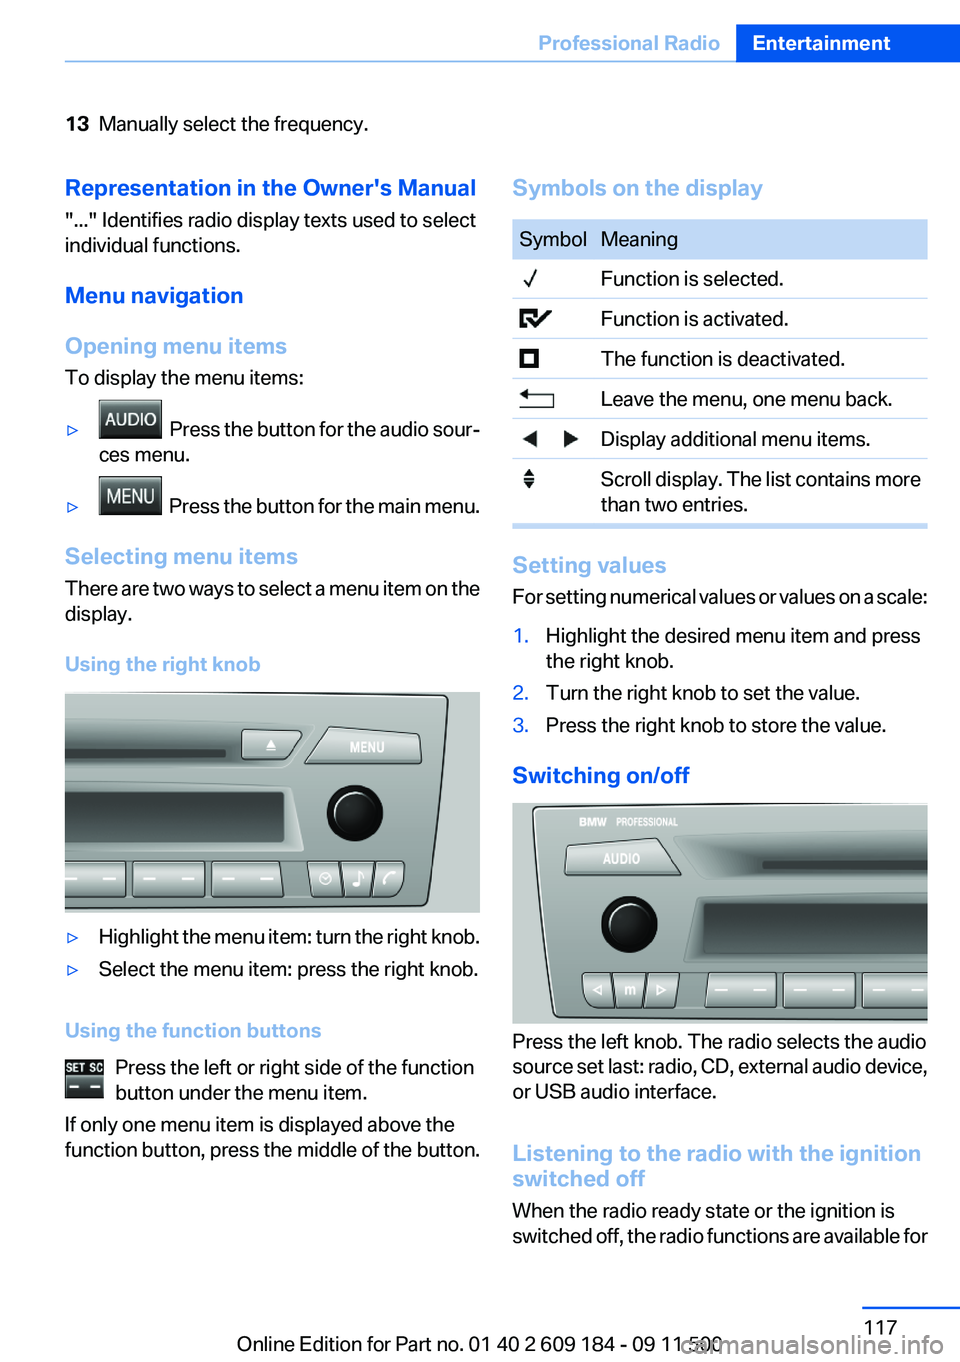
To display the menu items:▷ Press the button for the audio sour‐
ces menu.▷ Press the button for the main menu.
Selecting menu items
There are two ways to select a menu item on the
display.
Using the right knob
▷Highlight the menu item: turn the right knob.▷Select the menu item: press the right knob.
Using the function buttons Press the left or right side of the function
button under the menu item.
If only one menu item is displayed above the
function button, press the middle of the button.
Symbols on the displaySymbolMeaning Function is selected. Function is activated. The function is deactivated. Leave the menu, one menu back. Display additional menu items. Scroll display. The list contains more
than two entries.
Setting values
For setting numerical values or values on a scale:
1.Highlight the desired menu item and press
the right knob.2.Turn the right knob to set the value.3.Press the right knob to store the value.
Switching on/off
Press the left knob. The radio selects the audio
source set last: radio, CD, external audio device,
or USB audio interface.
Listening to the radio with the ignition
switched off
When the radio ready state or the ignition is
switched off, the radio functions are available for
Seite 117Professional RadioEntertainment117
Online Edition for Part no. 01 40 2 609 184 - 09 11 500
Page 118 of 220
approx. 20 minutes. To listen to the radio, switch
it back on.
To spare the battery, ensure that the radio is
switched off when you leave the vehicle.
Adjusting the volume
Turn the left knob. The setting is stored for the
remote control currently in use.
When a call is placed using the hands-free sys‐
tem, the audio sources are muted.
Speed-dependent volume and volumes
of PDC signal tone and gong▷"PDC" : volume of the PDC signal tone com‐
pared to the audio sources.▷"GONG": volume of the gong compared to
the audio sources.▷"S-VOL": speed-dependent volume con‐
trol.
Set the audio sources to a high volume to be able
to adjust the volume of the signal tones more
easily.
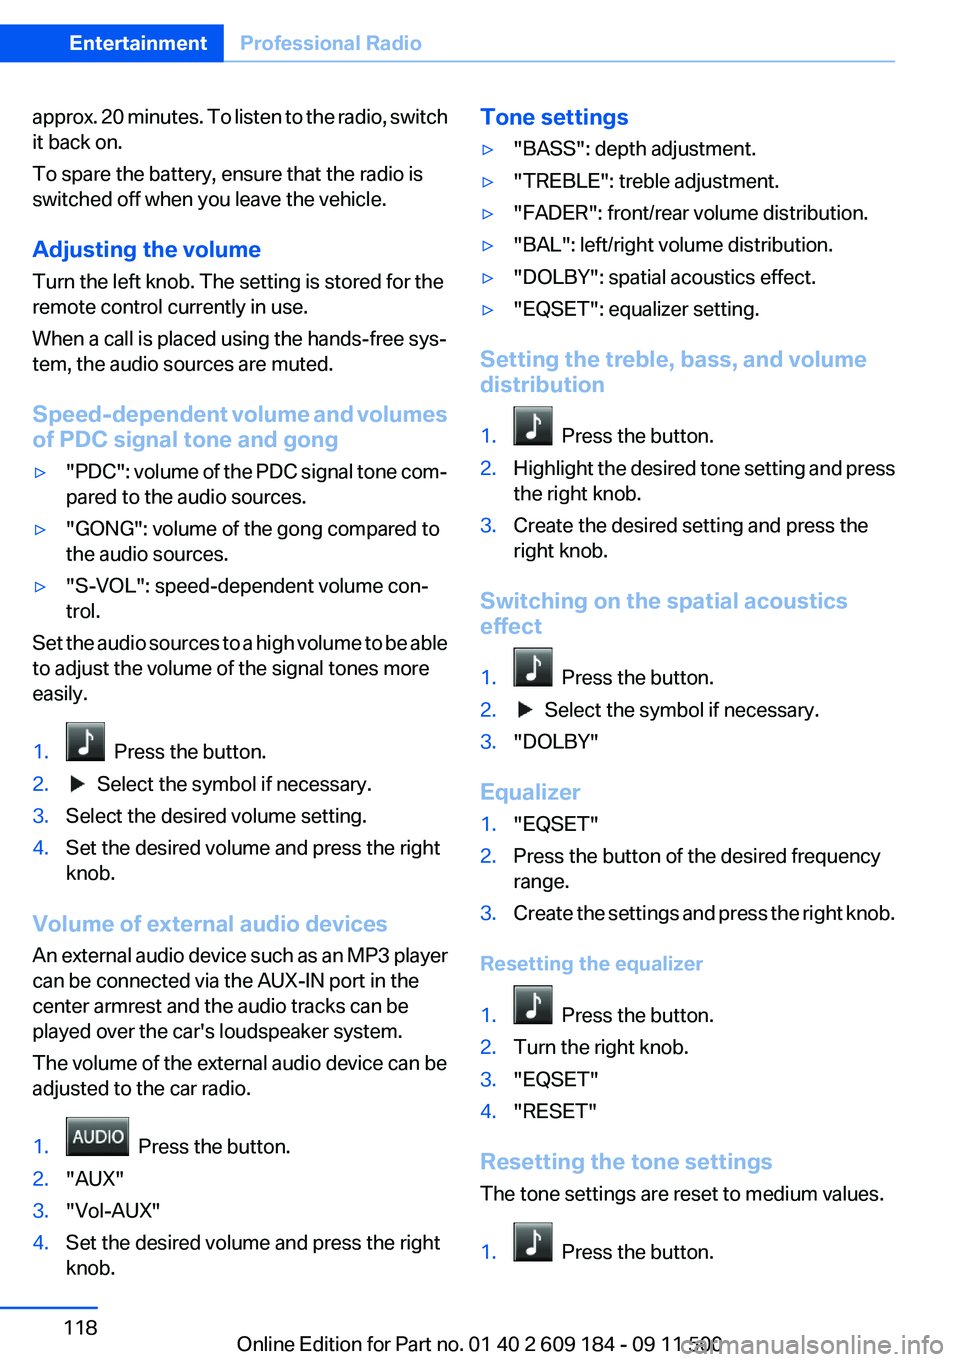
1. Press the button.2. Select the symbol if necessary.3.Select the desired volume setting.4.Set the desired volume and press the right
knob.
Volume of external audio devices
An external audio device such as an MP3 player
can be connected via the AUX-IN port in the
center armrest and the audio tracks can be
played over the car's loudspeaker system.
The volume of the external audio device can be
adjusted to the car radio.
1. Press the button.2."AUX"3."Vol-AUX"4.Set the desired volume and press the right
knob.Tone settings▷"BASS": depth adjustment.▷"TREBLE": treble adjustment.▷"FADER": front/rear volume distribution.▷"BAL": left/right volume distribution.▷"DOLBY": spatial acoustics effect.▷"EQSET": equalizer setting.
Setting the treble, bass, and volume
distribution
1. Press the button.2.Highlight the desired tone setting and press
the right knob.3.Create the desired setting and press the
right knob.
Switching on the spatial acoustics
effect
1. Press the button.2. Select the symbol if necessary.3."DOLBY"
Equalizer
1."EQSET"2.Press the button of the desired frequency
range.3.Create the settings and press the right knob.
Resetting the equalizer
1. Press the button.2.Turn the right knob.3."EQSET"4."RESET"
Resetting the tone settings
The tone settings are reset to medium values.
1. Press the button.
Seite 118EntertainmentProfessional Radio118
Online Edition for Part no. 01 40 2 609 184 - 09 11 500
Page 119 of 220
2."RESET"
Time
Displaying the time
Press the button.
When the ignition or the radio ready state is
switched off, the time is displayed for several
seconds.
Setting the time, date, and time format
1.Switch on the radio ready state or the igni‐
tion.2. Press the button.3."CONFIG"4."TIME"5.Select the desired category.6.Create the settings and press the right knob.
Setting the units of measure of the
computer and the language
1.Switch on the radio ready state or the igni‐
tion.2. Press the button.3."CONFIG"4.▷"DIST": change the unit of measure for
the range.▷"LANG": select the language of the dis‐
play texts.▷"CONSMP" : change the unit of measure
for the average fuel consumption.▷"TEMP" : change the unit of measure for
the external temperature.5.Highlight the desired menu item and press
the button.6.Create the desired setting.
The settings of the units of measure are adopted
for display on the radio and in the instrument
cluster and are stored in the remote control cur‐
rently in use.
Computer
The following vehicle information can be call up
via the computer:▷Average fuel consumption▷Average speed▷Range▷External temperature
Displaying information
1.Switch on the radio ready state or the igni‐
tion.2. Press the button.3."COMP"
Average fuel consumption
The average fuel consumption is calculated for
the time during which the engine is running.
To start calculation of the average fuel con‐
sumption:
1."CONSMP"2."RESET"
The previous display is set to zero and the sys‐
tem begins recalculating the average fuel con‐
sumption.
Average speed
The average speed is calculated for the time
during which the engine is running.
To start calculation of the average speed:
1."SPEED"2."RESET"
Estimated range
"RANGE"
The display shows the distance that can be
driven on the remaining fuel quantity, taking into
Seite 119Professional RadioEntertainment119
Online Edition for Part no. 01 40 2 609 184 - 09 11 500