2012 BMW 650I air vent
[x] Cancel search: air ventPage 93 of 282

4.
Start the engine - do not drive away.
5. Reset the tire pressure using "Reset".
6. Drive away.
The tires are shown in gray and "Resetting
TPM..." is displayed.
After
driving for a few minutes, the set tire infla‐
tion pressures are applied as set values. The re‐
setting process is completed automatically dur‐
ing driving. The tires are shown in green and
"TPM active" is shown on the Control Display.
The trip can be interrupted at any time. If you
drive away again, the process resumes auto‐
matically.
If a flat tire is detected during a reset, all tires are
displayed in yellow.
Low tire pressure message
The yellow warning lamp lights up. A
Check Control message is displayed.
▷There is a flat tire or a major loss in
tire inflation pressure.
▷ The system was not reset after a wheel
change and thus warns based on the infla‐
tion pressures initialized last.
1. Reduce your speed and stop cautiously.
Avoid sudden braking and steering maneu‐
vers.
2. Check whether the vehicle is fitted with reg‐
ular tires* or run-flat tires*.
Run-flat
tires, refer to page 234, are labeled
with a circular symbol containing the letters
RSC marked on the tire sidewall.
When a low inflation pressure is indicated, DSC
Dynamic
Stability Control is switched on if nec‐
essary.
Actions in the event of a flat tire
Normal tires*
1. Identify the damaged tire.
Do this by checking the air pressure in all
four tires.
If the tire inflation pressure in all four tires is
correct, the Tire Pressure Monitor may not have been initialized. In this case, initialize
the system.
If an identification is not possible, please
contact the service center.
2. Rectify the flat tire.
Use
of tire sealant, e.g., the Mobility System,
may damage the TPM wheel electronics. In
this case, have the electronics checked at
the next opportunity and have them re‐
placed if necessary.
Run-flat tires*
You
can continue driving with a damaged tire at
speeds up to 50 mph/80 km/h.
Do not continue driving without run-flat
tires
Do not continue driving if the vehicle is not
equipped with run-flat tires; continued driving
may result in serious accidents.◀
Continued driving with a flat tire
If continuing to drive with a damaged tire:
1. Avoid sudden braking and steering maneu‐
vers.
2. Do not exceed a speed of 50 mph/80 km/h.
3. Check the air pressure in all four tires at the
next opportunity.
If the tire inflation pressure in all four tires is
correct, the Flat Tire Monitor may not have
been initialized. In this case, initialize the
system.
If the tire inflation pressure in all four tires is
correct, the Tire Pressure Monitor may not
have been initialized. In this case, initialize
the system.
Possible driving distance with complete loss of
tire inflation pressure:
The possible driving distance after a loss of tire
inflation pressure depends on the cargo load
and the driving style and conditions.
For a vehicle containing an average load, the
possible driving distance is approx. 50 miles/
80 km. Seite 93
93Online Edition for Part no. 01 40 2 606 521 - 03 11 490
Reference Mobility Communication Entertainment Navigation Driving tips
Controls At a glance
Page 96 of 282
1.
Reduce your speed and stop cautiously.
Avoid sudden braking and steering maneu‐
vers.
2. Check whether the vehicle is fitted with reg‐
ular tires* or run-flat tires*.
Run-flat
tires, refer to page 234, are labeled
with a circular symbol containing the letters
RSC marked on the tire sidewall.
When a flat tire is indicated, DSC Dynamic Sta‐
bility Control is switched on if necessary.
Actions in the event of a flat tire
Normal tires*
1. Identify the damaged tire.
Do this by checking the air pressure in all
four tires.
If the tire inflation pressure in all four tires is
correct, the Flat Tire Monitor may not have
been initialized. In this case, initialize the
system.
If an identification is not possible, please
contact the service center.
2. Rectify the flat tire.
Run-flat tires*
You
can continue driving with a damaged tire at
speeds up to 50 mph/80 km/h.
Do not continue driving without run-flat
tires
Do not continue driving if the vehicle is not
equipped with run-flat tires; continued driving
may result in serious accidents.◀
Continued driving with a flat tire
If continuing to drive with a damaged tire:
1. Avoid sudden braking and steering maneu‐
vers.
2. Do not exceed a speed of 50 mph/80 km/h.
3. Check the air pressure in all four tires at the
next opportunity.
If the tire inflation pressure in all four tires is
correct, the Flat Tire Monitor may not have been initialized. In this case, initialize the
system.
If the tire inflation pressure in all four tires is
correct, the Tire Pressure Monitor may not
have been initialized. In this case, initialize
the system.
Possible driving distance with complete loss of
tire inflation pressure:
The possible driving distance after a loss of tire
inflation pressure depends on the cargo load
and the driving style and conditions.
For a vehicle containing an average load, the
possible driving distance is approx. 50 miles/
80 km.
When the vehicle is driven with a damaged tire,
its handling characteristics change, e.g., re‐
duced lane stability during braking, a longer
braking distance, and altered self-steering
properties. Adjust your driving style accord‐
ingly. Avoid abrupt steering maneuvers or driv‐
ing over obstacles, e.g., curbs, potholes, etc.
Because
the possible driving distance depends
on how the vehicle is used during the trip, the
actual distance may be smaller or greater de‐
pending on the driving speed, road conditions,
external temperature, cargo load, etc.
Continued driving with a flat tire
Drive moderately and do not exceed a
speed of 50 mph/80 km/h.
A loss of tire inflation pressure results in a
change in the handling characteristics, e.g., re‐
duced lane stability during braking, a longer
braking distance and altered self-steering prop‐
erties.◀
Final tire failure
Vibrations or loud noises while driving can
indicate the final failure of the tire. Reduce speed
and stop; otherwise, pieces of the tire could
come loose and cause an accident. Do not con‐
tinue driving, and contact your service center.◀ Seite 96
96 Online Edition for Part no. 01 40 2 606 521 - 03 11 490
Safety
Page 120 of 282
is moving from the right or left to the central area.
Display in the Head-up Display
*
The warning is simultaneously dis‐
played in the Head-up Display and in the
Control Display. The displayed symbol
can vary with the people detected. For people
located in the central area, the distance to the
person is indicated by the size of the symbol.
System limits
Basic limits
System operation is limited in situations such as
the following:
▷ On steep hills, in steep depressions or in
tight curves.
▷ When the camera is dirty or the protective
glass is damaged.
▷ In heavy fog, rain or snowfall.
▷ At very high external temperatures.
Limits of pedestrian detection
Animals are not detected by the pedestrian de‐
tection
function, even if they are clearly visible in
the image.
Limited pedestrian detection:
▷ When people are fully or partially covered,
especially when their heads are covered.
▷ When people are not in an upright position,
e.g., when lying down.
▷ Cyclists on unconventional bicycles (e.g.,
recumbent bicycles).
▷ After physical damage to the system, e.g.,
after an accident. Activation/deactivation
Press the button.
Display
Settings via iDrive
With Night Vision switched on:
1. Activate Night Vision with pedestrian detec‐
tion.
2. Press the controller.
3. Open the desired menu item.
▷ "Brightness"
▷ "Contrast"
▷ "Pedestrian detection"
The settings are stored for the remote control
currently in use.
Camera Rain, dirt, snow, or ice can impair camera oper‐
ation.
The camera is automatically heated when the
external temperatures are low.
The camera is automatically cleaned together
with the headlamps. Seite 120
120 Online Edition for Part no. 01 40 2 606 521 - 03 11 490
Driving comfort
Page 123 of 282

Climate control
Automatic climate control
1
Air distribution, left
2 Temperature, left
3 AUTO program, left
4 Air volume, AUTO intensity, residual heat,
left
5 Remove ice and condensation
6 Maximum cooling
7 Display
8 Air volume, AUTO intensity, right
9 AUTO program, right
10 Temperature, right 11
Air distribution, right
12 Seat heating*, right 55
13 Active seat ventilation*, right 55
14 Automatic recirculated-air control/recircu‐
lated-air mode
15 Cooling function
16 Rear window defroster
17 ALL program
18 Active seat ventilation*, left 55
19 Seat heating*, left 55
Climate control functions in detail
Manual air distribution Press the button repeatedly to select a
program:
▷ Upper body region.
▷ Upper body region and footwell. ▷
Footwell.
▷ Windows and footwell: driver's side only.
▷ Windows, upper body region and footwell:
driver's side only.
If the windows are fogged over, press the AUTO
button on the driver's side to utilize the conden‐
sation sensor.
Seite 123
123Online Edition for Part no. 01 40 2 606 521 - 03 11 490
Reference Mobility Communication Entertainment Navigation Driving tips
Controls At a glance
Page 124 of 282

Temperature
Turn the wheel to set the desired
temperature.
The automatic climate control achieves this
temperature as quickly as possible, if necessary
with the maximum cooling or heating capacity,
and then keeps it constant.
Avoid rapidly switching between different tem‐
perature settings. The automatic climate control
will not have sufficient time to adjust the set
temperature.
AUTO program Press the button.
Air volume, air distribution, and tem‐
perature are controlled automatically.
Depending on the selected temperature, AUTO
intensity, and outside influences, the air is di‐
rected to the windshield, side windows, upper
body, and into the footwell.
The cooling function, refer to page 125, is
switched on automatically with the AUTO pro‐
gram.
At the same time, a condensation sensor con‐
trols the program so as to prevent window con‐
densation as much as possible.
Intensity of the AUTO program
With the AUTO program switched on, automatic
control of the air volume and air distribution can
be adjusted.
Press the left or right side of the button:
decrease or increase the intensity.
The selected intensity is shown on the display
of the automatic climate control.
Convertible program
When the convertible top is open, the converti‐
ble program is activated as well. In the conver‐
tible program, the automatic climate control is
optimized for driving with the convertible top open. In addition, the air volume is increased as
the vehicle speed increases.
The
efficiency of the convertible program can be
greatly enhanced by installing the wind deflec‐
tor*.
Air volume, manual
To be able to manually adjust the air volume,
switch off the AUTO program first.
Press the left or right side of the button:
decrease or increase air volume.
The selected air volume is shown on the display
of the automatic climate control.
The air volume of the automatic climate control
may be reduced automatically to save battery
power.
Defrosting windows and removing
condensation Press the button.
Ice and condensation are quickly re‐
moved from the windshield and the front side
windows.
The air volume can be adjusted when the pro‐
gram is active.
If the windows are fogged over, additionally
switch on the cooling function or press the
AUTO button to utilize the condensation sensor.
Maximum cooling
Press the button.
The system is set to the lowest tem‐
perature, maximum air volume and recirculated-
air mode.
Air flows out of the vents for the upper body re‐
gion. Open them for this purpose.
Air is cooled as quickly as possible:
▷ At an external temperature of approx. 32 ℉/
0 ℃.
▷ When the engine is running.
The air volume can be adjusted when the pro‐
gram is active. Seite 124
124 Online Edition for Part no. 01 40 2 606 521 - 03 11 490
Climate control
Page 126 of 282
Switching the system on/off
Switching off
▷
Complete system:
At the lowest fan speed, press the
left
side of the button on the driver's
side. ▷
On the front passenger side:
At the lowest fan speed, press the
left side of the button on the front
passenger side. Switching on
Press any button.
Microfilter/activated-charcoal filter
The microfilter removes dust and pollen from
the incoming air.
The activated-charcoal filter removes gaseous
pollutants from the outside air that enters the
vehicle.
This combined filter should be replaced during
scheduled
maintenance of your vehicle., refer to
page 241
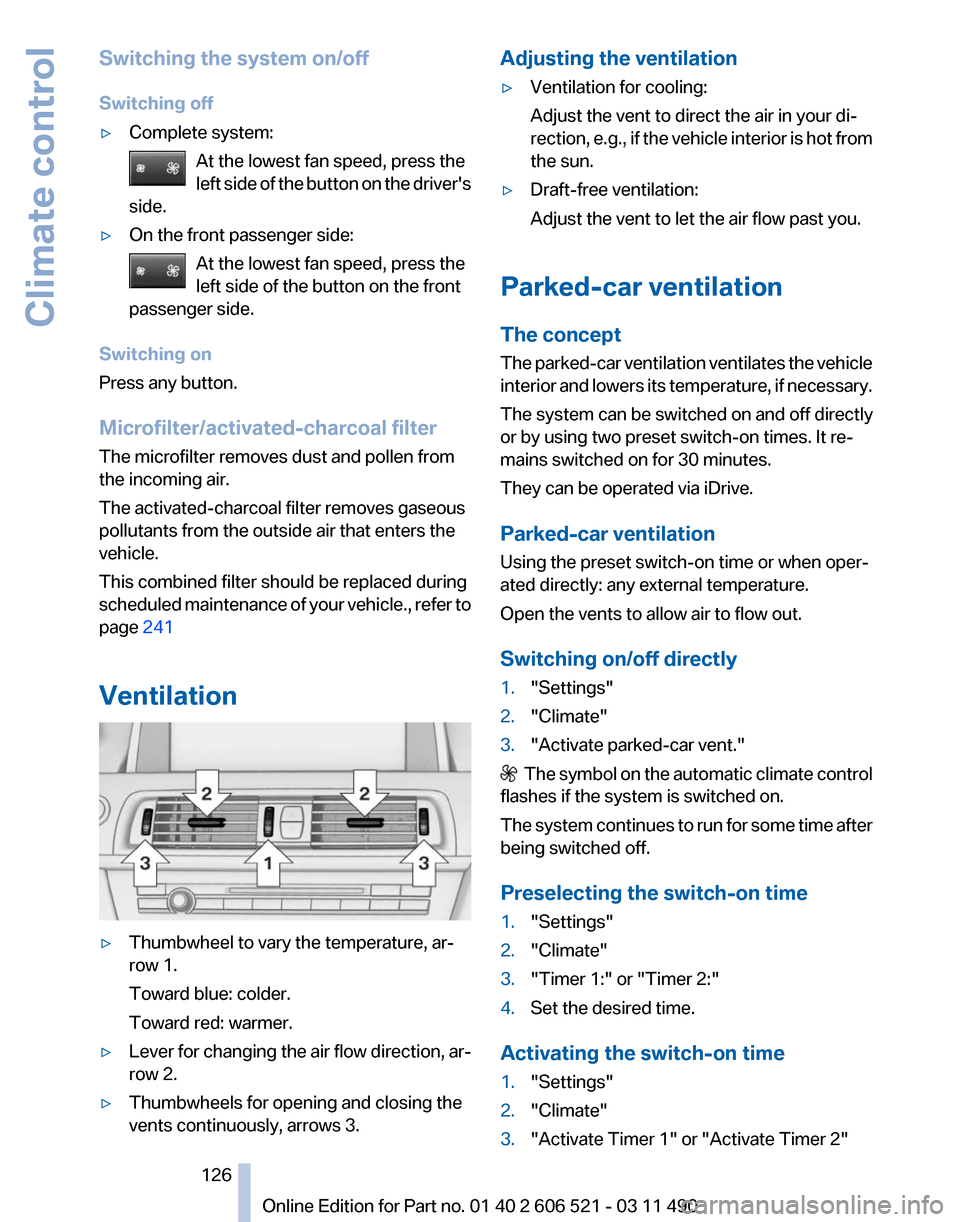
Ventilation ▷
Thumbwheel to vary the temperature, ar‐
row 1.
Toward blue: colder.
Toward red: warmer.
▷ Lever for changing the air flow direction, ar‐
row 2.
▷ Thumbwheels for opening and closing the
vents continuously, arrows 3. Adjusting the ventilation
▷
Ventilation for cooling:
Adjust the vent to direct the air in your di‐
rection,
e.g., if the vehicle interior is hot from
the sun.
▷ Draft-free ventilation:
Adjust the vent to let the air flow past you.
Parked-car ventilation
The concept
The
parked-car ventilation ventilates the vehicle
interior and lowers its temperature, if necessary.
The system can be switched on and off directly
or by using two preset switch-on times. It re‐
mains switched on for 30 minutes.
They can be operated via iDrive.
Parked-car ventilation
Using the preset switch-on time or when oper‐
ated directly: any external temperature.
Open the vents to allow air to flow out.
Switching on/off directly
1. "Settings"
2. "Climate"
3. "Activate parked-car vent." The symbol on the automatic climate control
flashes if the system is switched on.
The
system continues to run for some time after
being switched off.
Preselecting the switch-on time
1. "Settings"
2. "Climate"
3. "Timer 1:" or "Timer 2:"
4. Set the desired time.
Activating the switch-on time
1. "Settings"
2. "Climate"
3. "Activate Timer 1" or "Activate Timer 2"
Seite 126
126 Online Edition for Part no. 01 40 2 606 521 - 03 11 490
Climate control
Page 219 of 282
in advance. This shortens the duration of the
service appointment.
▷ In the event of a breakdown, data on the ve‐
hicle's condition can be sent directly to
Roadside Assistance.
▷ The service varies by country.
▷ Connection costs may ensue.
▷ Services may be restricted abroad.
Requirements
▷ BMW Assist is activated.
▷ Wireless reception is available.
▷ The engine is running.
Use of BMW TeleService*
The TeleServices are typically activated in the
vehicle.
Even TeleService Customer Service is not ac‐
tive, a voice contact to Roadside Assistance is
still possible.
To
continue using or to deactivate the services,
please contact your service partner or the BMW
customer hotline.
Concierge service*
General information
The BMW Assist Concierge service offers infor‐
mation on events, gas stations or hotels, and
provides phone numbers and addresses. Hotels
can be booked directly by the BMW Assist Con‐
cierge service. The Concierge service is part of
the optional BMW Convenience Plan.
Starting the Concierge service
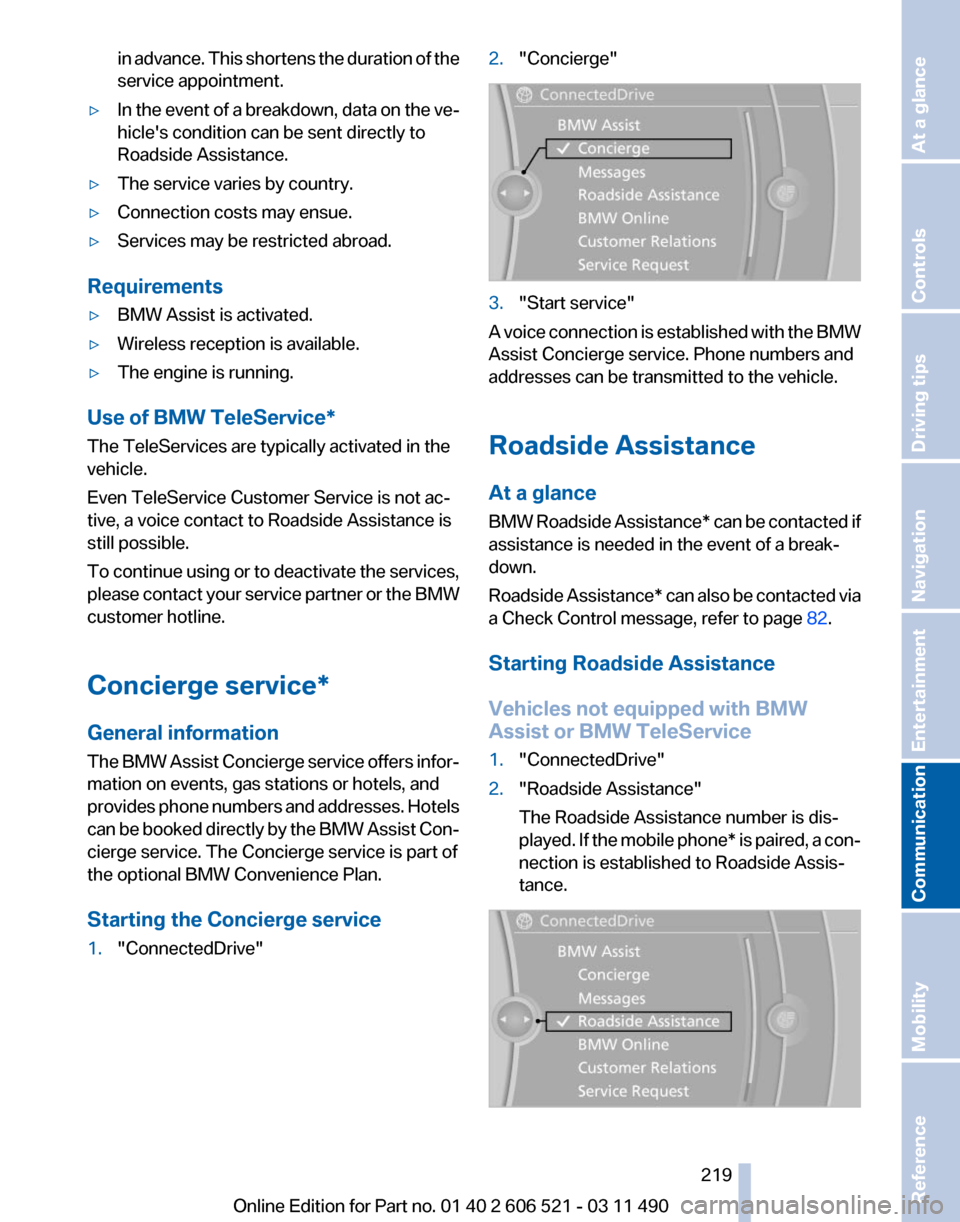
1. "ConnectedDrive" 2.
"Concierge" 3.
"Start service"
A voice connection is established with the BMW
Assist Concierge service. Phone numbers and
addresses can be transmitted to the vehicle.
Roadside Assistance
At a glance
BMW
Roadside Assistance* can be contacted if
assistance is needed in the event of a break‐
down.
Roadside Assistance* can also be contacted via
a Check Control message, refer to page 82.
Starting Roadside Assistance
Vehicles not equipped with BMW
Assist or BMW TeleService
1. "ConnectedDrive"
2. "Roadside Assistance"
The Roadside Assistance number is dis‐
played.
If the mobile phone* is paired, a con‐
nection is established to Roadside Assis‐
tance. Seite 219
219Online Edition for Part no. 01 40 2 606 521 - 03 11 490
Reference Mobility
Communication Entertainment Navigation Driving tips Controls At a glance
Page 234 of 282
Maximum speed of winter tires
If the maximum speed of the vehicle is higher
than the permissible speed for the winter tires,
then display a corresponding sign in the field of
vision.
You can obtain this sign from the tire spe‐
cialist or from your service center.
Maximum speed for winter tires
Do not exceed the maximum speed for the
winter tires; otherwise, tire damage and acci‐
dents can occur.◀
Run-flat tires
For your own safety, only use run-flat tires. No
spare tire is available in the case of a flat tire. Your
service center will be glad to advise you.
Rotating wheels between axles
The manufacturer of your vehicle advises
against swapping wheels between the front and
rear axles.
This can impair the handling characteristics.
Storage
Store wheels and tires in a cool, dry place with
as little exposure to light as possible.
Always protect tires against all contact with oil,
grease and fuels.
Do not exceed the maximum tire inflation pres‐
sure indicated on the side wall of the tire.
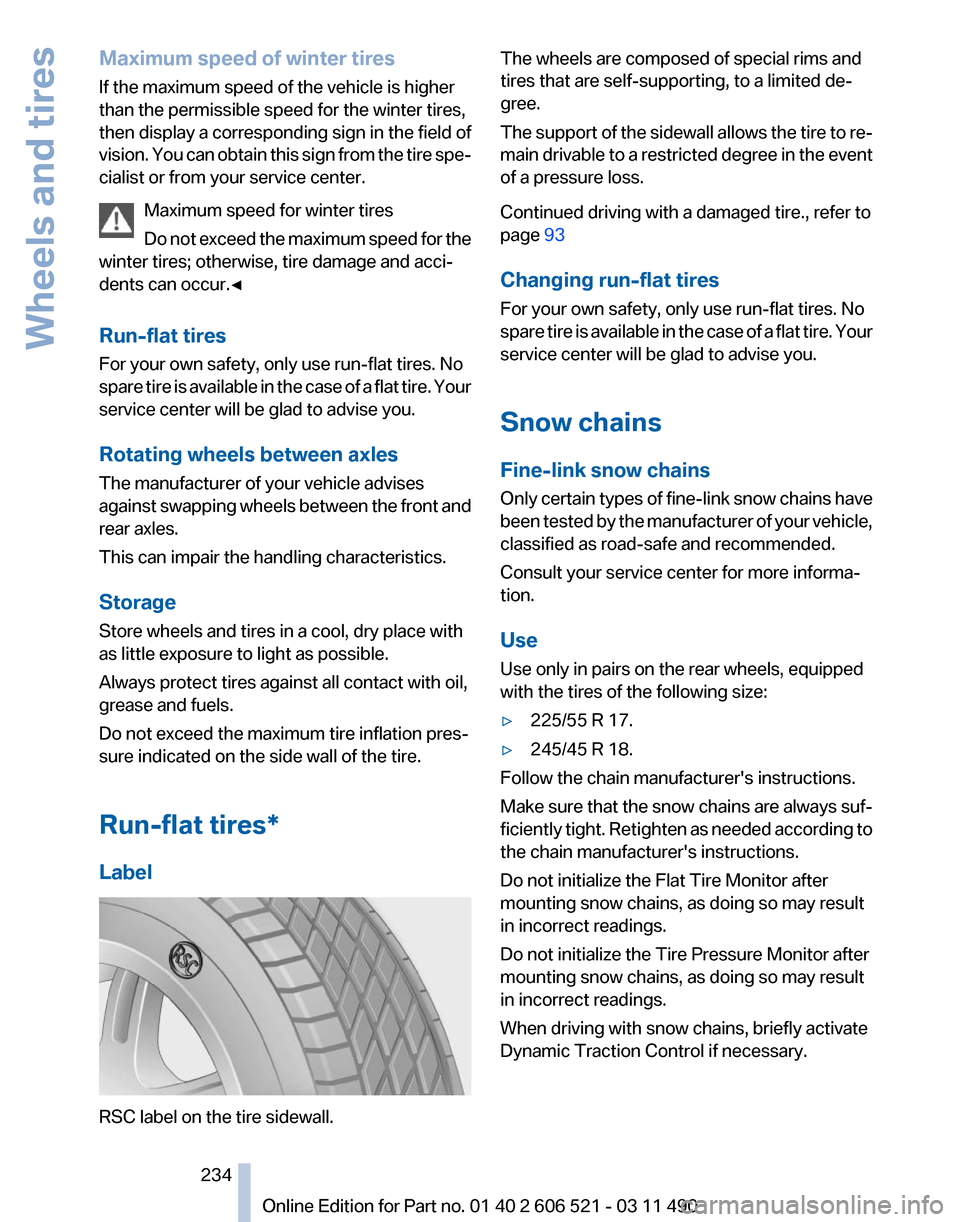
Run-flat tires*
Label RSC label on the tire sidewall. The wheels are composed of special rims and
tires that are self-supporting, to a limited de‐
gree.
The
support of the sidewall allows the tire to re‐
main drivable to a restricted degree in the event
of a pressure loss.
Continued driving with a damaged tire., refer to
page 93
Changing run-flat tires
For your own safety, only use run-flat tires. No
spare tire is available in the case of a flat tire. Your
service center will be glad to advise you.
Snow chains
Fine-link snow chains
Only certain types of fine-link snow chains have
been tested by the manufacturer of your vehicle,
classified as road-safe and recommended.
Consult your service center for more informa‐
tion.
Use
Use only in pairs on the rear wheels, equipped
with the tires of the following size:
▷ 225/55 R 17.
▷ 245/45 R 18.
Follow the chain manufacturer's instructions.
Make
sure that the snow chains are always suf‐
ficiently tight. Retighten as needed according to
the chain manufacturer's instructions.
Do not initialize the Flat Tire Monitor after
mounting snow chains, as doing so may result
in incorrect readings.
Do not initialize the Tire Pressure Monitor after
mounting snow chains, as doing so may result
in incorrect readings.
When driving with snow chains, briefly activate
Dynamic Traction Control if necessary.
Seite 234
234 Online Edition for Part no. 01 40 2 606 521 - 03 11 490
Wheels and tires