2011 Seat Ibiza SC turn signal
[x] Cancel search: turn signalPage 103 of 278

101
Lights and visibility
Note
● The turn signals only work when the ignition is switched on. The corre-
sponding warning lamp or flashes in the instrument panel. The warn-
ing lamp flashes when the turn signals are operated, provided a trailer is
correctly attached and connected to the vehicle. If a turn signal bulb is de-
fective, the warning lamp flashes at double speed. If the trailer turn signal
bulbs are damaged, warning lamp does not light up. Change the bulb.
● The main beam headlights can only be switched on if the dipped beam
headlights are already on. The warning lamp then comes on in the instru-
ment panel.
● The headlight flasher comes on for as long as you pull the lever – even if
no other lights are switched on. The warning lamp then comes on in the
instrument panel.
● When the parking lights are switched on, the headlight and the tail light
on the corresponding side of the vehicle light up. The parking lights will on-
ly work if the key is removed from the ignition. If the lights are switched on,
an acoustic signal will be emitted while the driver door is open.
● If the turn signal lever is left on after the key has been taken out of the
ignition lock, an acoustic signal sounds when the driver door is opened.
This is a reminder to switch off the turn signal, unless of course you wish to
leave the parking light on. Interior lights
Front interior light
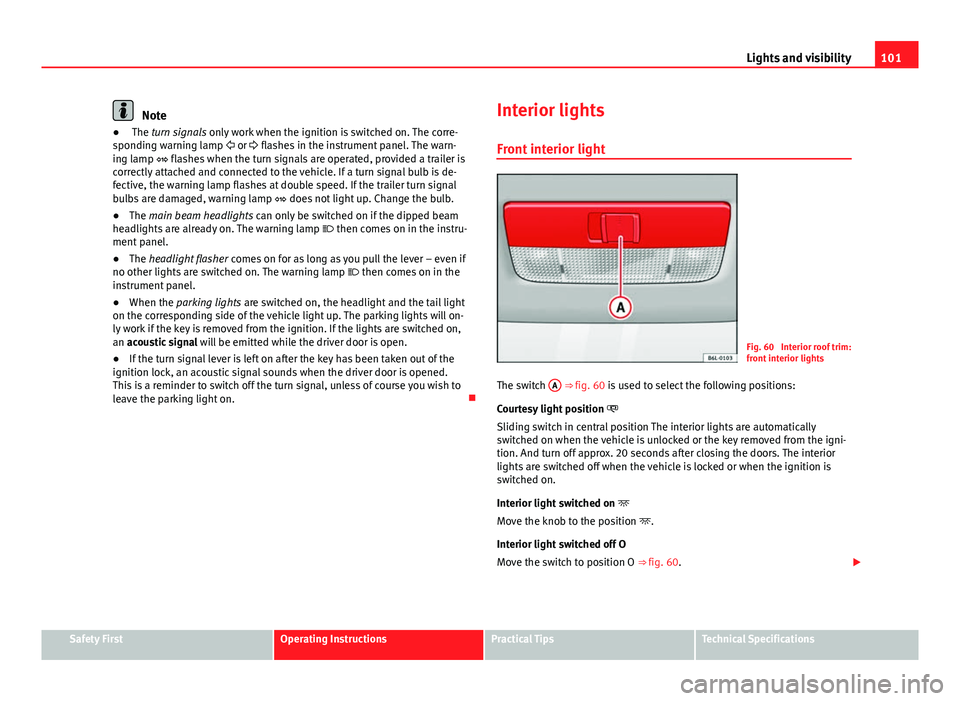
Fig. 60 Interior roof trim:
front interior lights
The switch A
⇒ fig. 60 is used to select the following positions:
Courtesy light position
Sliding switch in central position The interior lights are automatically
switched on when the vehicle is unlocked or the key removed from the igni-
tion. And turn off approx. 20 seconds after closing the doors. The interior
lights are switched off when the vehicle is locked or when the ignition is
switched on.
Interior light switched on
Move the knob to the position .
Interior light switched off O
Move the switch to position O ⇒ fig. 60.
Safety FirstOperating InstructionsPractical TipsTechnical Specifications
Page 157 of 278

155
Driving
Activation
The system is activated by engagement of the reverse gear. A brief acoustic
signal confirms the activation and correct function of the system.
Reverse gear
The distance warning will begin as soon as an obstacle is detected by the
system. The frequency of the bleeps emitted by the system will increase rap-
idly as the vehicle approaches the obstacle.
Within a short distance of about 30cm, a continuous signal sounds (stop
signal). The driver should not reverse any further.
Models with a factory-fitted towing bracket: When the vehicle is less than
0.35 m away from the obstacle the warning tone will sound continuously.
The driver should then not reverse any further.
The warning tone decreases by 30% after 3 seconds from the start of the
system.
Provided that it is not in continuous mode, the tone on the parking aid sys-
tem stops when it detects a wall parallel to the vehicle.
Trailer towing
For vehicles factory-fitted with a towing bar, the parking aid system will not
be activated by the engagement of the reverse gear when pulling a trailer,
as the trailer's electric connector will be plugged into the vehicle.
Possible faults
If a continuous beep sounds for some seconds when the reverse gear is en-
gaged, this indicates that there is a fault in the parking aid system.
If the fault continues until the ignition is turned off, the acoustic signal
warning of the fault will not be emitted every time the system is reactivated
(by engaging the reverse gear). Thus, the system ready indication will not
sound either. Have the fault repaired by an Authorised Service Centre as
soon as possible. If there is no ready signal or no acoustic warning signal, then the parking
aid loudspeaker is faulty and may not warn of obstacles.
To ensure that the system works properly, the sensors must be kept clean
and free of ice and snow.
WARNING
● The sensors have blind spots in which obstacles may not be detected.
● Always look out for small children and animals because the system
will not always detect them. Always pay attention when reversing to
avoid accidents.
● The parking aid is not a replacement for driver awareness. The driver
must take full responsibility for parking and other manoeuvres.
CAUTION
● Please note that low obstacles detected by the system may no longer be
registered by the sensors as the car moves closer, so the system will not
give any further warning. Certain kinds of obstacles (such as wire fences,
chains, thin posts or trailer draw bars, high kerbs or painted railings etc)
may not always be detected by the system, so there is a risk of damaging
the vehicle in such cases.
● In some cases, obstacles with uniform edges and bumps may not be de-
tected immediately by the system due to their geometry. Take special care
of this type of obstacle (corners, rectangular objects, etc.), as they can
cause damage to the vehicle.
● Be especially careful when manoeuvring into a corner between two per-
pendicular walls. Carefully watch the approach of the wall to the side of the
vehicle (using the mirrors).
● The parking aid system does not replace use of the mirrors for manoeu-
vres.
Safety FirstOperating InstructionsPractical TipsTechnical Specifications
Page 159 of 278

157
Driving
Cruise speed* (Cruise control system)
Description
The cruise control system is able to maintain the set speed
in the range of 30 km/h to 180 km/h.
Once the speed setting has been saved, you may take your foot off the ac-
celerator.
WARNING
It could be dangerous to use the cruise control system if it is not possible
to drive at constant speed.
● Do not use the cruise control system when driving in dense traffic, on
roads with lots of bends or on roads with poor conditions (with ice, slip-
pery surfaces, loose grit or gravel), as this could cause an accident.
● Always switch the cruise control system off after using it in order to
avoid an involuntary use.
● It is dangerous to use a set speed which is too high for the current
road, traffic or weather conditions. Risk of accident.
Note
The cruise control cannot maintain a constant speed when descending
downhill. The vehicle will accelerate due to its own weight. Use the foot
brake to slow the vehicle. Switching the cruise control system on and off
Fig. 111 Turn signal and
main beam headlight lev-
er: switch and rocker
switch for the cruise con-
trol
Switching on the system
– Move the control ⇒ fig. 111 A
to the left to
ON.
Switching off the system
– Move the control A
to the right to
OFF or turn the ignition off
when the vehicle is stationary.
When the cruise control is on and a speed is programmed, the indicator
on the instrument panel is lit. 1)
If the cruise control system is switched off, the symbol is switched off.
The system will also be deactivated completely when 1st gear is selected.*
1)
Depending on the model version
Safety FirstOperating InstructionsPractical TipsTechnical Specifications
Page 160 of 278

158Driving
Setting speed*
Fig. 112 Turn signal and
main beam headlight lev-
er: switch and rocker
switch for the cruise con-
trol
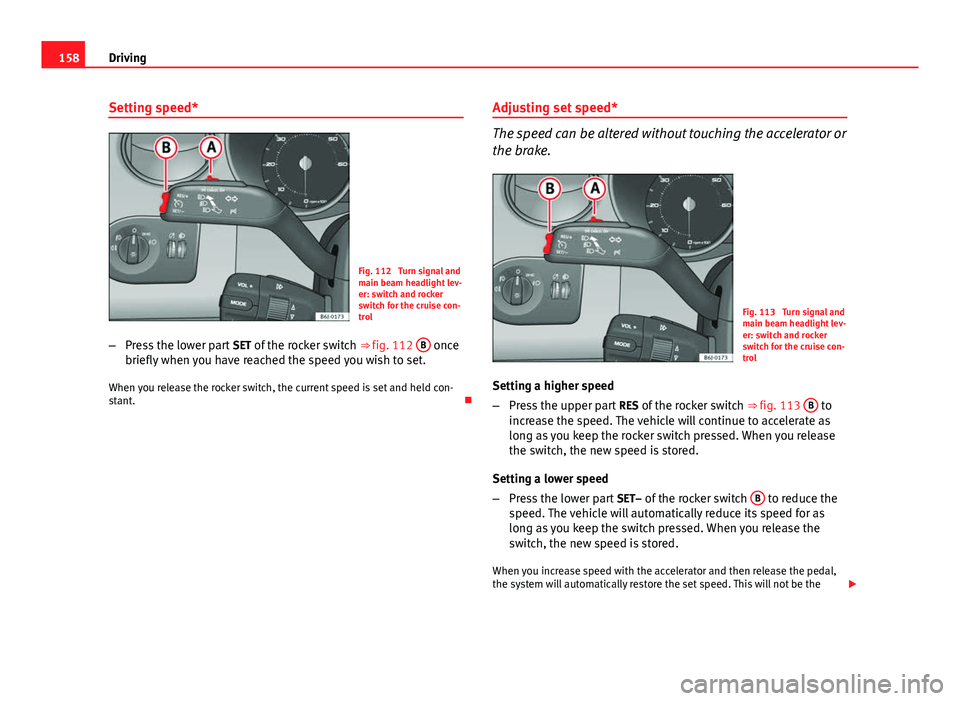
– Press the lower part SET of the rocker switch ⇒ fig. 112 B
once
briefly when you have reached the speed you wish to set.
When you release the rocker switch, the current speed is set and held con-
stant. Adjusting set speed*
The speed can be altered without touching the accelerator or
the brake.
Fig. 113 Turn signal and
main beam headlight lev-
er: switch and rocker
switch for the cruise con-
trol
Setting a higher speed
– Press the upper part RES of the rocker switch ⇒ fig. 113 B
to
increase the speed. The vehicle will continue to accelerate as
long as you keep the rocker switch pressed. When you release
the switch, the new speed is stored.
Setting a lower speed
– Press the lower part SET– of the rocker switch B
to reduce the
speed. The vehicle will automatically reduce its speed for as
long as you keep the switch pressed. When you release the
switch, the new speed is stored.
When you increase speed with the accelerator and then release the pedal,
the system will automatically restore the set speed. This will not be the
Page 161 of 278

159
Driving
case, however, if the vehicle speed is more than 10 km/h higher than the
stored speed for longer than 5 minutes. The speed will have to be stored
again.
Cruise control is switched off if you reduce speed by depressing the brake
pedal. Reactivate the control by pressing once on the upper part of the rock-
er switch RES+ ⇒ fig. 113 B
.
WARNING
It is dangerous to use a set speed which is too high for the current road,
traffic or weather conditions. Risk of accident.
Switching off the system temporarily*
Fig. 114 Turn signal and
main beam headlight lev-
er: switch and rocker
switch for the cruise con-
trol
The cruise control system will be switched off in the following situations:
● if the brake pedal is depressed,
● if the clutch pedal is depressed, ●
if the vehicle is accelerated to over 180 km/h,
● when the lever A
is moved in the direction of
OFF without fully being
engaged.
To resume cruise control, release the brake or clutch pedal or reduce the ve-
hicle speed to less than 180 km/h and press once on the upper part of the
rocker switch RES ⇒ fig. 114 B
.
WARNING
It is dangerous to use a set speed which is too high for the current road,
traffic or weather conditions. Risk of accident.
Completely switching off the system
Fig. 115 Turn signal and
main beam headlight lev-
er: switch and rocker
switch for the cruise con-
trol
Vehicles with a manual gearbox
The system is completely turned off by moving the control A
all the way to
the right hand side (OFF engaged), or when the vehicle is stationary, igni-
tion off.
Safety FirstOperating InstructionsPractical TipsTechnical Specifications
Page 165 of 278

163
Intelligent technology
TCS helps the vehicle to start moving, accelerate and climb a gradient in
slippery conditions where this may otherwise be difficult or even impossi-
ble.
The TCS is switched on automatically when the engine is started. If necessa-
ry, it may be turned on or off by briefly pushing the ESP button on the centre
console.
When the TCS is off, the warning lamp is lit. The TCS should normally be
left on. Only in exceptional circumstances, when the slipping of the wheels
is required, can they be disconnected using the ESP button, for example.
● With compact temporary spare wheel.
● When using the snow chains.
● When driving in deep snow or on loose surfaces
● When the vehicle is bogged-down, to free it by rocking.
The TCS should be switched on again as soon as possible.
WARNING
● It must be remembered that TCS cannot defy the laws of physics. This
should be kept in mind, particularly on slippery and wet roads and when
towing a trailer.
● Always adapt your driving style to suit the condition of the roads and
the traffic situation. Do not let the extra safety afforded by TCS tempt you
into taking any risks when driving, this can cause accidents.
CAUTION
● In order to ensure that TCS function correctly, all four wheels must be fit-
ted with the same tyres. Any differences in the rolling radius of the tyres can
cause the system to reduce engine power when this is not desired.
● Modifications to the vehicle (e.g. to the engine, the brake system, run-
ning gear or any components affecting the wheels and tyres) could affect
the efficiency of the ABS and TCS. XDS*
Driveshaft differential
When taking a bend, the driveshaft differential mechanism allows the outer
wheel to turn at a higher speed than the inner wheel. In this way, the wheel
that is turning faster (outer wheel) receives less drive torque than the inner
wheel. This may mean that in certain situations the torque delivered to the
inner wheel is too high, causing the wheels to spin. On the other hand, the
outer wheel is receiving a lower drive torque than it could transmit. This
causes an overall loss of lateral grip on the front axle, resulting in under-
steer or “lengthening” of the trajectory.
By using the ESP sensors and signals, the XDS system is able to detect and
correct this effect.
Through the ESP, the XDS brakes the inner wheel, thereby counteracting the
excess drive torque in this wheel. This means that the driver's desired tra-
jectory is much more precise,
The XDS system operates in combination with the ESP and is always active,
even when the traction control, TCS, is disconnected.
Electronic Stability Programme (ESP)* General notes
The Electronic Stability Programme increases the vehicle's
stability on the road.
The Electronic Stability Programme helps reduce the danger of skidding.
The Electronic Stability Programme (ESP) consists of ABS, EDL and TCS.
Safety FirstOperating InstructionsPractical TipsTechnical Specifications
Page 228 of 278

226If and when
Fuses in engine compartment above battery
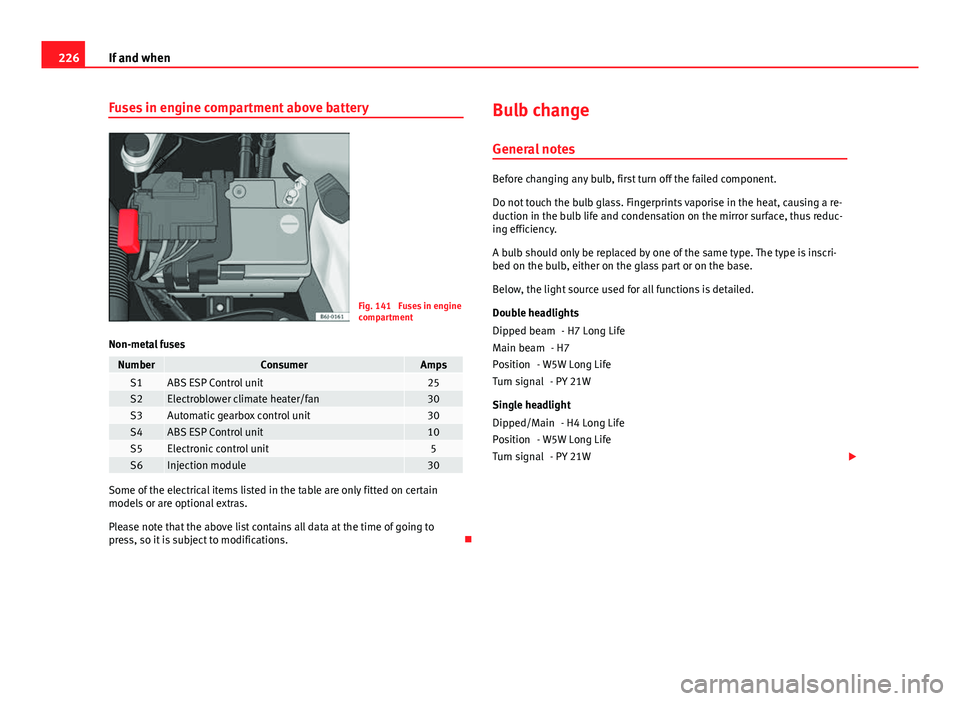
Fig. 141 Fuses in engine
compartment
Non-metal fuses
NumberConsumerAmpsS1ABS ESP Control unit25S2Electroblower climate heater/fan30S3Automatic gearbox control unit30S4ABS ESP Control unit10S5Electronic control unit5S6Injection module30
Some of the electrical items listed in the table are only fitted on certain
models or are optional extras.
Please note that the above list contains all data at the time of going to
press, so it is subject to modifications. Bulb change
General notes
Before changing any bulb, first turn off the failed component.
Do not touch the bulb glass. Fingerprints vaporise in the heat, causing a re-
duction in the bulb life and condensation on the mirror surface, thus reduc-
ing efficiency.
A bulb should only be replaced by one of the same type. The type is inscri-
bed on the bulb, either on the glass part or on the base.
Below, the light source used for all functions is detailed.
Double headlights - H7 Long Life
- H7
- W5W Long Life - PY 21W
Single headlight - H4 Long Life
- W5W Long Life - PY 21W
Dipped beam
Main beam
Position
Turn signal
Dipped/Main
Position
Turn signal
Page 229 of 278

227
If and when
Xenon 1)
/adaptive headlights*
- D1S2)
- LED 3)
- LED 3)
- PY 21W
Fog lights - H11
WARNING
● Take particular care when working on components in the engine com-
partment if the engine is warm - risk of burns!
● Bulbs are highly sensitive to pressure. The glass can break when you
touch the bulb, causing injury.
● The high voltage element of gas discharge bulbs* (xenon light) must
be handled correctly. Otherwise, there is a risk of death.
● When changing bulbs, please take care not to injure yourself on sharp
parts in the headlight housing.
CAUTION
● Remove the ignition key before working on the electric system. If not, a
short circuit could occur.
● Switch off the lights or parking lights before you change a bulb.
Dipped and full beam
Position
DRL (day light)
Turn signals
Fog light/cornering
For the sake of the environment
Please ask your specialist retailer how to dispose of used bulbs in the prop-
er manner.
Note
● Depending on weather conditions (cold or wet), the front lights, the fog
lights, the tail lights and the turn signals may be temporarily misted. This
has no influence on the useful life of the lighting system. By switching on
the lights, the area through which the beam of light is projected will quickly
be demisted. However, the edges may continue to be misted.
● Please check at regular intervals that all lighting (especially the exterior
lighting) on your vehicle is functioning properly. This is not only in the inter-
est of your own safety, but also that of all other road users.
● Before changing a bulb, make sure you have the correct new bulb.
● Do not touch the glass part of the bulb with your bare hands, use a cloth
or paper towel instead. Otherwise, the fingerprints left on the glass will va-
porise as a result of the heat generated by the bulb, they will be deposited
on the reflector and will impair its surface.
1)
With these types of headlights, the user can replace the indicator bulb. Replacement of the
dipped/main beam bulb must be done by a Technical Service, given that complex elements
must be removed from the vehicle and the automatic control system that incorporates it
must be reset.
2) The Xenon bulbs discharge 2.5 times the light flux and have an average lifespan of 5 times
more than that of halogen bulbs, this means that, except due to unusual circumstances,
there is no need to change the bulbs for the whole life of the vehicle.
3) In the event that there is a fault in the LEDs, the complete headlight must be replaced.
Safety FirstOperating InstructionsPractical TipsTechnical Specifications