2011 Seat Ibiza SC change wheel
[x] Cancel search: change wheelPage 6 of 278
Accessories, parts replacement and
modifications . . . . . . . . . . . . . . . . . . . . . . . . . . . . . 183
Accessories and spare parts . . . . . . . . . . . . . . . . 183
Technical modifications . . . . . . . . . . . . . . . . . . . . 183
Roof aerial* . . . . . . . . . . . . . . . . . . . . . . . . . . . . . . 184
Mobile telephones and two-way radios . . . . . . . . 184
Fitting a towing bracket* . . . . . . . . . . . . . . . . . . . 185
Checking and refilling levels . . . . . . . . . . . . . . . 187
Refuelling . . . . . . . . . . . . . . . . . . . . . . . . . . . . . . . 187
LPG system* . . . . . . . . . . . . . . . . . . . . . . . . . . . . . 189
Petrol . . . . . . . . . . . . . . . . . . . . . . . . . . . . . . . . . . . 192
Diesel . . . . . . . . . . . . . . . . . . . . . . . . . . . . . . . . . . . 192
Working in the engine compartment . . . . . . . . . . 193
Engine oil . . . . . . . . . . . . . . . . . . . . . . . . . . . . . . . . 196
Coolant . . . . . . . . . . . . . . . . . . . . . . . . . . . . . . . . . 200
Washer fluid and windscreen wiper blades . . . . 202
Brake fluid . . . . . . . . . . . . . . . . . . . . . . . . . . . . . . . 205
Vehicle battery . . . . . . . . . . . . . . . . . . . . . . . . . . . 207
Wheels . . . . . . . . . . . . . . . . . . . . . . . . . . . . . . . . . . 209
If and when . . . . . . . . . . . . . . . . . . . . . . . . . . . . . . . 215
Vehicle tools, spare wheel . . . . . . . . . . . . . . . . . . 215
Wheel change . . . . . . . . . . . . . . . . . . . . . . . . . . . . 216
Tyre repair kit (Tyre-Mobility-System)* . . . . . . . . . 221
Fuses . . . . . . . . . . . . . . . . . . . . . . . . . . . . . . . . . . . 223
Bulb change . . . . . . . . . . . . . . . . . . . . . . . . . . . . . 226
Single headlight bulb change . . . . . . . . . . . . . . . 228
Double headlight bulb change . . . . . . . . . . . . . . . 230
Changing the bulbs of AFS headlights . . . . . . . . 234
Changing the fog light bulbs . . . . . . . . . . . . . . . . 235
Changing the rear, side and interior light bulbs . 237
Jump-starting . . . . . . . . . . . . . . . . . . . . . . . . . . . . . 240
Towing and tow-starting . . . . . . . . . . . . . . . . . . . . 243 Technical Specifications
. . . . . . . . . . . 246
Description of specifications . . . . . . . . . . . . . . . 246
Important information . . . . . . . . . . . . . . . . . . . . . 246
Information on fuel consumption . . . . . . . . . . . . 248
Towing a trailer . . . . . . . . . . . . . . . . . . . . . . . . . . . 248
Wheels . . . . . . . . . . . . . . . . . . . . . . . . . . . . . . . . . . 249
Technical specifications . . . . . . . . . . . . . . . . . . . . 250
Checking fluid levels . . . . . . . . . . . . . . . . . . . . . . . 250
Petrol engine 1.2 44 kW (60 PS) . . . . . . . . . . . . . 251
Petrol engine 1.2 51 kW (70 PS) . . . . . . . . . . . . . 252
Petrol engine/LPG 1.6 60 kW (81 PS) . . . . . . . . . 253
Petrol engine 1.4 63 kW (85 PS) . . . . . . . . . . . . . 254
Petrol engine 1.2 TSI 77 kW (105 PS) . . . . . . . . . 255
Petrol engine 1.2 TSI 77 kW (105 PS) Start-Stop 256
Petrol engine 1.6 77 kW (105 PS) . . . . . . . . . . . . 257
Petrol engine 1.4 110 kW (150 PS) . . . . . . . . . . . 258
Petrol engine 1.4 132 kW (180 PS) - Cupra . . . . . 259
Diesel engine 1.2 TDI CR 55 kW (75 PS) DPF
Start-Stop Ecomotive . . . . . . . . . . . . . . . . . . . . . . 260
Diesel engine 1.2 TDI CR 55 kW (75 PS) DPF . . . . 261
Diesel engine 1.6 TDI CR 66 kW (90 PS) DPF . . . . 262
Diesel engine 1.6 TDI CR 77 kW (105 PS) with/
without DPF . . . . . . . . . . . . . . . . . . . . . . . . . . . . . . 263
Diesel engine 2.0 TDI CR 105 kW (143 PS) DPF . 264
Dimensions and capacities . . . . . . . . . . . . . . . . . 266
Index . . . . . . . . . . . . . . . . . . . . . . . . . . . . . . . . . . . 267
4Table of Contents
Page 56 of 278
54Cockpit
Rev counter
The rev counter displays the engine speed in revolutions per
minute.
The start of the red zone ⇒ fig. 30 1
indicates the maximum engine speed
operating at service temperature. However, it is advisable to change up a in-
to a higher gear, move the selector lever to D or lift your foot off the acceler-
ator before the needle reaches the red zone.
CAUTION
The rev counter needle must never enter the red zone on the scale. Risk of
engine damage.
For the sake of the environment
Changing up into higher gears sooner, following the recommended gear in-
dications ⇒ fig. 33 will help you to reduce fuel consumption, emissions and
also engine noise.
Speedometer
The speedometer is equipped with a digital odometer and a trip recorder, in
addition to a service intervals display.
During the running-in period, the instructions shown on ⇒ page 166
should be followed. LPG system*
LPG gauge
Fig. 31 Instrument pan-
el: gas gauge.
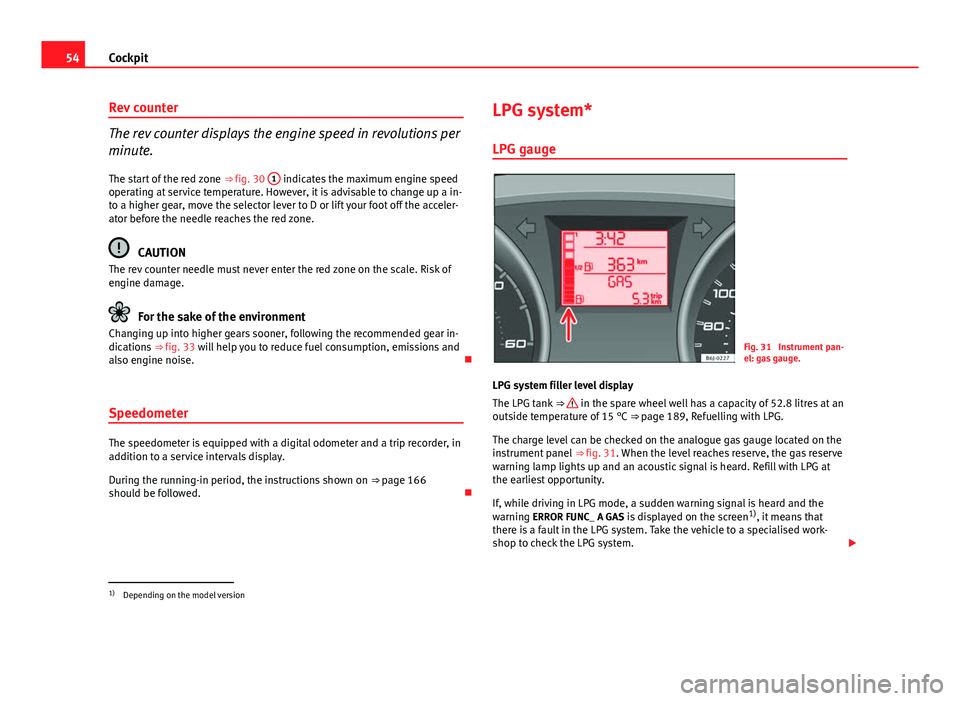
LPG system filler level display
The LPG tank ⇒
in the spare wheel well has a capacity of 52.8 litres at an
outside temperature of 15 °C ⇒ page 189, Refuelling with LPG.
The charge level can be checked on the analogue gas gauge located on the
instrument panel ⇒ fig. 31. When the level reaches reserve, the gas reserve
warning lamp lights up and an acoustic signal is heard. Refill with LPG at
the earliest opportunity.
If, while driving in LPG mode, a sudden warning signal is heard and the
warning ERROR FUNC_ A GAS is displayed on the screen 1)
, it means that
there is a fault in the LPG system. Take the vehicle to a specialised work-
shop to check the LPG system.
1)
Depending on the model version
Page 72 of 278
70Cockpit
Tyre pressure*
Fig. 40 Centre console:
tyre monitor system but-
ton
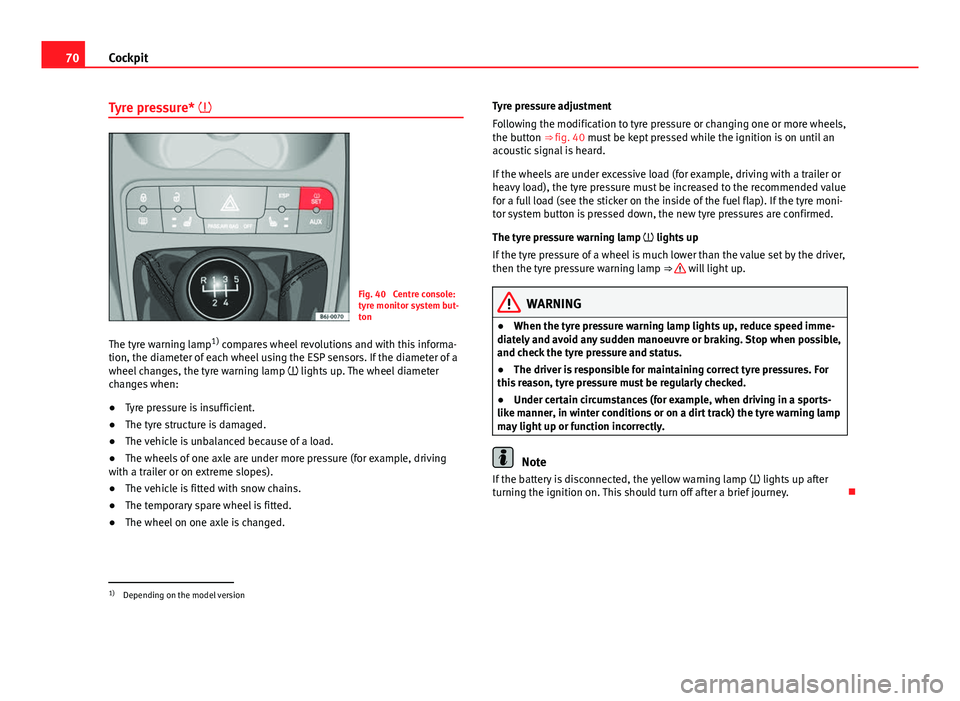
The tyre warning lamp 1)
compares wheel revolutions and with this informa-
tion, the diameter of each wheel using the ESP sensors. If the diameter of a
wheel changes, the tyre warning lamp lights up. The wheel diameter
changes when:
● Tyre pressure is insufficient.
● The tyre structure is damaged.
● The vehicle is unbalanced because of a load.
● The wheels of one axle are under more pressure (for example, driving
with a trailer or on extreme slopes).
● The vehicle is fitted with snow chains.
● The temporary spare wheel is fitted.
● The wheel on one axle is changed. Tyre pressure adjustment
Following the modification to tyre pressure or changing one or more wheels,
the button ⇒ fig. 40 must be kept pressed while the ignition is on until an
acoustic signal is heard.
If the wheels are under excessive load (for example, driving with a trailer or
heavy load), the tyre pressure must be increased to the recommended value
for a full load (see the sticker on the inside of the fuel flap). If the tyre moni-
tor system button is pressed down, the new tyre pressures are confirmed.
The tyre pressure warning lamp lights up
If the tyre pressure of a wheel is much lower than the value set by the driver,
then the tyre pressure warning lamp ⇒
will light up.
WARNING
● When the tyre pressure warning lamp lights up, reduce speed imme-
diately and avoid any sudden manoeuvre or braking. Stop when possible,
and check the tyre pressure and status.
● The driver is responsible for maintaining correct tyre pressures. For
this reason, tyre pressure must be regularly checked.
● Under certain circumstances (for example, when driving in a sports-
like manner, in winter conditions or on a dirt track) the tyre warning lamp
may light up or function incorrectly.
Note
If the battery is disconnected, the yellow warning lamp lights up after
turning the ignition on. This should turn off after a brief journey.
1)
Depending on the model version
Page 102 of 278
100Lights and visibility
Note
● The battery will run down if the hazard warning lights are left on for a
long time, even if the ignition is switched off.
● The use of the hazard warning lights described here is subject to the rel-
evant statutory requirements.
Turn signal and main beam headlight lever
The turn signal and main beam lever also operates the park-
ing lights and the headlight flasher.
Fig. 59 Turn signal and
main beam headlight lev-
er
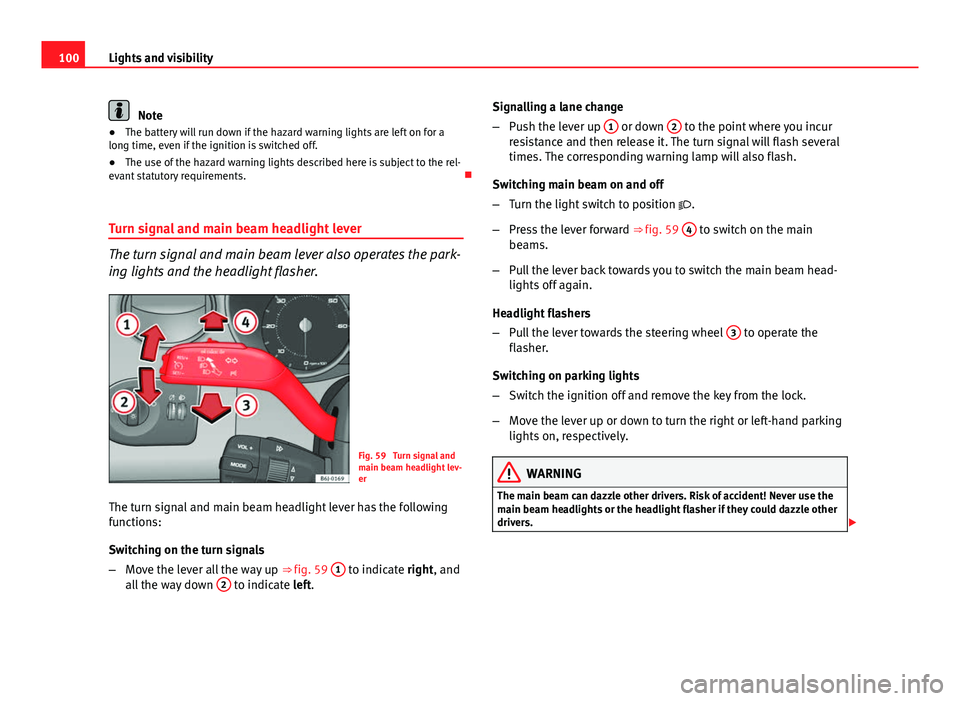
The turn signal and main beam headlight lever has the following
functions:
Switching on the turn signals
– Move the lever all the way up ⇒ fig. 59 1
to indicate right, and
all the way down 2 to indicate left. Signalling a lane change
–
Push the lever up 1
or down 2 to the point where you incur
resistance and then release it. The turn signal will flash several
times. The corresponding warning lamp will also flash.
Switching main beam on and off
– Turn the light switch to position .
– Press the lever forward ⇒ fig. 59 4
to switch on the main
beams.
– Pull the lever back towards you to switch the main beam head-
lights off again.
Headlight flashers
– Pull the lever towards the steering wheel 3
to operate the
flasher.
Switching on parking lights
– Switch the ignition off and remove the key from the lock.
– Move the lever up or down to turn the right or left-hand parking
lights on, respectively.
WARNING
The main beam can dazzle other drivers. Risk of accident! Never use the
main beam headlights or the headlight flasher if they could dazzle other
drivers.
Page 106 of 278
104Lights and visibility
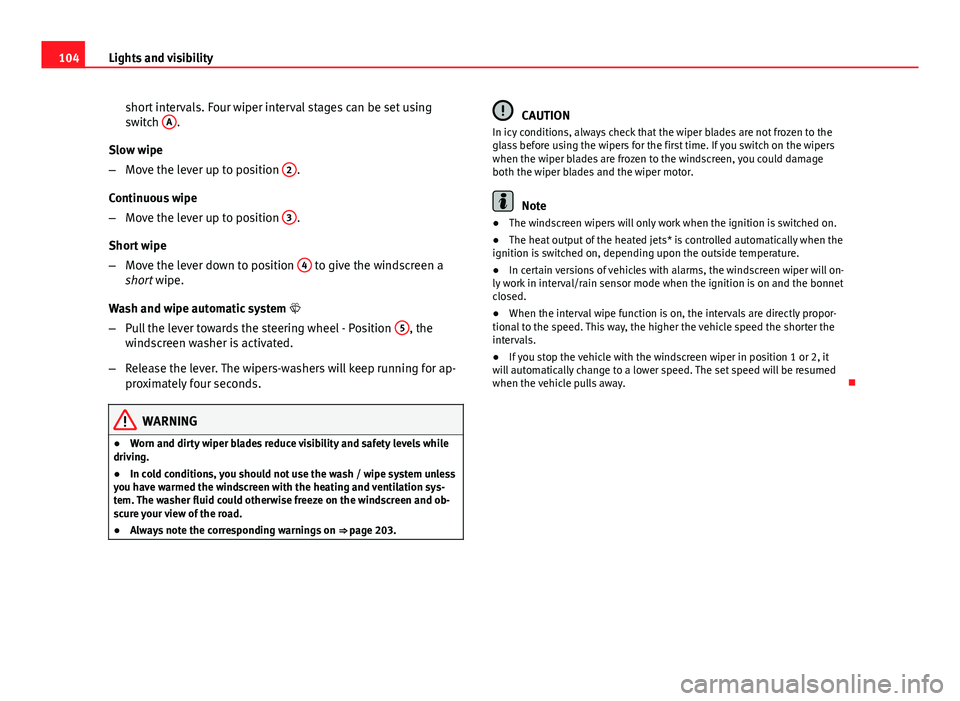
short intervals. Four wiper interval stages can be set using
switch A
.
Slow wipe
– Move the lever up to position 2
.
Continuous wipe
– Move the lever up to position 3
.
Short wipe
– Move the lever down to position 4
to give the windscreen a
short wipe.
Wash and wipe automatic system
– Pull the lever towards the steering wheel - Position 5
, the
windscreen washer is activated.
– Release the lever. The wipers-washers will keep running for ap-
proximately four seconds.
WARNING
● Worn and dirty wiper blades reduce visibility and safety levels while
driving.
● In cold conditions, you should not use the wash / wipe system unless
you have warmed the windscreen with the heating and ventilation sys-
tem. The washer fluid could otherwise freeze on the windscreen and ob-
scure your view of the road.
● Always note the corresponding warnings on ⇒ page 203.
CAUTION
In icy conditions, always check that the wiper blades are not frozen to the
glass before using the wipers for the first time. If you switch on the wipers
when the wiper blades are frozen to the windscreen, you could damage
both the wiper blades and the wiper motor.
Note
● The windscreen wipers will only work when the ignition is switched on.
● The heat output of the heated jets* is controlled automatically when the
ignition is switched on, depending upon the outside temperature.
● In certain versions of vehicles with alarms, the windscreen wiper will on-
ly work in interval/rain sensor mode when the ignition is on and the bonnet
closed.
● When the interval wipe function is on, the intervals are directly propor-
tional to the speed. This way, the higher the vehicle speed the shorter the
intervals.
● If you stop the vehicle with the windscreen wiper in position 1 or 2, it
will automatically change to a lower speed. The set speed will be resumed
when the vehicle pulls away.
Page 142 of 278
140Driving
temperature increases due to the heat accumulated in the engine compart-
ment or due to its prolonged exposure to solar radiation.
WARNING
● Never switch the engine off until the vehicle is completely stationary.
● The brake servo works only when the engine is running. With the en-
gine switched off, more strength is needed to brake. As normal brake op-
eration cannot be performed, risk of accidents and serious injury may ex-
ist.
● The steering lock can be immediately blocked once the key is re-
moved from the ignition. The vehicle cannot be steered. Risk of accident.
CAUTION
When the engine has been running under a heavy load for a long period,
heat can accumulate in the engine compartment and cause engine damage.
For this reason, you should idle the engine for approx. 2 minutes before you
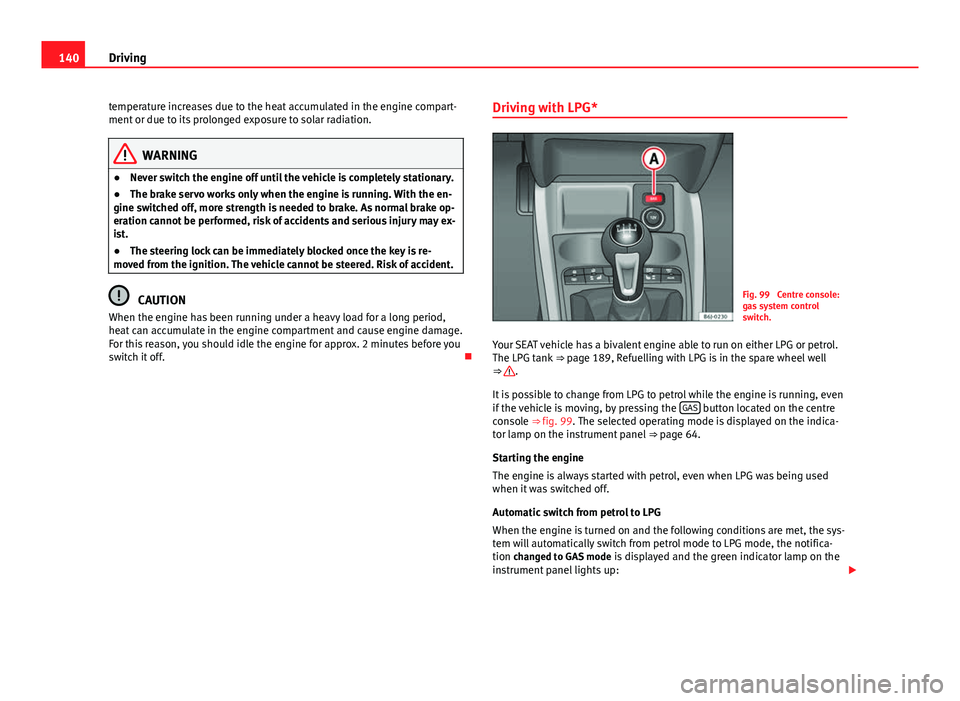
switch it off. Driving with LPG*Fig. 99 Centre console:
gas system control
switch.
Your SEAT vehicle has a bivalent engine able to run on either LPG or petrol.
The LPG tank ⇒ page 189, Refuelling with LPG is in the spare wheel well
⇒
.
It is possible to change from LPG to petrol while the engine is running, even
if the vehicle is moving, by pressing the GAS
button located on the centre
console ⇒ fig. 99. The selected operating mode is displayed on the indica-
tor lamp on the instrument panel ⇒ page 64.
Starting the engine
The engine is always started with petrol, even when LPG was being used
when it was switched off.
Automatic switch from petrol to LPG
When the engine is turned on and the following conditions are met, the sys-
tem will automatically switch from petrol mode to LPG mode, the notifica-
tion changed to GAS mode is displayed and the green indicator lamp on the
instrument panel lights up:
Page 151 of 278

149
Driving
Changing gear in tiptronic mode*
The tiptronic system allows the driver to select gears man-
ually
Fig. 107 Changing gear
with tiptronic
Fig. 108 Steering wheel
with paddle levers for au-
tomatic gearbox
General information about driving in tiptronic mode Changing gear in tiptronic mode
–
Press the selector lever from position D to the right into the tip-
tronic selector gate.
– Lightly press the selector forward + to change up into high
gears.
– Lightly press the selector lever backwards - to change down into
low gears.
Changing gear with the steering wheel paddle levers*
– Press the right paddle lever +
towards the steering wheel to
change up ⇒ fig. 108.
– Press the left paddle lever –
towards the steering wheel to
change down ⇒ fig. 108.
Using the paddle levers on the steering wheel, you can access manual driv-
ing mode regardless of the pre-selected driving mode.
General information about driving in tiptronic mode
When accelerating, the automatic gearbox / DSG automatic gearbox goes
into a higher gear a little before the engine reaches its maximum permitted
revolutions.
If a lower gear is selected, the automatic gearbox / DSG automatic gearbox
will only change down when the engine cannot go over its maximum permit-
ted revolutions.
If tiptronic is selected whilst the vehicle is in motion and the automatic
gearbox / DSG automatic gearbox is in third gear and selector lever position
D, tiptronic mode will then also be in third gear.
Safety FirstOperating InstructionsPractical TipsTechnical Specifications
Page 152 of 278
150Driving
Changing gears in the normal or sport programme using the steering wheel
paddle levers
If the paddle levers ⇒ fig. 108 are used in the normal or sport programme,
the system switches temporarily to tiptronic mode. To exit “tiptronic” mode
again, press the right paddle lever +
towards the steering wheel for approx-
imately one second. You will also leave tiptronic mode if the paddle levers
are not moved for a certain time.
Note
● The gear paddle levers on the steering wheel can be operated with the
selector lever in any position and with the vehicle in motion.
Selector lever positions
The selector lever positions and gears are shown on the in-
strument panel screen.
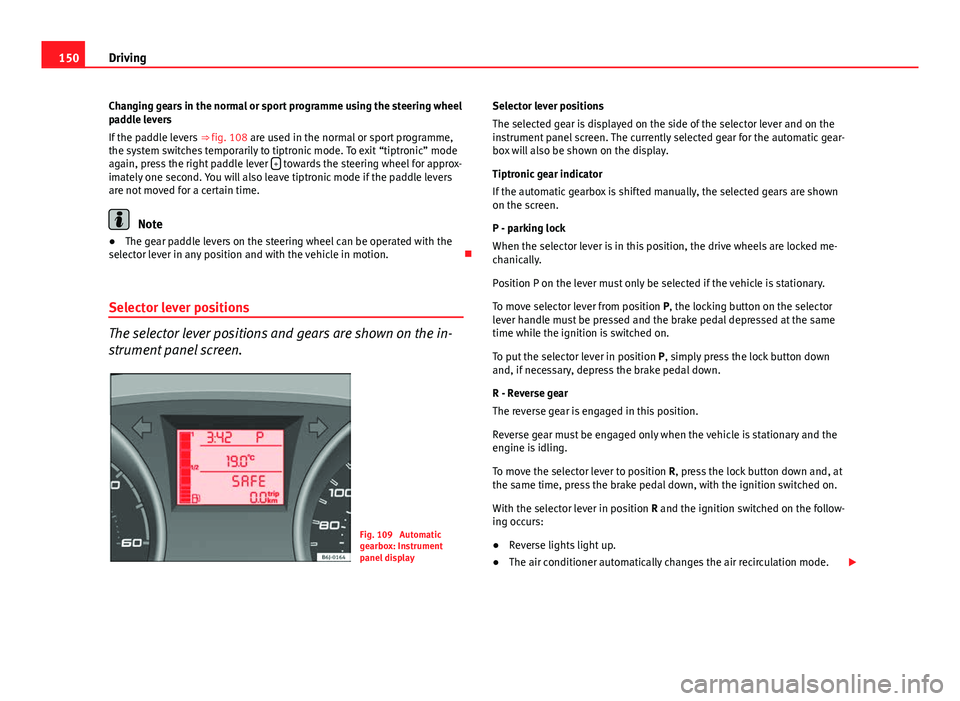
Fig. 109 Automatic
gearbox: Instrument
panel display Selector lever positions
The selected gear is displayed on the side of the selector lever and on the
instrument panel screen. The currently selected gear for the automatic gear-
box will also be shown on the display.
Tiptronic gear indicator
If the automatic gearbox is shifted manually, the selected gears are shown
on the screen.
P - parking lock
When the selector lever is in this position, the drive wheels are locked me-
chanically.
Position P on the lever must only be selected if the vehicle is stationary.
To move selector lever from position P, the locking button on the selector
lever handle must be pressed and the brake pedal depressed at the same
time while the ignition is switched on.
To put the selector lever in position
P, simply press the lock button down
and, if necessary, depress the brake pedal down.
R - Reverse gear
The reverse gear is engaged in this position.
Reverse gear must be engaged only when the vehicle is stationary and the
engine is idling.
To move the selector lever to position R, press the lock button down and, at
the same time, press the brake pedal down, with the ignition switched on.
With the selector lever in position R and the ignition switched on the follow-
ing occurs:
● Reverse lights light up.
● The air conditioner automatically changes the air recirculation mode.