2011 Seat Ibiza SC turn signal
[x] Cancel search: turn signalPage 86 of 278

84Unlocking and locking
Anti-theft alarm system*
Description of anti-theft alarm system*
The anti-theft alarm triggers if unauthorised movements are
detected around the vehicle.
The anti-theft alarm makes it more difficult to break into the vehicle or steal
it. The system will initiate acoustic and optical warning signals when your
vehicle is tried to be forced.
The anti-theft alarm system is automatically connected on locking the vehi-
cle. For this, either rotate the key in the locking position or press button
2 on the radio-frequency remote control*. The system is immediately acti-
vated and the turn signal light located on the driver door will flash along
with the turn signals, indicating that the alarm and the locking security sys-
tem (double lock) have been turned on.
If any of the doors or the bonnet are open, they will not be included in the
protection zones of the vehicle when the alarm is connected. If the door or
the bonnet are subsequently closed, they will be automatically included in
the protection areas of the vehicle and the turn signals will flash according-
ly when the doors close.
● The turn signal light will flash twice on opening and deactivating the
alarm..
● The turn signal light will flash once on closing and activating the alarm.
When does the system trigger an alarm?
The system triggers an alarm if the following unauthorised actions are car-
ried out when the car is locked: ●
Opening of vehicle with mechanical key without switching ignition on
within the next 15 seconds
● Opening a door
● Opening the bonnet
● Opening the tailgate
● Ignition switched on with a non-validated key.
● Movements in the driving compartment (vehicles with a volume sensor)
● Towing of the vehicle 1)
● Tilt angle (tow-away protection) 1)
● Undue manipulation of the alarm
● Battery handling
The acoustic signals sound and the turn signals flash for approx. 30 sec-
onds. This may be repeated up to 10 times depending on the country.
Opening all the doors in manual mode
In vehicles without alarm, when opening the driver door manually all the
doors are opened.
How to switch the alarm off
To deactivate the anti-theft alarm, turn the key to the opening direction,
open the door and switch the ignition on, or press the unlocking button
on the remote control.
In vehicles equipped with an anti-theft alarm system, you have 15 seconds
to insert the key in the ignition lock and activate the ignition if the vehicle is
opened using the driver door key.
Otherwise, the alarm will trigger for 30 sec. and the ignition will be blocked.
1)
With vehicles fitted with a tow-away protection
Page 93 of 278

91
Unlocking and locking
WARNING
● Incorrect use of the electric windows can result in injury.
● Always take the key with you when leaving the vehicle, even if you
only intend to be gone for a short time. Please ensure that children are
never left alone inside the vehicle.
● The electric windows will work until the ignition has been switched
off and one of the front doors has been opened.
● Closing the windows without observing and ensuring it is clear could
cause serious injury to you and third parties. Make sure that no one is in
the path of a window.
● Never allow people to remain in the vehicle when you close the vehi-
cle from the outside. The windows cannot be opened even in an emergen-
cy.
● The roll-back function does not prevent fingers or other parts of the
body from getting pinched against the window frame, causing injury.
Convenience opening and closing*
Using the door lock*
– Hold the key in the door lock of the driver door in either the
locking or the unlocking position until all windows are either
opened or closed.
– Release the key to interrupt this function.
Using the remote control
– Keep the locking/unlocking button pressed for the electrical
window risers to open/close; if you stop pressing the button,
the window raising/lowering function is stopped. –
If the automatic raising is stopped and immediately after, the
opening button is kept pressed, the window risers will lower.
– Once the windows are completely closed, the turn signals will
flash.
Panorama tilting sunroof* Opening and closing the panorama/tilting sunroof
The panorama/tilting sunroof is opened and closed by using
the switch when the ignition is switched on.
Fig. 51 Panorama/tilting
sunroof
Closing the panorama/tilting sunroof
– Press and hold button B
⇒ fig. 51 ⇒ . The roof starts to close
until the button is released.
Safety FirstOperating InstructionsPractical TipsTechnical Specifications
Page 97 of 278

95
Lights and visibility
● The rear fog light is so bright that it can dazzle drivers behind you. You
should use the rear fog light only when visibility is very poor.
● The use of the lighting described here is subject to the relevant statutory
requirements.
Automatic lighting*
Fig. 54 Automatic light-
ing
Activation
– Rotate the switch to the position “Auto”, this indication will
light up.
Deactivation
– Turn the light switch to 0.
Automatic lighting
If automatic headlight control is switched on, dipped beam headlights are
automatically switched on by a photosensor if you drive into a tunnel, for
example.
WARNING
● Even if the automatic headlight control is switched on, the dipped
headlights will not be switched on with fog. Therefore, the dipped beam
must be switched on manually.
Note
● For those vehicles with the automatic headlight system, when the key is
removed from the ignition, the acoustic signal will only sound if the light
knob is in position or .
● If the daylight driving automatic light function is switched on, the fog
lights or rear fog light cannot be switched on in addition.
● The use of the lighting described here is subject to the relevant statutory
requirements.
● Do not put stickers on the windscreen in front of the sensor. This may
cause disruptions or faults in the automatic lighting system.
● The rain sensor switches on the dipped beam headlights when the wind-
screen wipers have been operating continuously for a few seconds and it
switches the lights off when the continuous or interval wipe is switched off
for some minutes.
Safety FirstOperating InstructionsPractical TipsTechnical Specifications
Page 98 of 278

96Lights and visibility
Instrument and switch lighting / Headlight range control
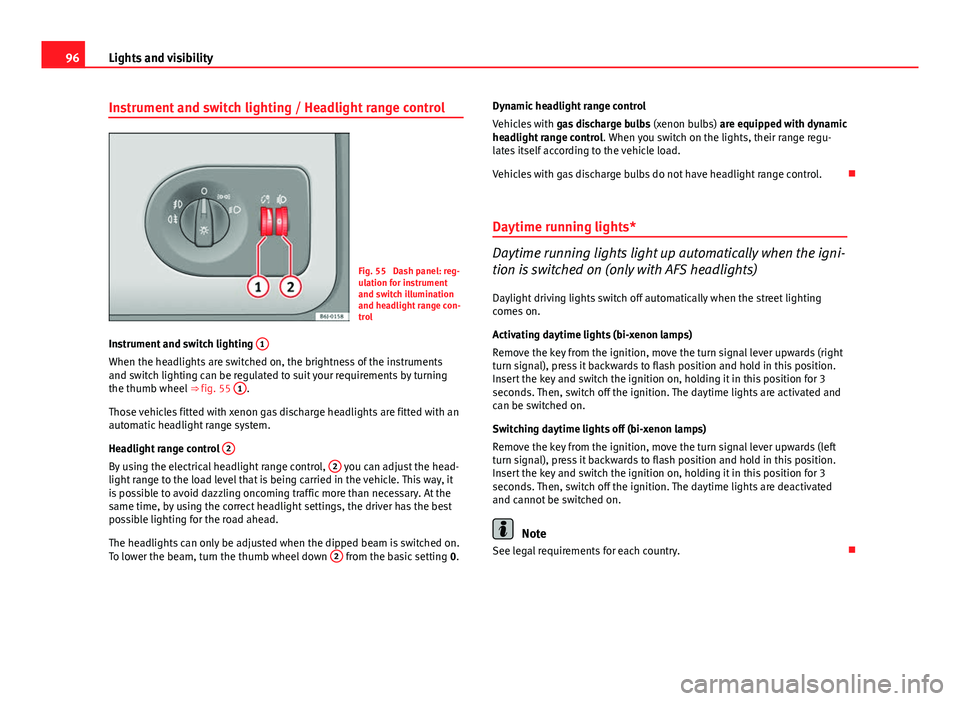
Fig. 55 Dash panel: reg-
ulation for instrument
and switch illumination
and headlight range con-
trol
Instrument and switch lighting 1
When the headlights are switched on, the brightness of the instruments
and switch lighting can be regulated to suit your requirements by turning
the thumb wheel
⇒ fig. 55 1
.
Those vehicles fitted with xenon gas discharge headlights are fitted with an
automatic headlight range system.
Headlight range control 2
By using the electrical headlight range control, 2 you can adjust the head-
light range to the load level that is being carried in the vehicle. This way, it
is possible to avoid dazzling oncoming traffic more than necessary. At the
same time, by using the correct headlight settings, the driver has the best
possible lighting for the road ahead.
The headlights can only be adjusted when the dipped beam is switched on.
To lower the beam, turn the thumb wheel down 2
from the basic setting
0.Dynamic headlight range control
Vehicles with
gas discharge bulbs (xenon bulbs) are equipped with dynamic
headlight range control . When you switch on the lights, their range regu-
lates itself according to the vehicle load.
Vehicles with gas discharge bulbs do not have headlight range control.
Daytime running lights*
Daytime running lights light up automatically when the igni-
tion is switched on (only with AFS headlights)
Daylight driving lights switch off automatically when the street lighting
comes on.
Activating daytime lights (bi-xenon lamps)
Remove the key from the ignition, move the turn signal lever upwards (right
turn signal), press it backwards to flash position and hold in this position.
Insert the key and switch the ignition on, holding it in this position for 3
seconds. Then, switch off the ignition. The daytime lights are activated and
can be switched on.
Switching daytime lights off (bi-xenon lamps)
Remove the key from the ignition, move the turn signal lever upwards (left
turn signal), press it backwards to flash position and hold in this position.
Insert the key and switch the ignition on, holding it in this position for 3
seconds. Then, switch off the ignition. The daytime lights are deactivated
and cannot be switched on.
Note
See legal requirements for each country.
Page 99 of 278

97
Lights and visibility
Adaptive headlights* (for driving round bends)
When driving around bends, the headlights will light the
most important areas of the road.
Fig. 56 Cornering light-
ing using adaptive head-
lights
This cornering light gives better illumination of the side of the road and the
corner area. The dynamic lighting is controlled automatically according to
speed and the steering wheel angle.
The two main headlights move at different angles to avoid that the front of
the vehicle is left completely in the dark.
Note
The system operates from a speed of about 10 km/h. Fog lights with cornering function*
This is an additional light source to dipped beam headlights
to light up the road as a bend is taken.
The cornering light operates with the lights switched on and when driving at
less than 40 Km/h. They light up when the steering wheel is turned or the
flashers are operated.
Forward gear
● If the steering wheel is turned to the right, or the right-hand turn signal
operated, the right-hand headlight lights up.
● If the steering wheel is turned to the left, or the left-hand flasher operat-
ed, the left-hand headlight lights up.
In reverse gear both headlights light up.
Note
When the fog lamps are on, the cornering function is activated and both
headlights are continuously on.
Coming/leaving Home function*
The Coming Home function is controlled manually. The Leav-
ing Home function is controlled with a photosensor.
If the Coming Home or Leaving Home function is connected, the front side
and dipped lights, the tail lights and the number plate light will light up to
provide assistance.
Coming home function
The Coming Home function is activated by switching off the ignition and
briefly flashing the lights. When the driver door is opened, the Coming
Safety FirstOperating InstructionsPractical TipsTechnical Specifications
Page 100 of 278

98Lights and visibility
Home lighting comes on. If the driver door is already open when the lights
are flashed briefly, the Coming Home lighting comes on immediately.
When the last door of the vehicle or the tailgate is closed, the Coming Home
function starts and the switching off the headlights is delayed.
The Coming Home lighting switches off in the following cases:
● On completion of the time period established for the delay in switching
off the lights after all the vehicle doors and the tailgate have been closed.
● If, 30 seconds after being connected, any doors or the tailgate remain
open.
● If the light switch is turned to position .
● If the ignition is switched on.
Leaving home function
The Leaving Home function is activated when the vehicle is unlocked if:
● the light control is in position and
● the photosensor detects “darkness”.
The Leaving Home lighting switches off in the following cases:
● If the time period for the delay in switching off the headlights has ended
● If the vehicle is locked again.
● If the light switch is turned to position .
● If the ignition is switched on.
Note
● To activate the coming/leaving home function, the rotary light switch
must be in position and the light sensor must detect darkness.
● If the ignition key is removed while the lights are on, and the lights are
flashed briefly and the driver door opened, no acoustic signal is heard, as
when the Coming Home function is on, the lights are automatically switched
off after a period of time (except when the light switch is in position or
.
Rear window heating
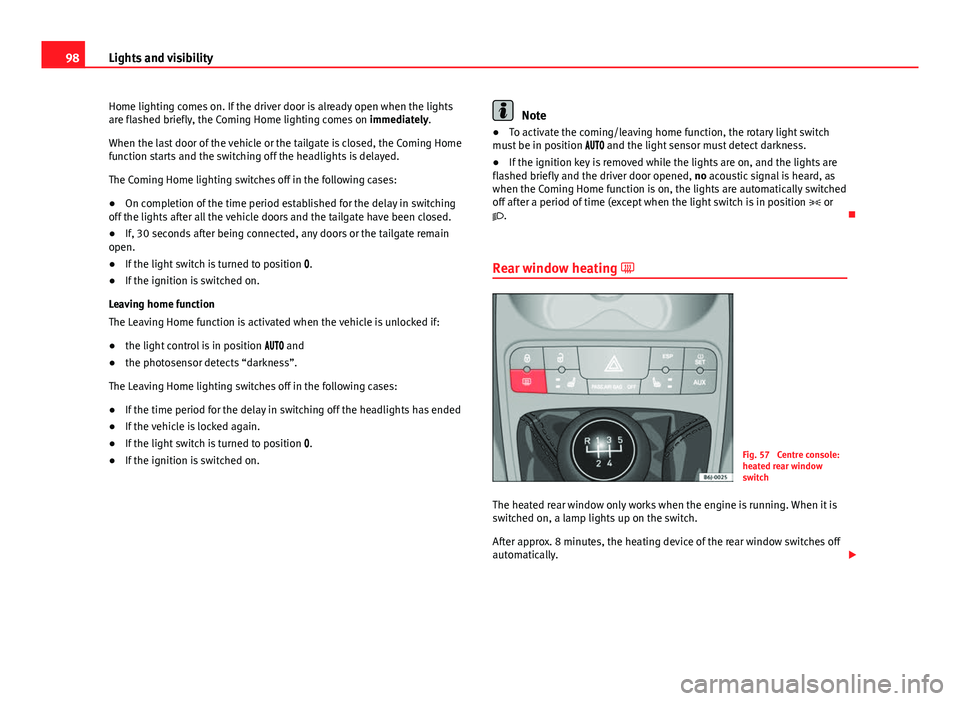
Fig. 57 Centre console:
heated rear window
switch
The heated rear window only works when the engine is running. When it is
switched on, a lamp lights up on the switch.
After approx. 8 minutes, the heating device of the rear window switches off
automatically.
Page 101 of 278

99
Lights and visibility
For the sake of the environment
The heated rear window should be disconnected as soon as the glass is
demisted. By saving electrical power you can also save fuel.
Note
To avoid possible damage to the battery, an automatic temporary discon-
nection of this function is possible, coming back on when normal operating
conditions are re-established.
Hazard warning lights
The hazard warning lights are used to draw the attention of
other road users to your vehicle in emergencies.
Fig. 58 Centre console:
switch for hazard warn-
ing lights
If your vehicle breaks down:
1. Park your vehicle at a safe distance from moving traffic. 2. Press the button to switch on the hazard warning lights
⇒
.
3. Switch the engine off.
4. Apply the handbrake.
5. On a manual gearbox engage 1st gear. On an automatic, move the selector lever to P.
6. Use the warning triangle to draw the attention of other road users to your vehicle.
7. Always take the vehicle key with you when you leave the vehi- cle.
Switch on the hazard warning lights to warn other road users, for example
when:
● reaching the tail end of a traffic jam,
● there is an emergency
● your vehicle breaks down due to a technical fault,
● you are towing another vehicle or your vehicle is being towed.
All turn signals flash simultaneously when the hazard warning lights are
switched on. That is that the two turn signal turn signal lamps and the
turn signal lamp in the switch will flash at the same time. The hazard
warning lights also work when the ignition is switched off.
WARNING
● The risk of an accident increases if your vehicle breaks down. Always
use the hazard warning lights and a warning triangle to draw the atten-
tion of other road users to your stationary vehicle.
● Never park where the catalytic converter could come into contact with
inflammable materials under the vehicle, for example dry grass or spilt
petrol. This could start a fire!
Safety FirstOperating InstructionsPractical TipsTechnical Specifications
Page 102 of 278

100Lights and visibility
Note
● The battery will run down if the hazard warning lights are left on for a
long time, even if the ignition is switched off.
● The use of the hazard warning lights described here is subject to the rel-
evant statutory requirements.
Turn signal and main beam headlight lever
The turn signal and main beam lever also operates the park-
ing lights and the headlight flasher.
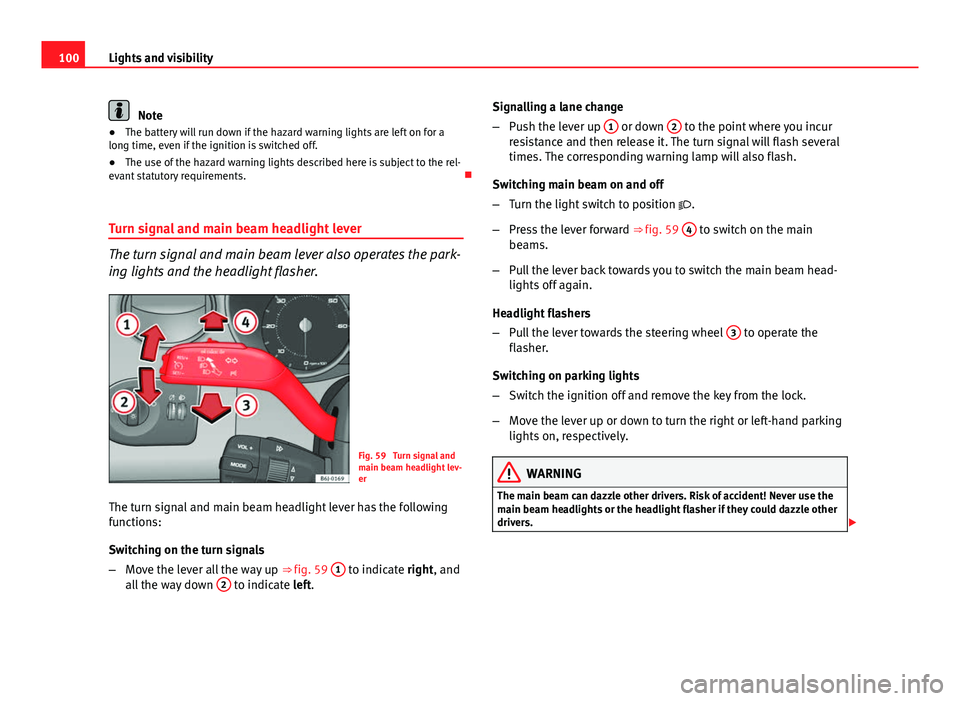
Fig. 59 Turn signal and
main beam headlight lev-
er
The turn signal and main beam headlight lever has the following
functions:
Switching on the turn signals
– Move the lever all the way up ⇒ fig. 59 1
to indicate right, and
all the way down 2 to indicate left. Signalling a lane change
–
Push the lever up 1
or down 2 to the point where you incur
resistance and then release it. The turn signal will flash several
times. The corresponding warning lamp will also flash.
Switching main beam on and off
– Turn the light switch to position .
– Press the lever forward ⇒ fig. 59 4
to switch on the main
beams.
– Pull the lever back towards you to switch the main beam head-
lights off again.
Headlight flashers
– Pull the lever towards the steering wheel 3
to operate the
flasher.
Switching on parking lights
– Switch the ignition off and remove the key from the lock.
– Move the lever up or down to turn the right or left-hand parking
lights on, respectively.
WARNING
The main beam can dazzle other drivers. Risk of accident! Never use the
main beam headlights or the headlight flasher if they could dazzle other
drivers.