Page 3598 of 3787

SC-20
< SERVICE INFORMATION >
STARTING SYSTEM
REMOVAL
1. Disconnect the battery cable from the negative terminal.
2. Remove air duct (inlet).EM-16, "
Removal and Installation"
3. Remove reservoir tank. Refer to CO-16, "Removal and Installation".
4. Remove “S” terminal nut.
5. Remove “B” terminal nut.
6. Remove starter motor bolts.
7. Remove starter motor.
INSTALLATION
Installation is in the reverse order of removal.
CAUTION:
Be sure to tighten “B” terminal nut carefully.
Removal and Installation MR18DEINFOID:0000000005929018
REMOVAL
1. Disconnect the battery negative terminal. Refer to SC-7, "Removal and Installation".
2. Remove air duct (inlet). Refer to EM-135, "
Removal and Installation".
3. Remove reservoir tank. Refer to CO-16, "
Removal and Installation".
4. Remove “S” terminal nut.
5. Remove “B” terminal nut.
6. Remove starter motor bolts.
7. Remove starter motor.
INSTALLATION
Installation is in the reverse order of removal.
CAUTION:
Be sure to tighten terminal nuts carefully.
1. "S" terminal harness 2. "B" terminal harness 3. Starter motor
4. Cylinder block Front
AWBIA0884GB
Revision: May 2010 2011 Versa
Page 3599 of 3787
CHARGING SYSTEMSC-21
< SERVICE INFORMATION >
C
DE
F
G H
I
J
L
M A
B
SC
N
O P
CHARGING SYSTEM
System DescriptionINFOID:0000000005929019
The generator provides DC voltage to operate the vehicl e's electrical system and to keep the battery charged.
The voltage output is controlled by the IC regulator.
Power is supplied at all times to generator terminal 3 through
• 10A fuse (No. 29, located in the fuse and fusible link box).
Power is supplied through terminal 1 to charge the batte ry and operate the vehicle's electrical system. Output
voltage is monitored at terminal 3 by the IC regulator. The charging circuit is protected by the 120A fusible link
[letter a , located in the fusible link box (battery)].
Ground is supplied
• to generator terminal 5
• through body ground F5, and
• through the generator case to the cylinder block
With the ignition switch in the ON or START position, power is supplied
• through 10A fuse [No. 3, located in the fuse block (J/B)]
• to combination meter terminal 28 for the charge warning lamp.
The IC regulator controls ground to terminal 38 of the combination meter through terminal 2 of the generator.
When the ignition is turned on and power becomes availabl e at terminal 2, this "wakes up" the regulator. The
regulator monitors charge output and grounds terminal 2 or leaves it open depending on charge output. With
power and ground supplied, the charge warning lamp will il luminate. When the generator is providing sufficient
voltage, the ground is opened and the charge warning lamp will go off.
If the charge warning lamp illuminates with the engine running, a malfunction is indicated.
Revision: May 2010 2011 Versa
Page 3600 of 3787
SC-22
< SERVICE INFORMATION >
CHARGING SYSTEM
Wiring Diagram - CHARGE -
INFOID:0000000005929020
Trouble Diagnosis with Multitas king Battery Diagnostic StationINFOID:0000000005929021
Refer to diagnostic station instruction manual.
WKWA4970E
Revision: May 2010 2011 Versa
Page 3602 of 3787
SC-24
< SERVICE INFORMATION >
CHARGING SYSTEM
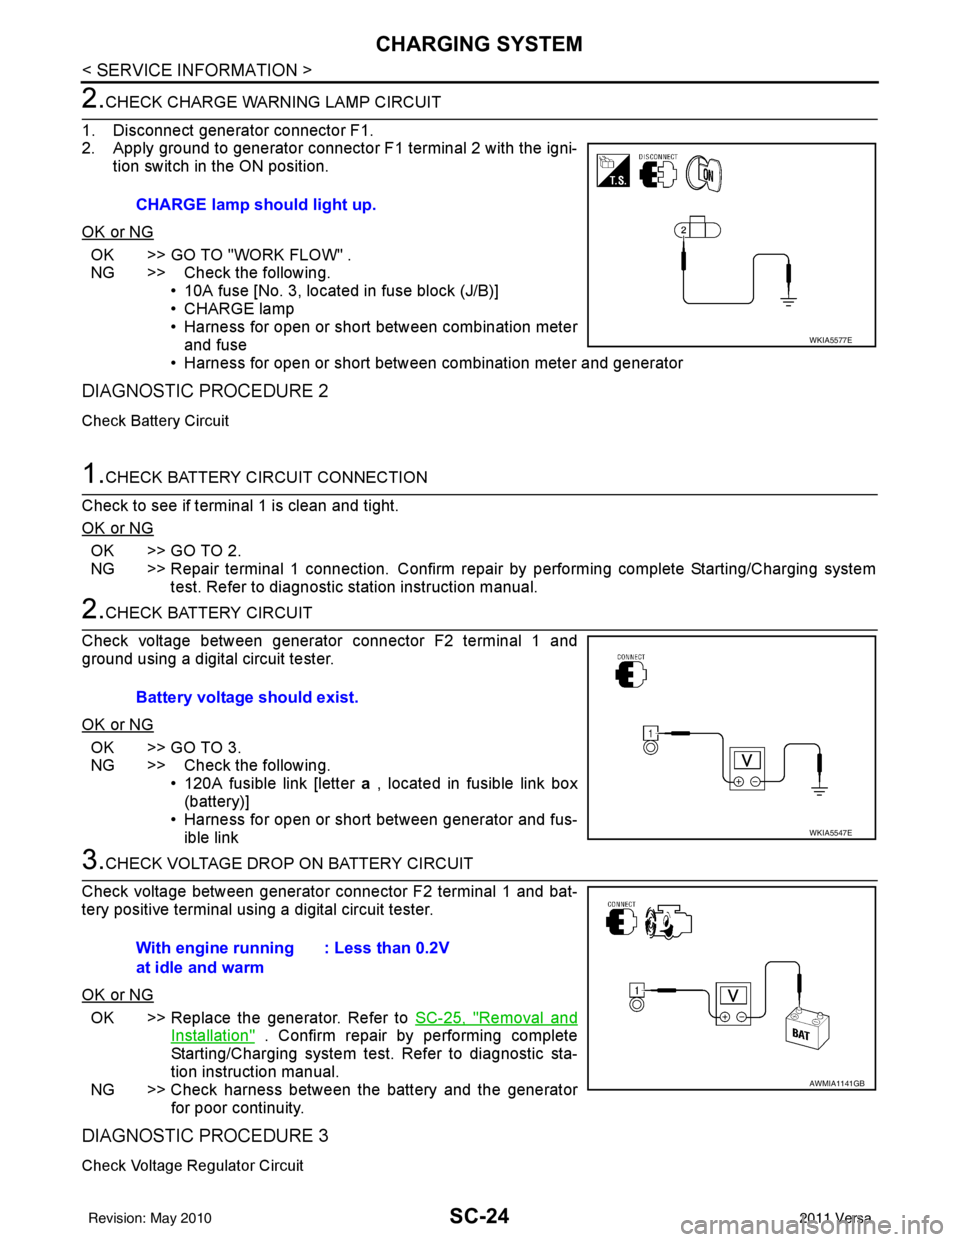
2.CHECK CHARGE WARNING LAMP CIRCUIT
1. Disconnect generator connector F1.
2. Apply ground to generator connector F1 terminal 2 with the igni- tion switch in the ON position.
OK or NG
OK >> GO TO "WORK FLOW" .
NG >> Check the following. • 10A fuse [No. 3, located in fuse block (J/B)]
• CHARGE lamp
• Harness for open or short between combination meterand fuse
• Harness for open or short between combination meter and generator
DIAGNOSTIC PROCEDURE 2
Check Battery Circuit
1.CHECK BATTERY CIRCUIT CONNECTION
Check to see if terminal 1 is clean and tight.
OK or NG
OK >> GO TO 2.
NG >> Repair terminal 1 connection. Confirm repair by performing complete Starting/Charging system test. Refer to diagnostic station instruction manual.
2.CHECK BATTERY CIRCUIT
Check voltage between generator connector F2 terminal 1 and
ground using a digital circuit tester.
OK or NG
OK >> GO TO 3.
NG >> Check the following. • 120A fusible link [letter a , located in fusible link box
(battery)]
• Harness for open or short between generator and fus- ible link
3.CHECK VOLTAGE DROP ON BATTERY CIRCUIT
Check voltage between generator connector F2 terminal 1 and bat-
tery positive terminal using a digital circuit tester.
OK or NG
OK >> Replace the generator. Refer to SC-25, "Removal and
Installation" . Confirm repair by performing complete
Starting/Charging system test. Refer to diagnostic sta-
tion instruction manual.
NG >> Check harness between the battery and the generator for poor continuity.
DIAGNOSTIC PROCEDURE 3
Check Voltage Regulator Circuit
CHARGE lamp should light up.
WKIA5577E
Battery voltage should exist.
WKIA5547E
With engine running
at idle and warm : Less than 0.2V
AWMIA1141GB
Revision: May 2010
2011 Versa
Page 3603 of 3787
CHARGING SYSTEMSC-25
< SERVICE INFORMATION >
C
DE
F
G H
I
J
L
M A
B
SC
N
O P
1.CHECK VOLTAGE REGULATOR CIRCUIT CONNECTION
Check to see if terminal 3 is clean and tight.
OK or NG
OK >> GO TO 2.
NG >> Repair terminal 3 connection. Confirm repair by performing complete Starting/Charging system test. Refer to diagnostic station instruction manual.
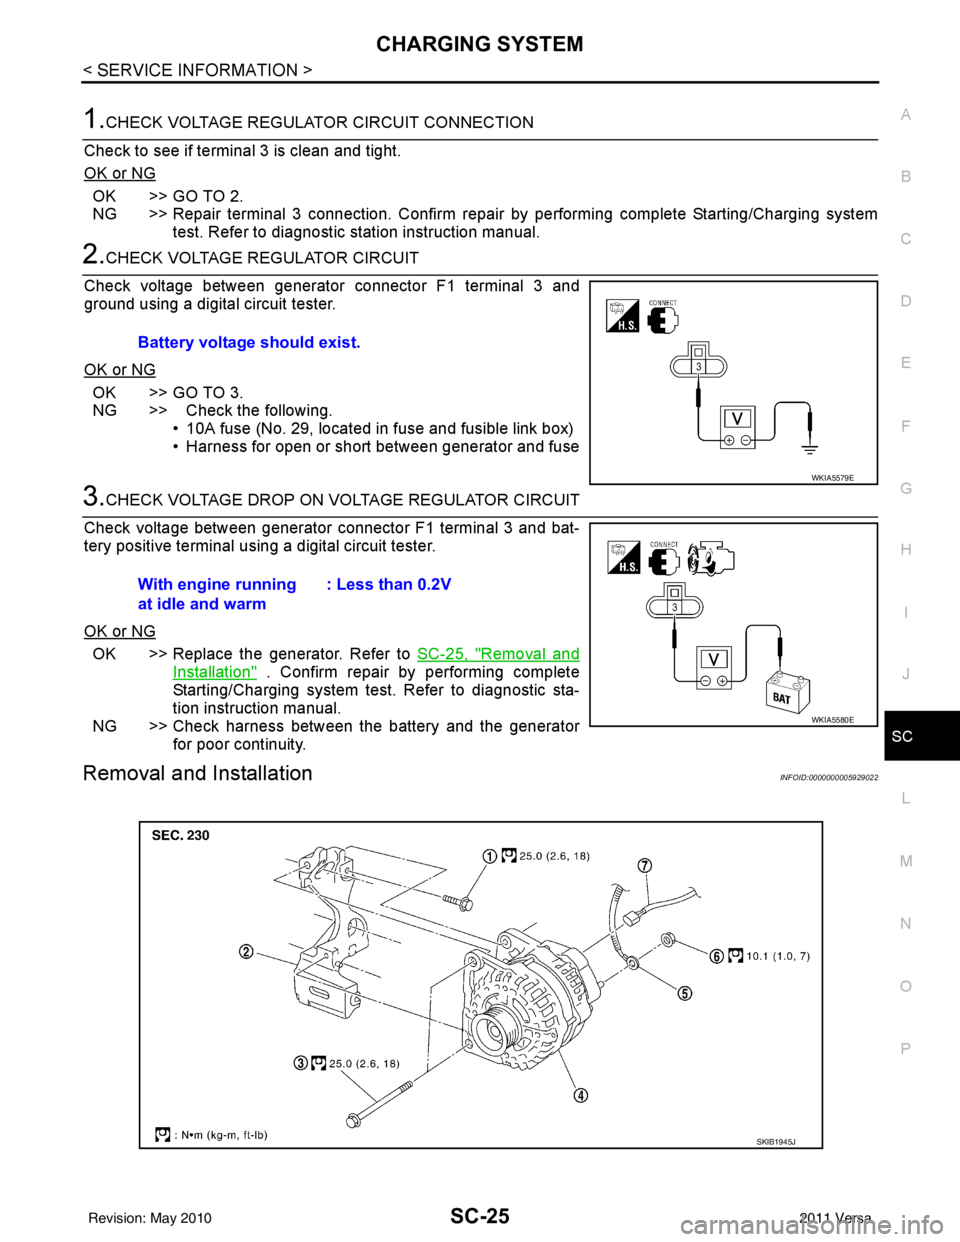
2.CHECK VOLTAGE REGULATOR CIRCUIT
Check voltage between generator connector F1 terminal 3 and
ground using a digital circuit tester.
OK or NG
OK >> GO TO 3.
NG >> Check the following. • 10A fuse (No. 29, located in fuse and fusible link box)
• Harness for open or short between generator and fuse
3.CHECK VOLTAGE DROP ON VOLTAGE REGULATOR CIRCUIT
Check voltage between generator connector F1 terminal 3 and bat-
tery positive terminal using a digital circuit tester.
OK or NG
OK >> Replace the generator. Refer to SC-25, "Removal and
Installation" . Confirm repair by performing complete
Starting/Charging system test. Refer to diagnostic sta-
tion instruction manual.
NG >> Check harness between the battery and the generator for poor continuity.
Removal and InstallationINFOID:0000000005929022
Battery voltage should exist.
WKIA5579E
With engine running
at idle and warm : Less than 0.2V
WKIA5580E
SKIB1945J
Revision: May 2010
2011 Versa
Page 3604 of 3787
SC-26
< SERVICE INFORMATION >
CHARGING SYSTEM
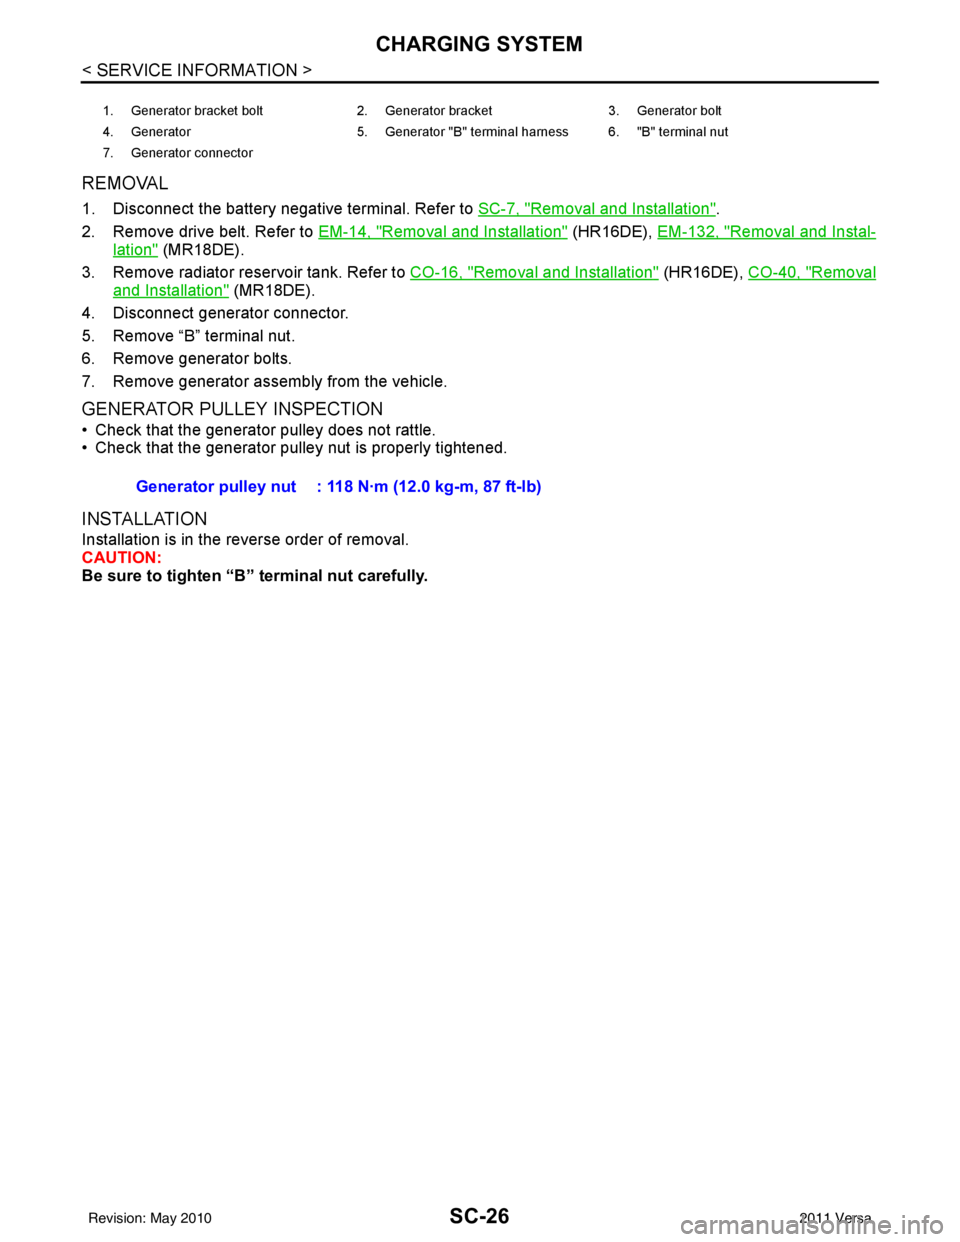
REMOVAL
1. Disconnect the battery negative terminal. Refer to SC-7, "Removal and Installation".
2. Remove drive belt. Refer to EM-14, "
Removal and Installation" (HR16DE), EM-132, "Removal and Instal-
lation" (MR18DE).
3. Remove radiator reservoir tank. Refer to CO-16, "
Removal and Installation" (HR16DE), CO-40, "Removal
and Installation" (MR18DE).
4. Disconnect generator connector.
5. Remove “B” terminal nut.
6. Remove generator bolts.
7. Remove generator assembly from the vehicle.
GENERATOR PULLEY INSPECTION
• Check that the generator pulley does not rattle.
• Check that the generator pulley nut is properly tightened.
INSTALLATION
Installation is in the reverse order of removal.
CAUTION:
Be sure to tighten “B” terminal nut carefully.
1. Generator bracket bolt 2. Generator bracket3. Generator bolt
4. Generator 5. Generator "B" terminal harness 6. "B" terminal nut
7. Generator connector
Generator pulley nut : 118 N·m (12.0 kg-m, 87 ft-lb)
Revision: May 2010 2011 Versa
Page 3605 of 3787
SERVICE DATA AND SPECIFICATIONS (SDS)SC-27
< SERVICE INFORMATION >
C
DE
F
G H
I
J
L
M A
B
SC
N
O P
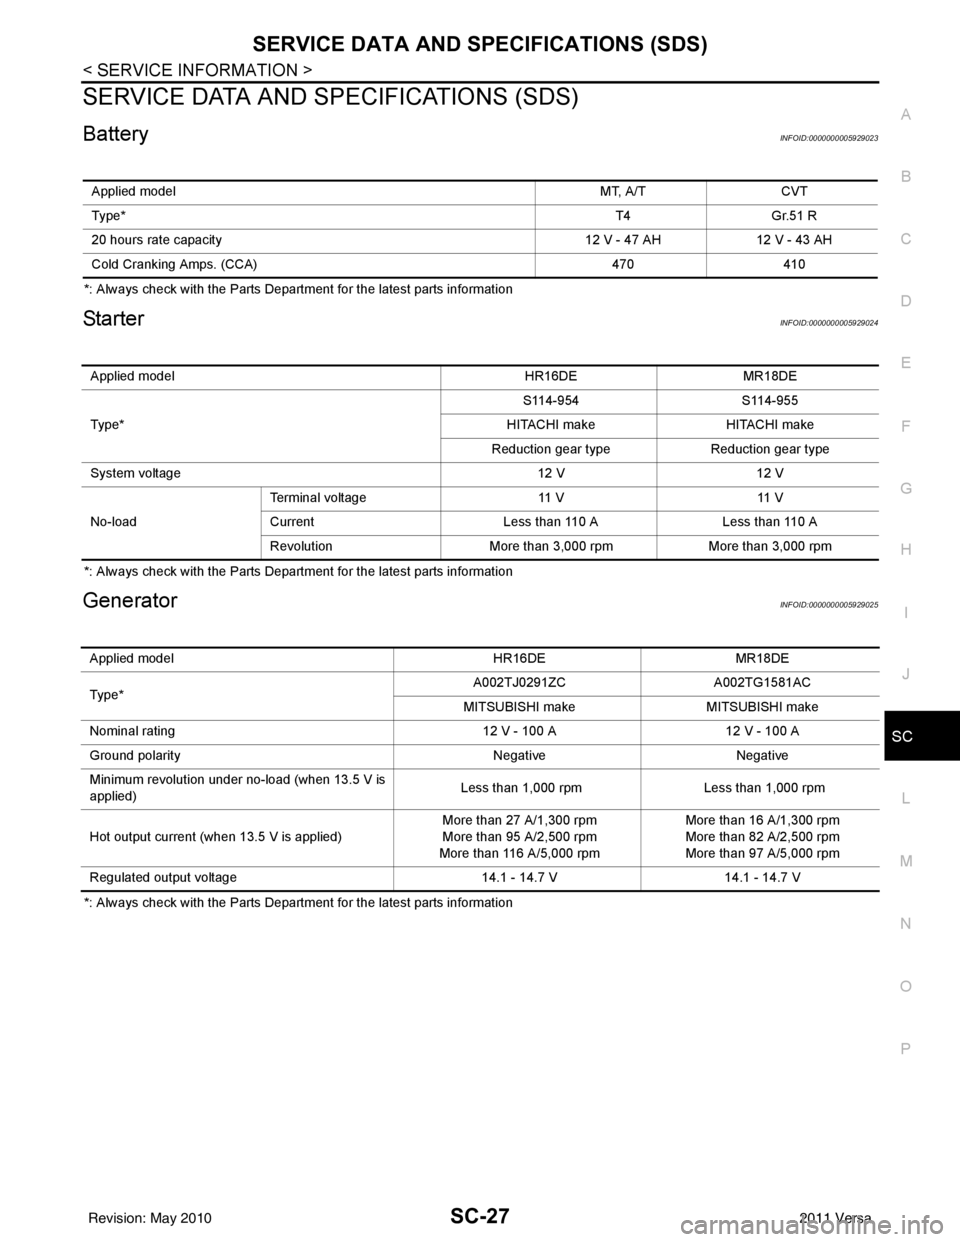
SERVICE DATA AND SPECIFICATIONS (SDS)
BatteryINFOID:0000000005929023
*: Always check with the Parts Department for the latest parts information
StarterINFOID:0000000005929024
*: Always check with the Parts Department for the latest parts information
GeneratorINFOID:0000000005929025
*: Always check with the Parts Department for the latest parts information Applied model MT, A/T CVT
Typ e*
T4Gr.51 R
20 hours rate capacity 12 V - 47 AH12 V - 43 AH
Cold Cranking Am ps. (CCA) 470410
Applied model HR16DEMR18DE
Typ e* S114-954
S114-955
HITACHI make HITACHI make
Reduction gear type Reduction gear type
System voltage 12 V12 V
No-load Terminal voltage
11 V11 V
Current Less than 110 ALess than 110 A
Revolution More than 3,000 rpmMore than 3,000 rpm
Applied model HR16DEMR18DE
Typ e* A002TJ0291ZC
A002TG1581AC
MITSUBISHI make MITSUBISHI make
Nominal rating 12 V - 100 A12 V - 100 A
Ground polarity NegativeNegative
Minimum revolution under no-load (when 13.5 V is
applied) Less than 1,000 rpm
Less than 1,000 rpm
Hot output current (when 13.5 V is applied) More than 27 A/1,300 rpm
More than 95 A/2,500 rpm
More than 116 A/5,000 rpm More than 16 A/1,300 rpm
More than 82 A/2,500 rpm
More than 97 A/5,000 rpm
Regulated output voltage 14.1 - 14.7 V14.1 - 14.7 V
Revision: May 2010 2011 Versa
Page 3606 of 3787
SE-1
BODY
C
DE
F
G H
J
K L
M
SECTION SE
A
B
SE
N
O P
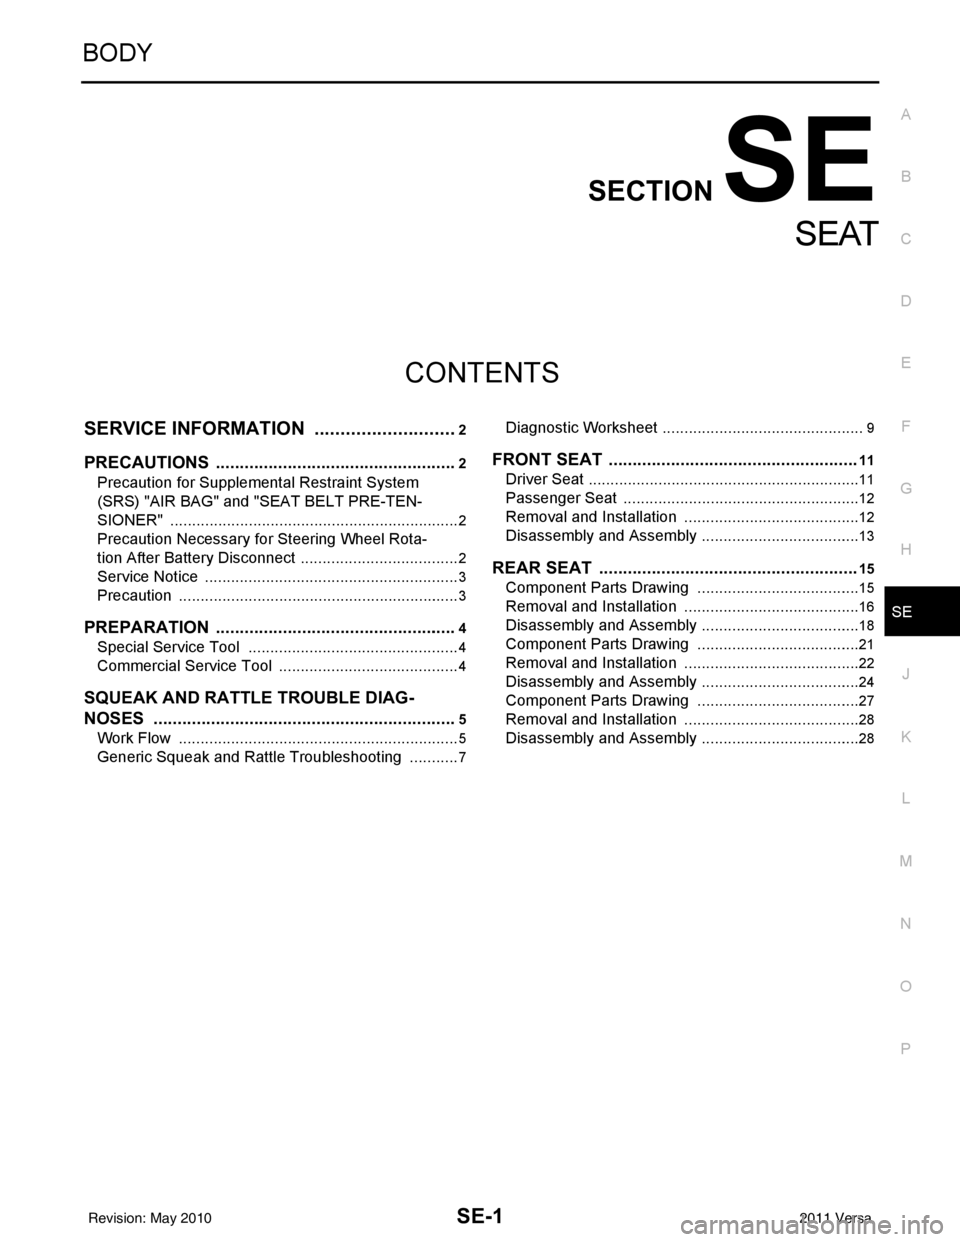
CONTENTS
SEAT
SERVICE INFORMATION .. ..........................2
PRECAUTIONS .............................................. .....2
Precaution for Supplemental Restraint System
(SRS) "AIR BAG" and "SEAT BELT PRE-TEN-
SIONER" ............................................................. ......
2
Precaution Necessary for Steering Wheel Rota-
tion After Battery Disconnect ............................... ......
2
Service Notice ...........................................................3
Precaution .................................................................3
PREPARATION ...................................................4
Special Service Tool ........................................... ......4
Commercial Service Tool ..........................................4
SQUEAK AND RATTLE TROUBLE DIAG-
NOSES ................................................................
5
Work Flow ........................................................... ......5
Generic Squeak and Rattle Troubleshooting ............7
Diagnostic Worksheet .......................................... .....9
FRONT SEAT ....................................................11
Driver Seat ...............................................................11
Passenger Seat .......................................................12
Removal and Installation .........................................12
Disassembly and Assembly .....................................13
REAR SEAT ......................................................15
Component Parts Drawing ......................................15
Removal and Installation .........................................16
Disassembly and Assembly .....................................18
Component Parts Drawing ......................................21
Removal and Installation .........................................22
Disassembly and Assembly .....................................24
Component Parts Drawing ......................................27
Removal and Installation .........................................28
Disassembly and Assembly .....................................28
Revision: May 2010 2011 Versa