2011 MITSUBISHI L200 display
[x] Cancel search: displayPage 208 of 330

To change the order of tracks for playback
Select the RDM mode, and the RDM indicator (18)
will come on. Tracks on the currently selected disc
will be played in a random sequence.
To exit the random mode, press the RPT/RDM but-
ton (11) again.Random modeMP3CD-DA
NOTE
l With a disc that contains both
CD-DA and
MP3 files, the random mode causes only
files of the same format (CDDA only or
MP3 files only) to be played in a random se-
quence.
To find the start of each track on a disc for playback
Press the SCAN button (10). “SCAN” will appear
on the display and the CD player will play back the
first 10 seconds of each track on the selected disc.
The track number will blink while the scan mode is
selected. To exit the scan mode, press the SCAN
button again.
NOTE
l Once all tracks on the disc have been scan-
ned, playback of the disc will restart from the
beginning of the track that was playing when
scanning started.
l The scan mode will be cancelled when radio
or CD operation is selected.
l With a disc that contains both
CD-DA and
MP3 files, the scan mode causes only files of
the same format ( CD-DA only or MP3 files
only) to be played.
To eject a disc
When the CD eject button (1) is pressed, the disc
automatically stops and is ejected. The system auto-
matically switches to radio mode.CD text and MP3 title display E00725000605
This CD player can display CD text and MP3 titles
including ID3 tag information.
CD text
The CD player can display disc and track titles for
discs encoded with disc and track title information.
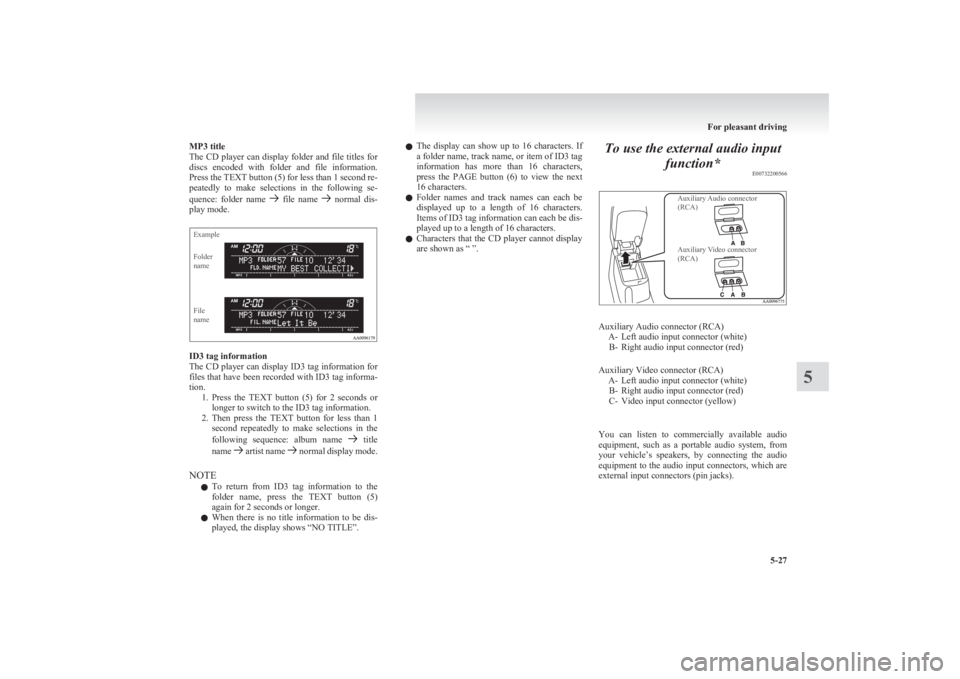
Press the TEXT button (5) repeatedly to make se-
lections in the following sequence: disc name
track name normal display mode.
ExampleDisc
nameTrack
name
NOTE
l The display can show up to 16 characters. If
a disc name or track name has more than 16
characters, press the PAGE button (6) to
view the next 16 characters.
l When there is no title information to be dis-
played, the display shows “NO TITLE”.
l Characters that the CD player cannot display
are shown as “ ”.
For pleasant driving
5-26
5
Page 209 of 330

MP3 title
The CD player can display folder and file titles for
discs encoded with folder and file information.
Press the TEXT button (5) for less than 1 second re-
peatedly to make selections in the following se-
quence: folder name
file name normal dis-
play mode.
ExampleFolder
nameFile
name
ID3 tag information
The CD player can display ID3 tag information for
files that have been recorded with ID3 tag informa-
tion. 1.Press the TEXT button (5) for 2 seconds or
longer to switch to the ID3 tag information.
2. Then press the TEXT button for less than 1
second repeatedly to make selections in the
following sequence: album name
title
name artist name normal display mode.
NOTE l To return from ID3 tag information to the
folder name, press the TEXT button (5)
again for 2 seconds or longer.
l When there is no title information to be dis-
played, the display shows “NO TITLE”.
l The display can show up to 16 characters. If
a folder name, track name, or item of ID3 tag
information has more than 16 characters,
press the PAGE button (6) to view the next
16 characters.
l Folder names and track names can each be
displayed up to a length of 16 characters.
Items of ID3 tag information can each be dis-
played up to a length of 16 characters.
l Characters that the CD player cannot display
are shown as “ ”.To use the external audio input
function* E00732200566
Auxiliary Audio connector
(RCA)Auxiliary Video connector
(RCA)
Auxiliary Audio connector (RCA) A- Left audio input connector (white)B- Right audio input connector (red)
Auxiliary Video connector (RCA) A- Left audio input connector (white)B- Right audio input connector (red)
C- Video input connector (yellow)
You can listen to commercially available audio
equipment, such as a portable audio system, from
your vehicle’s speakers, by connecting the audio
equipment to the audio input connectors, which are
external input connectors (pin jacks).
For pleasant driving
5-27
5
Page 210 of 330

NOTEl On vehicles equipped with the
MITSUBISHI
Multi-Communication System (MMCS), re-
fer to the separate owner’s manual of the
MITSUBISHI Multi-Communication Sys-
tem.
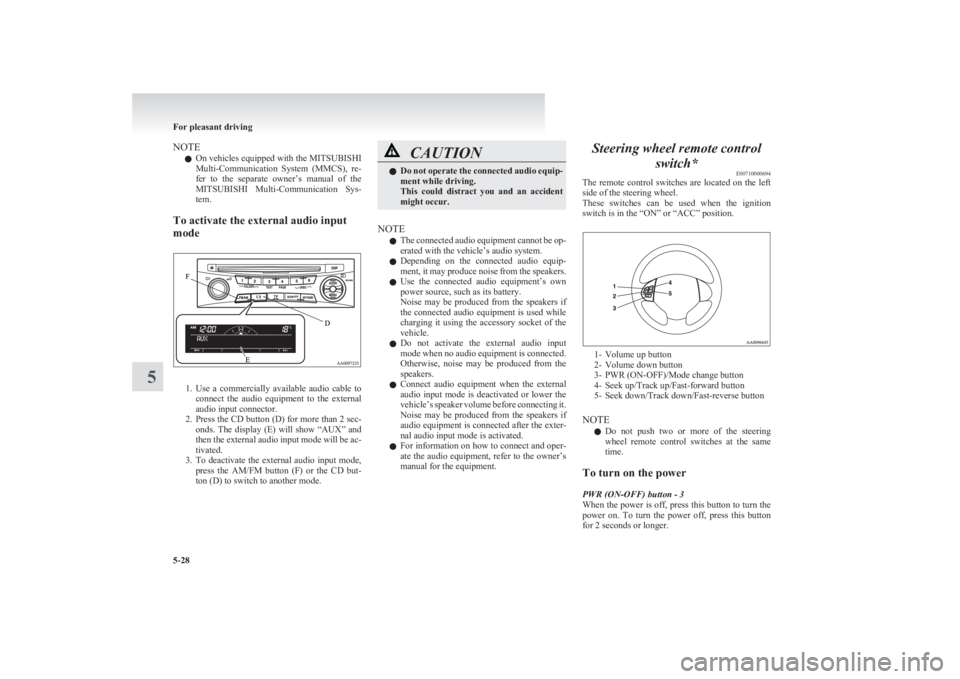
To activate the external audio input
mode
1. Use a commercially available audio cable to
connect the audio equipment to the external
audio input connector.
2. Press the CD button (D) for more than 2 sec-
onds. The display (E) will show “AUX” and
then the external audio input mode will be ac-
tivated.
3. To deactivate the external audio input mode,
press the AM/FM button (F) or the CD but-
ton (D) to switch to another mode.
CAUTIONl Do not operate the connected audio equip-
ment while driving.
This could distract you and an accident
might occur.
NOTE
l The connected audio equipment cannot be op-
erated with the vehicle’s audio system.
l Depending on the connected audio equip-
ment, it may produce noise from the speakers.
l Use the connected audio equipment’s own
power source, such as its battery.
Noise may be produced from the speakers if
the connected audio equipment is used while
charging it using the accessory socket of the
vehicle.
l Do not activate the external audio input
mode when no audio equipment is connected.
Otherwise, noise may be produced from the
speakers.
l Connect audio equipment when the external
audio input mode is deactivated or lower the
vehicle’s speaker volume before connecting it.
Noise may be produced from the speakers if
audio equipment is connected after the exter-
nal audio input mode is activated.
l For information on how to connect and oper-
ate the audio equipment, refer to the owner’s
manual for the equipment.
Steering wheel remote control
switch* E00710000694
The remote control switches are located on the left
side of the steering wheel.
These switches can be used when the ignition
switch is in the “ON” or “ACC” position.
1- Volume up button
2- Volume down button
3- PWR (ON-OFF)/Mode change button
4- Seek up/Track up/Fast-forward button
5- Seek down/Track down/Fast-reverse button
NOTE l Do not push two or more of the steering
wheel remote control switches at the same
time.
To turn on the power
PWR (ON-OFF) button - 3
When the power is off, press this button to turn the
power on. To turn the power off, press this button
for 2 seconds or longer.
For pleasant driving
5-28
5
Page 211 of 330

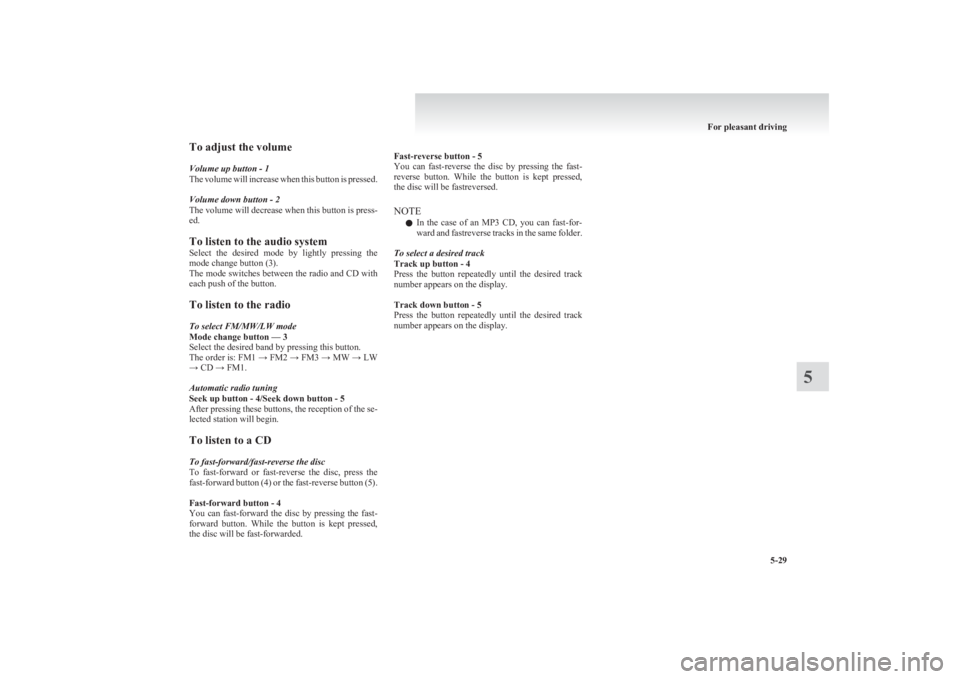
To adjust the volume
Volume up button - 1
The volume will increase when this button is pressed.
Volume down button - 2
The volume will decrease when this button is press-
ed.
To listen to the audio system
Select the desired mode by lightly pressing the
mode change button (3).
The mode switches between the radio and CD with
each push of the button.
To listen to the radio
To select FM/MW/LW mode
Mode change button — 3
Select the desired band by pressing this button.
The order is: FM1 → FM2 → FM3 → MW → LW
→ CD → FM1.
Automatic radio tuning
Seek up button - 4/Seek down button - 5
After pressing these buttons, the reception of the se-
lected station will begin.
To listen to a CD
To fast-forward/fast-reverse the disc
To fast-forward or fast-reverse the disc, press the
fast-forward button (4) or the fast-reverse button (5).
Fast-forward button - 4
You can fast-forward the disc by pressing the fast-
forward button. While the button is kept pressed,
the disc will be fast-forwarded.
Fast-reverse button - 5
You can fast-reverse the disc by pressing the fast-
reverse button. While the button is kept pressed,
the disc will be fastreversed.
NOTE l In the case of an MP3 CD, you can fast-for-
ward and fastreverse tracks in the same folder.
To select a desired track
Track up button - 4
Press the button repeatedly until the desired track
number appears on the display.
Track down button - 5
Press the button repeatedly until the desired track
number appears on the display.
For pleasant driving
5-29
5
Page 212 of 330

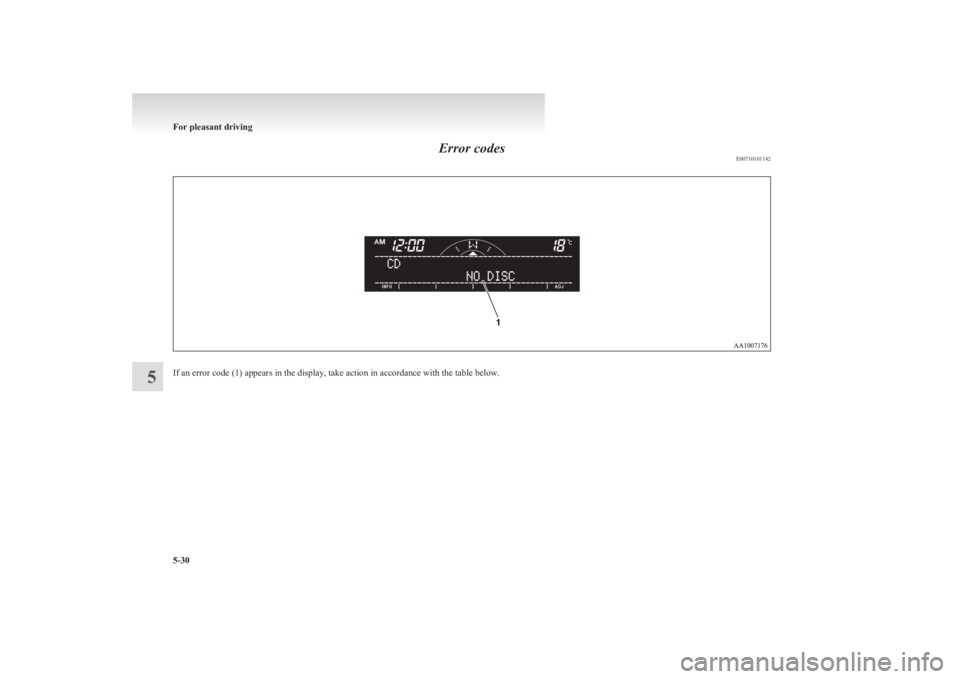
Error codesE00710101142
If an error code (1) appears in the display, take action in accordance with the table below.
For pleasant driving
5-30
5
Page 213 of 330

Error displayProblemDescriptionRepairNO DISCNo disc insertedDisc is not in CD player.Insert disc.ERROR 01Focus errorDisc is not loaded correctly, or condensation on
disc.Insert disc with label facing up. Remove
moisture from disc.ERROR 02Disc errorDisc is dirty, scratched, or deformed; or exces-
sive vehicle vibration.Clean or replace disc. Retry when vibra-
tions stop.ERROR 03Mechanism errorLoading or eject error. Pick-up is out of position.Eject disc and reload. If disc will not eject,
have the equipment inspected.ERROR HOTHigh temperatureInternal protection against high temperatures.Allow CD player to cool by waiting about
30 minutes.ERRORCommunication or power supply
errorCommunication error between external device
and audio equipment.
Power supply error of external device.Consult a MITSUBISHI MOTORS Author-
ized Service Point.
For pleasant driving
5-31
5
Page 214 of 330

Audio system anti-theft featureE00710200306
To prevent theft of the audio system, the control
knob can be removed. Always remove the control
knob when you leave the vehicle.
Removing the control knob
Slide the release button (A) to the right and remove
the control knob from the audio system.
Anti-theft function operates in two ways depending
on the position of the ignition key.
1. With the key in the “ON” or “ACC” posi-
tion
“Please refit the control panel.” indicator will
appear on the display. Any audio system op-
eration will be disabled while the “Please re-
fit the control panel.” indicator is displayed.
2. With the key in the “LOCK” position
The lamp (B) will start flashing to deter
thieves.
NOTE
l When sliding the release button, place one
hand on the control knob to prevent it from
falling out.
Refitting the control knob
Put the control knob back into the original position
and then push it until it clicks. The “Please refit the
control panel.” indicator will disappear or the lamp
(B) will stop flashing.
NOTE l Do not leave the control knob in any place
where it may become hot (for example, the
dashboard) or in any place where it may be-
come wet.
l If you lose the control knob, contact a
MITSUBISHI MOTORS Authorized Service
Point.
Handling of compact discs E00723000034
l Use only the type of compact discs that have
the mark shown in the illustration below.
(Playback of CD-R or CD-RW discs may
cause problems.)
For pleasant driving
5-32
5
Page 321 of 330

4
4-wheel drive operation 4-38A
Accessory (Installation) 04
Accessory socket 5-38
Active Stability & Traction Control (ASTC) 4-46
Additional equipment 8-19
Air conditioning Automatic air conditioning 5-08
Important operation tips for the air condition-
ing 5-12
Manual air conditioning 5-03
Air purifier 5-12
Airbag 2-27
Antenna 5-34
Anti-lock brake system (ABS) 4-43 Warning lamp 4-44
Armrest (Double cab) 2-07
Ashtray 5-36
Audio Audio system anti-theft feature 5-32
Error codes 5-30
Handling of compact discs 5-32
LW/MW/FM electronic tuning radio with CD
player 5-13
Steering wheel remote control switch 5-28
Automatic air conditioning 5-08
Automatic transmission 4A/T 4-16 Fluid 8-06,9-21
Overdrive control switch 4-17
Selector lever operation 4-16,4-20
Selector lever position 4-17
Selector lever position indicator 4-16
Automatic transmission Sports Mode 5A/T 4-20 Fluid 8-06,9-21
Selector lever operation 4-20
Selector lever position indicator 4-21
Selector lever positions 4-21
Sports mode 4-22
Sports mode indicator 4-22
B
Battery 8-09Discharged battery (Emergency starting) 6-02
Specification 9-16
Bleeding the fuel system 6-05
Bonnet 8-03
Bottle holder 5-45
Brake Anti-lock brake 4-43
Braking 4-42
Fluid 8-07,9-21
Parking brake 4-07
Parking brake lever stroke 8-16
Pedal free play 8-16
Warning lamp 3-08
C
Cargo loads 4-52
Catalytic converter 8-02
Cautions on handling of 4-wheel drive vehi-
cles 4-40
Central door locks 1-07
Centre console downlight 5-41 Bulb capacity 8-24
Replacement 8-34
Centre information display 3-10
Changing a fuse 8-22
Changing gears 4-14
Check engine warning lamp 3-08
Child restraint 2-13
Child-protection rear doors 1-08
Cigarette lighter 5-37
Cleaning Exterior of your vehicle 7-03
Genuine leather 7-02
Interior of your vehicle 7-02
Plastic, vinyl leather, etc 7-02
Sunroof 7-05
Waxing 7-04
Clock 3-19,5-39
Clutch Fluid 8-08,9-21
Pedal free play 8-15
Coat hook 5-46
Combination headlamps and dipper switch 3-30
Convenient hook 5-46
Coolant (engine) 8-05,9-21
Cruise control 4-48 Switch 4-49
Cup holder 5-44
Curtain airbag system 2-35
D
Demister (rear window) 3-40
Differential oil 9-21
Digital clock 3-19,5-39
Dimensions 9-03
Dipper (High/Low beam change) 3-31
Door courtesy lamps 5-41 Replacement 8-33
Doors Central door locks 1-07
Child-protection 1-08
Lock and unlock 1-06
Driving, alcohol and drugs 4-02
E
Easy select 4WD 4-25
Alphabetical index
1