2011 MITSUBISHI L200 oil
[x] Cancel search: oilPage 166 of 330

Crossing a stream
4-wheel drive vehicles are not necessarily water-
proof. If the electrical circuits become wet, further
operation of the vehicle will be impossible; there-
fore, avoid crossing streams unless absolutely nec-
essary. If crossing a stream is unavoidable, use the
following procedure: 1.Check depths of a stream and geographical
features before attempting to cross a stream
and ford the stream where the water is as shal-
low as practicable.
2. Set the transfer shift lever to “4L” position
(easy select 4WD), “4LLc” position (super se-
lect 4WD).
3. Drive slowly at a speed of approximately
5 km/h (3 mph) to avoid splashing too much
water.CAUTIONl Never cross a stream where the water is
deep.
Do not change gears while crossing the
stream.
Frequent crossing of streams can adverse-
ly affect the life span of the vehicle; we rec-
ommend you to take the necessary meas-
ures to prepare, inspect, and repair the ve-
hicle.
After crossing a stream, apply the brakes to be sure
they are functioning properly. If the brakes are wet
and not functioning properly, dry them out by driv-
ing slowly while lightly depressing the brake pedal.
Inspect each part of the vehicle carefully.
Inspection and maintenance
following rough road operation E00606700048
After operating the vehicle in rough road condi-
tions, be sure to perform the following inspection
and maintenance procedures:
l Check that the vehicle has not been damaged
by rocks, gravel, etc.
l Carefully wash the vehicle with water.
After washing, drive the vehicle slowly
while lightly depressing the brake pedal in or-
der to dry out the brakes. If the brakes still
do not function properly, we recommend you
to have the brakes checked as soon as possible.
l Remove the insects, dried grass, etc. clog-
ging the radiator core.
l After crossing a stream, be sure to have the
following items inspected at a MITSUBISHI
MOTORS Authorized Service Point and take
the necessary measures. •Check the brake system and, if necessary,
have it serviced.
• Check the engine, transmission, transfer,
and differential oil or grease level and tur-
bidity. If the oil or grease is milky, it indi-
cates water contamination. Replace it
with new oil or grease.
• Grease the propeller shaft.
• Check the inside of the vehicle. If ingress
of water is found, dry the carpet etc.
• Inspect the headlamps. If the headlamp
bulb is flooded with water, we recom-
mend you to have it drained.Cautions on handling of 4-wheel
drive vehicles E00606800368
Tyres and wheels
Since the driving torque can be applied to the 4
wheels, the performance of the vehicle when oper-
ating in 4-wheel drive is greatly affected by the con-
dition of the tyres.
Pay close attention to the tyres.
l Install specified tyres on all wheels. Refer to
“Tyres and wheels” on page 9-17.
l Be sure to fit all 4 tyres and wheels of the
same size and type.
When replacement of any of the tyres or
wheels is necessary, replace all of them.
l All tyres should be rotated whenever the
wear difference between the front and rear
tyres is recognizable.
Good vehicle performance cannot be expected if
there is a difference in wear between tyres. Refer to
“Tyre rotation” on page 8-13.
l Check the tyre inflation pressure regularly.
Starting and driving
4-40
4
Page 167 of 330
CAUTIONlAlways use tyres of the same size, same
type, and same brand, and which have no
wear differences. Using tyres of different
size, type, brands or degree of wear, will
increase the differential oil temperature,
resulting in possible damage to the driv-
ing system. Further, the drive train will
be subjected to excessive loading, possibly
leading to oil leakage, component seizure,
or other serious faults.
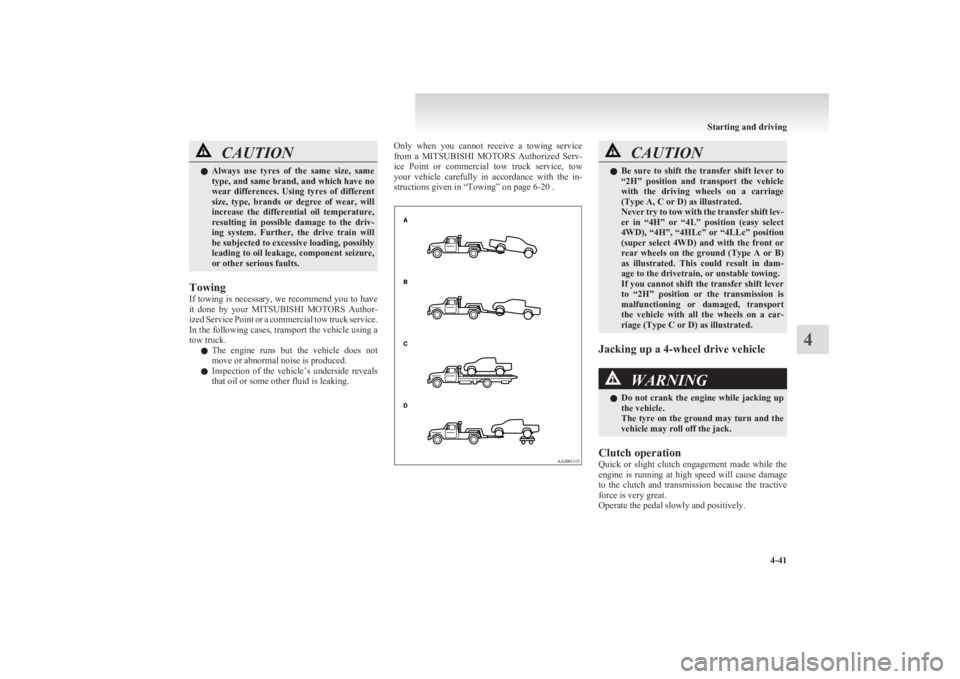
Towing
If towing is necessary, we recommend you to have
it done by your MITSUBISHI MOTORS Author-
ized Service Point or a commercial tow truck service.
In the following cases, transport the vehicle using a
tow truck.
l The engine runs but the vehicle does not
move or abnormal noise is produced.
l Inspection of the vehicle’s underside reveals
that oil or some other fluid is leaking.
Only when you cannot receive a towing service
from a MITSUBISHI MOTORS Authorized Serv-
ice Point or commercial tow truck service, tow
your vehicle carefully in accordance with the in-
structions given in “Towing” on page 6-20 .CAUTIONl Be sure to shift the transfer shift lever to
“2H” position and transport the vehicle
with the driving wheels on a carriage
(Type A, C or D) as illustrated.
Never try to tow with the transfer shift lev-
er in “4H” or “4L” position (easy select
4WD), “4H”, “4HLc” or “4LLc” position
(super select 4WD) and with the front or
rear wheels on the ground (Type A or B)
as illustrated. This could result in dam-
age to the drivetrain, or unstable towing.
If you cannot shift the transfer shift lever
to “2H” position or the transmission is
malfunctioning or damaged, transport
the vehicle with all the wheels on a car-
riage (Type C or D) as illustrated.
Jacking up a 4-wheel drive vehicle
WARNINGl Do not crank the engine while jacking up
the vehicle.
The tyre on the ground may turn and the
vehicle may roll off the jack.
Clutch operation
Quick or slight clutch engagement made while the
engine is running at high speed will cause damage
to the clutch and transmission because the tractive
force is very great.
Operate the pedal slowly and positively.
Starting and driving
4-41
4
Page 169 of 330

WARNINGlDo not leave any objects near the brake
pedal or let a floor mat slide under it; do-
ing so could prevent the full pedal stroke
that would be necessary in an emergency.
Make sure that the pedal can be operated
freely at all times. Make sure the floor
mat is securely held in place.
Brake pads and linings
l Avoid hard braking situations.
New brakes need to be broken-in by moder-
ate use for the first 200 km (124 miles).
l The disc brakes are provided with a warning
device which emits a shrieking metallic
sound while braking if the brake pads have
reached their wear limit.
If you hear this sound, have the brake pads re-
placed immediately.
WARNINGl Driving with worn brake pads will make
it harder to stop, and can cause an acci-
dent.Anti-lock brake system (ABS)* E00607100775
Environmental conditions can have an effect on
braking. During sudden braking when there is
snow, ice, oil, water etc. on the road surface, a skid
may occur. In this situation, steering control and
braking effectiveness is reduced and the stopping
distance is increased. The vehicle may also go into
an uncontrolled spin.
The ABS helps prevent the wheels from locking dur-
ing braking, thus maintaining directional stability,
ensuring controllability and providing optimum
braking force.
Driving hints l With ABS fitted, steering during sudden brak-
ing (when the ABS functions) differs slightly
from when the brakes are not being applied.
Steer the vehicle carefully in these conditions.
l Always maintain the same distance from the
vehicle in front of you as you would for a ve-
hicle not equipped with ABS.
Compared with vehicles not fitted with ABS,
your vehicle may require a longer stopping
distance in the following cases: • Driving on gravel or snow-covered roads.
• Driving with tyre chains installed.
• Driving on roads where the road surface
is pitted or has other differences in sur-
face height.
• Driving on bumpy roads or other poor driv-
ing surfaces.l Operation of ABS is not restricted to situa-
tions where brakes are applied suddenly.
This system may also operate to prevent
wheel lock when you are driving over man-
holes, steel road-work plates, or the vehicle
is driven over steps or level differences in
the road, road markings, or other surfaces
which are difficult for the wheels to grip.
l When the ABS is activated, you may feel the
brake pedal pulsation and hear a characteris-
tic noise. Also at this time, you may feel as if
the pedal attempts to resist being depressed.
In this situation, to let the ABS work for
you, just hold the brake pedal down more
firmly. Do not pump the brake. This pump-
ing will result in reduced braking perform-
ance.CAUTIONl Even the ABS cannot prevent the natural
laws of physics from acting on the vehi-
cle. It cannot for instance avoid accidents
that may result from excessive speed on
bends or following another vehicle too
closely or aquaplaning. It should remain
the driver’s task to observe safety precau-
tions to judge speeds and brake applica-
tions correctly in such conditions.
l Be sure to use tyres of the same type and
size on 4 wheels.
If tyre types or sizes are mixed, ABS may
not function normally.
Starting and driving
4-43
4
Page 235 of 330
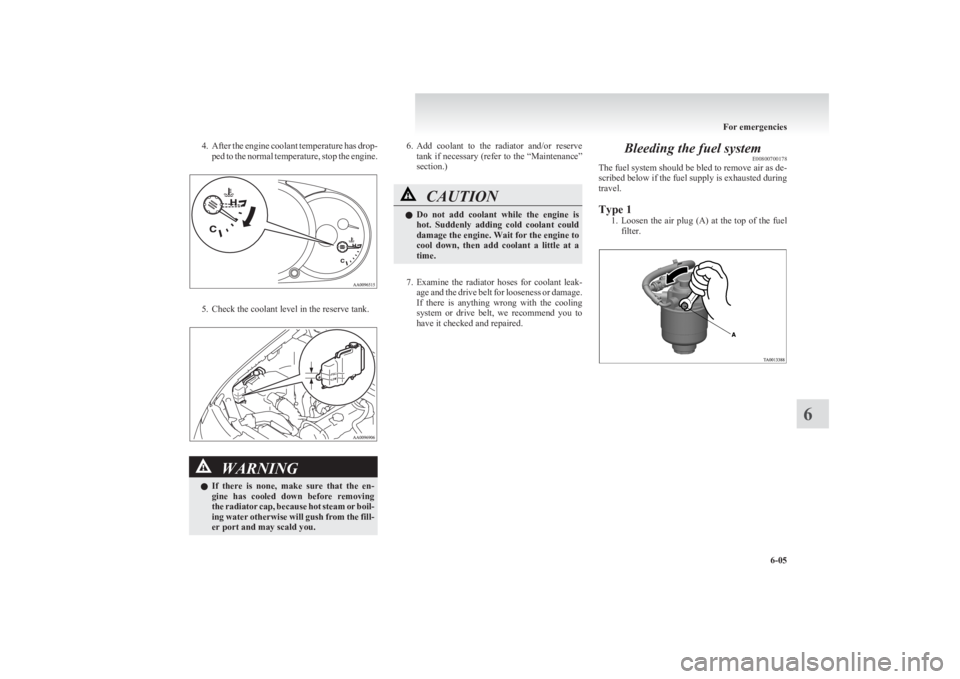
4.After the engine coolant temperature has drop-
ped to the normal temperature, stop the engine.
5. Check the coolant level in the reserve tank.
WARNINGl If there is none, make sure that the en-
gine has cooled down before removing
the radiator cap, because hot steam or boil-
ing water otherwise will gush from the fill-
er port and may scald you.6. Add coolant to the radiator and/or reserve
tank if necessary (refer to the “Maintenance”
section.)CAUTIONl Do not add coolant while the engine is
hot. Suddenly adding cold coolant could
damage the engine. Wait for the engine to
cool down, then add coolant a little at a
time.
7. Examine the radiator hoses for coolant leak-
age and the drive belt for looseness or damage.
If there is anything wrong with the cooling
system or drive belt, we recommend you to
have it checked and repaired.
Bleeding the fuel system E00800700178
The fuel system should be bled to remove air as de-
scribed below if the fuel supply is exhausted during
travel.
Type 1 1.Loosen the air plug (A) at the top of the fuel
filter.
For emergencies
6-05
6
Page 245 of 330

2.Using the jack handle, turn the release valve
anticlockwise slowly to lower the ram and re-
move the jack.
3. Press the piston down all the way, and turn
the release valve clockwise as far as possible.
4. Store jack, jack handle and chocks.
WARNINGl Be sure to open the release valve slowly.
If it is opened quickly, the vehicle will
drop abruptly and the jack may come out
of position, causing a serious accident.CAUTIONl If the release valve is loosened too much
(2 or more turns) in the anticlockwise di-
rection, the jack’s oil will leak and the
jack cannot be used.CAUTIONl Close the release valve slowly when lower-
ing the vehicle, or the valve may be dam-
aged.
NOTE
l Occasionally when the vehicle is jacked up,
the grooved portion of the designated point
will not come off. When this happens, rock
the vehicle to lower the ram.
l If the jack is difficult to remove by hand, in-
sert the jack handle (L) into the bracket (M).
Then using the handle, remove the jack.
WARNINGl Stop jacking up the vehicle as soon as the
tyre is raised off the ground. It is danger-
ous to raise the vehicle any higher.
l Do not get under your vehicle while using
the jack.WARNINGl Do not bump the raised vehicle or leave it
sitting on the jack for a long time. Both
are very dangerous.
l Do not use a jack except the one that
came with your vehicle.
l The jack should not be used for any pur-
pose other than to change a tyre.
l No one should be in your vehicle when us-
ing the jack.
l Do not start or run the engine while your
vehicle is on the jack.
l Do not turn the raised wheel. The tyres
still on the ground could turn and make
your vehicle fall off the jack.
For emergencies
6-15
6
Page 249 of 330
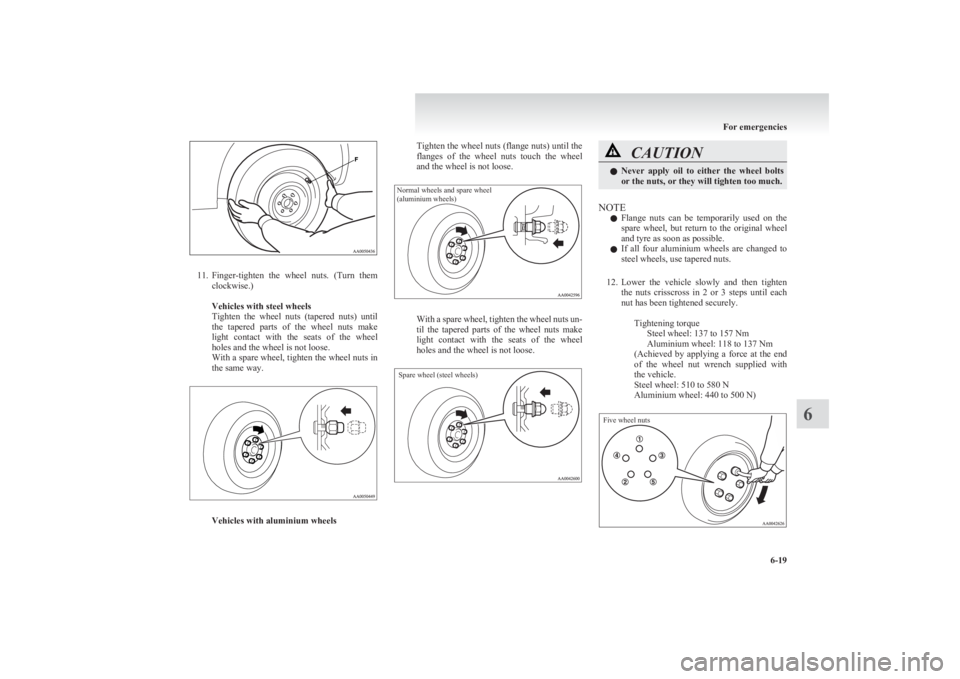
11.Finger-tighten the wheel nuts. (Turn them
clockwise.)
Vehicles with steel wheels
Tighten the wheel nuts (tapered nuts) until
the tapered parts of the wheel nuts make
light contact with the seats of the wheel
holes and the wheel is not loose.
With a spare wheel, tighten the wheel nuts in
the same way.
Vehicles with aluminium wheels
Tighten the wheel nuts (flange nuts) until the
flanges of the wheel nuts touch the wheel
and the wheel is not loose.Normal wheels and spare wheel
(aluminium wheels)
With a spare wheel, tighten the wheel nuts un-
til the tapered parts of the wheel nuts make
light contact with the seats of the wheel
holes and the wheel is not loose.
Spare wheel (steel wheels)
CAUTIONl Never apply oil to either the wheel bolts
or the nuts, or they will tighten too much.
NOTE
l Flange nuts can be temporarily used on the
spare wheel, but return to the original wheel
and tyre as soon as possible.
l If all four aluminium wheels are changed to
steel wheels, use tapered nuts.
12. Lower the vehicle slowly and then tighten
the nuts crisscross in 2 or 3 steps until each
nut has been tightened securely.
Tightening torqueSteel wheel: 137 to 157 Nm
Aluminium wheel: 118 to 137 Nm
( Achieved by applying a force at the end
of the wheel nut wrench supplied with
the vehicle.
Steel wheel: 510 to 580 N
Aluminium wheel: 440 to 500 N)
Five wheel nuts
For emergencies
6-19
6
Page 250 of 330
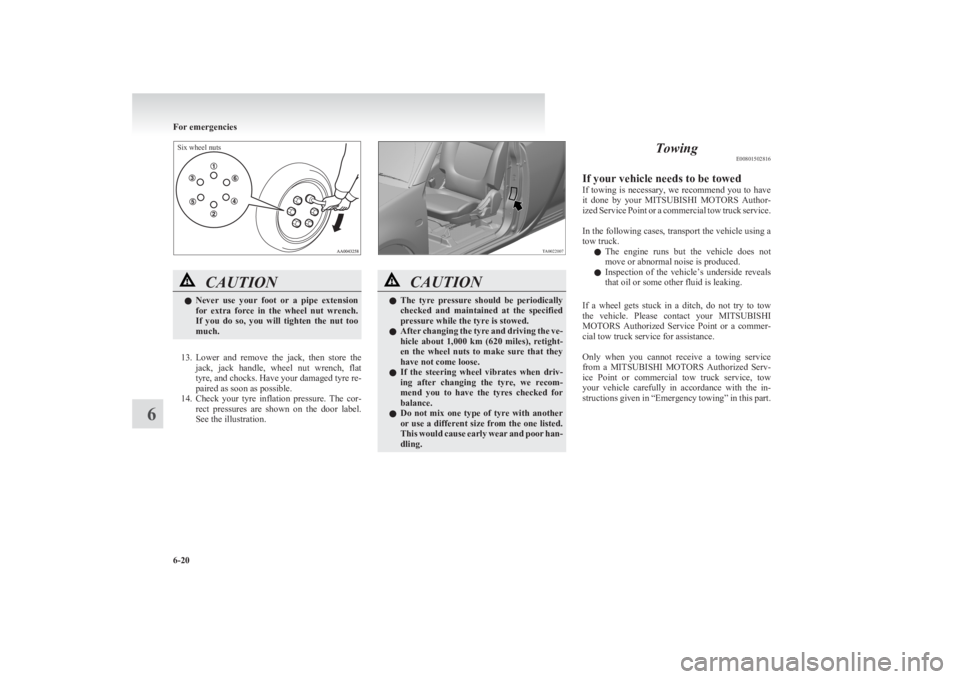
Six wheel nuts
CAUTIONlNever use your foot or a pipe extension
for extra force in the wheel nut wrench.
If you do so, you will tighten the nut too
much.
13. Lower and remove the jack, then store the
jack, jack handle, wheel nut wrench, flat
tyre, and chocks. Have your damaged tyre re-
paired as soon as possible.
14. Check your tyre inflation pressure. The cor-
rect pressures are shown on the door label.
See the illustration.
CAUTIONl The tyre pressure should be periodically
checked and maintained at the specified
pressure while the tyre is stowed.
l After changing the tyre and driving the ve-
hicle about 1,000 km (620 miles), retight-
en the wheel nuts to make sure that they
have not come loose.
l If the steering wheel vibrates when driv-
ing after changing the tyre, we recom-
mend you to have the tyres checked for
balance.
l Do not mix one type of tyre with another
or use a different size from the one listed.
This would cause early wear and poor han-
dling.Towing E00801502816
If your vehicle needs to be towed
If towing is necessary, we recommend you to have
it done by your MITSUBISHI MOTORS Author-
ized Service Point or a commercial tow truck service.
In the following cases, transport the vehicle using a
tow truck.
l The engine runs but the vehicle does not
move or abnormal noise is produced.
l Inspection of the vehicle’s underside reveals
that oil or some other fluid is leaking.
If a wheel gets stuck in a ditch, do not try to tow
the vehicle. Please contact your MITSUBISHI
MOTORS Authorized Service Point or a commer-
cial tow truck service for assistance.
Only when you cannot receive a towing service
from a MITSUBISHI MOTORS Authorized Serv-
ice Point or commercial tow truck service, tow
your vehicle carefully in accordance with the in-
structions given in “Emergency towing” in this part.
For emergencies
6-20
6
Page 253 of 330
WARNINGlTo prevent entry of exhaust gas from the
towing vehicle, set your air selection lever
to the recirculation position.CAUTIONl Avoid sudden braking, sudden accelera-
tion and sharp turning; such operation
could cause damage to the towing hooks
or the tow rope.
People in the vicinity could be injured as
a result.
l When towing or being towed down a long
slope, the brakes may overheat reducing
the effectiveness. In this situation, have
your vehicle transported by a tow truck.
l When the vehicle with automatic trans-
mission is to be towed by another vehicle
with the all wheels on the ground, make
sure that the towing speed and distance
given below are never exceeded, causing
damage to the transmission.
Towing speed: 50 km/h (30 mph)
Towing distance: 50 km (30 miles)
For the towing speed and the towing dis-
tance, follow the local driving laws and
regulations.
If your vehicle tows another vehicle (vehicles with
rear towing hook only)
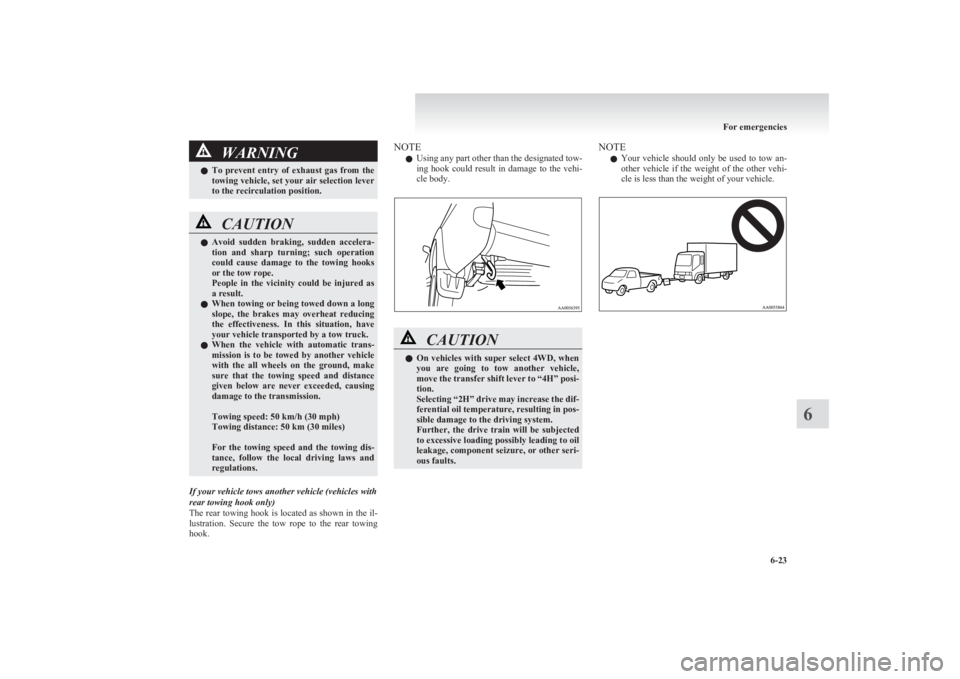
The rear towing hook is located as shown in the il-
lustration. Secure the tow rope to the rear towing
hook.
NOTE
l Using any part other than the designated tow-
ing hook could result in damage to the vehi-
cle body.CAUTIONl On vehicles with super select 4WD, when
you are going to tow another vehicle,
move the transfer shift lever to “4H” posi-
tion.
Selecting “2H” drive may increase the dif-
ferential oil temperature, resulting in pos-
sible damage to the driving system.
Further, the drive train will be subjected
to excessive loading possibly leading to oil
leakage, component seizure, or other seri-
ous faults.NOTE
l Your vehicle should only be used to tow an-
other vehicle if the weight of the other vehi-
cle is less than the weight of your vehicle.
For emergencies
6-23
6