2011 MERCEDES-BENZ SLS steering
[x] Cancel search: steeringPage 275 of 436
Press button briefly9
:to select submenu or scroll
through lists
within Audio menu to select
previous or next track, scene or
stored station
within Tel menu to switch to
the phone book and select a
name or numberPress and hold button9
:within Audio menu to select a
track or scene with quick
search or to select previous or
next station in station list or
wave band
within Tel menu to start the
quick search in the phone bookPress buttonato confirm selection or
messages
Depending on the selected menu, pressing
the buttons on the multifunction steering
wheel will alter what appears in the
multifunction display.
The information available in the multifunction
display is arranged in menus and
accompanying functions and submenus.
The individual functions are then found within
the relevant menu (radio or CD operations
under Audio, for example). These functions
serve to call up relevant information or to
customize the settings for your vehicle.
It is helpful to think of the menus, and the
functions within each menu, as being
arranged in a circular pattern.
In the Settings menu, instead of functions,
you will find a number of submenus for calling
up and changing settings. For instructions on
using these submenus, see “Settings menu”
( Y page 282).
The number of menus available in the system
depends on which optional equipment is
installed in your vehicle.
Using the control systemXTo select a menu: Press button =
or ; .XTo select a submenu: Press button :
or 9 .XTo go to the next higher menu level:
Press button %.XTo select the standard display: Press
button % repeatedly until the standard
display featuring the odometer and
speedometer appears.
or
XPress and hold button % until the
standard display featuring the trip
odometer and the main odometer appears.XTo confirm selection: Press button a.XTo confirm display message: Press
button a or % .
The control system saves certain display
messages. Calling up display messages
( Y page 282).
For information about warning and
malfunction messages appearing in the
multifunction display ( Y page 364).
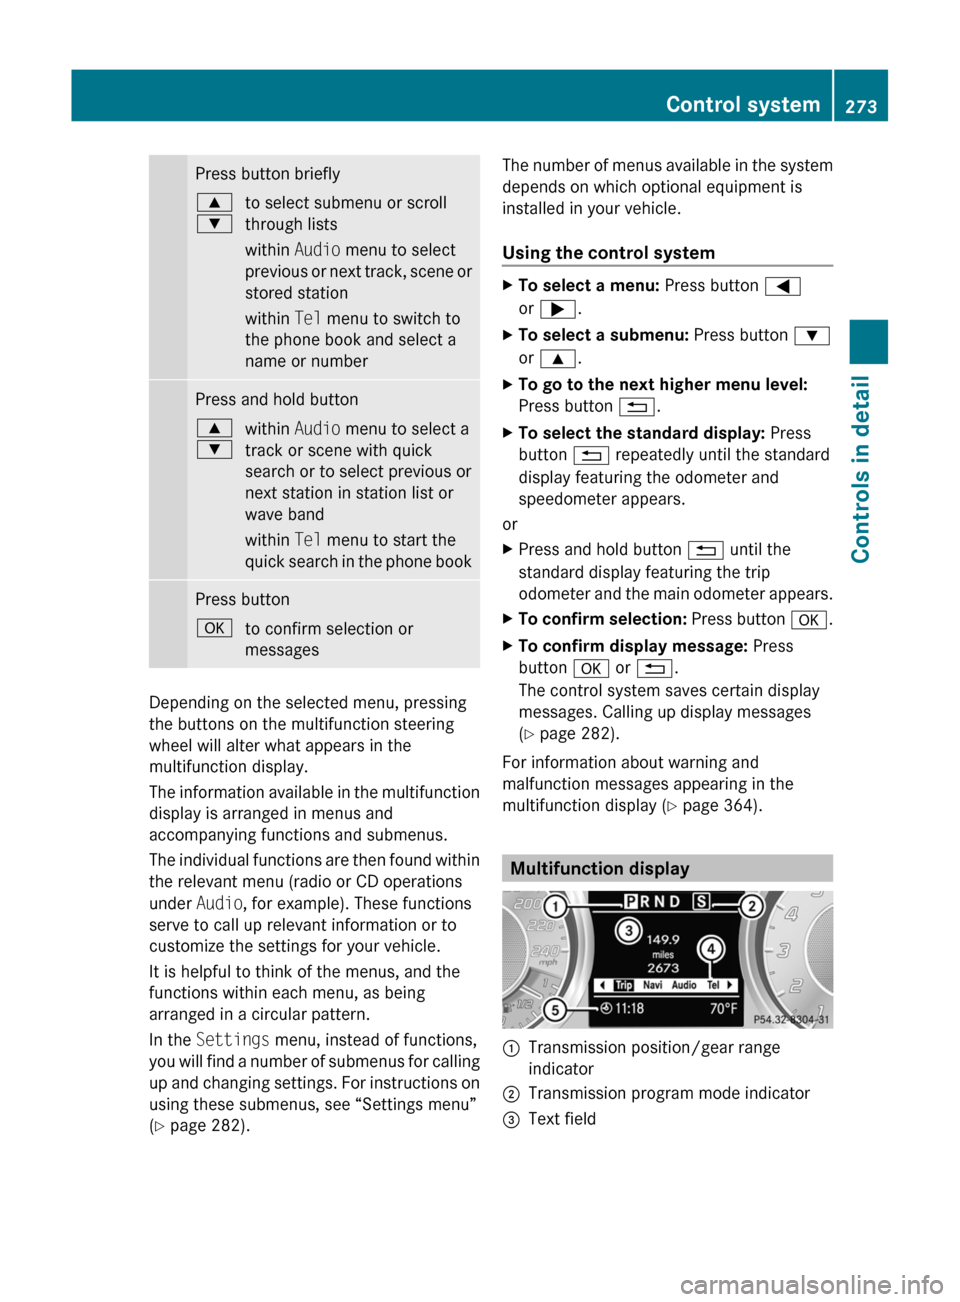
Multifunction display
:Transmission position/gear range
indicator;Transmission program mode indicator=Text fieldControl system273Controls in detailBA 197 USA, CA Edition A 2011; 1; 27, en-UShereepeVersion: 3.0.3.52010-03-24T15:31:10+01:00 - Seite 273Z
Page 281 of 436
The vehicle is either on a road that has not
been digitized ( Y page 135) or on the side
of a road, e.g. in a parking space.
R No Route
The COMAND system cannot calculate a
route to the selected destination.
R Direct. of Dest.
The vehicle has gone off the map during
route guidance ( Y page 135).
For more information on status displays, see
( Y page 135).
Audio menu
The functions in the Audio menu operate the
audio equipment which you have currently
switched on.
The following functions are available:
R Selecting radio station ( Y page 279)
R Operating audio devices/audio media
( Y page 279)
R Operating video DVD ( Y page 280)
If the COMAND system is currently switched
off, the message Audio Off appears in the
multifunction display.
XTo adjust the volume: Press button
W or X on the multifunction steering
wheel.
Selecting radio station
i The SIRIUS XM Satellite Radio is treated
as a radio application.
For more information on SIRIUS XM
Satellite Radio, see ( Y page 173).
Additional optional satellite radio
equipment and a subscription to a satellite
radio service provider are required for
satellite radio operation. Contact an
authorized Mercedes-Benz Center for
details and availability for your vehicle.
XSwitch on the COMAND system
( Y page 75) and select radio.XPress button = or ; to select the
Audio menu.
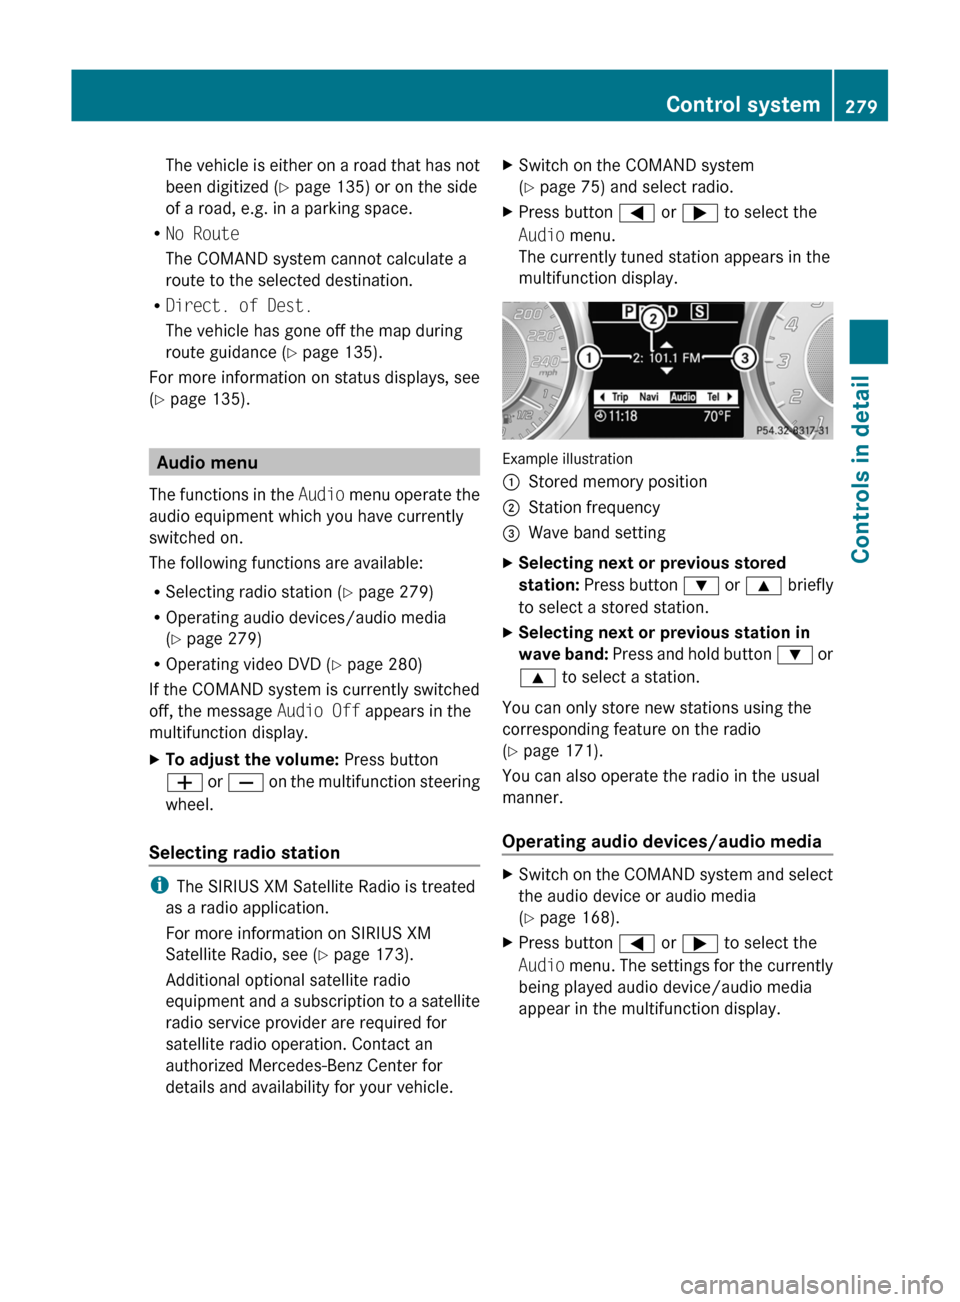
The currently tuned station appears in the
multifunction display.
Example illustration
:Stored memory position;Station frequency=Wave band settingXSelecting next or previous stored
station: Press button : or 9 briefly
to select a stored station.XSelecting next or previous station in
wave band: Press and hold button : or
9 to select a station.
You can only store new stations using the
corresponding feature on the radio
( Y page 171).
You can also operate the radio in the usual
manner.
Operating audio devices/audio media
XSwitch on the COMAND system and select
the audio device or audio media
( Y page 168).XPress button = or ; to select the
Audio menu. The settings for the currently
being played audio device/audio media
appear in the multifunction display.Control system279Controls in detailBA 197 USA, CA Edition A 2011; 1; 27, en-UShereepeVersion: 3.0.3.52010-03-24T15:31:10+01:00 - Seite 279Z
Page 288 of 436
XPress button a to change the current
status.
Depending on the previous status, the
Locator Lighting: function will be
Enabled or Disabled .
You can temporarily deactivate the
headlamps delayed shut-off feature:
XBefore exiting the vehicle, set the starter
switch to position 0 using the KEYLESS-GO
start/stop button.XSet the starter switch to position 2 and
back to position 0 using the KEYLESS-GO
start/stop button.
The headlamps delayed shut-off feature is
deactivated. It will reactivate as soon as
you start the engine.
Switching interior lighting delayed shut-
off on or off
Use this function to set whether you would
like the interior lighting to remain on for
10 seconds during darkness after you have
set the starter switch to position 0 using the
KEYLESS-GO start/stop button.
XPress button = or ; to select the
Settings menu.XPress button : or 9 to select the
Lights submenu.XPress button a.XPress button : or 9 to select the
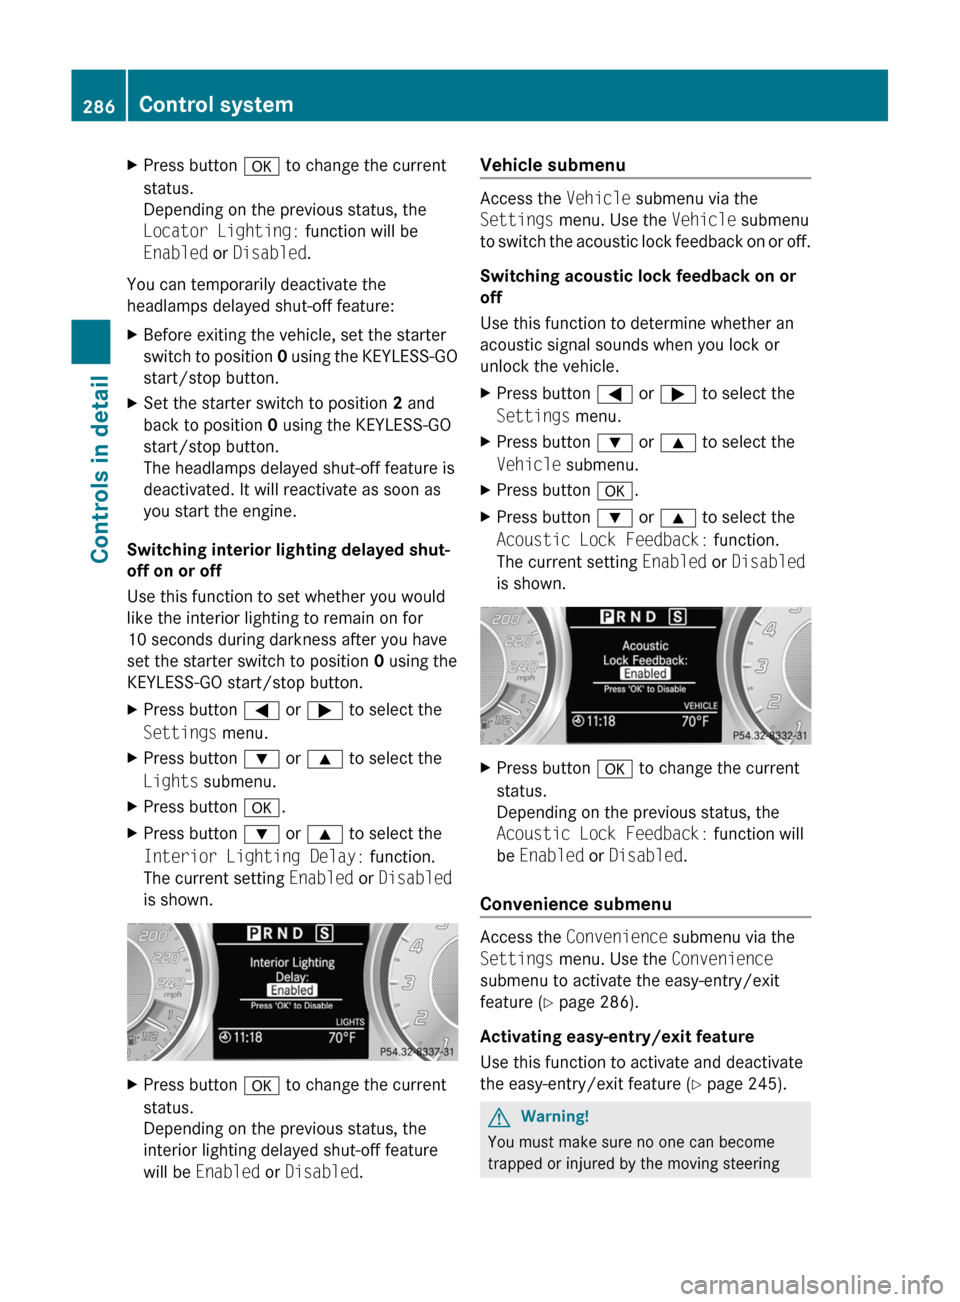
Interior Lighting Delay: function.
The current setting Enabled or Disabled
is shown.XPress button a to change the current
status.
Depending on the previous status, the
interior lighting delayed shut-off feature
will be Enabled or Disabled .Vehicle submenu
Access the Vehicle submenu via the
Settings menu. Use the Vehicle submenu
to switch the acoustic lock feedback on or off.
Switching acoustic lock feedback on or
off
Use this function to determine whether an
acoustic signal sounds when you lock or
unlock the vehicle.
XPress button = or ; to select the
Settings menu.XPress button : or 9 to select the
Vehicle submenu.XPress button a.XPress button : or 9 to select the
Acoustic Lock Feedback: function.
The current setting Enabled or Disabled
is shown.XPress button a to change the current
status.
Depending on the previous status, the
Acoustic Lock Feedback: function will
be Enabled or Disabled .
Convenience submenu
Access the Convenience submenu via the
Settings menu. Use the Convenience
submenu to activate the easy-entry/exit
feature ( Y page 286).
Activating easy-entry/exit feature
Use this function to activate and deactivate
the easy-entry/exit feature ( Y page 245).
GWarning!
You must make sure no one can become
trapped or injured by the moving steering
286Control systemControls in detail
BA 197 USA, CA Edition A 2011; 1; 27, en-UShereepeVersion: 3.0.3.52010-03-24T15:31:10+01:00 - Seite 286
Page 289 of 436
wheel when the easy-entry/exit feature is
activated.
To stop steering wheel movement, move
steering wheel adjustment stalk or press one
of the memory position buttons.
Do not leave children unattended in the
vehicle, or with access to an unlocked vehicle.
Children could open the driver’s door and
unintentionally activate the easy-entry/exit
feature, which could result in an accident
and/or serious personal injury.XPress button = or ; to select the
Settings menu.XPress button : or 9 to select the
Convenience submenu.XPress button a.XPress button : or 9 to select the
Easy Entry/Exit: function.
The current setting Enabled or Disabled
is shown.XPress button a to change the current
status.
Depending on the previous status, the
Easy Entry/Exit: feature will be
Enabled or Disabled .
Switching fold-in function for exterior rear
view mirrors on or off
Use this function to set the exterior rear view
mirrors to be folded in automatically when
you lock your vehicle.
With this function set to Enabled and the
exterior rear view mirrors folded in using the
button on the door control panel
( Y page 248), the exterior rear view mirrors
will not fold out when you switch on the
ignition. You will then have to fold out the
exterior rear view mirrors using the button on
the door control panel ( Y page 248).
Make sure both exterior rear view mirrors are
folded out completely before driving off.XPress button = or ; to select the
Settings menu.XPress button : or 9 to select the
Convenience submenu.XPress a.XPress button : or 9 to select the
Fold Mirrors in when Locking:
function.
The current setting Enabled or Disabled
is shown.XPress button a to change the current
status.
Depending on the previous status, the
automatic fold-in function for exterior rear
view mirrors will be Enabled or Disabled .
AMG menu
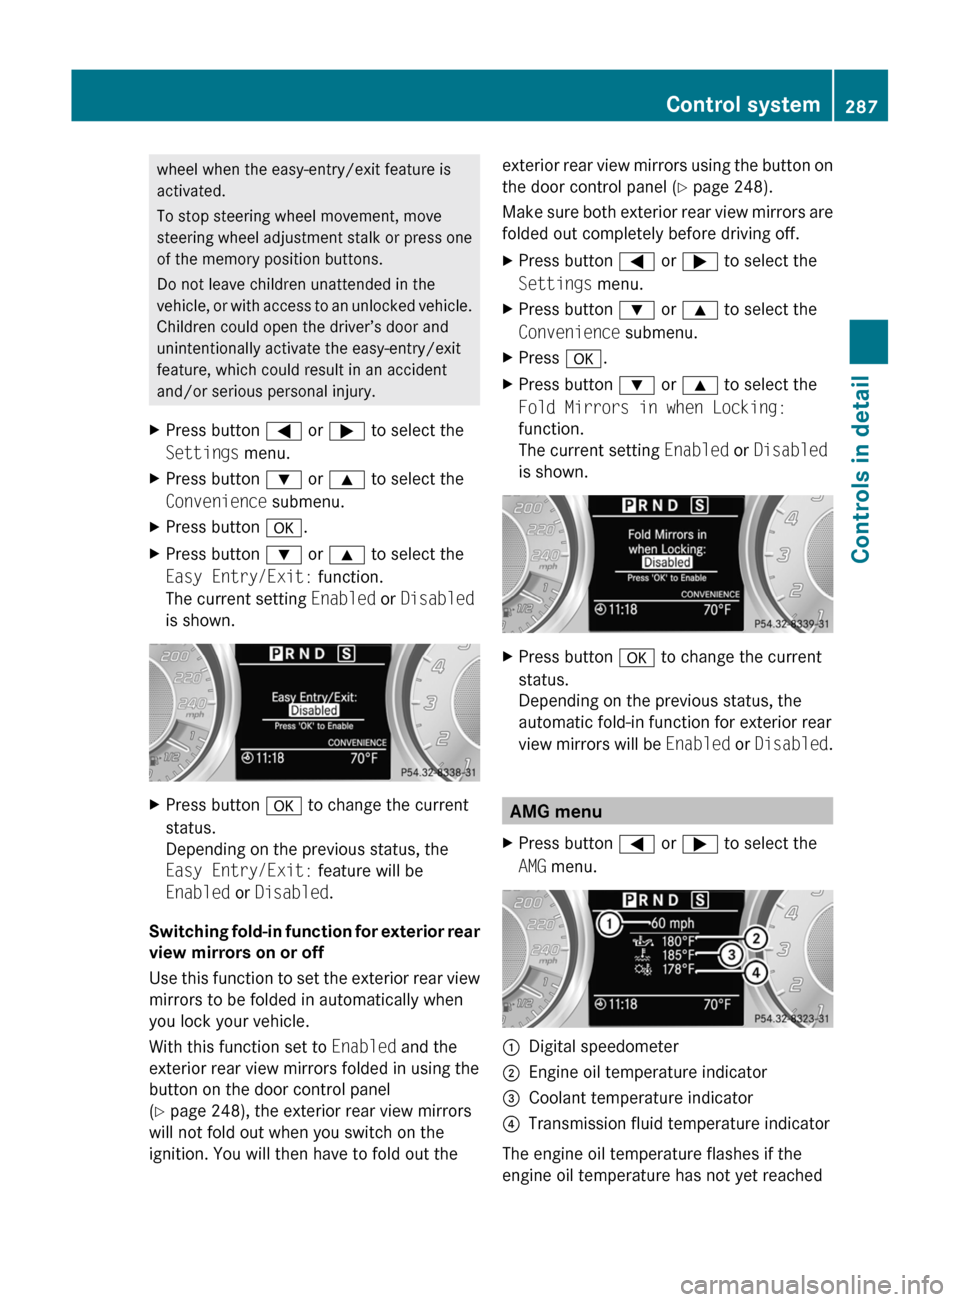
XPress button = or ; to select the
AMG menu.:Digital speedometer;Engine oil temperature indicator=Coolant temperature indicator?Transmission fluid temperature indicator
The engine oil temperature flashes if the
engine oil temperature has not yet reached
Control system287Controls in detailBA 197 USA, CA Edition A 2011; 1; 27, en-UShereepeVersion: 3.0.3.52010-03-24T15:31:10+01:00 - Seite 287Z
Page 294 of 436

increments each time you lift or press the
cruise control lever up or down to the
resistance point.XIncreasing: Briefly lift the cruise control
lever up to the resistance point in direction
of arrow :.XDecreasing: Briefly press the cruise
control lever down to the resistance point
in direction of arrow ;.XRelease the cruise control lever.
The new speed is set and the vehicle will
accelerate or decelerate.
Adjustment in 5 mph (Canada: 10 km/h)
increments
i The set speed value is increased or
decreased in 5 mph (Canada: 10 km/h)
increments each time you lift or press the
cruise control lever up or down past the
resistance point.
XIncreasing: Briefly lift the cruise control
lever up past the resistance point in
direction of arrow :.XDecreasing: Briefly press the cruise
control lever down past the resistance
point in direction of arrow ;.XRelease the cruise control lever.
The new speed is set and the vehicle will
accelerate or decelerate. Keep in mind that
it may take a brief moment until the vehicle
has reached the set speed.
Setting stored speed (Resume function)
GWarning!
The set speed stored in memory should only
be set again if prevailing road conditions and
legal speed limits permit. Possible
acceleration or deceleration differences
arising from returning to the preset speed
could cause an accident and/or serious injury
to you and others.
XBriefly pull the cruise control lever in
direction of arrow ?.
If no speed is stored, the current speed is
set and stored.XRemove your foot from the accelerator
pedal.
The last stored speed is deleted from memory
when the engine is turned off.
RACE START
RACE START enables optimum acceleration
from a standing start with suitable high-grip
road surface conditions.
GWarning!
RACE START is only available when ESC
SPORT is activated. ESC SPORT only
stabilizes the vehicle to a certain extent if it is
swerving or the wheels are spinning.
RACE START may only be used on closed
roads. Always adapt your speed and driving
style to suit the current road and weather
conditions.
Conditions for activation
RACE START can be activated when
R the doors are closed
R the trunk is closed
R the hood is closed
R the engine is running and the transmission
and the engine have reached their
operating temperature. The engine has
reached its operating temperature when
the engine oil temperature indicator in the
multifunction display stops flashing.
R ESC SPORT is switched on ( Y page 62)
R the multifunction steering wheel is in the
straight-ahead position
R the vehicle is standing still and the brake
pedal is depressed (left foot)
R the transmission is in drive position D
292Driving systemsControls in detail
BA 197 USA, CA Edition A 2011; 1; 27, en-UShereepeVersion: 3.0.3.52010-03-24T15:31:10+01:00 - Seite 292
Page 295 of 436
Activating RACE STARTXDepress the brake pedal with your left foot
and keep it depressed.XTurn the program mode selector dial
clockwise ( Y page 267) until the RS lamp
on the dial comes on.
The message RACE START Confirm:
Paddle UP Cancel: Paddle DOWN
appears in the multifunction display.
i When the activation conditions are not
fulfilled anymore, RACE START is canceled.
The message RACE START Canceled
appears in the multifunction display.
XTo cancel: Pull left steering wheel gearshift
control ( Y page 267).
or
XTo confirm: Pull right steering wheel
gearshift control ( Y page 267).
The message RACE START Available
Depress gas pedal. appears in the
multifunction display.
i If you do not depress the accelerator
pedal within a few seconds, RACE START is
canceled. The message RACE START Not
Possible See Operator’s Manual
appears in the multifunction display.
XDepress the accelerator pedal fully.
The engine speed increases.
The message RACE START Release
brake to start appears in the
multifunction display.
i If you do not release the brake pedal
within a few seconds, RACE START is
canceled. The message RACE START
Canceled appears in the multifunction
display.
XTake your foot off the brake pedal while
keeping the accelerator pedal depressed.
The vehicle pulls away at maximum
acceleration.
The message RACE START Active appears
in the multifunction display.
RACE START deactivates at a vehicle speed
of approximately 30 mph
(Canada: 50 km/h). The transmission
switches to program mode S+. ESC SPORT
remains switched on.
RACE START is canceled immediately if you
release the accelerator pedal while RACE
START is active or when the activation
conditions are not fulfilled anymore. The
message RACE START Not Possible See
Operator’s Manual appears in the
multifunction display.
i If RACE START is used repeatedly in a
short period of time, it is only available
again after having driven the vehicle a
certain distance.
Hill-start assist system
On uphill grades, the hill-start assist system
maintains the pressure in the brake system
for approximately 1 second after you have
released the brake pedal. Therefore, you can
start off smoothly without the vehicle moving
immediately after releasing the brake pedal.
GWarning!
The hill-start assist system is not designed to
function as a parking brake. It does not
prevent the vehicle from moving when parked
on an incline.
Always engage the electronic parking brake
in addition to shifting the transmission into
park position P.
XDepress the brake pedal.XShift the transmission into drive position
D or reverse gear R.XRelease the brake pedal.XCarefully depress the accelerator pedal.
The hill-start assist system is inactive
R when starting off on a level road or downhill
grades
R with the transmission in neutral position N
R with the electronic parking brake engaged
R if the ESC has switched off due to a
malfunction
Driving systems293Controls in detailBA 197 USA, CA Edition A 2011; 1; 27, en-UShereepeVersion: 3.0.3.52010-03-24T15:31:10+01:00 - Seite 293Z
Page 311 of 436
steps may result in a system that is not
activated.
If you have any questions regarding
activation, please call the Response Center
at 866-990-9007 (USA only) or
1-888-923-8367 (Canada only).
Shortly after the completion of your mbrace
acquaintance call, you will receive an account
number via email. You will also receive a two-
part welcome kit via mail that will provide
your account and Personal Identification
Number (PIN). You will only need the PIN once
to access the mbrace account section in
“Owners Online” at
http://www.MBUSA.com (USA only).
The mbrace system is available if
R it has been activated and is operational.
Activation requires a subscription for
monitoring services, connection and
cellular air time
R vehicle battery power is available
R the relevant cellular phone network and
GPS signals are available
i Location of the vehicle on a map is only
possible if the vehicle is able to receive
signals from the GPS satellite network and
pass the information on to the Response
Center.
The mbrace system
The mbrace system consists of three types of
response:
R Automatic and manual emergency
R Roadside Assistance
R Information
To adjust the speaker volume during a
mbrace call do the following:
XPress button W or X on the
multifunction steering wheel.
or
XUse the volume adjustment button on your
COMAND system.Be sure to check “Owners Online” at
http://www.MBUSA.com (USA only) for
more information and a description of all
available features.
System self-test
The system performs a self-test after you
have switched on the ignition.
GWarning!
A malfunction in the system has been
detected if any or all of the following
conditions occur:
R The indicator lamp in the SOS button does
not come on during the system self-test.
R The indicator lamp in the wrench button
F does not come on during the system
self-test.
R The indicator lamp in the Information
button ï does not come on during the
system self-test.
R The indicator lamp in the SOS button,
wrench button F, or Information button
ï remains illuminated constantly in red
after the system self-test.
R The message Tele Aid Inoperative or
Tele Aid Not Activated appears in the
multifunction display after the system self-
test.
If a malfunction is indicated as outlined above,
the system may not operate as expected. In
case of an emergency, help will have to be
summoned by other means.
Have the system checked at the nearest
Mercedes-Benz Center or contact the
Response Center at 866-990-9007 (USA
only) or 1-888-923-8367 (Canada only) as
soon as possible.
Emergency calls
! In order to activate the mbrace system, a
subscriber agreement must be completed.
To ensure your system is activated and
operational, please press Information
button ï to perform the acquaintance
Useful features309Controls in detailBA 197 USA, CA Edition A 2011; 1; 27, en-UShereepeVersion: 3.0.3.52010-03-24T15:31:10+01:00 - Seite 309Z
Page 313 of 436
XTerminating calls: Press button ~ on
the multifunction steering wheel.
or
XPress the respective button for ending a
telephone call on the COMAND system.
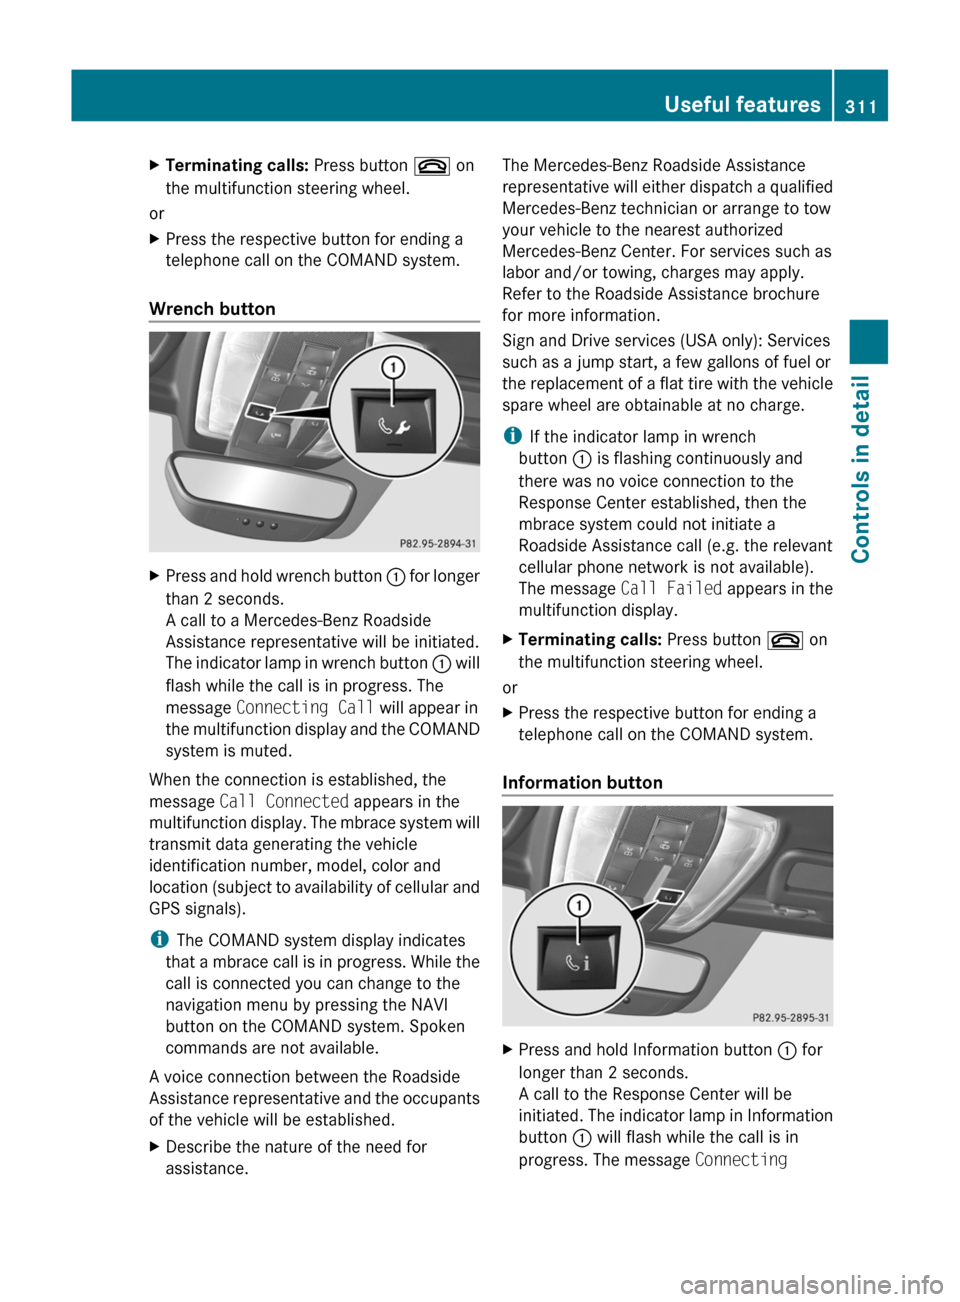
Wrench button
XPress and hold wrench button : for longer
than 2 seconds.
A call to a Mercedes-Benz Roadside
Assistance representative will be initiated.
The indicator lamp in wrench button : will
flash while the call is in progress. The
message Connecting Call will appear in
the multifunction display and the COMAND
system is muted.
When the connection is established, the
message Call Connected appears in the
multifunction display. The mbrace system will
transmit data generating the vehicle
identification number, model, color and
location (subject to availability of cellular and
GPS signals).
i The COMAND system display indicates
that a mbrace call is in progress. While the
call is connected you can change to the
navigation menu by pressing the NAVI
button on the COMAND system. Spoken
commands are not available.
A voice connection between the Roadside
Assistance representative and the occupants
of the vehicle will be established.
XDescribe the nature of the need for
assistance.The Mercedes-Benz Roadside Assistance
representative will either dispatch a qualified
Mercedes-Benz technician or arrange to tow
your vehicle to the nearest authorized
Mercedes-Benz Center. For services such as
labor and/or towing, charges may apply.
Refer to the Roadside Assistance brochure
for more information.
Sign and Drive services (USA only): Services
such as a jump start, a few gallons of fuel or
the replacement of a flat tire with the vehicle
spare wheel are obtainable at no charge.
i If the indicator lamp in wrench
button : is flashing continuously and
there was no voice connection to the
Response Center established, then the
mbrace system could not initiate a
Roadside Assistance call (e.g. the relevant
cellular phone network is not available).
The message Call Failed appears in the
multifunction display.XTerminating calls: Press button ~ on
the multifunction steering wheel.
or
XPress the respective button for ending a
telephone call on the COMAND system.
Information button
XPress and hold Information button : for
longer than 2 seconds.
A call to the Response Center will be
initiated. The indicator lamp in Information
button : will flash while the call is in
progress. The message Connecting Useful features311Controls in detailBA 197 USA, CA Edition A 2011; 1; 27, en-UShereepeVersion: 3.0.3.52010-03-24T15:31:10+01:00 - Seite 311Z