2011 MERCEDES-BENZ SLS instrument cluster
[x] Cancel search: instrument clusterPage 105 of 436
operation. As a result, you may have to drive
for some time until precise route guidance
takes place.
GPS Reception
The correct functioning of the navigation
system is also dependent on the GPS
reception. In certain situations, the GPS
reception may be impaired, distorted or even
impossible, e.g. in tunnels, multi-storey car
parks or due to snow on the GPS antenna. If
there is snow on the GPS antenna, you should
remove it. The GPS antenna is at the rear on
the vehicle's roof.
Route Guidance after Vehicle Transport
After vehicle transport (e.g. by ferry, car train
or by towing) COMAND must determine the
vehicle location again.
Position finding takes place automatically
when the vehicle is driven off again, even if
COMAND is switched off. The actual length of
time may vary from case to case.
While the vehicle is determining its position,
route guidance is subject to the following
restrictions:
R Navigation announcements, route
guidance displays and displayed street
names do not match the actual location.
R COMAND does not issue any navigation
announcements.
R The message Off Mapped Road and a
direction arrow are displayed instead of the
route guidance displays. The arrow
indicates the direction of the destination.
i Direction arrow accuracy is also
dependent on correct vehicle position
and/or direction.
Once the position finding operation has been
completed, route guidance takes place again
via navigation announcements and route
guidance displays.
Interrupting Journey during Route
Guidance
i An interruption in the journey means
parking the vehicle and switching off the
vehicle.
The continuation of the journey means
switching the vehicle on again and
continuing to drive.
If you interrupt the journey during route
guidance and continue it later, the following
applies:
R If you continue the journey within 2 hours,
COMAND automatically continues route
guidance.
R If you continue the journey after 2 hours,
route guidance is canceled. You will have
to continue the canceled route guidance
again manually ( Y page 137).
Measurement Units
The measurement units displayed in
navigation mode are identical to those set in
the instrument cluster.
Menu Overview
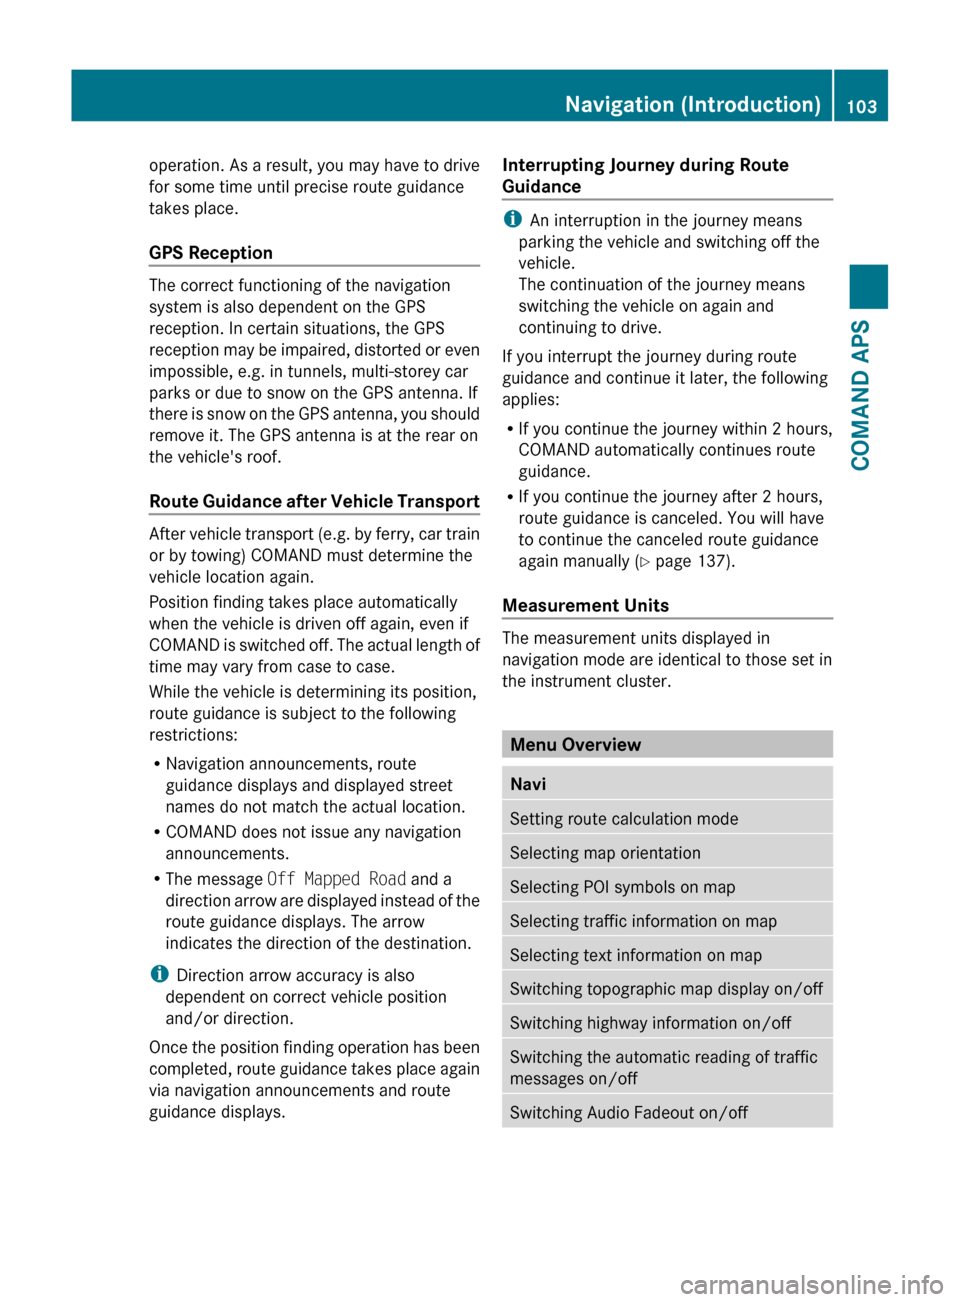
NaviSetting route calculation modeSelecting map orientationSelecting POI symbols on mapSelecting traffic information on mapSelecting text information on mapSwitching topographic map display on/offSwitching highway information on/offSwitching the automatic reading of traffic
messages on/offSwitching Audio Fadeout on/offNavigation (Introduction)103COMAND APSBA 197 USA, CA Edition A 2011; 1; 27, en-UShereepeVersion: 3.0.3.52010-03-24T15:31:10+01:00 - Seite 103Z
Page 158 of 436

made during phone mode when a mobile
phone is connected to COMAND.
The particular menu item can only be
selected if calls have already been received
or made from COMAND.
The display of missed calls in the COMAND
display is not possible with all mobile
phones.
iThe menu item Call lists is not active
if no mobile phone is connected to
COMAND.
iIf the mobile phone does not support
PBAP, COMAND automatically deletes the
call lists if a mobile phone other than the
last used is connected.
iThe instrument cluster control system
displays a list of the last dialed calls.
iFor many operating functions you can
also use the buttons on the multifunction
steering wheel, e.g. the =, ;,
9, :, a, 6 or ~ buttons,
for selecting a menu, scrolling through lists
or initiating or ending a call (Y page 84).
Calling up the List
XIn the phone main menu select Call
Lists.
A menu appears.
XSelect Calls Received or Calls
Dialed.
The appropriate list appears.
or
XWhen the main telephone menu is
displayed, press the K button on
COMAND or the 6 button on the multi-
function steering wheel.
A list of the last dialed calls appears.
List of incoming calls
1 List of calls received2 Date/time of the highlighted entry3 List entry options menuXTo select a list entry: Rotate y m z or slide
q m r.
XTo close list: Select Back.
or
XPress the k button next to the
COMAND controller.
Displaying Details on a List Entry
COMAND can also fully display an
abbreviated list entry.
XSelect the list entry.XSelect Options £ Details.
The details screen appears.
XBack to the list: Slide o m p until the list
is highlighted.
or
XPress the k button next to the
COMAND controller.
Saving Unsaved List Entry
Unsaved list entries are displayed with the
phone number.
Saved list entries are displayed with the
name. They are saved in the COMAND phone
book.
156TelephoneCOMAND APS
BA 197 USA, CA Edition A 2011; 1; 27, en-UShereepeVersion: 3.0.3.52010-03-24T15:31:10+01:00 - Seite 156
Page 237 of 436
Vehicle equipment ............................236
Locking and unlocking .....................236
Starter switch positions ...................241
Seats .................................................. 243
Multifunction steering wheel ..........245
Mirrors ............................................... 246
Memory function .............................. 249
Lighting .............................................. 249
Wipers ................................................ 253
Power windows ................................. 255
Driving and parking ..........................257
AMG SPEEDSHIFT DCT 7-SPEED
Transmission ..................................... 263
Instrument cluster ............................271
Control system .................................. 272
Driving systems ................................ 290
Climate control system ....................298
Rear window defroster .....................304
Loading and storing ..........................304
Useful features ................................. 306235Controls in detailBA 197 USA, CA Edition A 2011; 1; 27, en-UShereepeVersion: 3.0.3.52010-03-24T15:31:10+01:00 - Seite 235
Page 244 of 436
corresponds to the various starter switch
positions (Y page 242).
Pressing the KEYLESS-GO start/stop button
with the brake pedal firmly depressed will
start the engine (Y page 258).
The function of the SmartKey overrules the
KEYLESS-GO function.
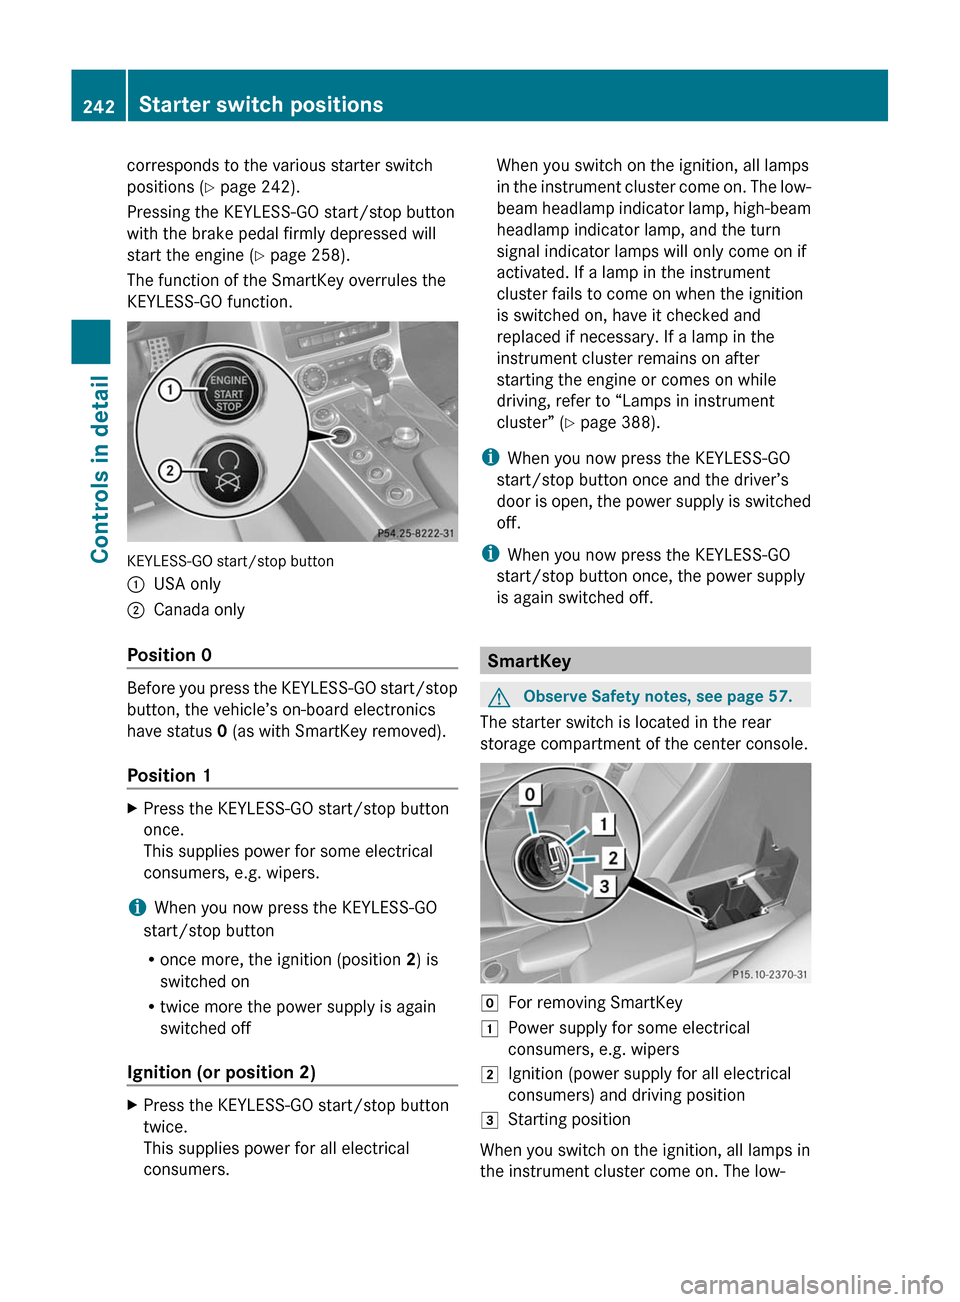
KEYLESS-GO start/stop button
:USA only;Canada only
Position 0
Before you press the KEYLESS-GO start/stop
button, the vehicle’s on-board electronics
have status 0 (as with SmartKey removed).
Position 1
XPress the KEYLESS-GO start/stop button
once.
This supplies power for some electrical
consumers, e.g. wipers.
iWhen you now press the KEYLESS-GO
start/stop button
Ronce more, the ignition (position 2) is
switched on
Rtwice more the power supply is again
switched off
Ignition (or position 2)
XPress the KEYLESS-GO start/stop button
twice.
This supplies power for all electrical
consumers.
When you switch on the ignition, all lamps
in the instrument cluster come on. The low-
beam headlamp indicator lamp, high-beam
headlamp indicator lamp, and the turn
signal indicator lamps will only come on if
activated. If a lamp in the instrument
cluster fails to come on when the ignition
is switched on, have it checked and
replaced if necessary. If a lamp in the
instrument cluster remains on after
starting the engine or comes on while
driving, refer to “Lamps in instrument
cluster” (Y page 388).
iWhen you now press the KEYLESS-GO
start/stop button once and the driver’s
door is open, the power supply is switched
off.
iWhen you now press the KEYLESS-GO
start/stop button once, the power supply
is again switched off.
SmartKey
GObserve Safety notes, see page 57.
The starter switch is located in the rear
storage compartment of the center console.
gFor removing SmartKey1Power supply for some electrical
consumers, e.g. wipers
2Ignition (power supply for all electrical
consumers) and driving position
3Starting position
When you switch on the ignition, all lamps in
the instrument cluster come on. The low-
242Starter switch positionsControls in detail
BA 197 USA, CA Edition A 2011; 1; 27, en-UShereepeVersion: 3.0.3.52010-03-24T15:31:10+01:00 - Seite 242
Page 245 of 436
beam headlamp indicator lamp, high-beam
headlamp indicator lamp, and the turn signal
indicator lamps will only come on if activated.
If a lamp in the instrument cluster fails to
come on when the ignition is switched on,
have it checked and replaced if necessary. If
a lamp in the instrument cluster remains on
after starting the engine or comes on while
driving, refer to “Lamps in instrument cluster”
( Y page 388).XAlways remove the SmartKey from the
starter switch when the engine is not in
operation.
This will help to prevent accelerated vehicle
battery discharge or a completely
discharged vehicle battery.
If the SmartKey cannot be turned in the
starter switch, the vehicle battery may not be
sufficiently charged.
XCheck the vehicle battery and charge it if
necessary ( Y page 410).
or
XGet a jump start ( Y page 413).
i
If the SmartKey does not belong to the
vehicle, the SmartKey can be turned in the
starter switch. However, the ignition does
not switch on and the engine does not start.
Seats
Safety notes
GWarning!
In order to avoid possible loss of vehicle
control the following must be done before the
vehicle is put into motion:
R seat adjustment
R steering wheel adjustment
R rear view mirror adjustment
R fastening of seat belts
GWarning!
Do not adjust the driver’s seat while driving.
Adjusting the seat while driving could cause
the driver to lose control of the vehicle.
Never ride in a moving vehicle with the seat
backrest in an excessively reclined position as
this can be dangerous. You could slide under
the seat belt in a collision. If you slide under
it, the seat belt would apply force at the
abdomen or neck. That could cause serious
or fatal injuries. The seat backrest and seat
belts provide the best restraint when the
wearer is in a position that is as upright as
possible and seat belts are properly
positioned on the body.
GWarning!
Your seat must be adjusted so that you can
correctly fasten your seat belt.
Observe the following points:
R Adjust the seat backrest until your arms are
slightly angled when holding the steering
wheel.
R Adjust the seat to a comfortable seating
position that still allows you to reach the
accelerator/brake pedal safely. The
position should be as far back as possible
with the driver still able to operate the
controls properly.
R Never place hands under the seat or near
any moving parts while a seat is being
adjusted.
Failure to do so could result in an accident
and/or serious personal injury.
GWarning!
The power seats can be operated at any time.
Therefore, do not leave children unattended
in the vehicle, or with access to an unlocked
vehicle. A child’s unsupervised access to a
vehicle could result in an accident and/or
serious personal injury.
Seats243Controls in detailBA 197 USA, CA Edition A 2011; 1; 27, en-UShereepeVersion: 3.0.3.52010-03-24T15:31:10+01:00 - Seite 243Z
Page 247 of 436
Seat heating
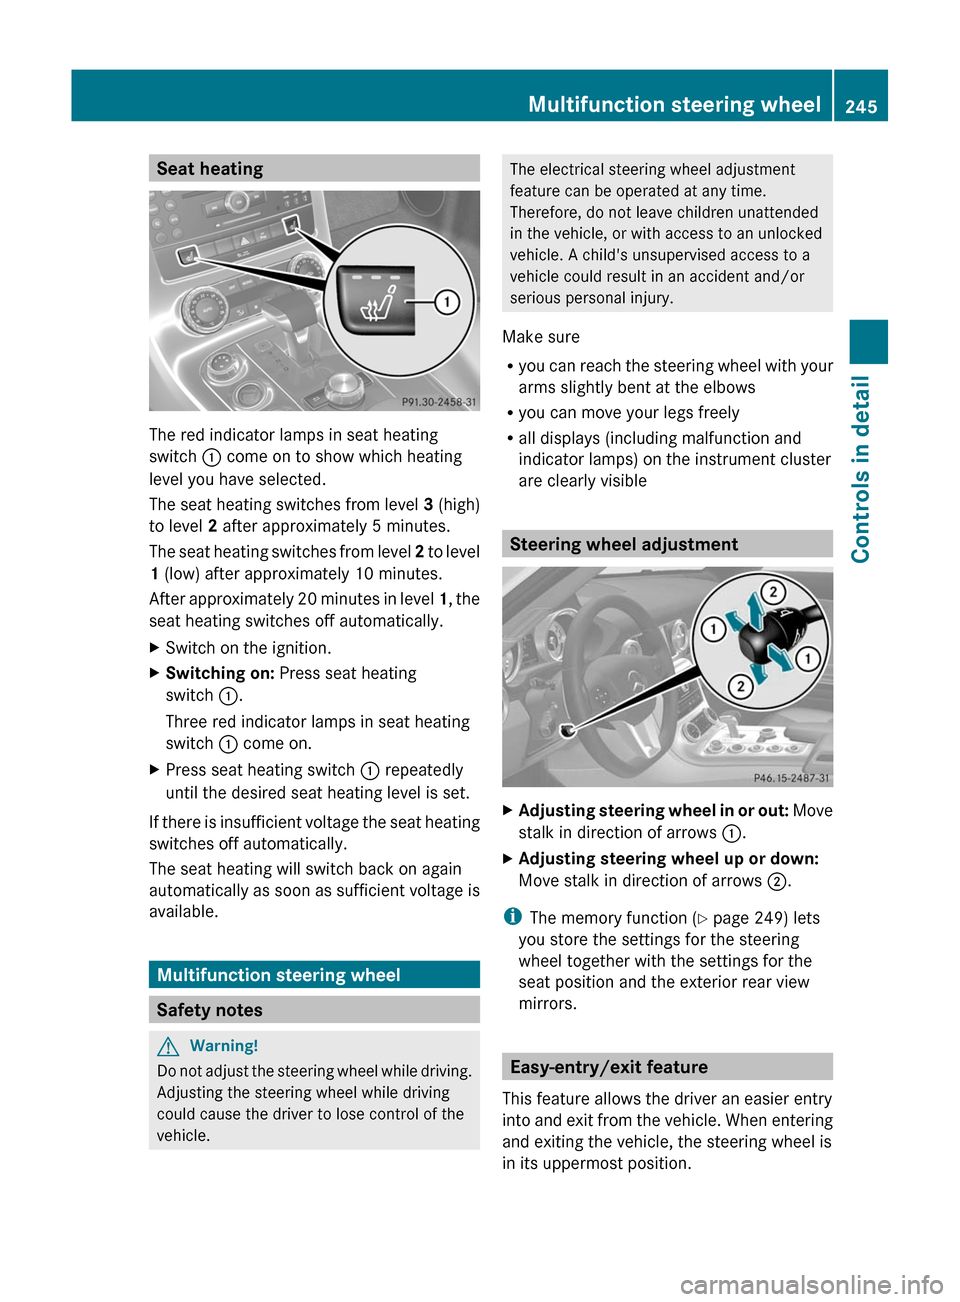
The red indicator lamps in seat heating
switch : come on to show which heating
level you have selected.
The seat heating switches from level 3 (high)
to level 2 after approximately 5 minutes.
The seat heating switches from level 2 to level
1 (low) after approximately 10 minutes.
After approximately 20 minutes in level 1, the
seat heating switches off automatically.
XSwitch on the ignition.XSwitching on: Press seat heating
switch :.
Three red indicator lamps in seat heating
switch : come on.
XPress seat heating switch : repeatedly
until the desired seat heating level is set.
If there is insufficient voltage the seat heating
switches off automatically.
The seat heating will switch back on again
automatically as soon as sufficient voltage is
available.
Multifunction steering wheel
Safety notes
GWarning!
Do not adjust the steering wheel while driving.
Adjusting the steering wheel while driving
could cause the driver to lose control of the
vehicle.
The electrical steering wheel adjustment
feature can be operated at any time.
Therefore, do not leave children unattended
in the vehicle, or with access to an unlocked
vehicle. A child's unsupervised access to a
vehicle could result in an accident and/or
serious personal injury.
Make sure
Ryou can reach the steering wheel with your
arms slightly bent at the elbows
Ryou can move your legs freely
Rall displays (including malfunction and
indicator lamps) on the instrument cluster
are clearly visible
Steering wheel adjustment
XAdjusting steering wheel in or out: Move
stalk in direction of arrows :.
XAdjusting steering wheel up or down:
Move stalk in direction of arrows ;.
iThe memory function (Y page 249) lets
you store the settings for the steering
wheel together with the settings for the
seat position and the exterior rear view
mirrors.
Easy-entry/exit feature
This feature allows the driver an easier entry
into and exit from the vehicle. When entering
and exiting the vehicle, the steering wheel is
in its uppermost position.
Multifunction steering wheel245Controls in detailBA 197 USA, CA Edition A 2011; 1; 27, en-UShereepeVersion: 3.0.3.52010-03-24T15:31:10+01:00 - Seite 245Z
Page 252 of 436
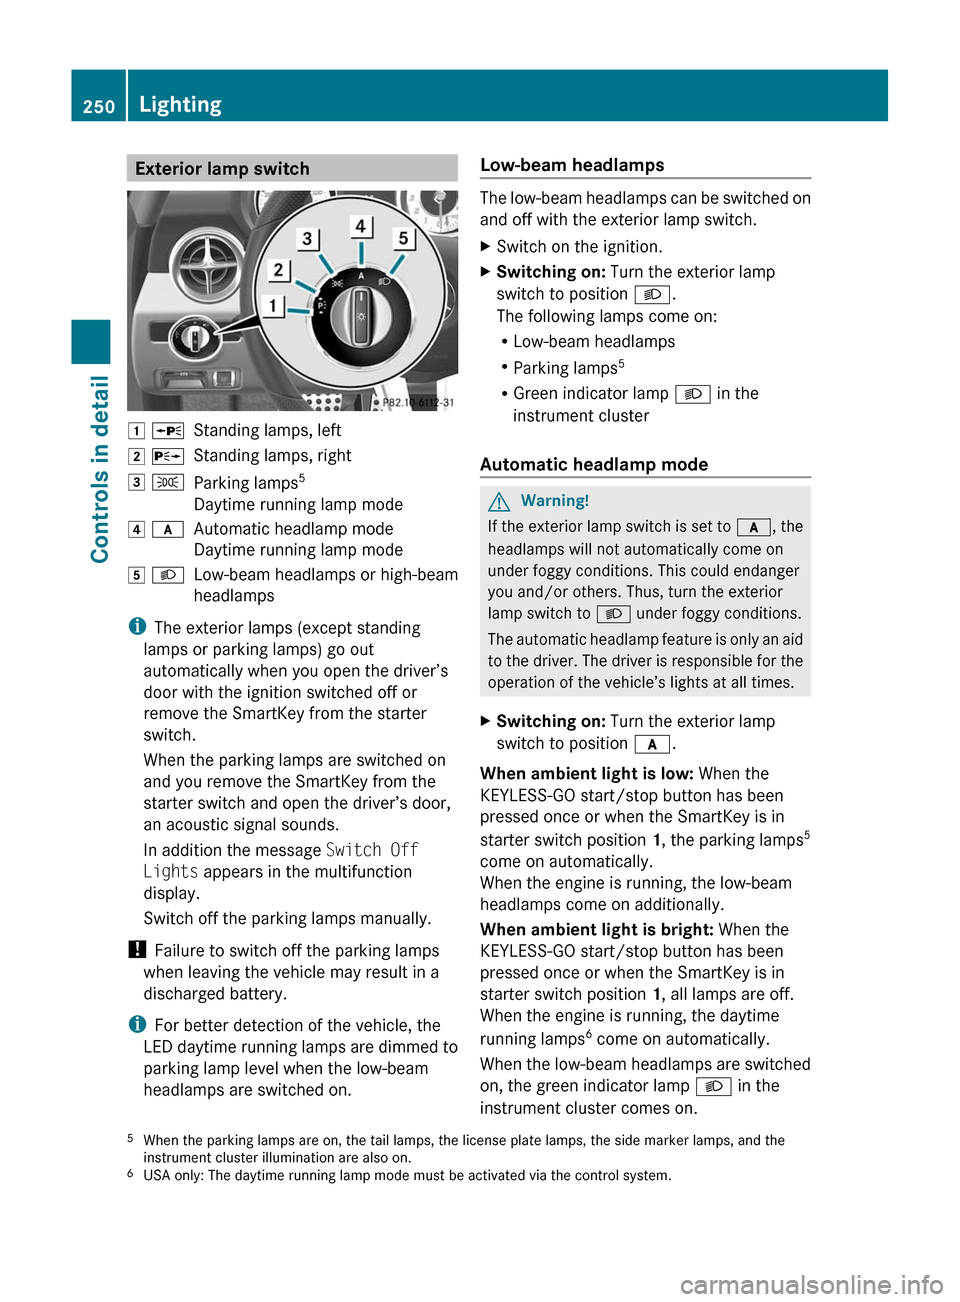
Exterior lamp switch1 WStanding lamps, left2 XStanding lamps, right3 TParking lamps 5
Daytime running lamp mode4 cAutomatic headlamp mode
Daytime running lamp mode5 LLow-beam headlamps or high-beam
headlamps
i The exterior lamps (except standing
lamps or parking lamps) go out
automatically when you open the driver’s
door with the ignition switched off or
remove the SmartKey from the starter
switch.
When the parking lamps are switched on
and you remove the SmartKey from the
starter switch and open the driver’s door,
an acoustic signal sounds.
In addition the message Switch Off
Lights appears in the multifunction
display.
Switch off the parking lamps manually.
! Failure to switch off the parking lamps
when leaving the vehicle may result in a
discharged battery.
i For better detection of the vehicle, the
LED daytime running lamps are dimmed to
parking lamp level when the low-beam
headlamps are switched on.
Low-beam headlamps
The low-beam headlamps can be switched on
and off with the exterior lamp switch.
XSwitch on the ignition.XSwitching on: Turn the exterior lamp
switch to position L.
The following lamps come on:
R Low-beam headlamps
R Parking lamps 5
R Green indicator lamp L in the
instrument cluster
Automatic headlamp mode
GWarning!
If the exterior lamp switch is set to c, the
headlamps will not automatically come on
under foggy conditions. This could endanger
you and/or others. Thus, turn the exterior
lamp switch to L under foggy conditions.
The automatic headlamp feature is only an aid
to the driver. The driver is responsible for the
operation of the vehicle’s lights at all times.
XSwitching on: Turn the exterior lamp
switch to position c.
When ambient light is low: When the
KEYLESS-GO start/stop button has been
pressed once or when the SmartKey is in
starter switch position 1, the parking lamps 5
come on automatically.
When the engine is running, the low-beam
headlamps come on additionally.
When ambient light is bright: When the
KEYLESS-GO start/stop button has been
pressed once or when the SmartKey is in
starter switch position 1, all lamps are off.
When the engine is running, the daytime
running lamps 6
come on automatically.
When the low-beam headlamps are switched
on, the green indicator lamp L in the
instrument cluster comes on.
5 When the parking lamps are on, the tail lamps, the license plate lamps, the side marker lamps, and the
instrument cluster illumination are also on.
6 USA only: The daytime running lamp mode must be activated via the control system.250LightingControls in detail
BA 197 USA, CA Edition A 2011; 1; 27, en-UShereepeVersion: 3.0.3.52010-03-24T15:31:10+01:00 - Seite 250
Page 253 of 436
Once the low-beam headlamps are on, the
high-beam headlamps are also available.
Daytime running lamp mode
In Canada, the daytime running lamp mode is
mandatory and therefore in a constant mode.
In the USA, the daytime running lamp mode
is activated by default.
XMake sure the daytime running lamp mode
is activated in the control system, see
“Switching daytime running lamp mode on
or off (USA only)” ( Y page 284).XTurn the exterior lamp switch to position
c .
When the engine is running and the
ambient light is bright, the daytime running
lamps come on.
In low ambient lighting conditions, the
following lamps will come on additionally:
R Low-beam headlamps
R Parking lamps 5
R green indicator lamp L in the
instrument cluster
You can only switch on the high-beam
headlamps when the low-beam headlamps
are on.
The high-beam flasher is available at all times.
Canada only
When the engine is running, and you
R shift from a driving position to park
position P with the vehicle at a standstill,
the daytime running lamps or the low-beam
headlamps will go out with a delay of
3 minutes
R turn the exterior lamp switch to position
T , the daytime running lamps and the
parking lamps 5
come on in bright ambient
lighting conditions.
R turn the exterior lamp switch to position
L , the manual headlamp mode has
priority over the daytime running lamp
mode
The corresponding exterior lamps come on
( Y page 250).
USA only
When the engine is running, and you turn the
exterior lamp switch to position T or
L , the manual headlamp mode has
priority over the daytime running lamp mode.
The corresponding exterior lamps come on
( Y page 250).
Locator lighting
The locator lighting is described in the
“Control system” section, see “Switching
locator lighting on or off” ( Y page 285).
Combination switch
Turn signals
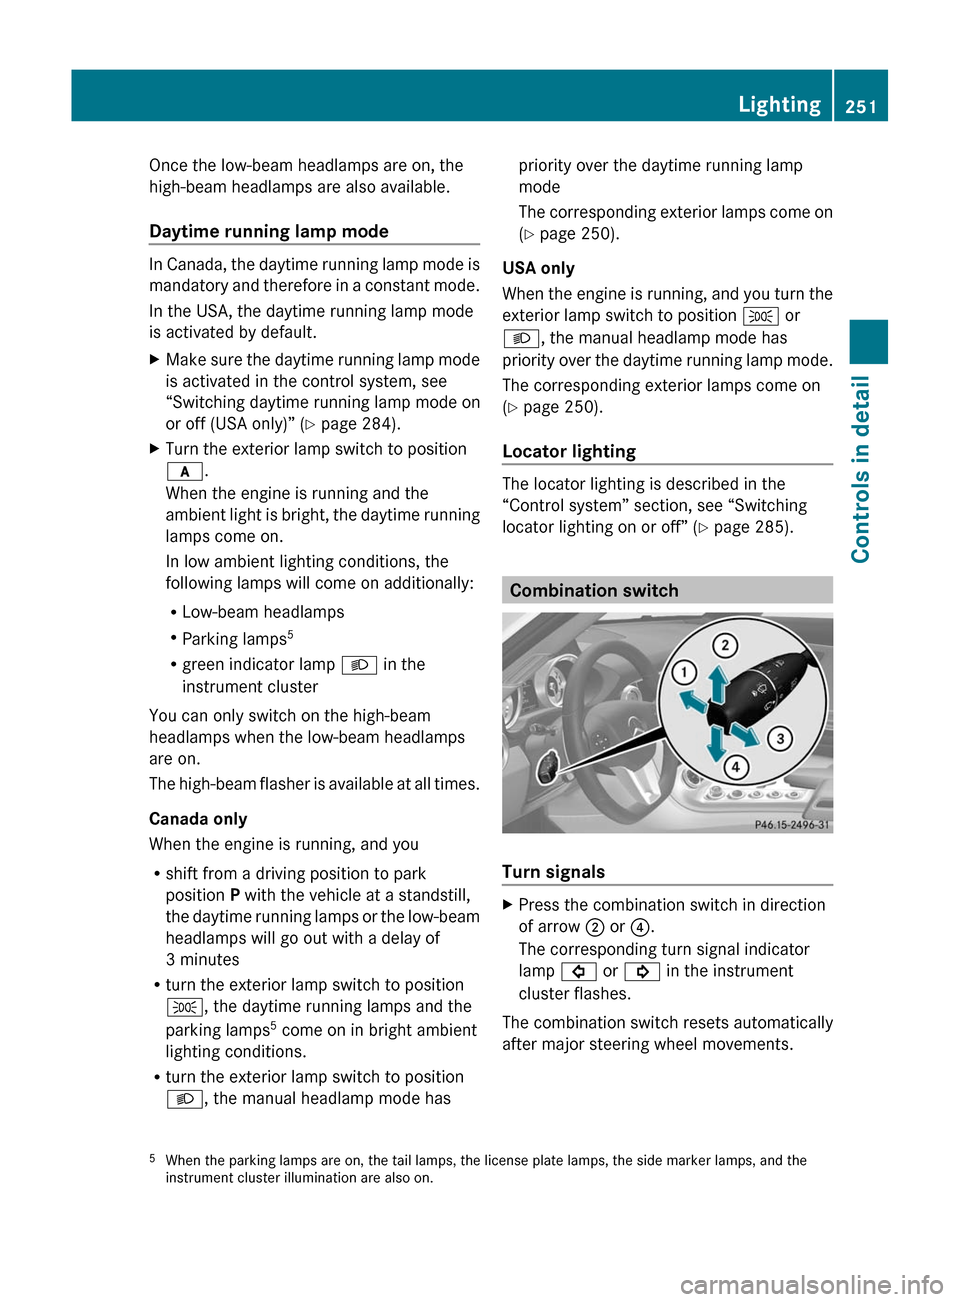
XPress the combination switch in direction
of arrow ; or ?.
The corresponding turn signal indicator
lamp # or ! in the instrument
cluster flashes.
The combination switch resets automatically
after major steering wheel movements.
5 When the parking lamps are on, the tail lamps, the license plate lamps, the side marker lamps, and the
instrument cluster illumination are also on.Lighting251Controls in detailBA 197 USA, CA Edition A 2011; 1; 27, en-UShereepeVersion: 3.0.3.52010-03-24T15:31:10+01:00 - Seite 251Z