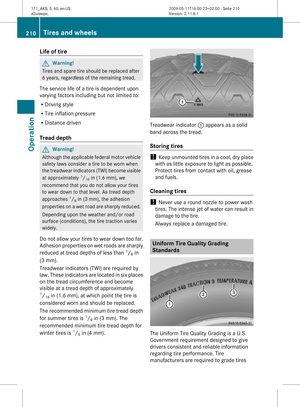
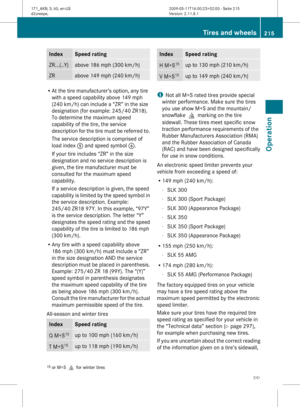
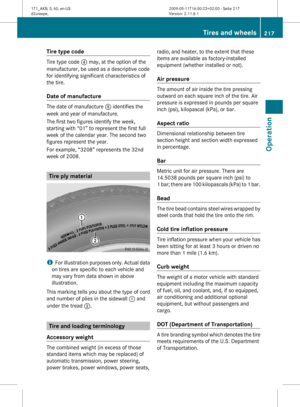
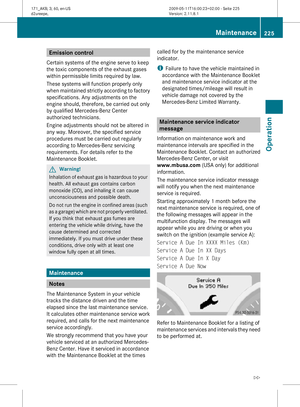
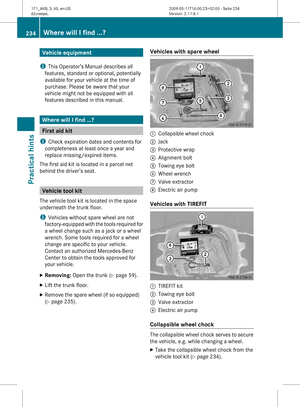
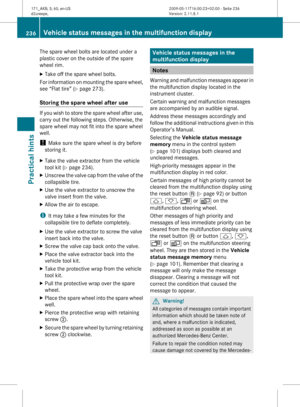
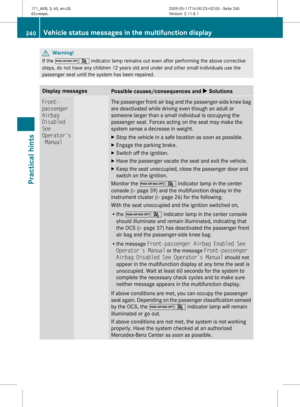
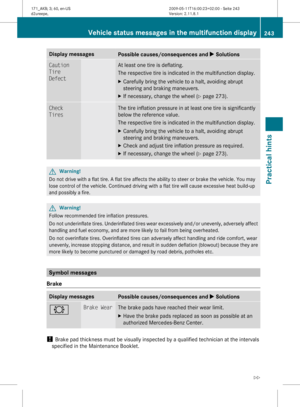
Page 289 of 312

X
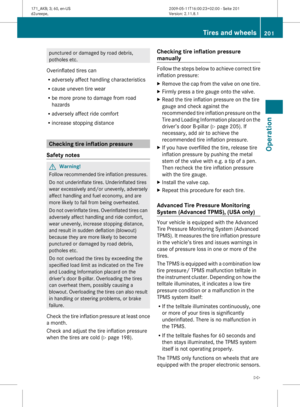
Press mark on cover : as indicated by the
arrow.
X Lift cover : off to reveal the threaded hole
for the towing eye bolt.
Fixing towing eye bolt Example illustration front bumper
X
Take the towing eye bolt and, if so
equipped, the wheel wrench from the
vehicle tool kit (Y page 234).
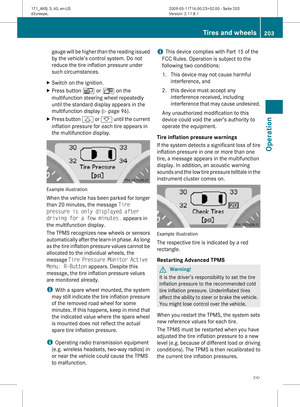
X Screw towing eye bolt ; clockwise into
threaded hole to its stop.
X Insert wheel wrench into towing eye and
tighten towing eye bolt ; by turning it
clockwise.
or
X If your vehicle is not equipped with a wheel
wrench, use a suitable object to turn the
towing eye bolt. Removing towing eye bolt X
Loosen towing eye bolt ; by turning it
counterclockwise.
X Unscrew towing eye bolt ;.
X Reinstalling cover: Fit cover :
(Y page 286) and snap it into place.
X Store the towing eye bolt ; and wheel
wrench back into the vehicle tool kit. Towing with front axle raised
! The vehicle may be towed only for
distances up to 30 miles (50 km) and at a
speed not to exceed 30 mph (50 km/h).
X Make sure the ignition is switched on.
X With the vehicle at a standstill, depress the
brake pedal and keep it pressed.
X Vehicles with manual transmission: Shift
the manual transmission into the neutral
position (no gear selected).
or
X Vehicles with automatic transmission: Shift
the automatic transmission into neutral
position N.
X Release the brake pedal.
X If engaged, release the parking brake.
X Switch off the automatic central locking
(Y page 108).
X Switch off the ignition and leave the
SmartKey in the starter switch.
X Switch on the hazard warning flasher
(Y page 74).
! Because the ESP ®
operates
automatically, the engine and ignition must
be shut off (SmartKey in starter switch
position 0 or 1) when the vehicle is being
towed with the front axle raised.
Active braking action through the ESP ®
may otherwise seriously damage the brake
system which is not covered by the
Mercedes-Benz Limited Warranty. Towing the vehicle
287Practical hints
171_AKB; 3; 60, en-US
d2ureepe, Version: 2.11.8.1 2009-05-11T16:00:23+02:00 - Seite 287 Z
Page 290 of 312

Towing with all wheels on the ground
G
Warning!
If circumstances require towing the vehicle
with all wheels on the ground, always tow with
a tow bar if:
R the engine will not run
R there is a malfunction in the brake system
R there is a malfunction in the power supply
or in the vehicle’s electrical system
This is necessary to adequately control the
towed vehicle.
Prior to towing the vehicle with all wheels on
the ground, make sure the SmartKey is in
starter switch position 2.
If the SmartKey is left in the starter switch
position 0 for an extended period of time, it
can no longer be turned in the switch. In this
case, the steering is locked. To unlock,
remove SmartKey from starter switch and
reinsert. G
Warning!
With the engine not running, there is no power
assistance for the brake and steering
systems. In this case, it is important to keep
in mind that a considerably higher degree of
effort is necessary to brake and steer the
vehicle. Adapt your driving accordingly.
X Make sure the ignition is switched on.
X With the vehicle at a standstill, depress the
brake pedal and keep it pressed.
X Vehicles with manual transmission: Shift
the manual transmission into the neutral
position (no gear selected).
or
X Vehicles with automatic transmission: Shift
the automatic transmission into neutral
position N.
X Release the brake pedal.
X If engaged, release the parking brake.
X Switch on the hazard warning flasher
(Y page 74). !
The vehicle may be towed only for
distances up to 30 miles (50 km) and at a
speed not to exceed 30 mph (50 km/h).
i While being towed with the hazard
warning
flasher in use, use the combination
switch in the usual manner to signal turns.
Only the selected turn signal will operate.
Upon canceling the turn signal, the hazard
warning flasher will operate again. Fuses
Introduction
The electrical fuses in your vehicle serve to
switch off malfunctioning power circuits.
If a fuse is blown, the components and
systems secured by that fuse will stop
operating. G
Warning!
Only use fuses approved by Mercedes-Benz
with
the specified amperage for the system in
question and do not attempt to repair or
bridge a blown fuse. Using other than
approved fuses or using repaired or bridged
fuses may cause an overload leading to a fire,
and/or cause damage to electrical
components and/or systems. Have the cause
determined and remedied by an authorized
Mercedes-Benz Center.
A blown fuse must be replaced by an
appropriate spare fuse (recognizable by its
color or the fuse rating given on the fuse) of
the amperage recommended in the fuse
chart. Any Mercedes-Benz Center will be glad
to advise you on this subject.
i In case of a blown fuse contact Roadside
Assistance or an authorized Mercedes-
Benz Center.
If a newly inserted fuse blows again, have the
cause determined and rectified by an
authorized Mercedes-Benz Center.
The fuse chart is located in the fuse box in the
passenger compartment. The fuse chart 288
Fuses
Practical hints
171_AKB; 3; 60, en-US
d2ureepe,
Version: 2.11.8.1 2009-05-11T16:00:23+02:00 - Seite 288
Page 291 of 312

explains the fuse allocation and fuse
amperages.
Before replacing fuses
X Engage the parking brake.
X Make sure the automatic transmission is in
park position P (manual transmission to
Neutral).
X Switch off all electrical consumers.
X Turn off the engine.
X Remove the SmartKey from the starter
switch. Fuse box in passenger compartment
! Do not use sharp objects such as a
screwdriver to open the fuse box cover in
the dashboard. You could damage the fuse
box cover or the dashboard. X
Open the driver’s door.
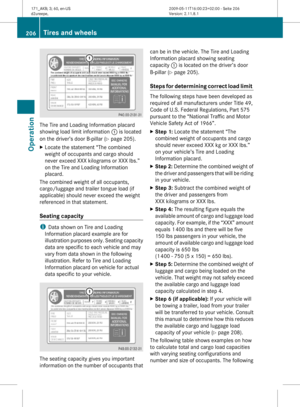
X Opening: Insert flat, blunt object as a lever
in recess on the edge of cover : at the
position indicated by the arrow.
X Loosen fuse box cover : from the
dashboard using the lever.
X Closing: Hook fuse box cover : into the
opening at the front.
X Press fuse box cover : back on until it
engages.
! The fuse box cover must be properly
positioned as described. Otherwise, moisture or dirt could enter the fuse box
and possibly impair fuse operation. Fuse box in engine compartment
X Open the hood. X
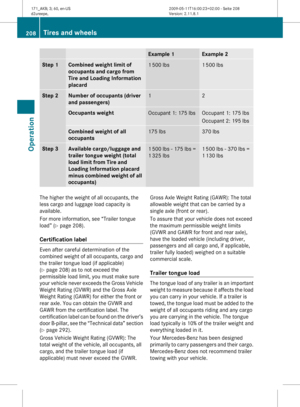
With a dry cloth, remove any moisture from
fuse box cover :.
X Opening: Release clamps ;.
X Remove fuse box cover =.
X Closing: Make sure the sealing rubber is
positioned properly.
X Press fuse box cover = down and secure
with clamps ;.
! The fuse box cover must be properly
positioned as described. Otherwise,
moisture or dirt could enter the fuse box
and possibly impair fuse operation.
X Close the hood after checking or replacing
fuses. Fuses
289Practical hints
171_AKB; 3; 60, en-US
d2ureepe, Version: 2.11.8.1 2009-05-11T16:00:23+02:00 - Seite 289 Z
Page 292 of 312
290 171_AKB; 3; 60, en-US
d2ureepe,
Version: 2.11.8.1 2009-05-11T16:00:23+02:00 - Seite 290
Page 293 of 312
Vehicle equipment ............................
292
Parts service ..................................... 292
Warranty coverage ...........................292
Identification labels ..........................292
Vehicle specification SLK 300
(171.454) ........................................... 294
Vehicle specification SLK 350
(171.458) ........................................... 295
Vehicle specification SLK 55 AMG
(171.473) ........................................... 296
Rims and tires ................................... 297
Fuels, coolants, lubricants, etc. ......300 291Technical data
171_AKB; 3; 60, en-US
d2ureepe,
Version: 2.11.8.1 2009-05-11T16:00:23+02:00 - Seite 291
Page 294 of 312

Vehicle equipment
i This Operator’s Manual describes all
features, standard or optional, potentially
available for your vehicle at the time of
purchase. Please be aware that your
vehicle might not be equipped with all
features described in this manual. Parts service
All authorized Mercedes-Benz Centers
maintain a stock of Genuine Mercedes-Benz
Parts required for maintenance and repair
work. In addition, strategically located parts
distribution centers provide quick and
reliable parts service.
More than 300 000 different parts for
Mercedes-Benz models are available.
Genuine Mercedes-Benz Parts are subjected
to stringent quality inspections. Each part has
been specifically developed, manufactured or
selected for and adapted to Mercedes-Benz
vehicles.
Therefore, Genuine Mercedes-Benz Parts
should be installed.
! Do not use non-genuine Mercedes-Benz
parts and accessories not authorized by
Mercedes-Benz. Doing so could damage
the vehicle, which is not covered by the
Mercedes-Benz Limited Warranty. Also, it
could compromise the vehicle’s durability
or safety. Warranty coverage
Your vehicle is covered under the terms of the
warranties printed in the Service and
Warranty Information booklet.
Your authorized Mercedes-Benz Center will
exchange or repair any defective parts
originally installed in the vehicle in
accordance with the terms of the following
warranties: R
New Vehicle Limited Warranty
R Emission System Warranty
R Emission Performance Warranty
R California, Connecticut, Maine,
Massachusetts, New York, Pennsylvania,
Rhode Island, and Vermont Emission
Control Systems Warranty
R State Warranty Enforcement Laws (Lemon
Laws)
Replacement parts and accessories are
covered by the Mercedes-Benz Parts and
Accessories warranties, copies of which are
available at any authorized Mercedes-Benz
Center. Loss of Service and Warranty
Information booklet
Should you lose your Service and Warranty
Information booklet, have an authorized
Mercedes-Benz Center arrange for a
replacement. It will be mailed to you. Identification labels292
Identification labelsTechnical data
171_AKB; 3; 60, en-US
d2ureepe,
Version: 2.11.8.1 2009-05-11T16:00:23+02:00 - Seite 292
Page 295 of 312

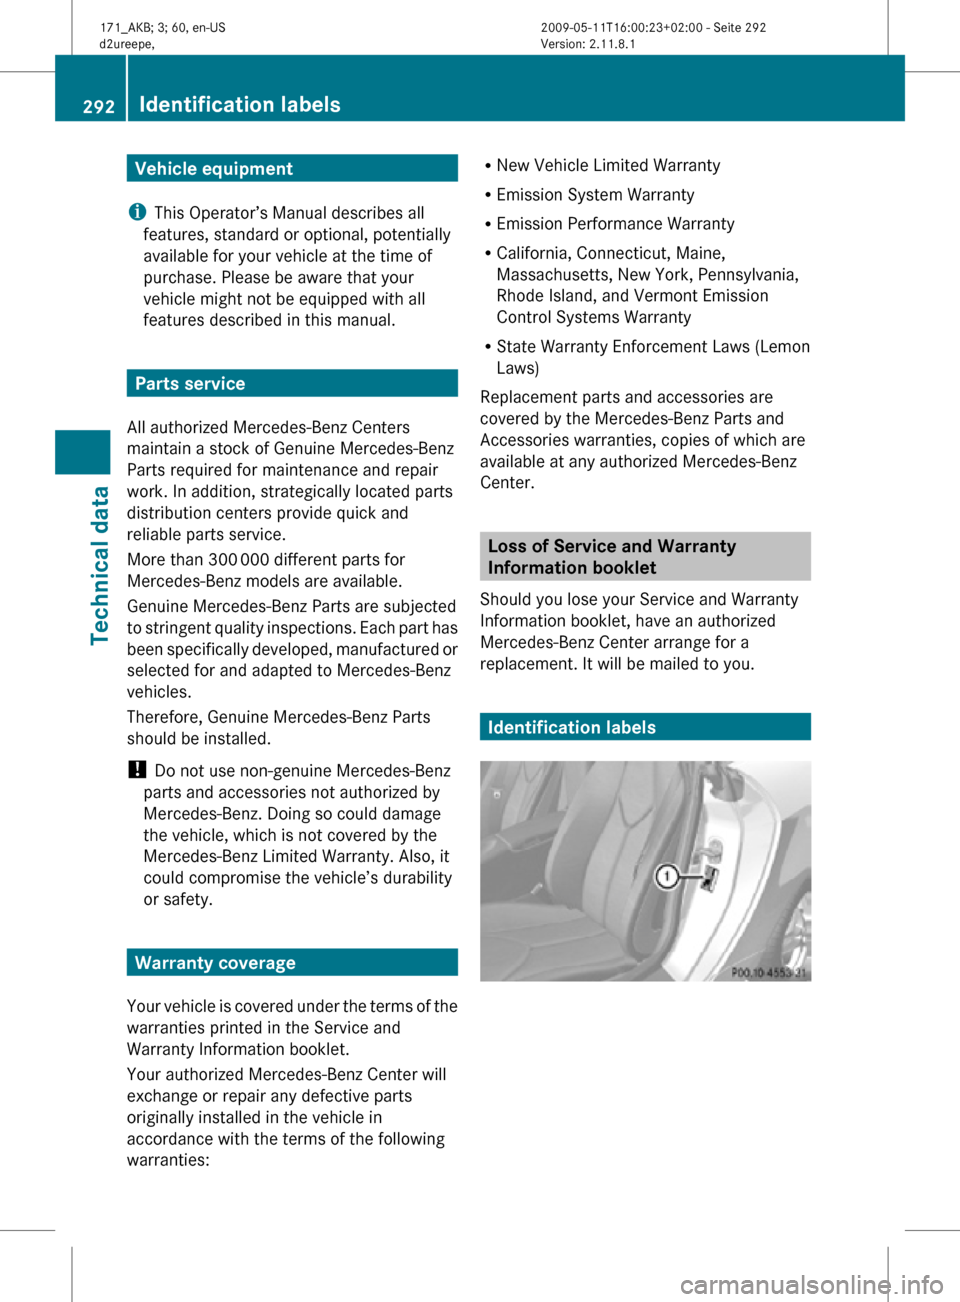
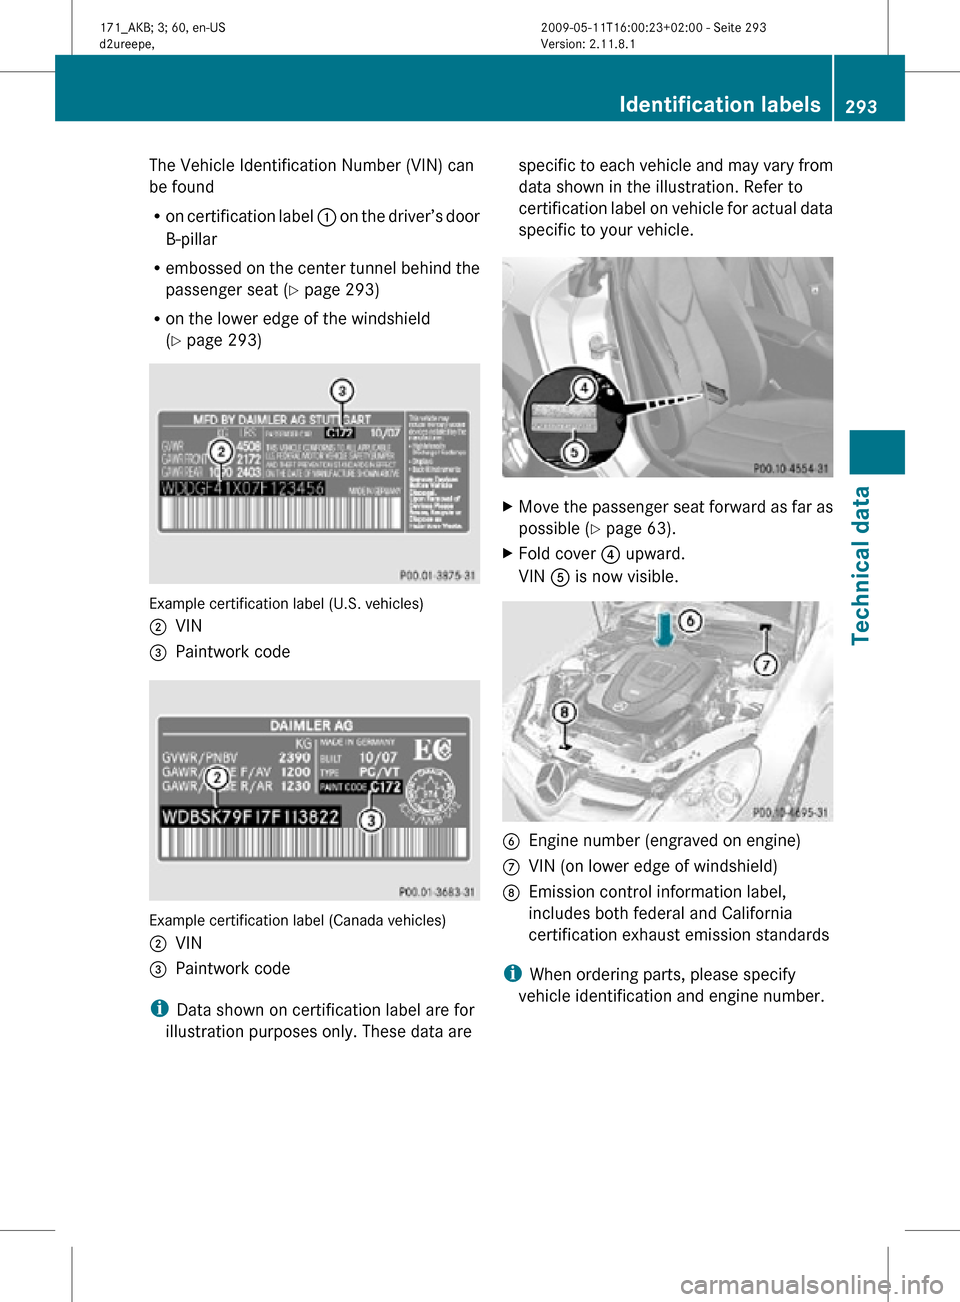
The Vehicle Identification Number (VIN) can
be found
R
on certification label : on the driver’s door
B-pillar
R embossed on the center tunnel behind the
passenger seat ( Y page 293)
R on the lower edge of the windshield
(Y page 293) Example certification label (U.S. vehicles)
;
VIN
= Paintwork code Example certification label (Canada vehicles)
;
VIN
= Paintwork code
i Data shown on certification label are for
illustration purposes only. These data are specific to each vehicle and may vary from
data shown in the illustration. Refer to
certification label on vehicle for actual data
specific to your vehicle.
X
Move the passenger seat forward as far as
possible ( Y page 63).
X Fold cover ? upward.
VIN A is now visible. B
Engine number (engraved on engine)
C VIN (on lower edge of windshield)
D Emission control information label,
includes both federal and California
certification exhaust emission standards
i When ordering parts, please specify
vehicle identification and engine number. Identification labels
293Technical data
171_AKB; 3; 60, en-US
d2ureepe, Version: 2.11.8.1 2009-05-11T16:00:23+02:00 - Seite 293 Z
Page 296 of 312

Vehicle specification SLK 300
(171.454)
The quoted data apply only to the standard
vehicle. Contact an authorized Mercedes-
Benz
Center for the corresponding data of all
special bodies and special equipment. Engine SLK 300
Engine, type
272
Mode of operation
4-stroke engine,
gasoline injection No. of cylinders
6
Bore
3.46 in (88.00 mm)
Stroke
3.23 in (82.10 mm)
Total piston
displacement
182.8 cu in
(2 996 cm 3
) Compression
ratio
11.3:1
Output acc. to
SAE J 1349
17 228 hp/6
100 rpm
(170 kW/6 100 rpm) Maximum torque
acc.
to SAE J 1349 221 lb-ft/
2 500 - 5 000 rpm
(300 Nm/
2 500 - 5 000 rpm) Maximum engine
speed
6 500 rpm
Firing order
1-4-3-6-2-5
Poly-V-belt
2 401 mm
Electrical system SLK 300
Alternator
14 V/150 A
Starter motor
12 V/1.4 kW
Battery
12 V/74 Ah Electrical system SLK 300
Spark plugs, type
Bosch Y 7 MPP33
Spark plugs,
electrode gap
0.031 in (0.8 mm)
Spark plugs,
tightening torque
15 - 18 lb-ft
(20 - 25 Nm) Main dimensions SLK 300
Overall vehicle
length
161.7 in (4
107 mm) Overall vehicle
width
18 79.2 in (2
012 mm) Overall vehicle
height
51.0 in (1
296 mm) 60.8 in (1
545 mm) 19 Wheelbase
95.7 in (2
430 mm) Track, front
60.2 in (1
530 mm) Track, rear
61.0 in (1
549 mm) Turning circle
34.5 ft (10.5 m)
Weights SLK 300
Roof load
max. 110 lb (50 kg)
Trunk load
max. 220 lb (100 kg)
!
This
vehicle is not designed to carry items
on its roof. Roof rails and any roof-mounted
devices, unless expressly approved by
Mercedes-Benz for use on this vehicle
model, must not be used as they will
damage the vehicle and retractable
hardtop.
At time of printing, Mercedes-Benz does
not offer any roof racks or any other roof-
mounted devices for use on this vehicle.
17 Premium fuel required. Performance may vary with fuel octane rating.
18 Exterior rear view mirrors folded out.
19 When opening/closing hardtop. 294
Vehicle specification SLK 300 (171.454)
Technical data
171_AKB; 3; 60, en-US
d2ureepe,
Version: 2.11.8.1 2009-05-11T16:00:23+02:00 - Seite 294