2011 MERCEDES-BENZ G-CLASS turn signal
[x] Cancel search: turn signalPage 96 of 288
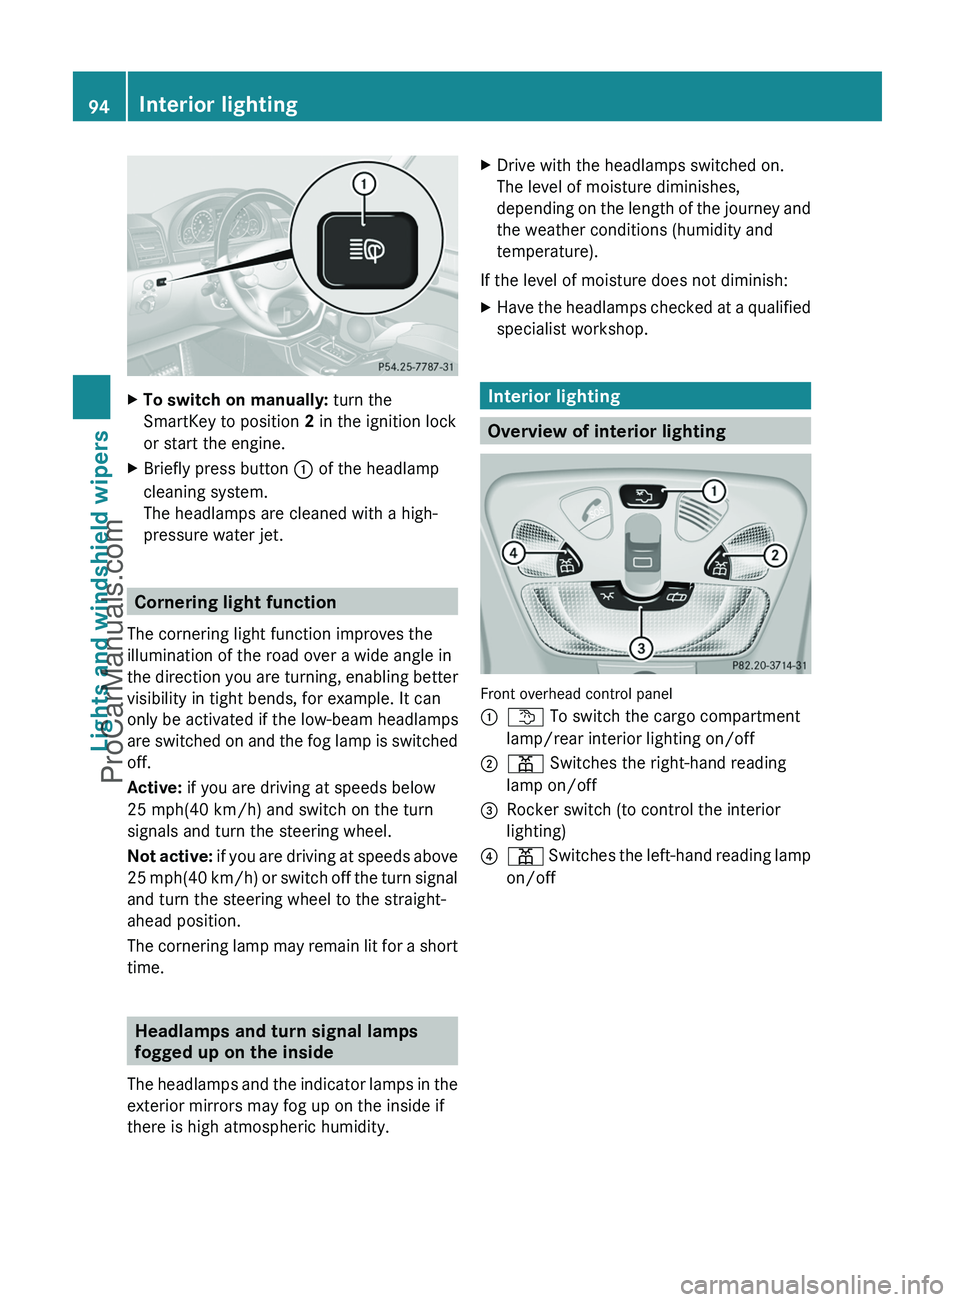
XTo switch on manually: turn the
SmartKey to position 2 in the ignition lock
or start the engine.XBriefly press button : of the headlamp
cleaning system.
The headlamps are cleaned with a high-
pressure water jet.
Cornering light function
The cornering light function improves the
illumination of the road over a wide angle in
the direction you are turning, enabling better
visibility in tight bends, for example. It can
only be activated if the low-beam headlamps
are switched on and the fog lamp is switched
off.
Active: if you are driving at speeds below
25 mph(40 km/h) and switch on the turn
signals and turn the steering wheel.
Not active: if you are driving at speeds above
25 mph (40 km/h) or switch off the turn signal
and turn the steering wheel to the straight-
ahead position.
The cornering lamp may remain lit for a short
time.
Headlamps and turn signal lamps
fogged up on the inside
The headlamps and the indicator lamps in the
exterior mirrors may fog up on the inside if
there is high atmospheric humidity.
XDrive with the headlamps switched on.
The level of moisture diminishes,
depending on the length of the journey and
the weather conditions (humidity and
temperature).
If the level of moisture does not diminish:
XHave the headlamps checked at a qualified
specialist workshop.
Interior lighting
Overview of interior lighting
Front overhead control panel
:t To switch the cargo compartment
lamp/rear interior lighting on/off;p Switches the right-hand reading
lamp on/off=Rocker switch (to control the interior
lighting)?p Switches the left-hand reading lamp
on/off94Interior lightingLights and windshield wipers
ProCarManuals.com
Page 99 of 288
Halogen bulbs are pressurized and could
explode when you change them, particularly
if they are very hot. You should therefore wear
eye protection and gloves when you are
changing them.
There are bulbs other than the Xenon bulbs
that you cannot replace. Replace only the
bulbs listed ( Y page 97). Have the bulbs that
you cannot replace yourself changed at a
qualified specialist workshop.
Mercedes-Benz recommends that you use an
authorized Mercedes-Benz Center for this
purpose. In particular, work relevant to safety
or on safety-related systems must be carried
out at a qualified specialist workshop.
If you require assistance changing bulbs,
consult a qualified specialist workshop.
Do not touch the glass tube of new bulbs with
your bare hands. Even minor contamination
can burn into the glass surface and reduce
the service life of the bulbs. Always use a lint-
free cloth or only touch the base of the bulb
when installing.
Only use bulbs of the correct type.
If the new bulb still does not light up, consult
a qualified specialist workshop.
Bulbs and lamps are an important aspect of
vehicle safety. You must therefore make sure
that these function correctly at all times.
Have the headlamp setting checked regularly.
Before changing bulbs
Have the following bulbs changed at a
qualified specialist workshop, e.g. an
authorized Mercedes-Benz Center:
R additional turn signals in the exterior
mirrors
R high-mounted brake lamp
R high-beam/low-beam headlamps (Xenon
bulbs)
R parking lamp/standing lamp
R license plate lamp
i Individual segments of the license plate
lamp LEDs may fail without a display
message appearing in the multifunction
display. Check the license plate lamp
regularly. Consult a qualified specialist
workshop if necessary.
You can replace the following bulbs:
R fog lamp/cornering light with fog lamp
function
R turn signal lamp (front)
R brake/tail lamp
R turn signal lamp (rear)
R tail lamp/standing lamp
R backup lamp
R rear fog lamp
R side marker lamp
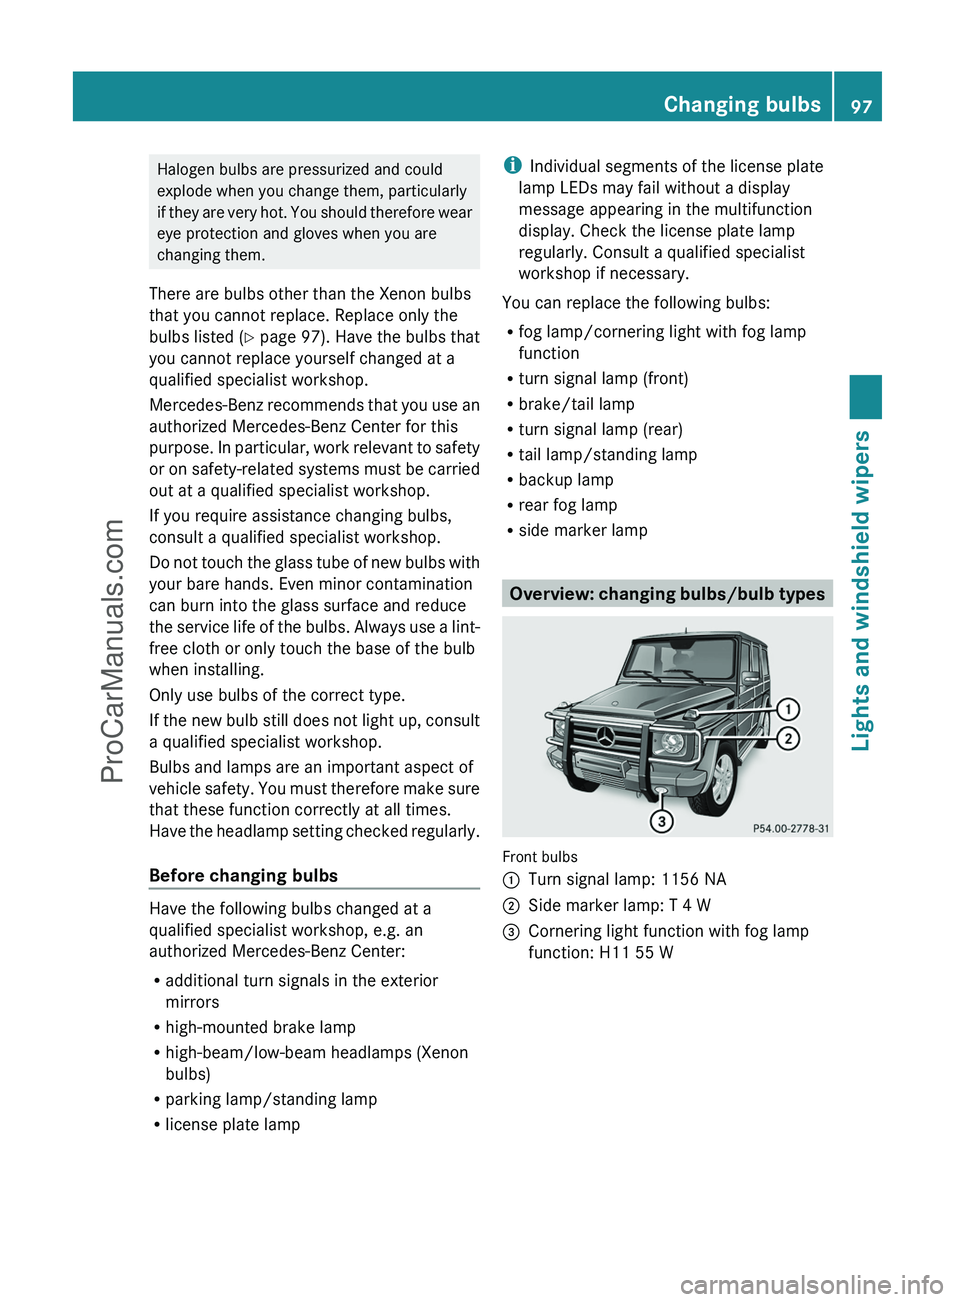
Overview: changing bulbs/bulb types
Front bulbs
:Turn signal lamp: 1156 NA;Side marker lamp: T 4 W=Cornering light function with fog lamp
function: H11 55 WChanging bulbs97Lights and windshield wipersZProCarManuals.com
Page 100 of 288
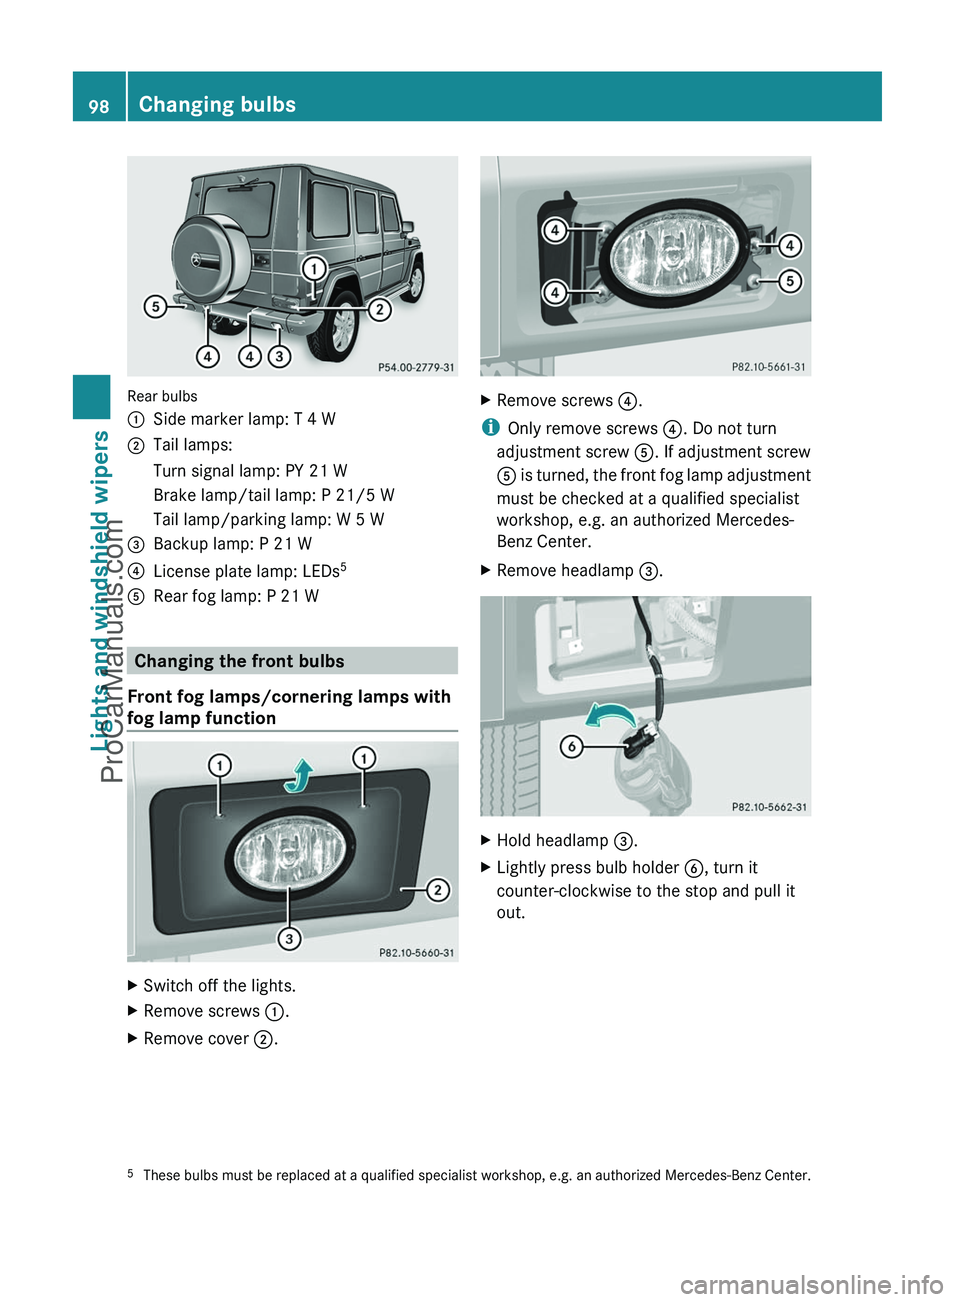
Rear bulbs
:Side marker lamp: T 4 W;Tail lamps:Turn signal lamp: PY 21 WBrake lamp/tail lamp: P 21/5 WTail lamp/parking lamp: W 5 W=Backup lamp: P 21 W?License plate lamp: LEDs5ARear fog lamp: P 21 W
Changing the front bulbs
Front fog lamps/cornering lamps with
fog lamp function
XSwitch off the lights.XRemove screws :.XRemove cover ;.XRemove screws ?.
i
Only remove screws ?. Do not turn
adjustment screw A. If adjustment screw
A is turned, the front fog lamp adjustment
must be checked at a qualified specialist
workshop, e.g. an authorized Mercedes-
Benz Center.
XRemove headlamp =.XHold headlamp =.XLightly press bulb holder B, turn it
counter-clockwise to the stop and pull it
out.5 These bulbs must be replaced at a qualified specialist workshop, e.g. an authorized Mercedes-Benz Center.98Changing bulbsLights and windshield wipers
ProCarManuals.com
Page 101 of 288
XTake bulb C out of bulb holder B.XInsert the new bulb into bulb holder B.XInsert bulb holder B into headlamp = and
turn it clockwise to the stop.XInsert headlamp =.XReplace and tighten screws ?.XPosition cover ;.XReplace and tighten screws :.
Turn signal
XG 55 AMG: release the turn signal
protection grille from the rear of the
bracket and fold it forward.
! Make sure that the headlamp protection
grille does not strike against painted
surfaces.
You could otherwise damage the
paintwork.
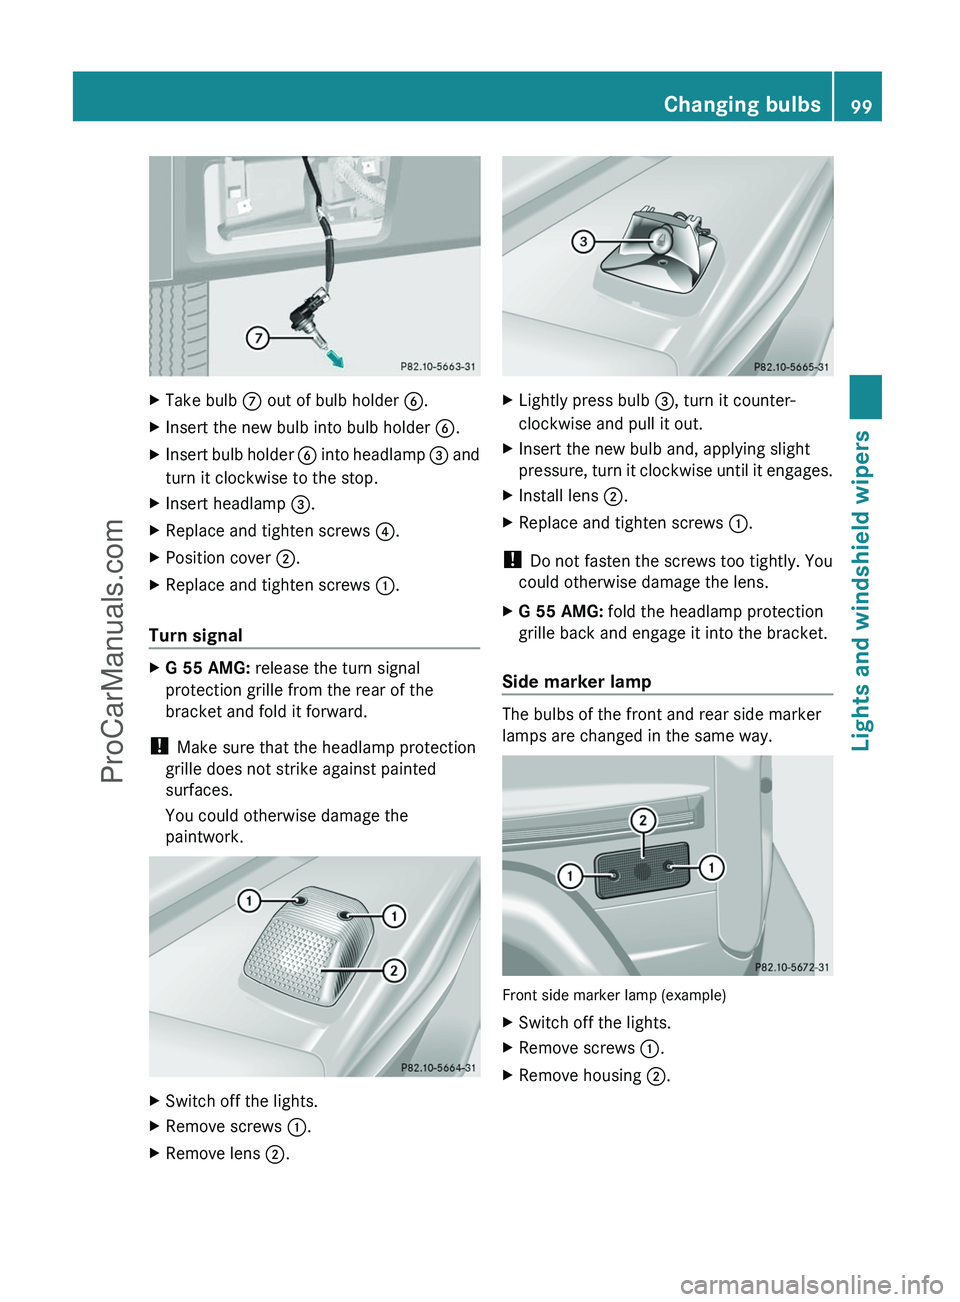
XSwitch off the lights.XRemove screws :.XRemove lens ;.XLightly press bulb =, turn it counter-
clockwise and pull it out.XInsert the new bulb and, applying slight
pressure, turn it clockwise until it engages.XInstall lens ;.XReplace and tighten screws :.
!
Do not fasten the screws too tightly. You
could otherwise damage the lens.
XG 55 AMG: fold the headlamp protection
grille back and engage it into the bracket.
Side marker lamp
The bulbs of the front and rear side marker
lamps are changed in the same way.
Front side marker lamp (example)
XSwitch off the lights.XRemove screws :.XRemove housing ;.Changing bulbs99Lights and windshield wipersZProCarManuals.com
Page 103 of 288
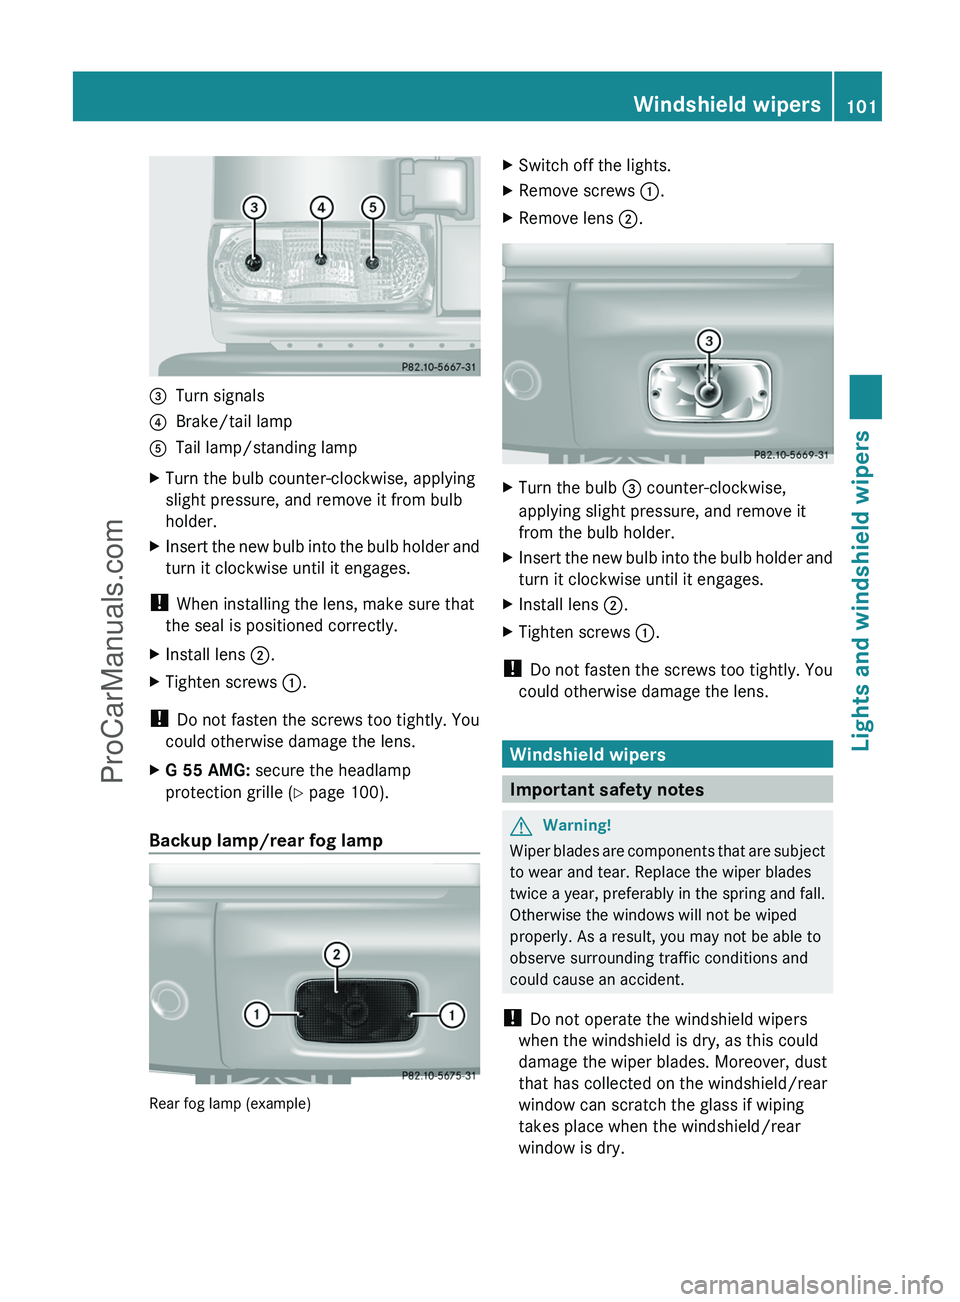
=Turn signals?Brake/tail lampATail lamp/standing lampXTurn the bulb counter-clockwise, applying
slight pressure, and remove it from bulb
holder.XInsert the new bulb into the bulb holder and
turn it clockwise until it engages.
! When installing the lens, make sure that
the seal is positioned correctly.
XInstall lens ;.XTighten screws :.
!
Do not fasten the screws too tightly. You
could otherwise damage the lens.
XG 55 AMG: secure the headlamp
protection grille ( Y page 100).
Backup lamp/rear fog lamp
Rear fog lamp (example)
XSwitch off the lights.XRemove screws :.XRemove lens ;.XTurn the bulb = counter-clockwise,
applying slight pressure, and remove it
from the bulb holder.XInsert the new bulb into the bulb holder and
turn it clockwise until it engages.XInstall lens ;.XTighten screws :.
!
Do not fasten the screws too tightly. You
could otherwise damage the lens.
Windshield wipers
Important safety notes
GWarning!
Wiper blades are components that are subject
to wear and tear. Replace the wiper blades
twice a year, preferably in the spring and fall.
Otherwise the windows will not be wiped
properly. As a result, you may not be able to
observe surrounding traffic conditions and
could cause an accident.
! Do not operate the windshield wipers
when the windshield is dry, as this could
damage the wiper blades. Moreover, dust
that has collected on the windshield/rear
window can scratch the glass if wiping
takes place when the windshield/rear
window is dry.
Windshield wipers101Lights and windshield wipersZProCarManuals.com
Page 174 of 288

LightsDisplay messagesPossible causes/consequences and M Solutionsb
Low Beam Left
or
Low Beam RightThe left or right-hand low-beam headlamp is defective.XVisit a qualified specialist workshop.b
AUTO-Light
InoperativeThe light sensor is defective. The low-beam headlamps are
switched on.XUSA only: set the lights to manual operation in the on-board
computer ( Y page 164).XSwitch the lights on and off using the light switch.XVisit a qualified specialist workshop.b
Turn Signal Rear
Left Auxiliary
Bulb On
or
Turn Signal Rear
Right Auxiliary
Bulb OnThe rear left-hand or rear right-hand turn signal is defective.
Another lamp has taken over its function.XReplace the bulb ( Y page 96).b
Turn Signal Left
Side Mirror
or
Turn Signal Right
Side MirrorThe turn signal in the left-hand or right-hand exterior mirror is
defective. These messages will only appear if all of the turn signal's
LEDs have failed.XVisit a qualified specialist workshop.b
Turn Signal Front
Left Auxiliary
Bulb On
or
Turn Signal Front
Right Auxiliary
Bulb OnThe front left-hand or front right-hand turn signal is defective.
Another lamp has taken over its function.XReplace the bulb ( Y page 96).b
Brake Lamp Left
or
Brake Lamp RightThe left or right-hand brake lamp is defective.XReplace the bulb ( Y page 96).172Display messagesOn-board computer and displays
ProCarManuals.com
Page 211 of 288
Programming the remote control
Programming
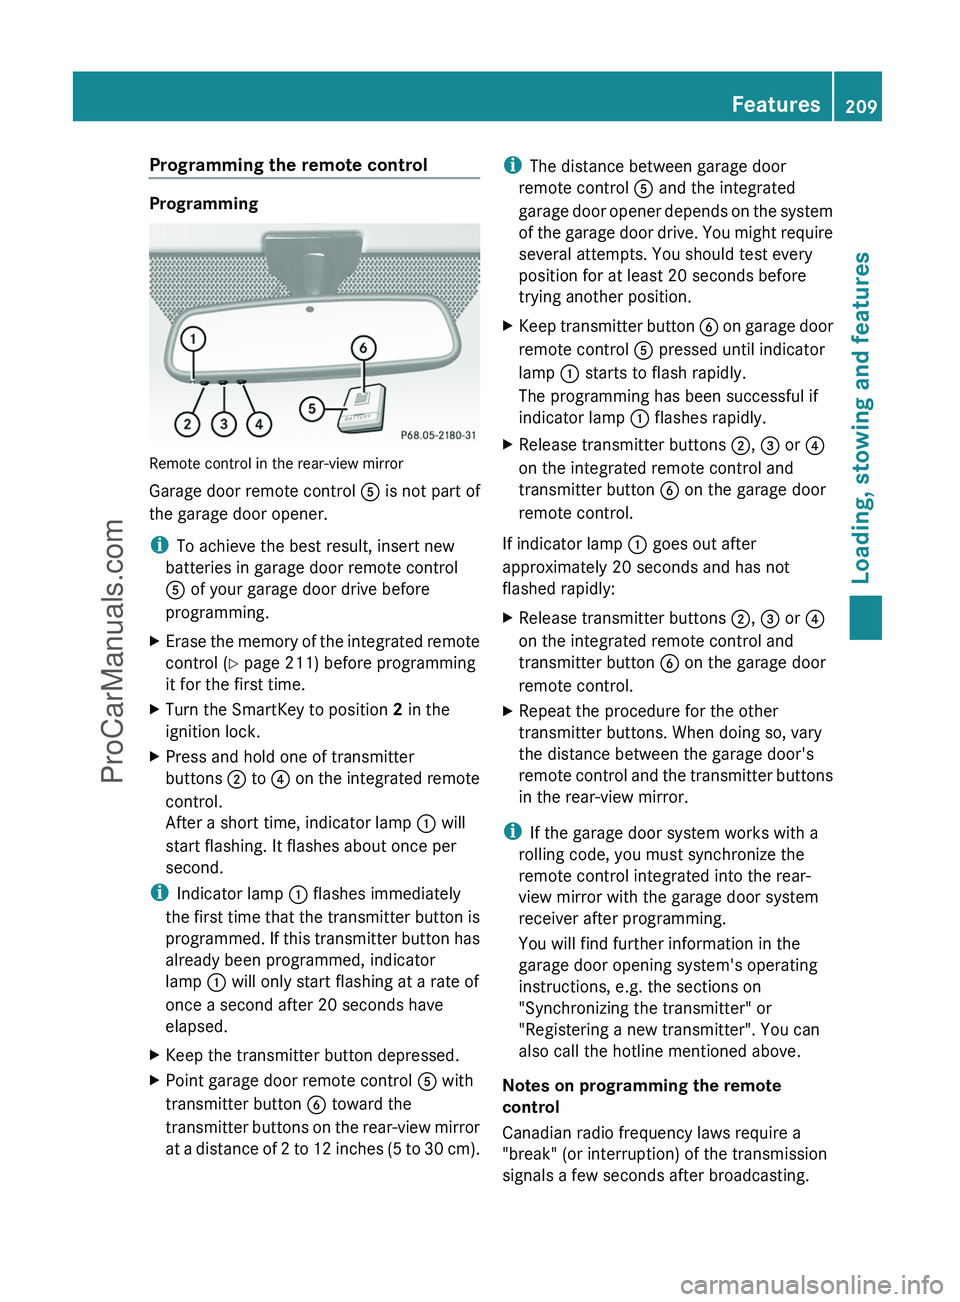
Remote control in the rear-view mirror
Garage door remote control A is not part of
the garage door opener.
i To achieve the best result, insert new
batteries in garage door remote control
A of your garage door drive before
programming.
XErase the memory of the integrated remote
control ( Y page 211) before programming
it for the first time.XTurn the SmartKey to position 2 in the
ignition lock.XPress and hold one of transmitter
buttons ; to ? on the integrated remote
control.
After a short time, indicator lamp : will
start flashing. It flashes about once per
second.
i Indicator lamp : flashes immediately
the first time that the transmitter button is
programmed. If this transmitter button has
already been programmed, indicator
lamp : will only start flashing at a rate of
once a second after 20 seconds have
elapsed.
XKeep the transmitter button depressed.XPoint garage door remote control A with
transmitter button B toward the
transmitter buttons on the rear-view mirror
at a distance of 2 to 12 inches (5 to 30 cm).i The distance between garage door
remote control A and the integrated
garage door opener depends on the system
of the garage door drive. You might require
several attempts. You should test every
position for at least 20 seconds before
trying another position.XKeep transmitter button B on garage door
remote control A pressed until indicator
lamp : starts to flash rapidly.
The programming has been successful if
indicator lamp : flashes rapidly.XRelease transmitter buttons ;, = or ?
on the integrated remote control and
transmitter button B on the garage door
remote control.
If indicator lamp : goes out after
approximately 20 seconds and has not
flashed rapidly:
XRelease transmitter buttons ;, = or ?
on the integrated remote control and
transmitter button B on the garage door
remote control.XRepeat the procedure for the other
transmitter buttons. When doing so, vary
the distance between the garage door's
remote control and the transmitter buttons
in the rear-view mirror.
i If the garage door system works with a
rolling code, you must synchronize the
remote control integrated into the rear-
view mirror with the garage door system
receiver after programming.
You will find further information in the
garage door opening system's operating
instructions, e.g. the sections on
"Synchronizing the transmitter" or
"Registering a new transmitter". You can
also call the hotline mentioned above.
Notes on programming the remote
control
Canadian radio frequency laws require a
"break" (or interruption) of the transmission
signals a few seconds after broadcasting.
Features209Loading, stowing and featuresZProCarManuals.com
Page 212 of 288
Therefore, these signals may not last long
enough for the integrated remote control to
recognize the signal during programming.
Comparable with Canadian law, some U.S.
garage door openers also have a built-in
"interruption".
If you live in Canada or have difficulties
programming the garage door opener
(regardless of where you live) when using the
programming steps (see above), proceed as
follows:XPress transmitter button ( ;, = or ?) and
hold it down during the following steps until
the setup has been completed
successfully.XAt the same time, press transmitter button
B of the garage door remote control for
two seconds, then release it for two
seconds, then press it again for two
seconds.XRepeat this sequence on transmitter
button B of the garage door remote
control until the frequency signal has been
saved.XIf the setup procedure is successful,
indicator lamp : flashes once slowly and
goes out after a few seconds.XContinue with the other programming
steps (see above).
Problems when programming
If you have problems when programming the
integrated remote control, please note the
following:
R check the transmitter frequency of garage
door remote control A (which can usually
be found on the rear of the remote control).
The integrated remote control is
compatible with devices that operate at
frequencies between 280 and 390 MHz.
R replace the batteries in garage door remote
control A. This increases the likelihood of
garage door remote control A sending a
strong and precise signal to the integrated
remote control on the rear-view mirror.
R when programming, hold garage door
remote control A at varying distances and
angles from the transmitter button which
you are programming. Try different angles
at a distance between 2 and 12 inches (5
to 30 cm) or the same angle at varying
distances.
R if there is another garage door remote
control for the same device, perform the
programming steps again using that garage
door opener. Before performing these
steps, make sure that new batteries have
been installed in the garage door remote
control.
R align the antenna cable of the garage door
opener unit. This can improve signal
reception/transmission.
Opening/closing the garage door
Once programmed, the integrated remote
control will assume the function of the garage
door system's remote control. Please also
read the operating instructions for the garage
door system.
XTurn the SmartKey to position 2 in the
ignition lock.XPress transmitter button ;, = or ? on
the integrated remote control in the rear-
view mirror that is programmed to operate
the garage door.
Garage door system with fixed code:
indicator lamp : lights up continuously.
Garage door system with rolling code:
indicator lamp : flashes briefly and then
lights up for approximately two seconds.
This is repeated for up to 20 seconds.
i The transmitter will transmit a signal for
as long as the transmitter button is being
pressed. The transmission will be halted
after a maximum of 20 seconds and
indicator lamp : will flash. Press the
transmitter button again, if necessary.
210FeaturesLoading, stowing and features
ProCarManuals.com