2011 MERCEDES-BENZ E-CLASS CABRIOLET reset
[x] Cancel search: resetPage 221 of 353

i
If the gearshift recommendation is shown
in the multifunction display,itisn ot shown
in the status bar.
For further information on gearshift recom-
mendations, see (Y page 154).
Resetting values You can reset the values of the following func-
tions:
R
trip meter
R trip computer "From start"
R trip computer "From reset"
X Press the =or; button on the steer-
ing wheeltos elect theTrip menu.
X Press the 9or: button to select the
function that you wish to reset.
X Press a. Resetting the trip computer "From start" (example)
X Press :to select Yes and press
a
to confirm. Navigation menu
Displaying navigatio ninstructions In the
Navi menu, the multifunction display
shows navigation instructions. For more
information, see the separate operating
instructions.
X Switch on the audio system or COMAND
APS (see the separate operating instruc-
tions).
X Press the =or; button on the steer-
ing wheeltos elect theNavi menu.Route guidance not active :
Direction of travel
; Current street
Activated route guidance No change of directio
nannounced :
Distance to the destination
; Distance to the next change of direction
= Current street
? Symbol for "follow the road's course"
Change of directio nannounced without a
lane recommendation :
Roadtow hich the change of direction
leads
; Distance to change of direction and visual
distance display
= Current street
? Change-of-direction icon
When achange of direction has been
announced, you wills ee visualdistancedis-
play ;nex ttot he symbol for change of 218
Menus and submenusOn-board computer and displays
Page 227 of 353

Vehicles with Parking Guidance:
if PARK-
TRONIC is activate dand yo uare driving at a
spee dunder 35 km/h, the jParking Guid-
ance symbol is show ninstea doftheÄ
symbol.
Activating/deactivating Attention
Assist X
Press =or; on the steering wheel
to select the Assist. menu.
X Press the 9or: button to select
Attention Asst. .
X Press a.
The current selection is displayed.
X To activate/deactivate: pressa
again.
When ATTENTION ASSIST (Y page 194) is
activated, the Àsymbol appears in the
multifunction displayw hen the ignition is on.
Activating/deactivating Blind Spot
Assist You can use the
Blind Spot Asst. function
to activate or deactivate Blind Spot Assist
(Y page 196) or Active Blind Spot Assist
(Y page 199).
X Press =or; on the steering wheel
to select the Assist. menu.
X Press 9or: to select Blind Spot
Asst. .
X Press a.
If the function is activated, the monitored
areas in the multifunction displayl ight up
red.
X To activate/deactivate: pressa
again.
Activating/deactivating Lane Keeping
Assist You can use the
Lane Keep. Asst. function
to activate/deactivate Lane Keeping Assist
(Y page 198) or Active Lane Keeping Assist
(Y page 202). X
Press =or; on the steering wheel
to select the Assist. menu.
X Press 9or: to select Lane Keep.
Asst. .
X Press a.
If the function is activated, the lane marking
symbol in the multifunction displayl ights
up red.
X To activate/deactivate: pressa
again.
When Lane Keeping Assist or Active Lane
Keeping Assist is activated, the Ãsymbol
appears in the multifunction displayw hen the
ignition is on. Service menu
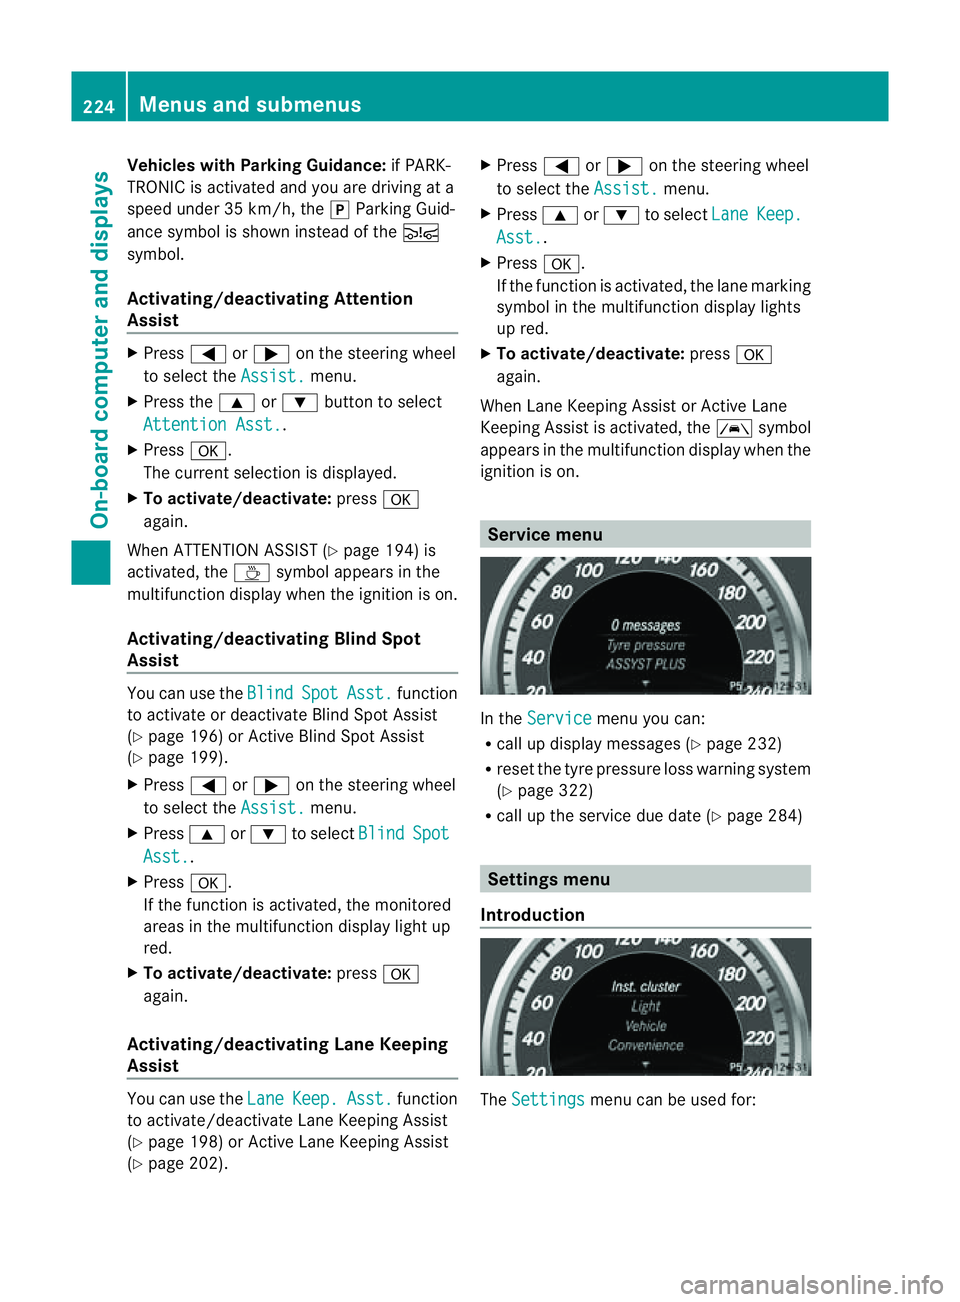
In the
Service menu you can:
R call up displaym essages (Ypage 232)
R reset the tyre pressure loss warning system
(Y page 322)
R call up the service due date (Y page 284) Settings menu
Introduction The
Settings menu can be used for:224
Menus and submenusOn-board computer and displays
Page 234 of 353

open
adoor, the exterior mirrors fold out
again.
If you have switched the function on and you
fold the exterior mirrors in using the button
on the door (Y page 110), they will not fold
out automatically. The exterior mirrors can
then only be folded out using the button on
the door.
X Press the =or; button on the steer-
ing wheel to select the Settings menu.
X Press the :or9 button to select the
Convenience submenu.
X Press the abutton to confirm.
X Press the :or9 to select the
Auto. fold in function.
If the Auto. fold in function is activated,
the vehicle's exterior mirror is displayed in
red in the multifunction display.
X Press the abutton to save the setting.
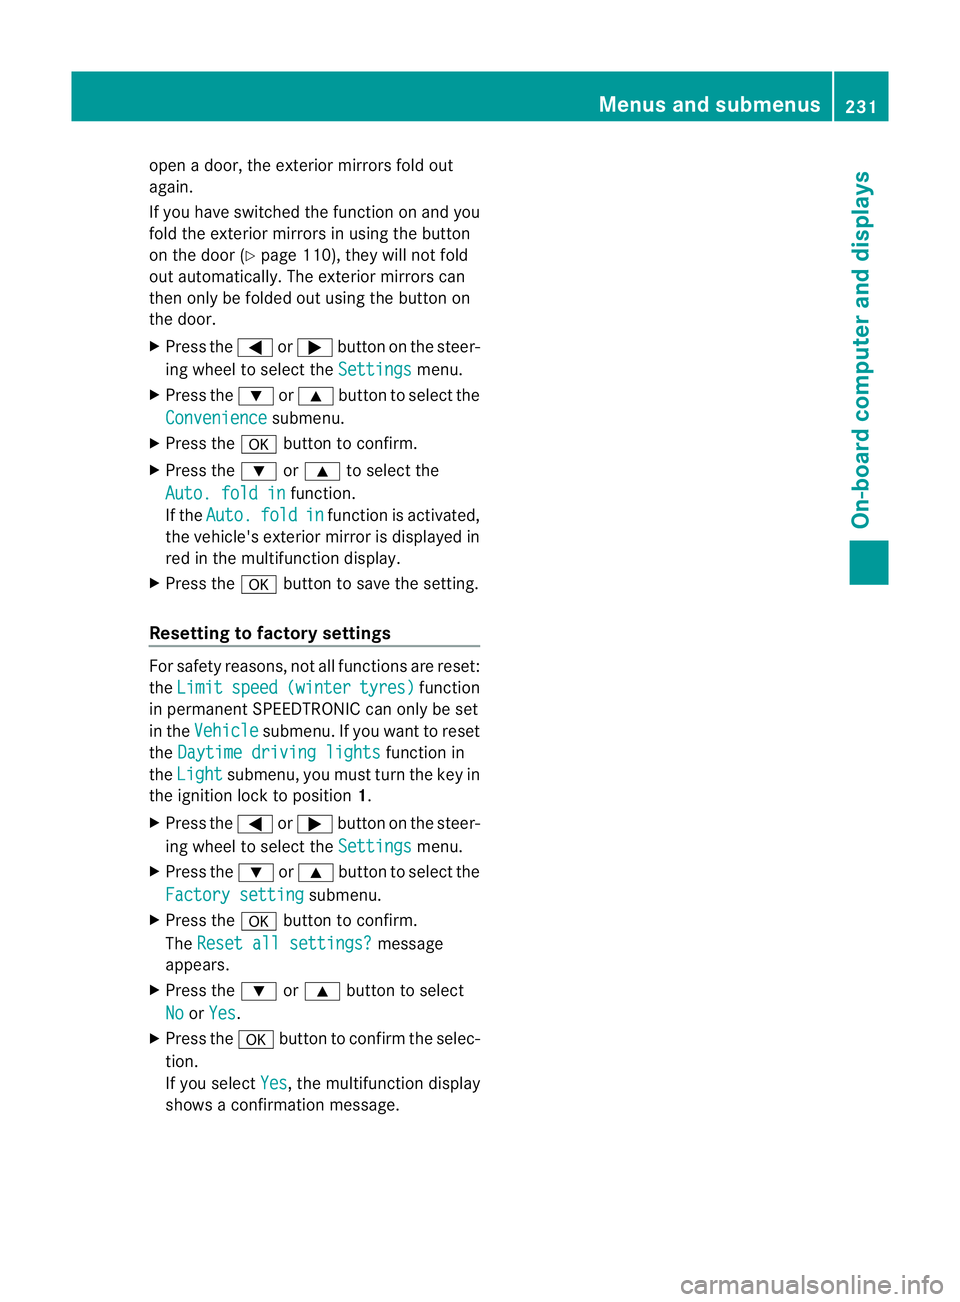
Resetting to factory settings For safety reasons, not all functions are reset:
the Limit speed (winter tyres) function
in permanent SPEEDTRONIC can only be set
in the Vehicle submenu. If you want to reset
the Daytime driving lights function in
the Light submenu, you must turn the key in
the ignition lock to position 1.
X Press the =or; button on the steer-
ing wheel to select the Settings menu.
X Press the :or9 button to select the
Factory setting submenu.
X Press the abutton to confirm.
The Reset all settings? message
appears.
X Press the :or9 button to select
No or
Yes .
X Press the abutton to confirm the selec-
tion.
If you select Yes ,t
he multifunction display
shows aconfirmation message. Menus and submenus
231On-board computer and displays Z
Page 253 of 353

Vehicle
Display messages Possible causes/consequences and
M Solutions
To start engine,
shift to either P
or N Yo
uh avea ttempte dtostart the engine with the transmission in
position Ror D.
X Shift the transmission to position Por N. P
Select Par
k(P) Yo
uh aves witched off the engine with the Start/Sto pbutton and
opene dthe driver' sdoor.
Yo uw anted to lock the vehicle.
Aw arning tone also sounds.
or
You have switched off th eenginew itht he Start/Sto pbutto nand
opene dthe driver's door with the transmission in position N.
X Shift the transmission to position P. While the HOLD functio
norDISTRONIC PLUS is active, you have:
R opened the driver's door and released the seat belt or
R switched off the engine or
R opened the bonnet
At one may also sound at regular intervals. The toneb ecomes
louder if you attempt to lock the vehicle.
You cannot start the engine.
X Shift the transmission to position P.
You can restart the engine. N The boot lid is open.
X
Close the boot lid. M G
Risk of accident
The bonnet is open. Awarning tone also sounds.
X Pull ove rand stop the vehicl esafelyass oonasp ossible,p aying
attention to road and traffic conditions.
X Apply the parking brake.
X Close the bonnet.
If the active bonnet (pedestrian protection) has been triggered:
X Reset the bonnet (Y page 280).
X Close the bonnet. Active bonnet
malfunction See
Owner's Manual The active bonnet (pedestrian protection) is not active due to a
malfunction.
X
Visit aqualified specialist workshop. 250
Display messagesOn-board computer and displays
Page 283 of 353

Useful information
i This Owner's Manual describes all models
and all standard and optional equipment
available to your vehicle at the time of pub-
lication of the Owner's Manual. Country-
specific deviation sare possible. Please
not ethat your vehicle may not be equipped
with all feature sdescribed. This also
applies to safety-relevan tsystems and
functions.
i Pleas ereadt he information on qualified
specialist workshop s(Ypage 22). Engin
ecompartment Bonnet
Active bonnet (pedestrian protection) Operating principle
i
The active bonne tisonly available in cer-
tain countries.
The active bonnet can reduce the risk of injury
to pedestrians in certain accident situations.
Raising the active bonnet increases the clear-
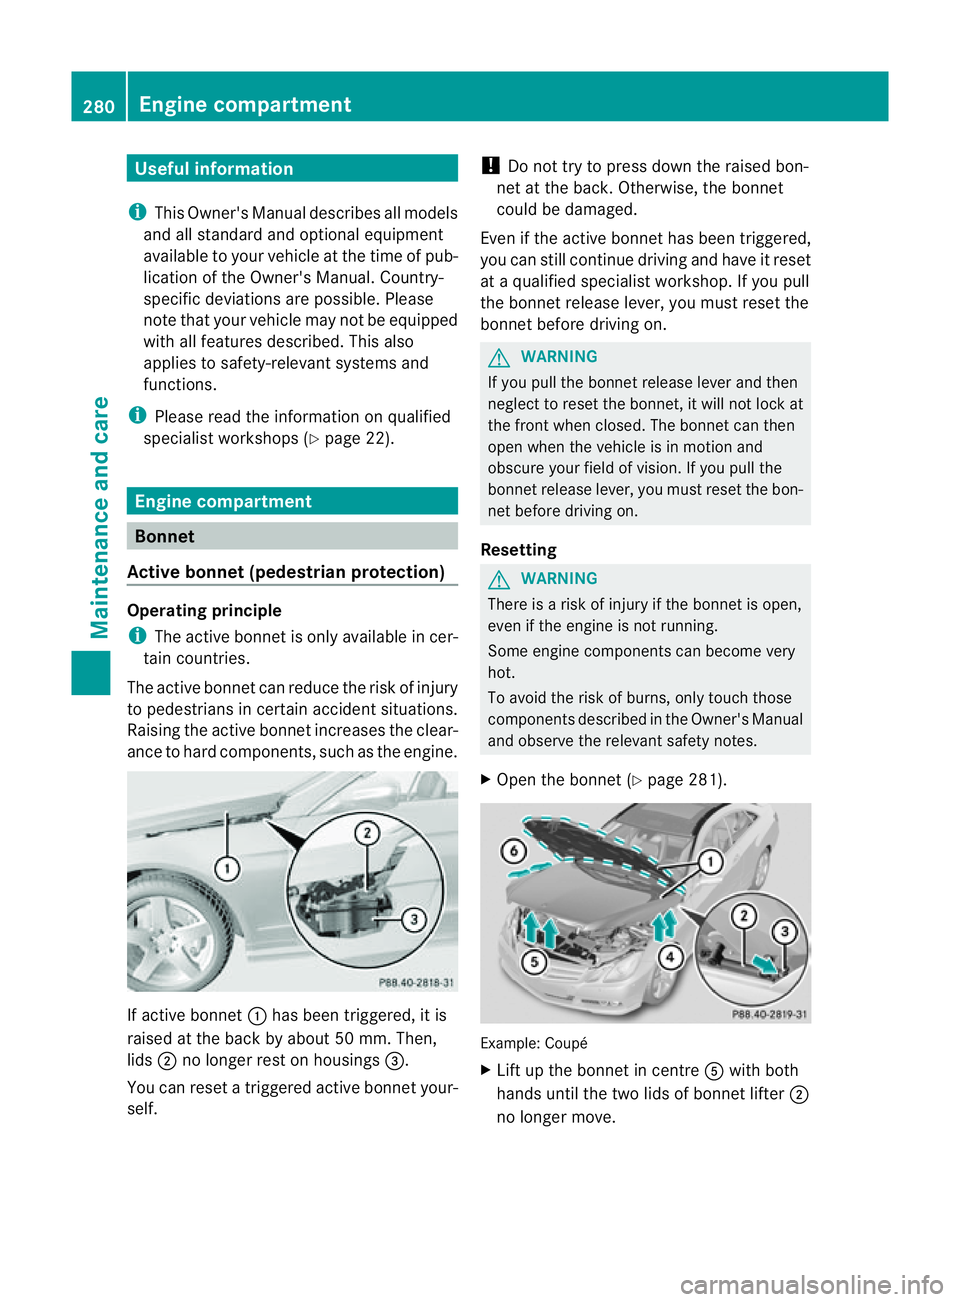
ance to hard components, such as the engine. If active bonnet
:has been triggered, it is
raised at the back by about50m m. Then,
lids ;no longer rest on housings =.
You can reset atriggered active bonnet your-
self. !
Do not try to press down the raised bon-
net at the back. Otherwise, the bonnet
could be damaged.
Even if the active bonnet has been triggered,
you can still continue driving and have it reset
at aq ualified specialist workshop. If you pull
the bonnet release lever, you must reset the
bonnet before driving on. G
WARNING
If you pull the bonnet release lever and then
neglect to reset the bonnet, it will not lock at
the front when closed. The bonnet can then
open when the vehicle is in motion and
obscure your field of vision. If you pull the
bonnet release lever, you must reset the bon-
net before driving on.
Resetting G
WARNING
There is arisk of injury if the bonnet is open,
even if the engine is not running.
Some engine componentsc an become very
hot.
To avoid the risk of burns, only touch those
componentsd escribed in the Owner's Manual
and observe the relevant safety notes.
X Open the bonnet (Y page 281). Example: Coupé
X
Lift up the bonnet in centre Awith both
hands until the two lids of bonnet lifter ;
no longer move. 280
Engine compartmentMaintenance and care
Page 288 of 353

You can obtain further information fro
ma
Mercedes-Ben zService Centre.
The ASSYS TPLUS service interval display
informs you when the nex tservice is due.
The multifunction display shows aservice
message for afew seconds, e.g.:
Next service Adue in .. days Service
Adue Service
Aoverdue by ... days The letter indicates which servic
eisdue.A stands for
aminor servic eand B for
am ajor
service. Anumber or another letter may be
displayed after the letter. This figure indicates
any necessary additional maintenanc ework
to be performed.
If you report this displayed information to a
qualified specialist workshop, for example a
Mercedes-Benz Service Centre, they can
infor myou of the costst he service will incur.
The ASSYST PLUS service interval display
does not take into account any periods of
time during which the battery is disconnec-
ted.
Maintaining the time-dependent service
schedule:
X Note down the service due date displayed
in the multifunction display before discon-
necting the battery.
or
X Subtract the battery disconnection periods
from the service date shown on the display
after reconnecting the battery.
i The ASSYST PLUS service interval display
does not show any information on the
engine oil level. Observe the notes on the
engine oil level (Y page 282).
Hiding aservice message X
Pres sthe % ora button on th esteer-
ing wheel. Displaying service messages X
Switch th eignitio non.
X Press =or; on the steering wheel
to select the Serv. menu.
X Press 9or: to select the ASSYST PLUS submenu and press
ato confirm.
The servic eduedate appear sinthe multi-
functio ndisplay.
Please bear th efollowing in mind Resetting th
eASSYST PLUS service inter-
val display
Aq ualified specialist workshop, e.g. a
Mercedes-Ben zService Centre, will reset the
ASSYST PLUS servic einterval display after
the servic ework has been carried out.
You can obtain further information ,e.g.
regarding servic ework, from aMercedes-
Benz Service Centr eordirectly from
Mercedes-Benz.
! If the ASSYST PLUS servic einterval dis-
play has been inadvertently reset ,this set-
tingc an be corrected at aMercedes-Benz
Service Centre.
Have servic ework carried out as described
in the Service Booklet. This may otherwise
lead to increased wear and damage to the
major assemblies or the vehicle.
Driving abroad
An extensive Mercedes-Benz Service network
is also available in other countries. The
Service Hotline's curren ttelephone numbers
for use when you are abroad are to be found
in the "Mercedes-BenzS ervice24h" section
of the Service Booklet. Care
Notes on care
Regular care of your vehicle is acondition for
retaining the quality in the long term. Care
285Maintenance and care Z
Page 311 of 353

Removing/fitting the battery
X To remove: disconnect the battery
(Y page 307).
X Loosen the bol twhich holds the battery in
place.
X Remove the battery.
X To fit: follow the steps described in "To
remove" in reverse order. Reconnecting the battery
! Always connect the battery in the order
described below. Never swap the terminal
clamps. You may otherwise damage the
vehicle electronics.
X Switch off all electrical consumers (e.g.
radio, blower, etc.).
X Connect the positive terminal clamp and
secure the cover.
X Connect the negative terminal clamp.
X Put the filter box back in place, then clip in
and close the retaining clamps.
X Close the bonnet.
i If the power supply has been interrupted,
e.g. if the battery has been reconnected,
you must carry out the following tasks:
R set the clock (Y page 226).
R reset the function for automatically fold-
ing the exterior mirrors in/out by folding
the mirrors out once (Y page 110).Charging the battery
G
WARNING
Only charge the battery in awell-ventilated
area. As the battery is being charged, gases
can escape and generate minor explosions.
This could injure you and other persons or
cause damage to the paintwork or acid cor-
rosion on the vehicle.
You can obtain information about battery
chargers which allow the battery to be charged while still installed from
aqualified
specialist workshop, e.g. aMercedes-Benz
Service Centre. G
WARNING
There is arisk of acid burns during the charg-
ing process due to the gases which escape
from the battery. Do not lean over the battery
during the chargin gprocess. G
WARNING
Battery acid is caustic. Avoid contact with the
skin ,eyes or clothing.
! Only charge the installed batter ywith a
batter ycharger which has been tested and
approved by Mercedes-Benz .These battery
chargers allow the battery to be charged
while still installed.
! Only use battery chargers with amaxi-
mum charging voltage of 14.8 V.
! Only charge the battery using the jump-
start connection point.
The jump-starting connection point is in the
engine compartment( Ypage 309).
X Open the bonnet (Y page 281).
X Connect the battery charger to the positive
terminal and earth point in the same order
as when connecting the donor battery in
the jump-starting procedure
(Y page 309).
X Read the battery charger's operating
instructions before charging the battery. 308
BatteryBreakdown assistance
Page 315 of 353

Example: Cabriolet
X
Press the mark on cover :inwards in the
direction of the arrow.
X Take cover :off the opening.
X Screw the towing ey einclockwise to the
stop and tighten it.
Removing the towin geye X
Loosen the towing ey eand unscrew it.
X Attach cover :to the bumpe rand press
unti lite ngages.
X Place the towing ey einthe vehicl etool kit. Towin
gthe vehicle with the rear axle
raised
Whe ntowing your vehicle with the rear axle
raised, it is important that you observe the
safety instructions (Y page 310).
! The ignition must be switched off if you
are towing the vehicle with the rear axle
raised. Intervention by ESP ®
could other-
wise damage the brake system. X
Switch on the hazard warning lamps
(Y page 117).
X Turn the key in the ignition lock to position
0and remove the key from the ignition
lock.
X When leaving the vehicle, take the key or
the KEYLESS-GO key with you. Towing the vehicle with both axles on
the ground
It is important that you observe the safety
instructions when towing away your vehicle
(Y page 310). G
WARNING
The power assistance for the steering and the
brake force booster do not work when the
engine is not running. You will then need
much more effort to brake and steer the vehi-
cle. Adapt your style of driving accordingly.
X Switch on the hazard warning lamps
(Y page 117).
i When towing with the hazard warning
lamps switched on, use the combination
switch as usual to signal achange of direc-
tion. In this case, only the turn signals for
the desired direction flash. When the com-
bination switch is reset, the hazard warning
lamps start flashing again.
X Turn the key to position 2in the ignition
lock.
X When the vehicle is stationary, depress the
brake pedal and keep it depressed.
X Vehicles with manualt ransmission:
depress the clutch pedal.
X Shift to neutral.
or
X Vehicles with automatic transmission:
shift the automatic transmission to posi-
tion N.
X Release the brake pedal.
X Release the parking brake. 312
Towing and tow-startingBreakdown assistance