2011 MERCEDES-BENZ C-CLASS COUPE key
[x] Cancel search: keyPage 195 of 373

from the side
.When you overtake a vehicle,
the warning only occurs if the difference in
speed is less than 12 km/h.
The yellow indicator lamp goes out if reverse
gear is engaged. Blind Spot Assist is then
deactivated.
The brightness of the indicator/warning
lamps is adjusted automatically according to
the ambient light. G
WARNING
Blind Spot Assist is not active at speeds below
30 km/h, and the indicator lamps in the exte-
rior mirrors are yellow.V ehicles in the moni-
toring range are then not indicated.
Always pay attention to traffic conditions and
your surroundings. Otherwise, you may fail to
recognise dangers in time, cause an accident
and injure yourself and others.
Collision warning
If a vehicle is detected in the monitoring range
of Blind Spot Assist and you switch on the turn
signal, a double warning tones ounds. Red
warning lamp :flashes. If the turn signal
remains on, detected vehicles are indicated
by the flashing of red warning lamp :.There
are no further warning tones.
Switching on Blind Spot Assist
X On vehicles without a navigation system,
make sure that the Becker ®
MAP PILOT is
connected; see the separate operating
instructions for Audio 20.
X Make sure that the radar sensor system
(Y page 226) and Blind Spot Assist
(Y page 222) are activated in the on-board
computer.
X Turn the key to position 2in the ignition
lock.
Warning lamps :light up red in the exte-
rior mirrors for approximately 1.5 seconds
and then turn yellow. Trailer towing
If you attach a trailer, make sure you have
correctly established the electrical connec-
tion. This can be accomplished by checking
the trailer lighting. In this event, Blind Spot
Assist is deactivated. The indicator lamp in
the exterior mirrors lights up yellow, and the
Blind Spot Assist currently unavail‐
able See Owner's Manual message
appears in the multifunction display.
i You can deactivate the indicator lamps in
the exterior mirrors.
To do so, switch off Blind Spot Assist if:
R the key is in position 2in the ignition
lock.
R the engine is not running.
R the electrical connection to the trailer
has been established.
Lane Keeping Assist Important safety notes
Lane Keeping Assist monitors the area in
front of your vehicle by means of a camera at
the top of the windscreen. Lane Keeping
Assist detects lane markings on the road and
warns you before you leave your lane unin-
tentionally. :
Lane Keeping Assist camera
If you have chosen the Display unit Speed-/odometer: (Y
page 223) function in
the on-board computer and select kmkm as
the unit of measurement, Active Lane Keep-
ing Assist is active from speeds of 60 km/h. 192
Driving systemsDriving and parking
Page 199 of 373

Visual and acoustic collision warning
If you switch on the appropriate turn signals
to change lanes, and a vehicle is detected in
the side monitoring range of Active Blind Spot
Assist, you will receive a visual and acoustic
collision warning .You will then hear a double
warning tone, and red warning lamp :
flashes. If the turn signal remains on, detec-
ted vehicles are indicated by the flashing of
red warning lamp :. There are no further
warning tones.
Course-correcting brake application
If Active Blind Spot Assist detects a risk of a
lateral collision in the monitoring range, a
course-correcting brake application is carried
out. This is designed to help you avoid a col-
lision.
The course-correcting brake application is
available in the range between 30 km/ha nd
200 km/h.
If a course-correcting brake application
occurs, red warning lamp :flashes in the
exterio rmirro rand the following is shown in
the multifunctio ndisplay, for example: Example: vehicles with automatic transmission
G
WARNING
Active Blind Spot Assist is only an aid
designed to assist driving. It is not a substitute
for attentive driving. Automatic braking by the
system may not always be sufficien tto avoid
a collision. In such cases, you need to steer,
brake or accelerate yourself.
In very rare cases, the system may detect a
risk of collision where there is none and brake
in error near crash barriers or similar road
boundaries. Active Blind Spot Assist cannot
detect all traffic situations and road users.
Ensure at all times that there is sufficient lat- eral distance between you and other road
users or obstacles. You can, for example,
countersteer gently or depress the accelera-
tor pedal at any time to cancel inappropriate
braking action.
You are responsible for the vehicle's speed,
correc
tsteering and for braking in good time.
Always adap tyour driving style to suit the
prevailing road and weather conditions.
Always pay attention to traffic conditions and
your surroundings. Otherwise, you may fail to
recognise dangers in time, cause an accident
and injure yourself and others.
Either a very slight course-correcting brake
application, or none at all, may occur if:
R there are vehicles or obstacles, e.g. crash
barriers, on both sides of your vehicle.
R a vehicle approaches too closely on the
side.
R you have adopted a sporty driving style with
high cornering speeds.
R you brake or accelerate decisively.
R a driving safety system intervenes, such as
ESP ®
or PRE-SAFE ®
Brake.
R ESP ®
is deactivated.
R a loss of tyre pressure or a defective tyre is
detected.
Activating Active Blind Spot Assist
X On vehicles without a navigation system,
make sure that the Becker ®
MAP PILOT is
connected; see the separate operating
instructions for Audio 20.
X Make sure that the radar sensor system
(Y page 226) and Active Blind Spot Assist
(Y page 222) are activated in the on-board
computer.
X Turn the key to position 2in the ignition
lock.
Warning lamps :light up red in the exte-
rior mirrors for approximately 1.5 seconds
and then turn yellow. 196
Driving systemsDriving and parking
Page 206 of 373

X
Place the protective cap on the ball cou-
pling.
The release wheel is located behind the left-
hand side trim panel in the boot. Coupé
X
To open the cover: turn handle:anti-
clockwise and fold down cover ;.X
Pull out release wheel =.
X Turn release wheel =anti-clockwise.
The ball coupling unlocks and lowers. Indi-
cator lamp ?flashes. X
Press the ball coupling in the direction of
the arrow until it engages behind the
bumper.
Indicator lamp ?goes out and the mes-
sage in the multifunction display disap-
pears. Trailer power supply
When it leaves the factory, your vehicle's
trailer socket is equipped with a permanent
power supply and a power supply that is
switched on via the ignition lock.
The permanen tpower supply is supplied via
trailer socket pin 9.
The power supply that is switched on via the
ignition lock is supplied via trailer socket pin
10.
! You can connect consumers with a power
rating of up to 240 W to the permanent
power supply and up to 180 W to the power
supply that is switched on via the ignition
lock.
You must not charge a trailer battery using
the power supply.
The trailer's permanent power supply is
switched off in the event of low vehicle supply
voltage and after six hours at the latest.
You can obtain further information about
installing the trailer electrics from a qualified
specialist workshop, e.g. aMercedes-Benz
Service Centre.
X To switch the connected power supply
on or off: turn the key in the ignition lock
to position 2or 0respectively. Bulb failure indicator for LED lamps
i If LED lamps are fitted in the trailer, an
error message may appear in the multi-
function display even if there is no fault. The
reason for the error message may be that
the curren thas falle nbelow the minimum
of 50 milliamperes (mA). Trailer towing
203Driving and parking Z
Page 210 of 373

!
Do not drive in the overrevving range.
Doing so will damage the engine.
The fuel supply is interrupted to protect the
engine when the red band is reached. Outside temperature display
The outside temperature display is in the
instrument cluster (Y page 32).G
WARNING
At temperatures just above freezing point, the
street may be icy, especially in wooded areas
or on bridges. If you do not adapty our driving
style to the conditions, the vehicle could skid.
For this reason, adapt your driving style and
speed to the weather conditions.
Changes in the outside temperature are dis-
played after a short delay. Operating the on-board computer
The on-board computer is activated as soon
as you turn the key to position 1in the ignition
lock. You can use the on-board computer to
call up information relating to your vehicle
and to make and adjust settings.
i You can have certain functions set at a
qualified specialist workshop, e.g. a
Mercedes-Benz Service Centre.
Example:
R automatic door lock
R speed limit for winter tyres
You can obtain information about this at
any Mercedes-Benz Service Centre.
You can control the multifunction display and
the settings in the on-board computer using
the buttons on the multifunction steering
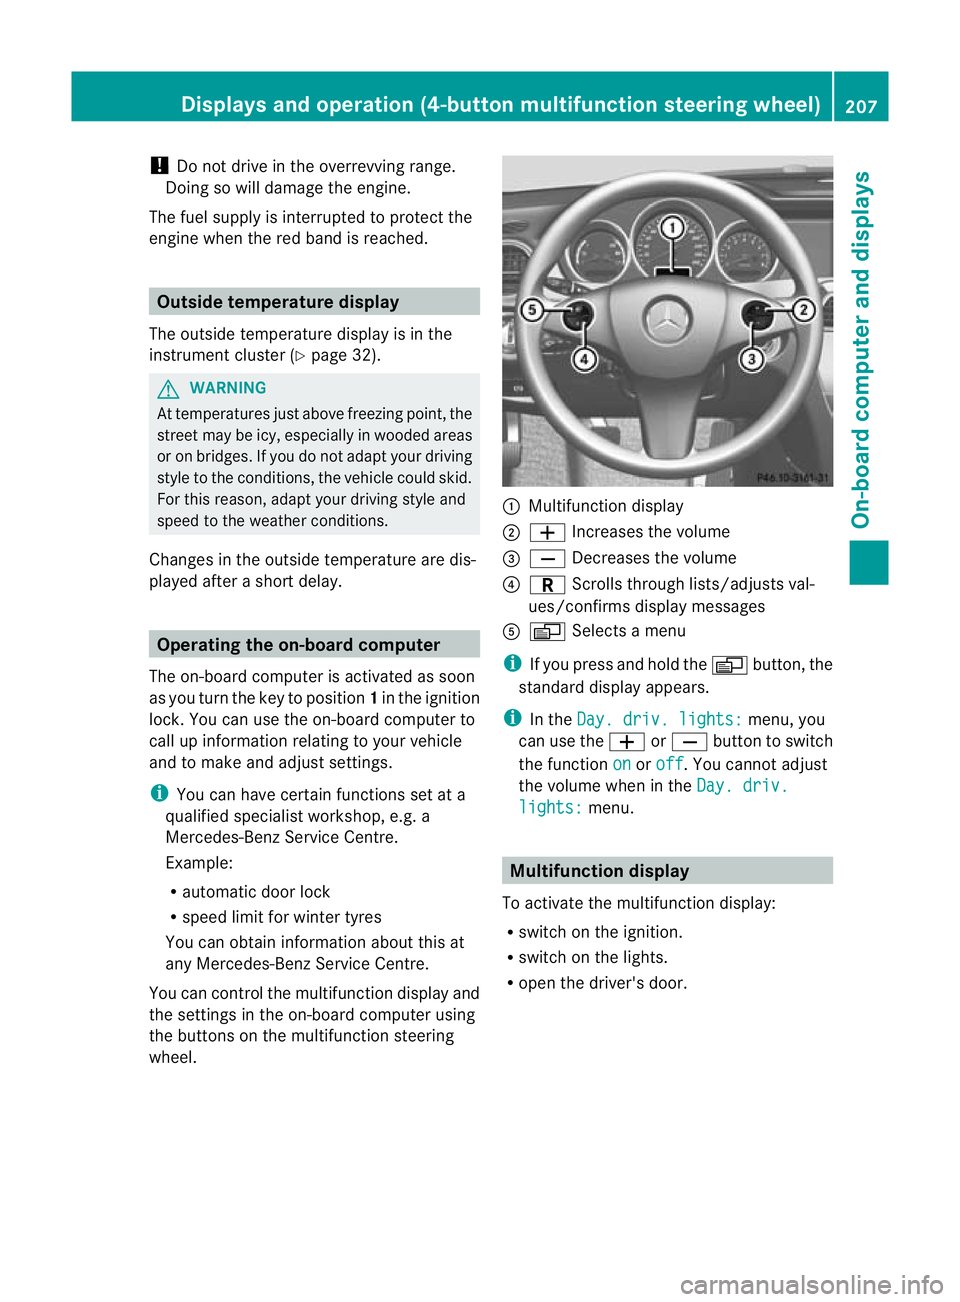
wheel. :
Multifunction display
; W Increases the volume
= X Decreases the volume
? C Scrolls through lists/adjusts val-
ues/confirms display messages
A V Selects a menu
i If you press and hold the Vbutton, the
standard display appears.
i In the Day. driv. lights: menu, you
can use the WorX button to switch
the function on or
off .Y
ou cannot adjust
the volume when in the Day. driv. lights: menu.
Multifunction display
To activate the multifunction display:
R switch on the ignition.
R switch on the lights.
R open the driver's door. Displays and operation (4-button multifunction steering wheel)
207On-board computer and displays Z
Page 213 of 373

X
To reset the trip meter: press and hold
the V until the standard display
appears.
X Press and hold the Cbutton until the
value has been reset. Trip computer
X Press the Vbutton on the steering
wheel repeatedly until the trip computer
appears. :
Distance
; Average speed
= Time
? Average fuel consumption
X To reset the trip computer: press and
hold the Cbutton on the steering wheel
until the values have been reset. Calling up the range
X Press the Vbutton on the steering
wheel repeatedly until the approximate
range appears.
The approximate range which can be covered
depends on the fuel level and your current
driving style .Ifthere is only a small amount
of fuel left in the fuel tank, the display shows
a vehicle being refuelled Cinstead of the
range. Switching the daytime driving lights
on/off
If you have activated the Day. driv.lights: function and the light switch is in the Ã
position, the daytime driving lights are
automatically switched on during daylight
hours when the engine is running. When it is
dark, the side lamps and the dipped-beam
headlamps are switched on automatically.
On vehicles with daytime driving lamps, the
factory setting is on .
If you want to change the setting for the Day. driv. lights: function, you have to turn
the key in the ignition lock to position 1.
X Press the Vbutton on the steering
wheel repeatedly until the Day. driv. lights: menu appears.
You will see the selected setting: on or
off .
X Press the WorX button to change
the setting. Displays and operation (12-button
multifunction steering wheel)
Coolant temperature gauge
The coolant temperature gauge is in the
instrumentc luster on the left-hand side.
Under normal operating conditions and with
the specified coolan tlevel, the coolant tem-
perature may rise to 120 †.
At high outside temperatures and when driv-
ing uphill, the coolant temperature may rise
to the end of the scale. Rev counter
The red band in the rev counter indicates the
engine's overrevving range.
! Do not drive in the overrevving range.
Doing so will damage the engine.
The fuel supply is interrupted to protec tthe
engine when the red band is reached. 210
Displays and operation (12-button multifunction steering wheel)On-board computer and displays
Page 214 of 373

Outside temperature display
The outside temperature display is in the mul-
tifunction display (Y page 212). G
WARNING
At temperatures just above freezing point, the
street may be icy, especially in wooded areas
or on bridges. If you do not adapt your driving
style to the conditions ,the vehicle could skid.
For this reason, adapt your driving style and
speed to the weather conditions.
Changes in the outside temperature are dis-
played after a short delay. Speedometer with segments
The segments in the speedometer indicate
which speed range is available.
Cruise control (Y page 162) activated:
The segments light up from the stored speed
to the maximum speed.
Variable SPEEDTRONIC (Y page 173) activa-
ted:
The segments light up from the start of the
scale to the selected limit speed.
DISTRONIC PLUS (Y page 164) activated:
One or two segments in the set speed range
light up.
DISTRONIC PLUS detects a vehicle in front:
The segments between the speed of the vehi-
cle in front and the stored speed light up. Operating the on-board computer
Overview The on-board computer is activated as soon
as you turn the key to position 1in the ignition
lock.
You can control the multifunction display and
the settings in the on-board computer using
the buttons on the multifunction steering
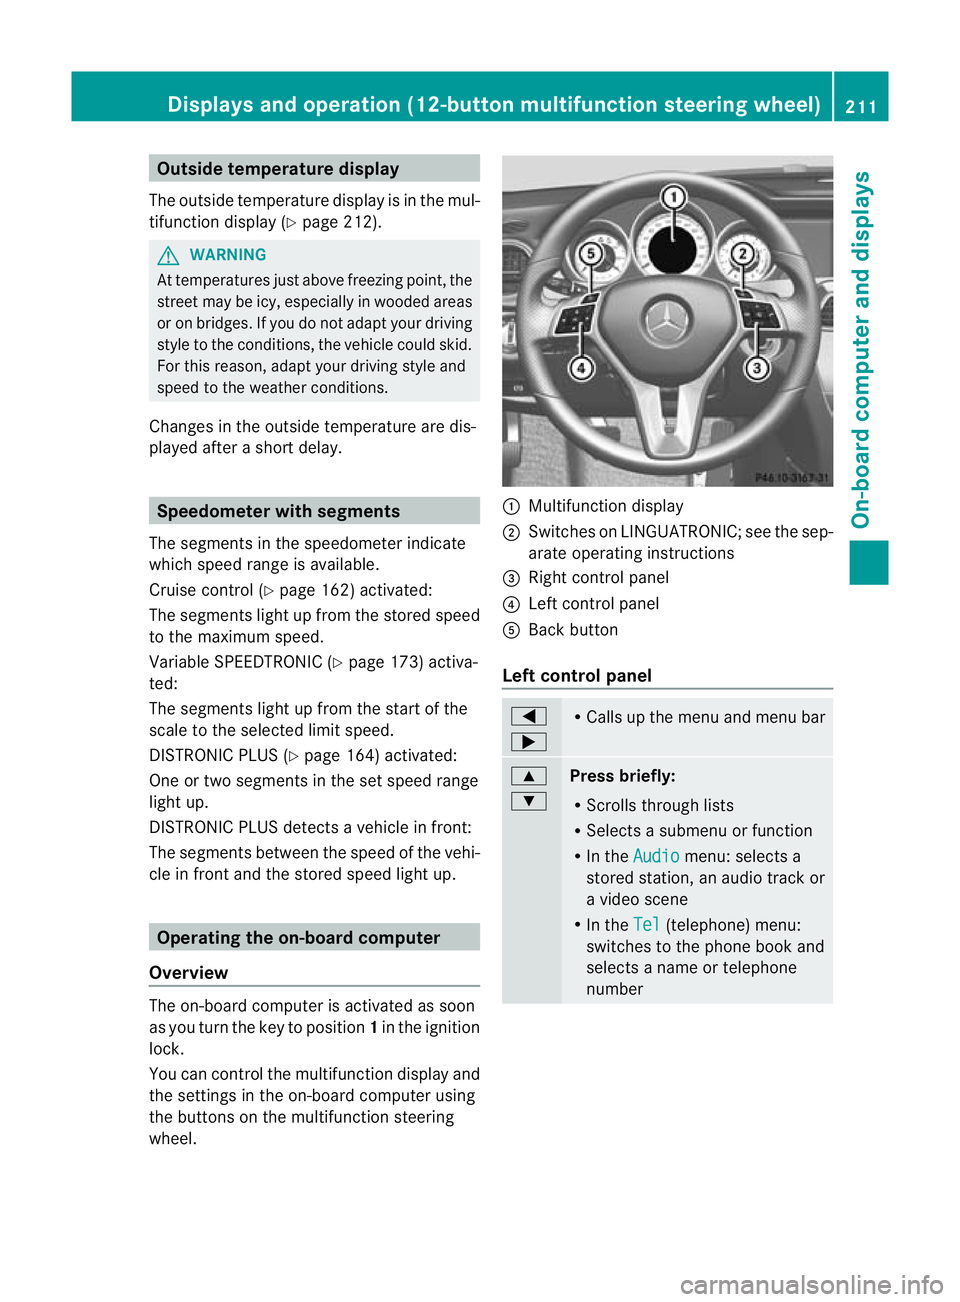
wheel. :
Multifunction display
; Switches on LINGUATRONIC; see the sep-
arate operating instructions
= Right control panel
? Left control panel
A Back button
Left control panel =
; R
Calls up the menu and menu bar 9
:
Press briefly:
R
Scrolls through lists
R Selects a submenu or function
R In the Audio menu: selects a
stored station, an audio track or
a video scene
R In the Tel (telephone) menu:
switches to the phone book and
selects a name or telephone
number Displays and operation (12-button multifunction steering wheel)
211On-board computer and displays Z
Page 228 of 373

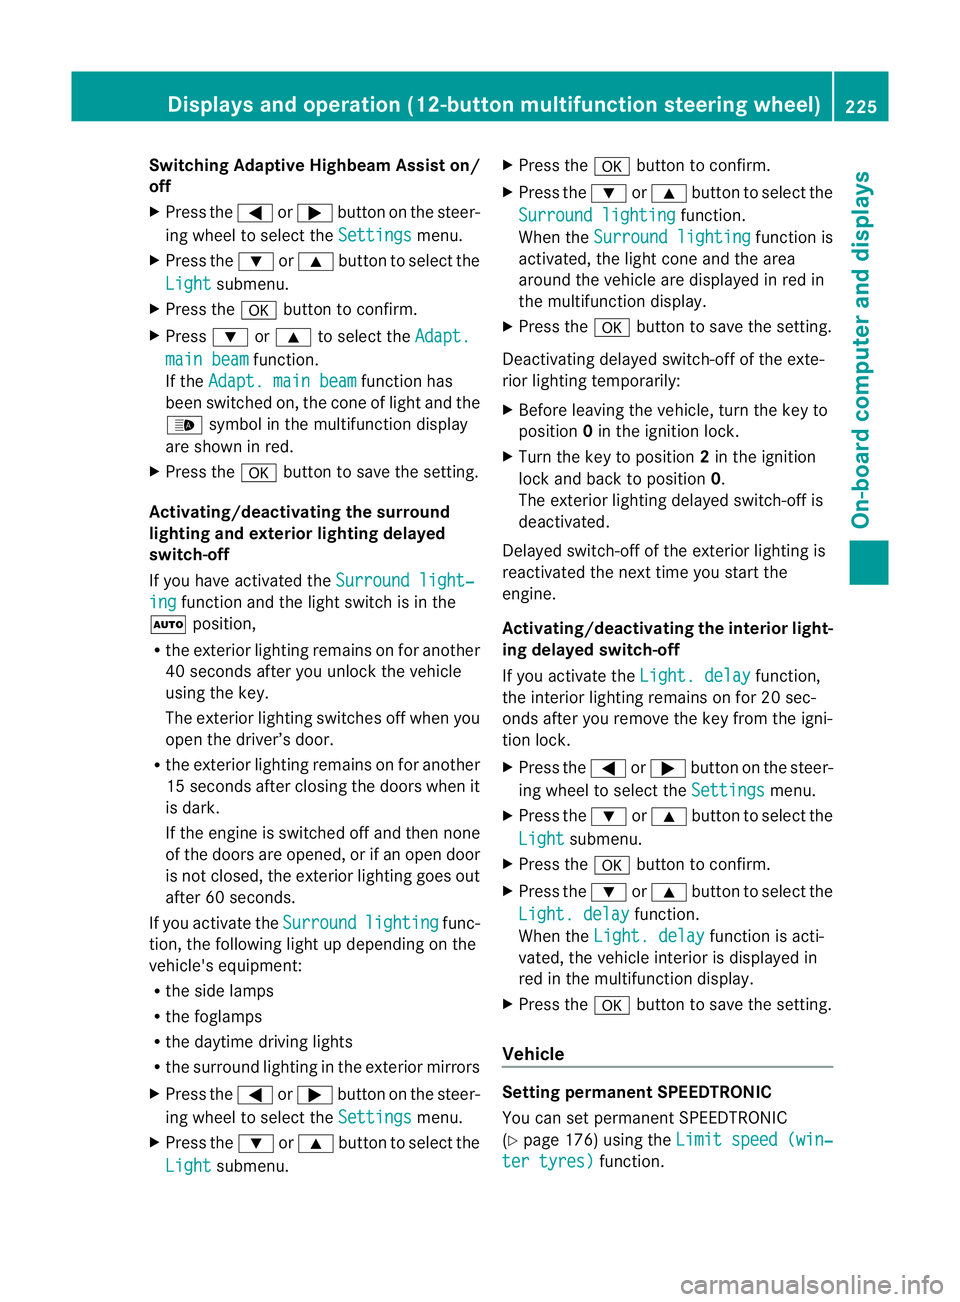
Switching Adaptive Highbeam Assist on/
off
X Press the =or; button on the steer-
ing wheel to select the Settings menu.
X Press the :or9 button to select the
Light submenu.
X Press the abutton to confirm.
X Press :or9 to select the Adapt. main beam function.
If the Adapt. main beam function has
been switched on, the cone of light and the
_ symbol in the multifunction display
are shown in red.
X Press the abutton to save the setting.
Activating/deactivating the surround
lighting and exterior lighting delayed
switch-off
If you have activated the Surround light‐ing function and the light switch is in the
à position,
R the exterior lighting remains on for another
40 seconds after you unlock the vehicle
using the key.
The exterior lighting switches off when you
open the driver’s door.
R the exterior lighting remains on for another
15 seconds after closing the doors when it
is dark.
If the engine is switched off and then none
of the doors are opened, or if an open door
is not closed, the exterior lighting goes out
after 60 seconds.
If you activate the Surround lighting func-
tion, the following light up depending on the
vehicle's equipment:
R the side lamps
R the foglamps
R the daytime driving lights
R the surround lighting in the exterior mirrors
X Press the =or; button on the steer-
ing wheel to select the Settings menu.
X Press the :or9 button to select the
Light submenu. X
Press the abutton to confirm.
X Press the :or9 button to select the
Surround lighting function.
When the Surround lighting function is
activated, the light cone and the area
around the vehicle are displayed in red in
the multifunction display.
X Press the abutton to save the setting.
Deactivating delayed switch-of fofthe exte-
rior lighting temporarily:
X Before leaving the vehicle, turn the key to
position 0in the ignition lock.
X Turn the key to position 2in the ignition
lock and back to position 0.
The exterior lighting delayed switch-off is
deactivated.
Delayed switch-off of the exterior lighting is
reactivated the next time you start the
engine.
Activating/deactivating the interior light-
ing delayed switch-off
If you activate the Light. delay function,
the interior lighting remains on for 20 sec-
onds after you remove the key from the igni-
tion lock.
X Press the =or; button on the steer-
ing wheel to select the Settings menu.
X Press the :or9 button to select the
Light submenu.
X Press the abutton to confirm.
X Press the :or9 button to select the
Light. delay function.
When the Light. delay function is acti-
vated, the vehicle interior is displayed in
red in the multifunction display.
X Press the abutton to save the setting.
Vehicle Setting permanent SPEEDTRONIC
You can set permanent SPEEDTRONIC
(Y
page 176) using the Limit speed (win‐ ter tyres) function.Displays and operation (12-button multifunction steering wheel)
225On-board computer and displays Z
Page 231 of 373

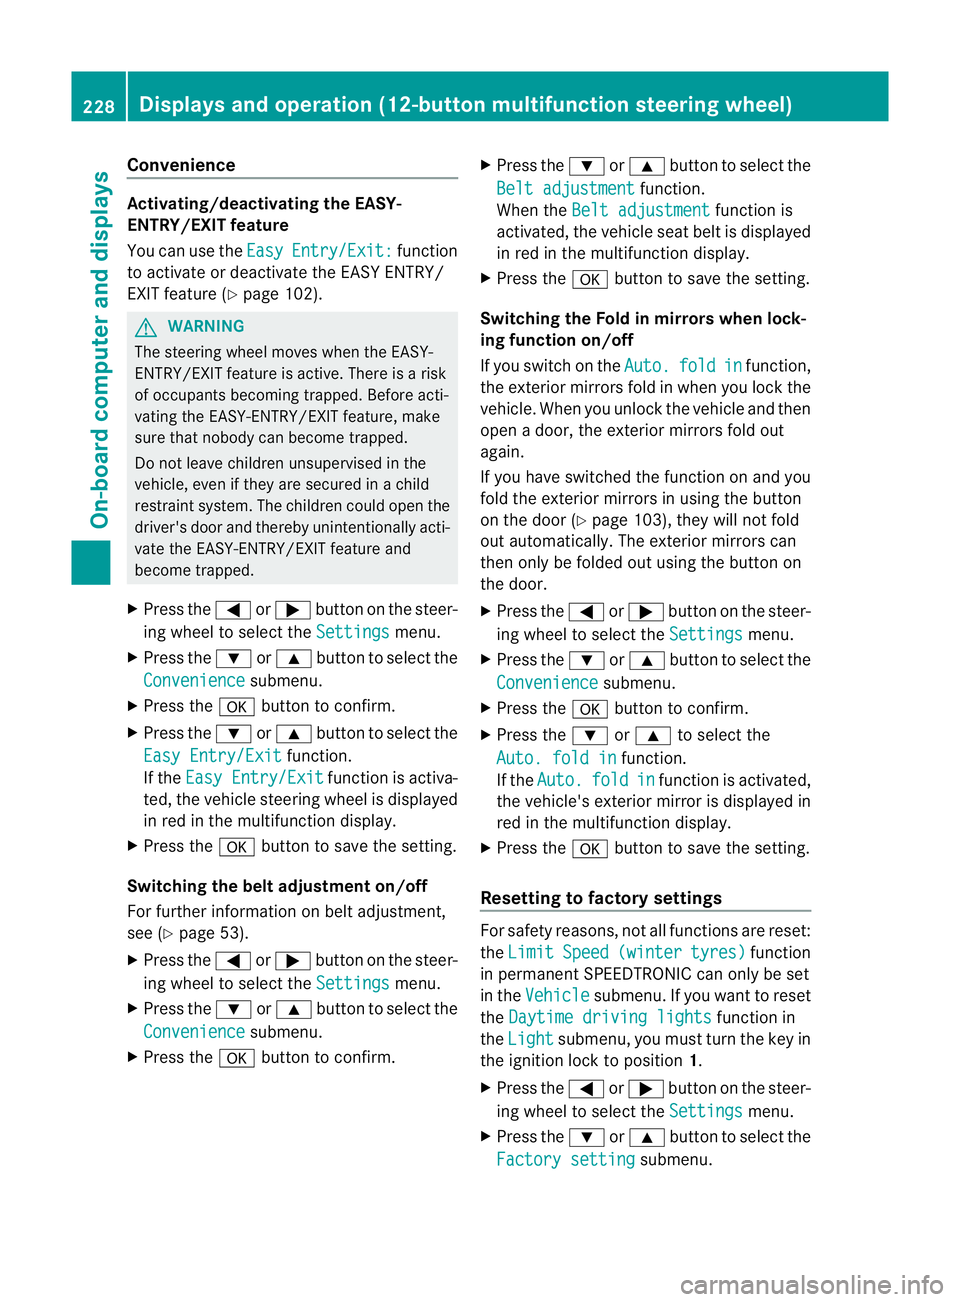
Convenience
Activating/deactivating the EASY-
ENTRY/EXIT feature
You can use the
Easy Entry/Exit: function
to activate or deactivate the EASY ENTRY/
EXIT feature (Y page 102). G
WARNING
The steering wheel moves when the EASY-
ENTRY/EXIT feature is active. There is a risk
of occupants becomin gtrapped. Before acti-
vating the EASY-ENTRY/EXIT feature, make
sure that nobody can become trapped.
Do not leave children unsupervised in the
vehicle, even if they are secured in a child
restraint system. The children could open the
driver's door and thereby unintentionally acti-
vate the EASY-ENTRY/EXIT feature and
become trapped.
X Press the =or; button on the steer-
ing wheel to select the Settings menu.
X Press the :or9 button to select the
Convenience submenu.
X Press the abutton to confirm.
X Press the :or9 button to select the
Easy Entry/Exit function.
If the Easy Entry/Exit function is activa-
ted, the vehicle steering wheel is displayed
in red in the multifunction display.
X Press the abutton to save the setting.
Switching the belta djustmenton/off
For further information on belt adjustment,
see (Y page 53).
X Press the =or; button on the steer-
ing wheel to select the Settings menu.
X Press the :or9 button to select the
Convenience submenu.
X Press the abutton to confirm. X
Press the :or9 button to select the
Belt adjustment function.
When the Belt adjustment function is
activated, the vehicle seat belt is displayed
in red in the multifunction display.
X Press the abutton to save the setting.
Switching the Fold in mirrors when lock-
ing function on/off
If you switch on the Auto. fold in function,
the exterior mirrors fold in when you lock the
vehicle. When you unlock the vehicle and then
open a door, the exterior mirrors fold out
again.
If you have switched the function on and you
fold the exterior mirror sinusing the button
on the door (Y page 103), they will not fold
out automatically. The exterior mirrors can
then only be folded out using the button on
the door.
X Press the =or; button on the steer-
ing wheel to select the Settings menu.
X Press the :or9 button to select the
Convenience submenu.
X Press the abutton to confirm.
X Press the :or9 to select the
Auto. fold in function.
If the Auto. fold in function is activated,
the vehicle's exterior mirror is displayed in
red in the multifunction display.
X Press the abutton to save the setting.
Resetting to factory settings For safety reasons, not all functions are reset:
the
Limit Speed (winter tyres) function
in permanent SPEEDTRONIC can only be set
in the Vehicle submenu. If you want to reset
the Daytime driving lights function in
the Light submenu, you must turn the key in
the ignition lock to position 1.
X Press the =or; button on the steer-
ing wheel to select the Settings menu.
X Press the :or9 button to select the
Factory setting submenu.228
Displays and operation (12-button multifunction steering wheel)On-board computer and displays