Page 345 of 380
757
Maintenance
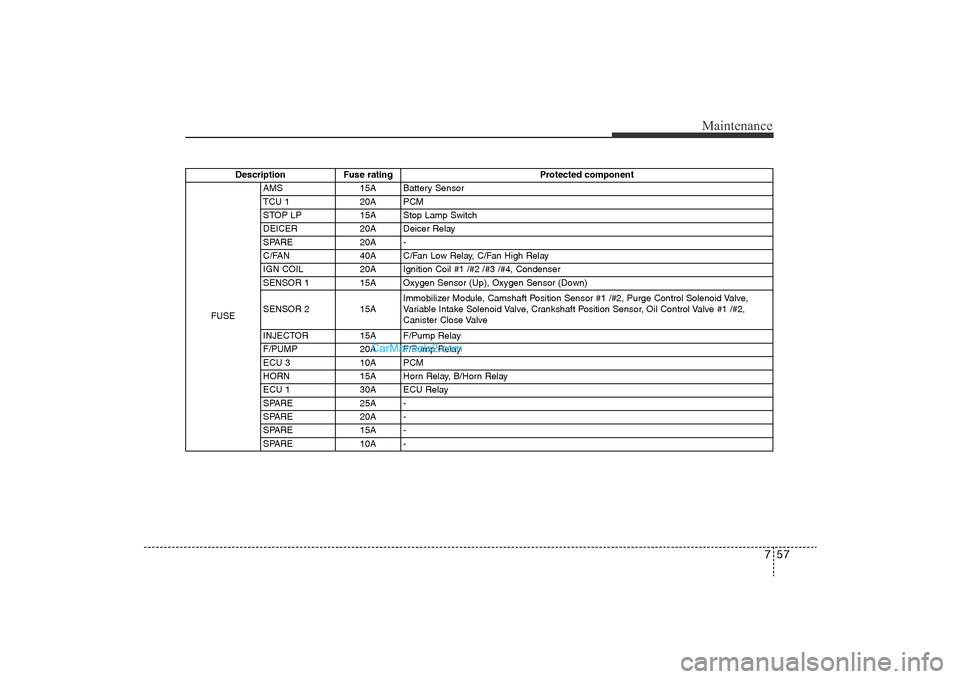
Description Fuse rating Protected component
FUSE AMS 15A Battery Sensor
TCU 1 20A PCM
STOP LP 15A Stop Lamp Switch
DEICER 20A Deicer Relay
SPARE 20A -
C/FAN 40A C/Fan Low Relay, C/Fan High Relay
IGN COIL 20A Ignition Coil #1 /#2 /#3 /#4, Condenser
SENSOR 1 15A Oxygen Sensor (Up), Oxygen Sensor (Down)
SENSOR 2 15A
Immobilizer Module, Camshaft Position Sensor #1 /#2, Purge Control Solenoid Valve,
Variable Intake Solenoid Valve, Crankshaft Position Sensor, Oil Control Valve #1 /#2,
Canister Close Valve
INJECTOR 15A F/Pump Relay
F/PUMP 20A F/Pump Relay
ECU 3 10A PCM
HORN 15A Horn Relay, B/Horn Relay
ECU 1 30A ECU Relay
SPARE 25A -
SPARE 20A -
SPARE 15A -
SPARE 10A -
YF HMA 7.QXP 11/25/2009 1:51 PM Page 57
Page 346 of 380

Maintenance58
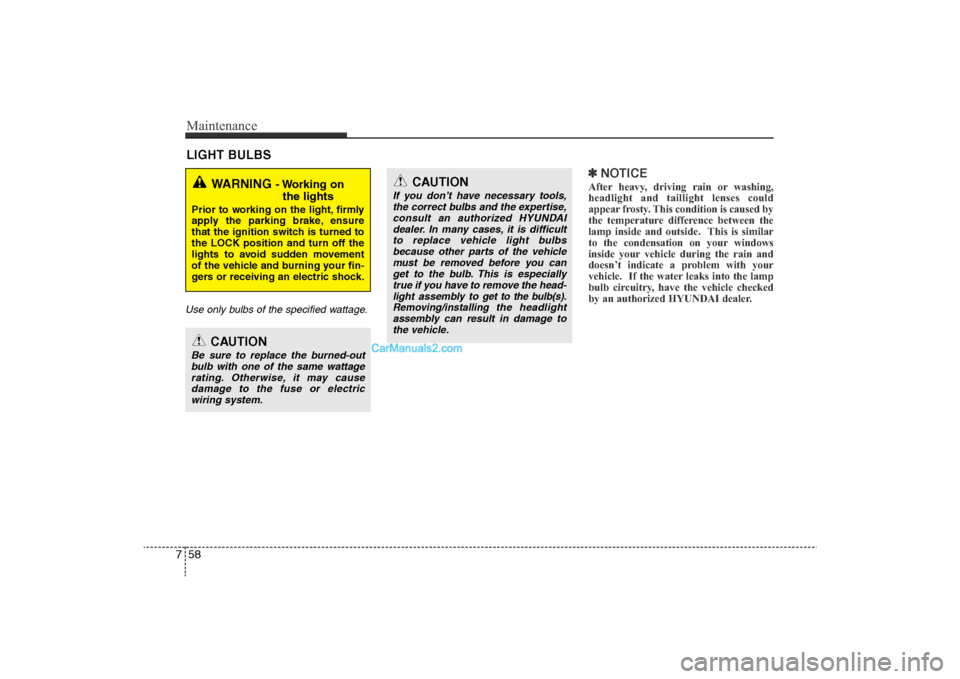
7LIGHT BULBSUse only bulbs of the specified wattage.
✽
NOTICEAfter heavy, driving rain or washing,
headlight and taillight lenses could
appear frosty. This condition is caused by
the temperature difference between the
lamp inside and outside. This is similar
to the condensation on your windows
inside your vehicle during the rain and
doesn’t indicate a problem with your
vehicle. If the water leaks into the lamp
bulb circuitry, have the vehicle checked
by an authorized HYUNDAI dealer.
WARNING
- Working on
the lights
Prior to working on the light, firmly
apply the parking brake, ensure
that the ignition switch is turned to
the LOCK position and turn off the
lights to avoid sudden movement
of the vehicle and burning your fin-
gers or receiving an electric shock.
CAUTION
Be sure to replace the burned-out
bulb with one of the same wattage rating. Otherwise, it may causedamage to the fuse or electricwiring system.
CAUTION
If you don’t have necessary tools,the correct bulbs and the expertise,consult an authorized HYUNDAIdealer. In many cases, it is difficultto replace vehicle light bulbs because other parts of the vehiclemust be removed before you canget to the bulb. This is especiallytrue if you have to remove the head- light assembly to
get to the bulb(s).
Removing/installing
the headlight
assembly can result in damage to the vehicle.
YF HMA 7.QXP 11/25/2009 1:51 PM Page 58
Page 347 of 380
759
Maintenance
Headlight, position light, turn sig-
nal light, side marker light and
front fog light bulb replacement(1) Headlight (High)
(2) Headlight (Low)
(3) Front turn signal light / Position light
(4) Front fog light (if equipped)
Headlight bulb
(Continued)
• If a bulb becomes damaged orcracked, replace it immediately
and carefully dispose of it.
• Wear eye protection when chang- ing a bulb. Allow the bulb to cool
down before handling it.
OHD076046
WARNING
-Halogen bulbs
• Halogen bulbs contain pressur-ized gas that will produce flying
pieces of glass if broken.
• Always handle them carefully, and avoid scratches and abra-
sions. If the bulbs are lit, avoid
contact with liquids. Never touch
the glass with bare hands.
Residual oil may cause the bulb
to overheat and burst when lit. A
bulb should be operated only
when installed in a headlight.
(Continued)
OYF079027
YF HMA 7.QXP 11/25/2009 1:52 PM Page 59
Page 348 of 380

Maintenance60
71. Open the hood.
2. Remove the headlight bulb cover by
turning it counterclockwise.
3. Disconnect the headlight bulb socket- connector.
4. Unsnap the headlight bulb retaining wire by depressing the end and push-
ing it upward.
5. Remove the bulb from the headlight assembly.
6. Install a new headlight bulb and snap the headlight bulb retaining wire into
position by aligning the wire with the
groove on the bulb.
7. Connect the headlight bulb socket- connector.
8. Install the headlight bulb cover by turn- ing it clockwise.
✽NOTICEIf the headlight aiming adjustment is
necessary after the headlight assembly is
reinstalled, consult an authorized
HYUNDAI dealer.G220102ABH-EUFront turn signal, position, side mark-
er and fog light bulbs (if equipped)If the light bulb is not operating, have the
vehicle checked by an authorized
HYUNDAI dealer.
Side repeater light bulb replace-
ment (if equipped)If the light bulb is not operating, have the
vehicle checked by an authorized
HYUNDAI dealer.
OYF079041
OYF079045
YF HMA 7.QXP 11/25/2009 1:52 PM Page 60
Page 349 of 380

761
Maintenance
Rear combination light bulb
replacement(1) Back-up light
(2) Tail light
(3) Rear turn signal light
(4) Stop and tail light
(5) Side marker
Rear turn signal, stop and tail light,side marker1. Open the trunk lid.
2. Remove the service cover by pulling out the service cover. 3. Remove the socket from the assembly
by turning the socket counterclockwise
until the tabs on the socket align with
the slots on the assembly.
4. Remove the bulb from the socket by pressing it in and rotating it counter-
clockwise until the tabs on the bulb
align with the slots in the socket. Pull
the bulb out of the socket.
5. Insert a new bulb by inserting it into the socket and rotating it until it locks
into place.
6. Install the socket in the assembly by aligning the tabs on the socket with the
slots in the assembly. Push the socket
into the assembly and turn the socket
clockwise.
7. Install the service cover by putting it into the service hole.
Back-up lightIf the light is not operating, have the vehi-
cle checked by an authorized HYUNDAI
dealer.
OYF079042N
OYF079035
OYF079043
YF HMA 7.QXP 11/26/2009 10:55 AM Page 61
Page 350 of 380
Maintenance62
7High mounted stop light
replacementIf the light is not operating, have the vehi-
cle checked by an authorized HYUNDAI
dealer.
License plate light bulb replace-
ment1. Loosen the retaining screws with a
philips head screwdriver.
2. Remove the soket by turning it connterclockwise.
3. Remove the bulb by pulling it straight out.
4. Install a new bulb.
5. Reinstall the bulb assembly securely with the retaining screws.
OYF079037L
OYF079036
YF HMA 7.QXP 11/25/2009 1:53 PM Page 62
Page 351 of 380
763
Maintenance
Interior light bulb replacement1. Using a flat-blade screwdriver, gentlypry the lens from the interior light
housing.
2. Remove the bulb by pulling it straight out.
3. Install a new bulb in the socket.
4. Align the lens tabs with the interior light housing notches and snap the
lens into place.
WARNING
Prior to working on the Interior
Lights, ensure that the “OFF” but-
ton is depressed to avoid burning
your fingers or receiving an electric
shock.
CAUTION
Use care not to dirty or damagelens, lens tab, and plastic housings.
Luggage lamp (if equipped)
Map lamp
Sunvisor lamp
Room lamp
OYF079038/OYF079039 OYF079040/OTD079035
YF HMA 7.QXP 11/25/2009 1:54 PM Page 63
Page 352 of 380

Maintenance64
7APPEARANCE CAREExterior careExterior general caution It is very important to follow the label
directions when using any chemical
cleaner or polish. Read all warning and
caution statements that appear on the
label.Finish maintenanceWashing
To help protect your vehicle’s finish from
rust and deterioration, wash it thoroughly
and frequently at least once a month with
lukewarm or cold water.
If you use your vehicle for off-road driv-
ing, you should wash it after each off-
road trip. Pay special attention to the
removal of any accumulation of salt, dirt,
mud, and other foreign materials. Make
sure the drain holes in the lower edges of
the doors and rocker panels are kept
clear and clean.
Insects, tar, tree sap, bird droppings,
industrial pollution and similar deposits
can damage your vehicle’s finish if not
removed immediately.
Even prompt washing with plain water
may not completely remove all these
deposits. A mild soap, safe for use on
painted surfaces, may be used. After washing, rinse the vehicle thor-
oughly with lukewarm or cold water. Do
not allow soap to dry on the finish.
CAUTION
• Do not use strong soap, chemical
detergents or hot water, and donot wash the vehicle in directsunlight or when the body of thevehicle is warm.
• Be careful when washing the side windows of your vehicle.Especially, with high-pressurewater, water may leak through thewindows and wet the interior.
• To prevent damage to the plastic parts, do not clean with chemicalsolvents or strong detergents.
WARNING -
Wet brakes
After washing the vehicle, test the
brakes while driving slowly to see if
they have been affected by water. If
braking performance is impaired,
dry the brakes by applying them
lightly while maintaining a slow for-
ward speed.
CAUTION
• Water washing in the engine com- partment including high pressurewater washing may cause the fail- ure of electrical circuits or engineand related components locatedin the engine compartment.
• Never allow water or other liquids to come in contact with electri-cal/electronic components andair duct inside the vehicle as this may damage them.
OJB037800
YF HMA 7.QXP 11/25/2009 1:54 PM Page 64