Page 359 of 560

739
Maintenance
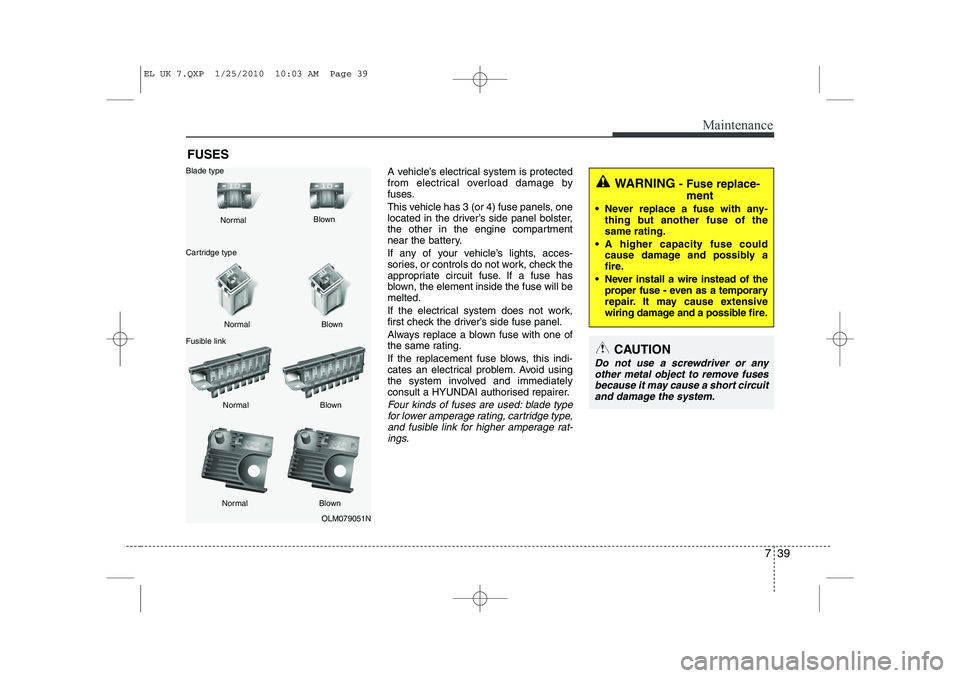
FUSESA vehicle’s electrical system is protected
from electrical overload damage by
fuses.
This vehicle has 3 (or 4) fuse panels, one
located in the driver’s side panel bolster,
the other in the engine compartment
near the battery.
If any of your vehicle’s lights, acces-
sories, or controls do not work, check the
appropriate circuit fuse. If a fuse has
blown, the element inside the fuse will bemelted.
If the electrical system does not work,
first check the driver’s side fuse panel.
Always replace a blown fuse with one of
the same rating.
If the replacement fuse blows, this indi-
cates an electrical problem. Avoid using
the system involved and immediately
consult a HYUNDAI authorised repairer.
Four kinds of fuses are used: blade typefor lower amperage rating, cartridge type,
and fusible link for higher amperage rat- ings.
WARNING - Fuse replace-
ment
Never replace a fuse with any- thing but another fuse of the same rating.
A higher capacity fuse could cause damage and possibly a
fire.
Never install a wire instead of the proper fuse - even as a temporary
repair. It may cause extensive
wiring damage and a possible fire.
CAUTION
Do not use a screwdriver or any
other metal object to remove fusesbecause it may cause a short circuit and damage the system.
OLM079051N
Normal
Normal
Blade type
Cartridge type
Fusible link Blown
Blown
Normal Blown
Normal Blown
EL UK 7.QXP 1/25/2010 10:03 AM Page 39
Page 360 of 560
Maintenance
40
7
Inner panel fuse replacement
1. Turn the ignition switch and all other
switches off.
2. Open the fuse panel cover. 3. Pull the suspected fuse straight out.
Use the removal tool provided in the
engine compartment fuse panel.
4. Check the removed fuse; replace it if it is blown.
5. Push in a new fuse of the same rating, and make sure it fits tightly in the clips.
If it fits loosely, consult a HYUNDAI
authorised repairer.
If you do not have a spare, use a fuse of the same rating from a circuit you may
not need for operating the vehicle, such as the cigar lighter fuse.
If the headlights or other electrical com-
ponents do not work and the fuses are
OK, check the fuse block in the engine
compartment. If a fuse is blown, it mustbe replaced.
OLM079020ROLM079021N
EL UK 7.QXP 1/25/2010 10:03 AM Page 40
Page 361 of 560
741
Maintenance
Memory fuse
Your vehicle is equipped with a memory
fuse to prevent battery discharge if your
vehicle is parked without being operated
for prolonged periods. Use the following
procedures before parking the vehicle for
prolonged periods.
1. Turn off the engine.
2. Turn off the headlights and tail lights.
3. Open the driver’s side panel cover andpull out the memory fuse.
✽✽ NOTICE
Page 362 of 560

Maintenance
42
7
3. Check the removed fuse; replace it if it
is blown. To remove or insert the fuse, use the fuse puller in the engine com-
partment fuse panel.
4. Push in a new fuse of the same rating, and make sure it fits tightly in the clips.
If it fits loosely, consult a HYUNDAI
authorised repairer.
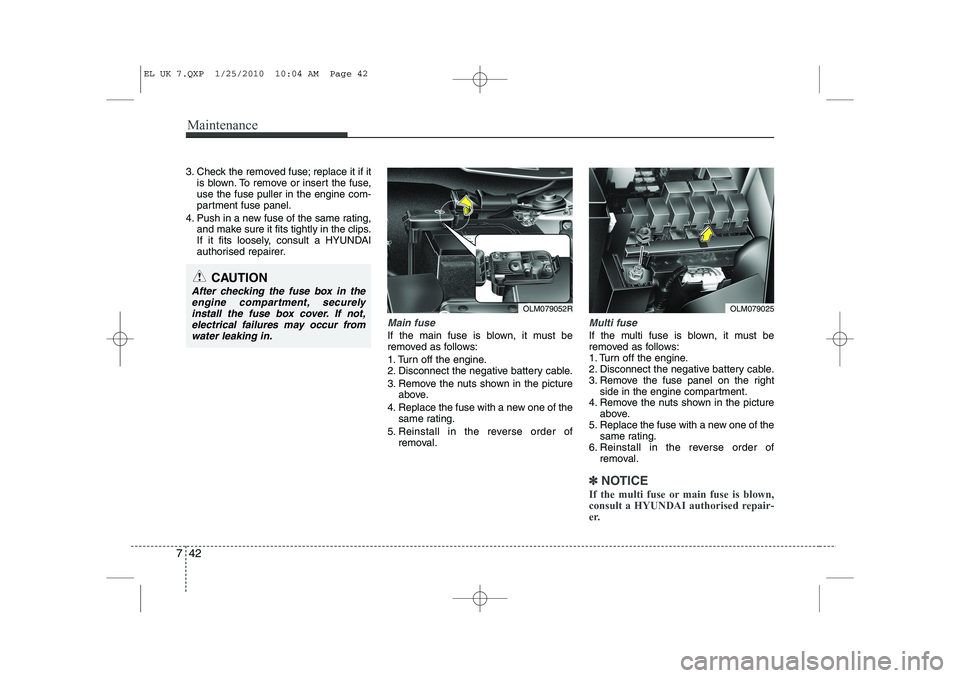
Main fuse
If the main fuse is blown, it must be
removed as follows:
1. Turn off the engine.
2. Disconnect the negative battery cable.
3. Remove the nuts shown in the pictureabove.
4. Replace the fuse with a new one of the same rating.
5. Reinstall in the reverse order of removal.
Multi fuse
If the multi fuse is blown, it must be
removed as follows:
1. Turn off the engine.
2. Disconnect the negative battery cable.
3. Remove the fuse panel on the right side in the engine compartment.
4. Remove the nuts shown in the picture above.
5. Replace the fuse with a new one of the
same rating.
6. Reinstall in the reverse order of removal.
✽✽ NOTICE
If the multi fuse or main fuse is blown,
consult a HYUNDAI authorised repair-
er.
CAUTION
After checking the fuse box in the engine compartment, securelyinstall the fuse box cover. If not, electrical failures may occur from
water leaking in.
OLM079025OLM079052R
EL UK 7.QXP 1/25/2010 10:04 AM Page 42
Page 363 of 560
743
Maintenance
✽✽NOTICE
Not all fuse panel descriptions in this
manual may be applicable to your vehi-cle. It is accurate at the time of printing.When you inspect the fuse box on your
vehicle, refer to the fuse box label.
Engine compartment
OLM079026R/OLM079053R/OLM079027/OLM079028
Fuse/Relay panel description
Inside the fuse/relay box covers, you can find the fuse/relay label describing fuse/relay
name and capacity.
Diesel only
Driver’s side panel
Main fuse
EL UK 7.QXP 1/25/2010 10:04 AM Page 43
Page 367 of 560

747
Maintenance
Engine compartment main fuse panel
No.Fuse ratingSymbolFuse Name Circuit Protected
MULTIFUSE
180AMDPSEPS Control Module
260AB+1I/P Junction Box (Fuse - F13 / F20 / F26 / F31 / F37, IPS 4 / IPS 5 / IPS 6 / IPS 7)
340AABS 2ESP Control Module, ABS Control Module, Multipurpose Check Connector
440AEMSEMS Box (Fuse - F1 / F2 / F3 / F6)
540AABS 1ESP Control Module, ABS Control Module, Multipurpose Check Connector
640ABLOWERRLY. 1 (Blower Relay)
760AB+3I/P Junction Box (Fuse - F30 / F35 / F36, Power Connector - F1 / F2)
860AB+2I/P Junction Box (Power Window Relay, Fuse - F23 / F28 / F33, IPS 0 / IPS 1 / IPS 2 / IPS 3)
FUSE
940A(50A)
GSL(DSL)COOLING FA NRLY. 3 (Cooling Fan Low Relay), RLY. 9 (Cooling Fan High Relay)
1040AHEATED
GLASS RRRLY. 6 (Rear Defogger Relay)
1130AIGN 1W/O Smart Key - Ignition Switch, With Smart Key - PDM Relay Box (IGN1
Relay)
1240AIGN 2RLY. 4 (Start Relay), W/O Smart Key - Ignition Switch, With Smart Key - PDM
Relay Box (IGN2 Relay)
1315AHORNRLY. 2 (Horn Relay), RLY. 5 (Burglar Alarm Horn Relay)
EL UK 7.QXP 1/25/2010 10:04 AM Page 47
Page 368 of 560
Maintenance
48
7
Engine compartment sub fuse panel (Disel Engine)
No.Fuse ratingFuse SymbolCircuit ProtectedRelay SymbolRelay Type
150APTC Heater Relay #1 MICRO PLUG
250APTC Heater Relay #2MICRO PLUG
350APTC Heater Relay #3 MICRO PLUG
430AFuel Filter Heater Relay MICRO PLUG
580AGlow Relay Unit--
No.Fuse ratingSymbolFuse Name Circuit Protected
FUSE
1415ADEICERRLY. 10 (Front Wiper Deicer Relay)
1510ASTOP LAMPStop Lamp Switch, ICM Relay Box (DBC Relay)
1610AB+ SENSORBattery Sensor
1710A4WD4WD ECM
187.5AECU 2RLY. 11 (ATM P/N Relay), G4KD - PCM,
Multifrnction Switch (Remote Control), D4HA - ECM, Mass Air Flow Sensor
197.5AABSESP Control Module, ABS Control Module, Multipurpose Check Connector,
Fuel Filter Warning Sensor (D4HA), Glow Relay Unit (D4HA),
Diesel Box (RLY. 4 - Fuel Filter Heater Relay)
207.5ATCU 2Transaxle Range Switch, TCM (D4HA), Vehicle Speed Sensor
EL UK 7.QXP 1/25/2010 10:05 AM Page 48
Page 371 of 560

751
Maintenance
Turn signal light/Position light
Turn signal light
1. Turn off the engine and open the bon-net.
2. Remove the socket from the assembly by turning the socket counterclockwise
until the tabs on the socket align with
the slots on the assembly.
3. Remove the bulb from the socket by pressing it in and rotating it counter-
clockwise until the tabs on the bulb
align with the slots in the socket. Pull
the bulb out of the socket.
4. Insert a new bulb by inserting it into the socket and rotating it until it locks
into place.
5. Install the socket in the assembly by aligning the tabs on the socket with the
slots in the assembly. Push the socket
into the assembly and turn the socket
clockwise.
OHD076046
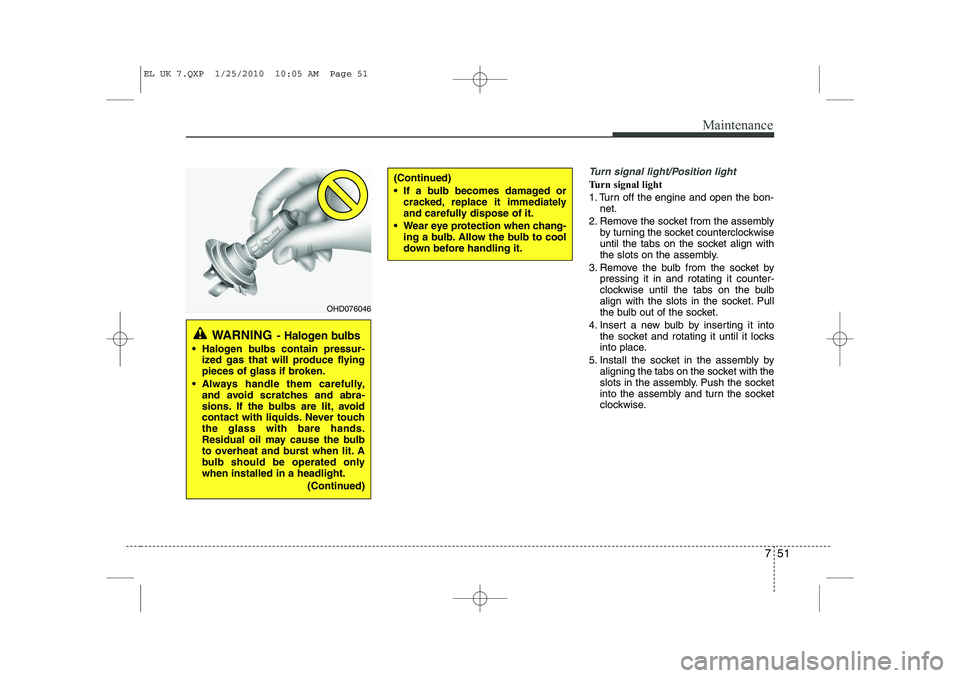
WARNING - Halogen bulbs
Halogen bulbs contain pressur-
ized gas that will produce flying
pieces of glass if broken.
Always handle them carefully, and avoid scratches and abra-
sions. If the bulbs are lit, avoid
contact with liquids. Never touchthe glass with bare hands.
Residual oil may cause the bulb
to overheat and burst when lit. A
bulb should be operated onlywhen installed in a headlight.
(Continued)
(Continued)
If a bulb becomes damaged orcracked, replace it immediately
and carefully dispose of it.
Wear eye protection when chang- ing a bulb. Allow the bulb to cool
down before handling it.
EL UK 7.QXP 1/25/2010 10:05 AM Page 51