Page 387 of 722
The audio system reads and plays
playable sound f iles on the iPod. The
system cannot operate an iPod as a
mass storage device. The system will
only play songs stored on the iPod
with iTunes.
iPod and iTunes are registered
trademarks owned by Apple Inc.
You can select the AUX mode by
using the voice control buttons.
This audio system can select and
play the audio f iles on the iPod
with
the same controls used f or the in-
dash disc player. To play an iPod,
connect it to the USB adapter cable
in the glove box by using your dock
connector, then press the USB/AUX
button. The ignition switch must be
in the ACCESSORY (I) or ON (II)
position. The iPod will also be
charged with the ignition switch in
these settings.
iPods compatible with your audio
system using the USB adapter cable
are: The audio system, including the
music search f eature Song By
Voice , can be operated by voice
control. See the navigation system
manual f or complete details.
Model
iPod 5th and 6th
generations
iPod classic
iPod nano
1st generation
iPod nano
2nd generation
iPod nano
3rd generation
iPod nano
4th generation
iPod nano
5th generation
iPod touch
1st generation
iPod touch
2nd generation
iPod touch
3rd generation
iPhone
iPhone 3G
iPhone 3GS Sof tware
Ver. 1.3 or more
Ver. 1.1.2 or more
Ver. 1.3.1 or more
Ver. 1.1.3 or more
Ver. 1.1.3 or more
Ver. 1.0.4 or more
Ver. 1.0.1 or more
Ver. 1.1.1 or more
Ver. 2.2.1 or more
Ver. 3.1.1 or more
Ver. 2.1.0 or more
Ver. 2.1.0 or more
Ver. 5.12.1 or more
To Play an iPod
Voice Cont rol Syst em
Playing an iPod
(Models with navigation system)
384
TM
10/07/17 10:25:28 31TK8600_389
2011 Odyssey
Page 396 of 722
�Î
�ÎOnly AAC f ormat f iles recorded
with iTunes are playable on this
audio unit.
Some USB f lash memory devices
(such as devices with security lock-
out f eatures, etc.) will not work in
this audio unit. The recommended USB f lash
memory devices are 256 MB or
higher, and f ormatted with the FAT
f ile system. Some digital audio
players may be compatible as well.
This audio system can select and
play the audio f iles f rom a USB f lash
memory device with the same
controls used f or the in-dash disc
player. To play a USB f lash memory
device, connect it to the USB adapter
cable in the glove box, then press the
USB/AUX button. The ignition
switch must be in the ACCESSORY
(I) or ON (II) position. Do not use a device such as a card
reader or hard drive as it or your
f iles may be damaged.
Do not connect your USB f lash
memory device using a hub.
Do not use an extension cable to
the USB adapter cable equipped
with your vehicle.
The audio system reads and plays
the audio f iles on the USB f lash
memory device in MP3, WMA or
AAC formats. The USB flash
memory device limit is up to 700
f olders or up to 15000 f iles. :
CONT INUED
To Play a USB Flash Memory
Device
Playing a USB Flash Memory Device (Models with navigation system)
Features
393
NOTE:
10/07/17 10:26:40 31TK8600_398
2011 Odyssey
Page 416 of 722
�µ
�µ
On all models except LXIf your vehicle’s battery is
disconnected or goes dead, or the
radio f use is removed, the audio
system will disabled itself . If this
happens, there are two methods to
make it work again. Turn the ignition
switch to the ON (II) position, press
the power/volume knob once. The
enter code screen will appear. Vehicle Specif ic Method Press
and hold the power/volume knob f or
a f ew seconds, the audio unit will
check the VIN inf ormation stored in
the vehicle. The audio system will
start activating if the VIN
informationstoredintheaudio
system and the vehicle match.
Security Code Method The enter
code screen will appear. Use the
preset buttons to enter the five-digit
code. The code is on the radio code
card included in your owner’s
manual kit. When it is entered
correctly, the radio will start playing. Youshouldhavereceivedacardthat
lists your audio system code number
and serial number. It is best to store
this card in a saf e place at home. In
addition, you should write the audio
system’s serial number in this owner’s
manual.
If you make a mistake entering the
code, do not start over; complete the
f ive-digit sequence, then enter the
correct code. You have ten tries to
enter the correct code. If you are
unsuccessful in ten attempts, you
must then leave the system on for 1
hour bef ore trying again.
If you cannot activate the audio
system, and lose the card, take the
vehicle to your dealer.
Radio Thef t Protection
Features
413
10/07/17 10:29:19 31TK8600_418
2011 Odyssey
Page 417 of 722
On vehicles with standard rear screenOn vehicles without navigation system
Press the REAR POWER button.
The indicator on the REAR POWER
button will come on. The rear seat
passengers can then operate the rear
system f rom the control panel in the
ceiling. The rear control panel can
also be detached and used as a
remote control, by pushing the
release button, and pulling the
remote toward you.
You can disable the rear control
panel f rom the f ront control panel.
Your vehicle is equipped with a rear
entertainment system that includes a
DVD player f or the enjoyment of the
rear passengers.
With this system, the rear
passengers can enjoy a dif f erent
entertainment source (radio, disc,
CD Library, HDD, USB, iPod
,DVD
player or XM Radio) than the f ront
seat occupants. The audio is
broadcast through the supplied
wireless headphones.
The ignition switch must be in the
ACCESSORY (I) or the ON (II)
position to operate the rear
entertainment system. Press the SETUP button and turn
the selector knob to ‘‘Rear Setup,’’
then press the selector knob. Select
the ‘‘Rear Remote On.’’ Each time
you press and release the selector
knob, this feature turn on and off. To Turn On the System
To turn of f the rear control
Rear Entertainment System414
This vehicle’s overhead mounted video
display, if so equipped, includes
mercury-containing components. Upon
removal, please reuse, recycle, or
dispose of as hazardous waste.
10/07/17 10:29:28 31TK8600_419
2011 Odyssey
Page 445 of 722
Press the REAR POWER button.
The indicator on the REAR POWER
button will come on. The rear seat
passengers can then operate the rear
system f rom the control panel in the
ceiling. The rear control panel can
also be detached and used as a
remote control, by pushing the
release button, and pulling the
remote toward you.
With this system, the rear
passengers can enjoy a dif f erent
entertainment source (radio, disc,
HDD, USB, iPod
, DVD player or
XM Radio) than the front seat
occupants. The audio is broadcast
through the supplied wireless
headphones. Your vehicle is equipped with a rear
entertainment system that includes a
DVD player f or the enjoyment of the
rear passengers. The ignition switch must be in the
ACCESSORY (I) or the ON (II)
position to operate the rear
entertainment system.
On vehicles with ultrawide rear screen.
To Turn On the System
Ultrawide Rear Entertainment System442
10/07/17 10:33:29 31TK8600_447
2011 Odyssey
Page 478 of 722
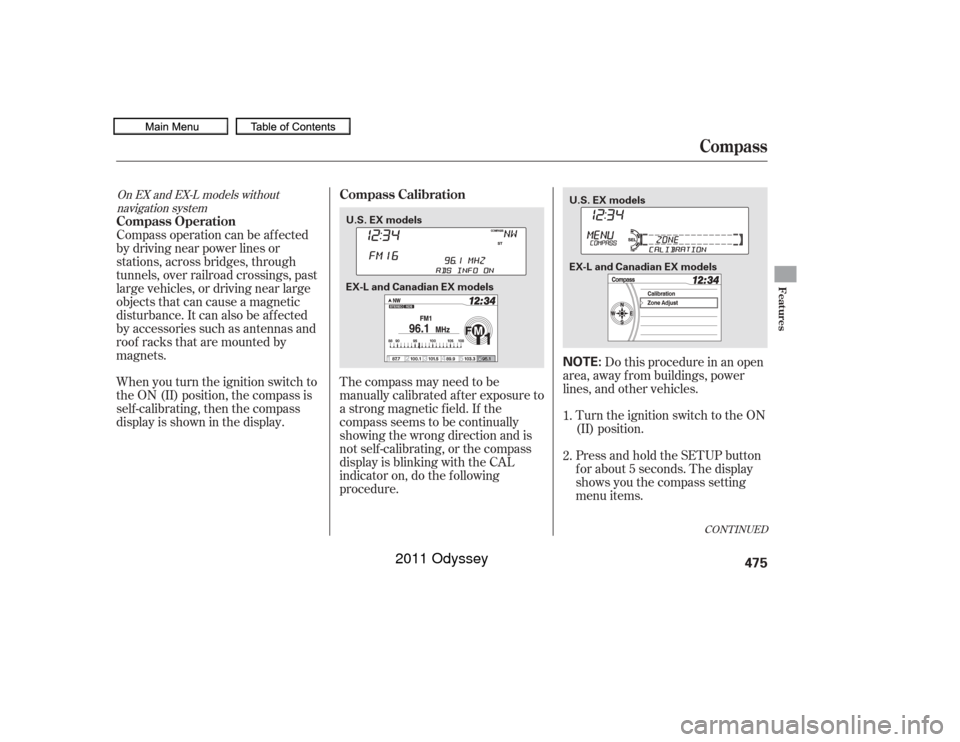
The compass may need to be
manually calibrated af ter exposure to
a strong magnetic field. If the
compassseemstobecontinually
showing the wrong direction and is
not self -calibrating, or the compass
display is blinking with the CAL
indicator on, do the f ollowing
procedure.Do this procedure in an open
area, away f rom buildings, power
lines, and other vehicles.
Turn the ignition switch to the ON
(II) position.
Press and hold the SETUP button
f or about 5 seconds. The display
shows you the compass setting
menu items.
When you turn the ignition switch to
the ON (II) position, the compass is
self-calibrating, then the compass
display is shown in the display. Compass operation can be af f ected
by driving near power lines or
stations, across bridges, through
tunnels, over railroad crossings, past
large vehicles, or driving near large
objects that can cause a magnetic
disturbance. It can also be af f ected
by accessories such as antennas and
roof racks that are mounted by
magnets.
1.
2.
CONT INUED
On EX and EX-L models withoutnavigation system
Compass Calibration
Compass Operation
Compass
Features
475
NOTE:
U.S. EX models
EX-L and Canadian EX models U.S. EX models
EX-L and Canadian EX models
10/07/19 15:54:24 31TK8600_480
2011 Odyssey
Page 480 of 722
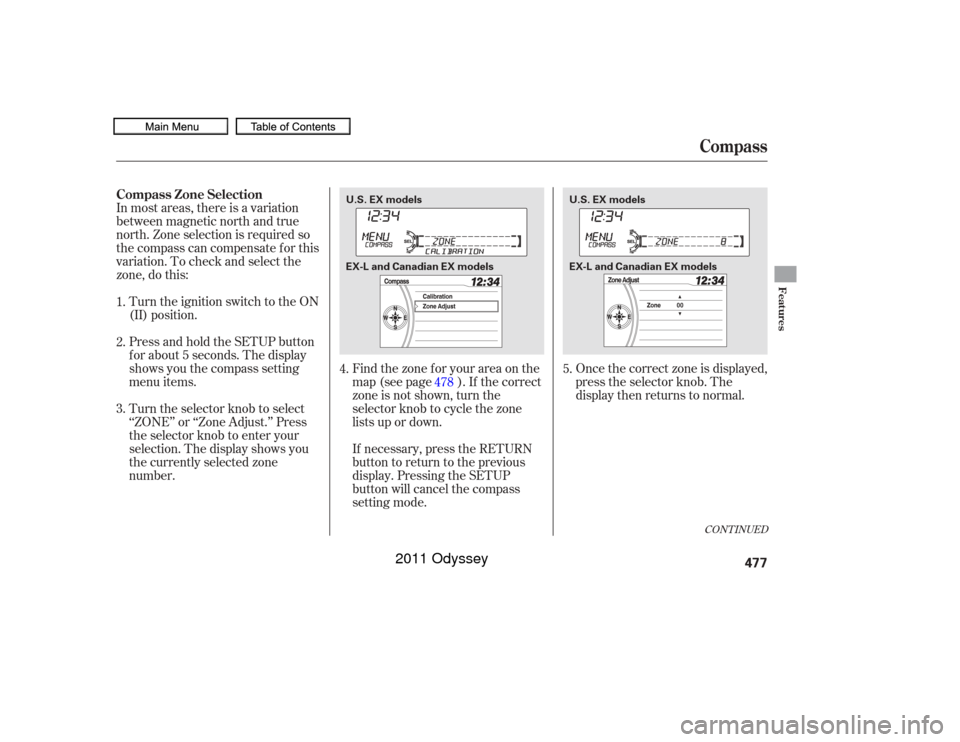
Once the correct zone is displayed,
press the selector knob. The
display then returns to normal.
Find the zone f or your area on the
map (see page ). If the correct
zone is not shown, turn the
selector knob to cycle the zone
lists up or down.
In most areas, there is a variation
between magnetic north and true
north. Zone selection is required so
the compass can compensate f or this
variation. To check and select the
zone, do this:
Turn the ignition switch to the ON
(II) position.
If necessary, press the RETURN
button to return to the previous
display. Pressing the SETUP
button will cancel the compass
setting mode.
Press and hold the SETUP button
f or about 5 seconds. The display
shows you the compass setting
menu items.
Turn the selector knob to select
‘‘ZONE’’ or ‘‘Zone Adjust.’’ Press
the selector knob to enter your
selection. The display shows you
the currently selected zone
number.
4.
5.
2.
3. 1.
478
CONT INUED
Compass Zone Selection
Compass
Features
477
U.S. EX models
EX-L and Canadian EX modelsU.S. EX models
EX-L and Canadian EX models
10/07/19 15:54:44 31TK8600_482
2011 Odyssey
Page 482 of 722

The alarm will also be activated if a
passenger inside the locked vehicle
turns the ignition switch on.
The security system will not set if
the hood, tailgate, or any door is not
f ully closed. Bef ore you leave the
vehicle, make sure the doors,
tailgate, and hood are securely
closed.To see if the system is set
af ter you exit the vehicle, press the
LOCK button on the remote
transmitter within 5 seconds. If the
system is set, the horn will beep
once.
Do not attempt to alter this system
or add other devices to it.
The security system helps to protect
your vehicle and valuables f rom thef t.
The horn sounds and a combination
of headlights, parking lights, side
marker lights, and taillights f lash if
someone attempts to break into your
vehicleorremovetheradio.This
alarm continues f or 2 minutes, then
the system resets. To reset an
activated system before the 2
minutes have elapsed, unlock the
driver’s door with the key or the
remote transmitter.
The security system automatically
sets 15 seconds after you lock the
doors, hood, and the tailgate. For the
system to activate, you must lock the
doorsandthetailgatefromthe
outside with the key, driver’s lock
tab, door lock master switch, or
remote transmitter. The security
system indicator on the instrument
panel starts blinking immediately to
show you the system is setting itself .
Once the security system is set,
opening any door, the tailgate, or the
hood without using the key or the
remote transmitter, will cause it to
alarm. It also alarms if the audio unit
is removed f rom the dashboard or
the wiring is cut.
On all models except LX
Security System
Features
479
NOTE:
SECURITY SYSTEM INDICATOR
10/07/17 10:38:38 31TK8600_484
2011 Odyssey