Page 143 of 356
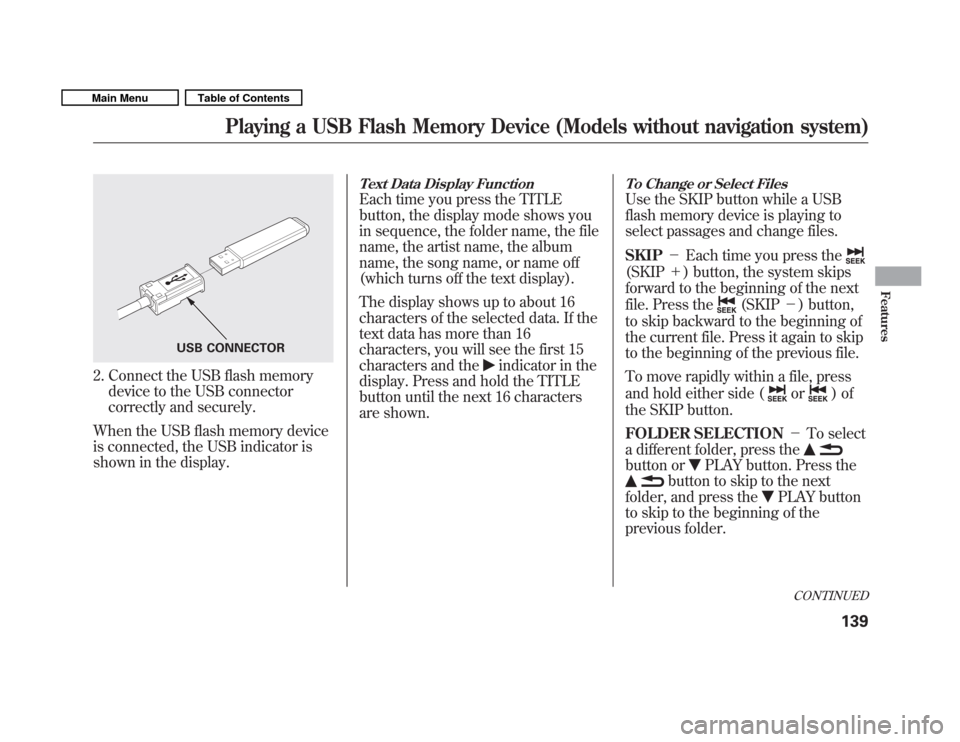
2. Connect the USB flash memorydevice to the USB connector
correctly and securely.
When the USB flash memory device
is connected, the USB indicator is
shown in the display.
Text Data Display Function
Each time you press the TITLE
button, the display mode shows you
in sequence, the folder name, the file
name, the artist name, the album
name, the song name, or name off
(which turns off the text display).
The display shows up to about 16
characters of the selected data. If the
text data has more than 16
characters, you will see the first 15
characters and the
indicator in the
display. Press and hold the TITLE
button until the next 16 characters
are shown.
To Change or Select Files
Use the SKIP button while a USB
flash memory device is playing to
select passages and change files. SKIP �Each time you press the
(SKIP +) button, the system skips
forward to the beginning of the next
file. Press the
(SKIP �) button,
to skip backward to the beginning of
the current file. Press it again to skip
to the beginning of the previous file.
To move rapidly within a file, press
and hold either side (
or)of
the SKIP button.
FOLDER SELECTION �To select
a different folder, press the
button orPLAY button. Press the
button to skip to the next
folder, and press the
PLAY button
to skip to the beginning of the
previous folder.
USB CONNECTOR
CONTINUED
Playing a USB Flash Memory Device (Models without navigation system)
139
Features
Main MenuTable of Contents
Page 177 of 356
Connecting an iPod
1. Open the upper glove box, and pullout the USB adapter cable.
2. Connect your dock connector tothe iPod correctly and securely.
3. Install the dock connector to the USB connector securely. If the audio system still does not
recognize the iPod, the iPod may
need to be reset. Follow the
instructions that came with your
iPod, or you can find reset
instructions online at
www.apple.com/
ipod .
The current file number and total of
the selected playable files are
displayed on the screen. It also
shows the artist, album and track
(file) names on the screen.
USB CONNECTOR
USB ADAPTER CABLE
DOCK CONNECTOR USB CONNECTOR
CONTINUED
Playing an iPod
Page 183 of 356
To Play a USB Flash Memory Device
This audio system can operate the
audio files on a USB flash memory
device with the same controls used
for the in-dash disc player. To play a
USB flash memory device, connect it
to the USB adapter cable in the
upper glove box, then press the CD/
AUX button. The ignition switch
must be in the ACCESSORY (I) or
ON (II) position.
The audio system reads and plays
the audio files on the USB flash
memory device in MP3, WMA orAAC
�formats. Depending on the
format, the display shows MP3,
WMA or AAC when a USB flash
memory device is playing. The USB
flash memory device limit is up to
700 folders or up to 65535 files. � : Only AAC format files recorded
with iTunes are playable on this
audio unit. The recommended USB flash
memory devices are 256 Mbyte or
higher, and formatted with the FAT
file system. Some digital audio
players may be compatible as well.
Some USB flash memory devices
(such as devices with security
lockout features, etc.) will not work
in this audio unit. NOTE:
� Do not use a device such as a card
reader or hard drive as the device
or your files may be damaged.
� Do not connect your USB flash
memory device using a HUB.
� Do not use an extension cable to
the USB adapter cable equipped
with your vehicle.
� Do not keep the USB flash
memory device in the vehicle.
Direct sunlight and high heat will
damage it. �
We recommend backing up your
data before playing a USB flash
memory device.
� Depending on the type and
number of files, it may take some
time before they begin to play.
� Depending on the software the
files were made with, it may not be
possible to play some files, or
display some text data.
� Some devices cannot be powered
or charged via the USB adapter. If
this is the case, use the accessory
adapter to supply power to yourdevice.
� Depending on the type of
encoding and writing software
used, there may be cases where
character information does not
display properly.
CONTINUED
Playing a USB Flash Memory Device (Models with navigation system)
179
Features
Main MenuTable of Contents
Page 185 of 356
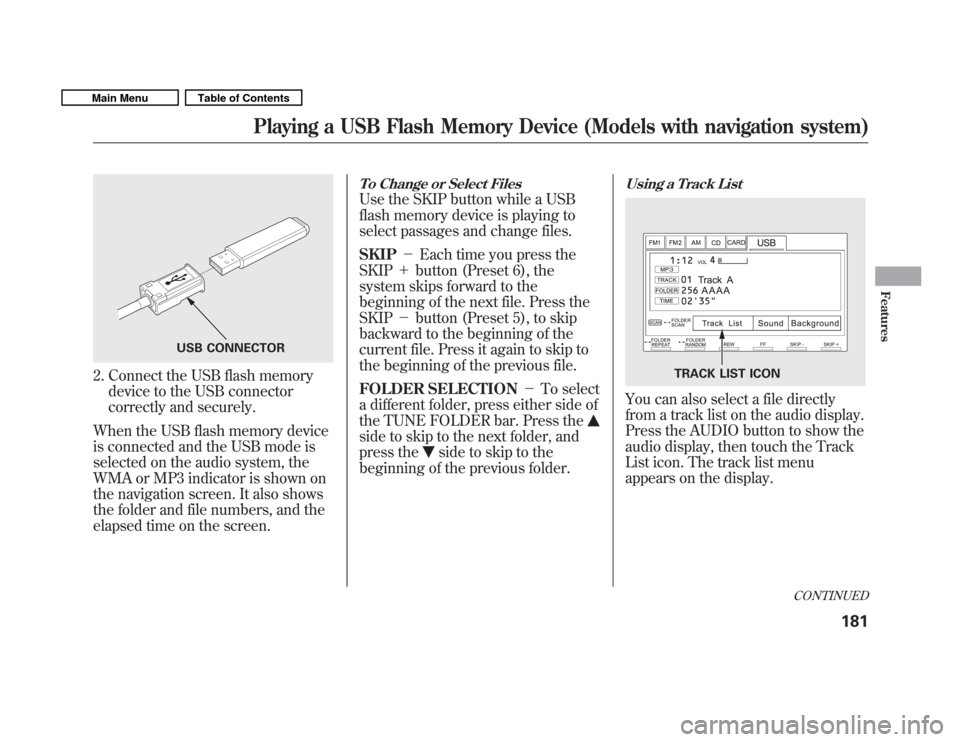
2. Connect the USB flash memorydevice to the USB connector
correctly and securely.
When the USB flash memory device
is connected and the USB mode is
selected on the audio system, the
WMA or MP3 indicator is shown on
the navigation screen. It also shows
the folder and file numbers, and the
elapsed time on the screen.
To Change or Select Files
Use the SKIP button while a USB
flash memory device is playing to
select passages and change files. SKIP �Each time you press the
SKIP +button (Preset 6), the
system skips forward to the
beginning of the next file. Press theSKIP �button (Preset 5), to skip
backward to the beginning of the
current file. Press it again to skip to
the beginning of the previous file.
FOLDER SELECTION �To select
a different folder, press either side of
the TUNE FOLDER bar. Press the
side to skip to the next folder, and
press the
side to skip to the
beginning of the previous folder.
Using a Track List
You can also select a file directly
from a track list on the audio display.
Press the AUDIO button to show the
audio display, then touch the Track
List icon. The track list menu
appears on the display.
USB CONNECTOR
TRACK LIST ICON
CONTINUED
Playing a USB Flash Memory Device (Models with navigation system)
181
Features
Main MenuTable of Contents
Page 198 of 356
On Sport model
The security system helps to protect
your vehicle and valuables from
theft. The horn sounds and a
combination of headlights, parking/
side marker lights and taillights
flashes if someone attempts to break
into your vehicle or remove the audio
unit. This alarm continues for 2
minutes, then the system resets. To
reset an activated system before the
2 minutes have elapsed, unlock the
driver's door with the key or the
remote transmitter.
The security system automatically
sets 15 seconds after you lock the
doors, hood, and the tailgate. For the
system to activate, you must lock the
doors and the tailgate from the
outside with the key, driver's lock
tab, door lock master switch, or
remote transmitter. The security
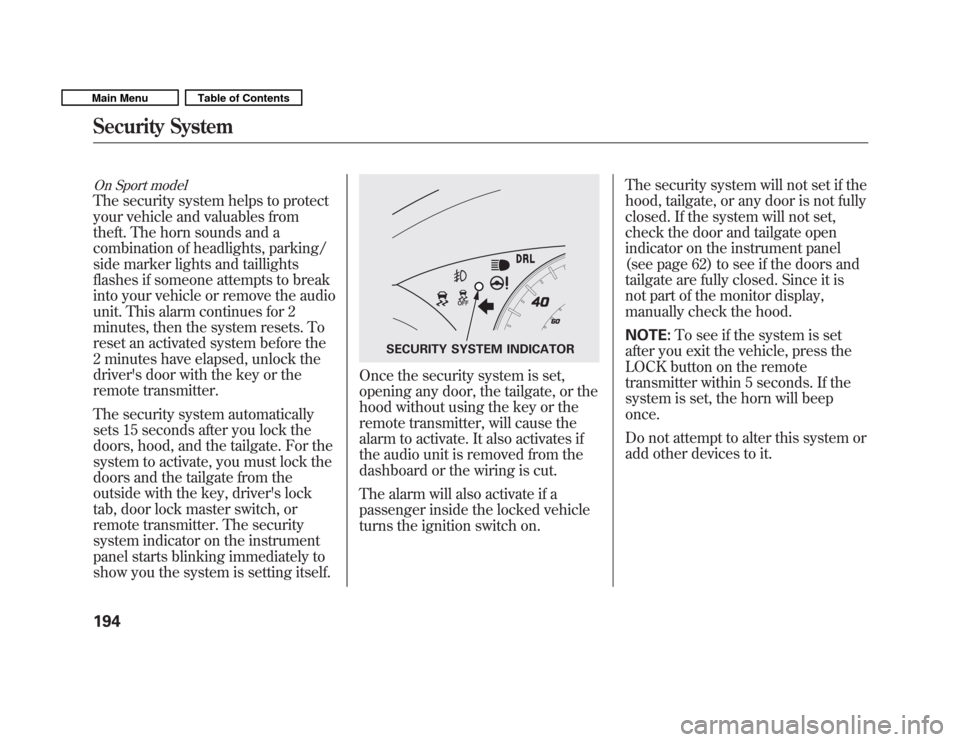
system indicator on the instrument
panel starts blinking immediately to
show you the system is setting itself.
Once the security system is set,
opening any door, the tailgate, or the
hood without using the key or the
remote transmitter, will cause the
alarm to activate. It also activates if
the audio unit is removed from the
dashboard or the wiring is cut.
The alarm will also activate if a
passenger inside the locked vehicle
turns the ignition switch on.The security system will not set if the
hood, tailgate, or any door is not fully
closed. If the system will not set,
check the door and tailgate open
indicator on the instrument panel
(see page 62) to see if the doors and
tailgate are fully closed. Since it is
not part of the monitor display,
manually check the hood. NOTE:
To see if the system is set
after you exit the vehicle, press the
LOCK button on the remote
transmitter within 5 seconds. If the
system is set, the horn will beeponce.
Do not attempt to alter this system or
add other devices to it.
SECURITY SYSTEM INDICATOR
Security System
194
Main MenuTable of Contents
Page 207 of 356
Opening and Closing the Hood
1. Park the vehicle, and set theparking brake. Pull the hood
release handle under the lower left
corner of the dashboard. The hood
will pop up slightly.
2. Put your fingers under the frontedge of the hood near the center.
Slide your hand to the left until
you feel the hood latch handle.
Push this handle up to release it.
Lift up the hood.
If the hood latch handle moves
stiffly, or if you can open the hood
without lifting the handle, the
mechanism should be cleaned andlubricated.3. Holding the grip, pull the supportrod out of its clip. Insert the end
into the designated hole in thehood.
To close the hood, lift it up slightly to
remove the support rod from the
hole. Put the support rod back into
its holding clip. Lower the hood to
about a foot (30 cm) above the
fender, then let it drop. Make sure it
is securely latched.
HOOD RELEASE HANDLELATCHSUPPORT ROD
GRIP CLIP
Service Station Procedures
203
Before Driving
Main MenuTable of Contents
Page 217 of 356
Carrying Cargo in the Passenger Compartment� Store or secure all items that could
be thrown around and hurt
someone during a crash.
� Be sure items placed on the floor
behind the front seats cannot roll
under the seats and interfere with
the driver's ability to operate the
pedals, the proper operation of the
seats, or proper operation of the
sensors under the seats.
� Keep the upper and lower glove
boxes closed while driving. If it is
open, a passenger could injure
their knees during a crash or
sudden stop. �
If you fold the rear seats up or
down, tie down items that could be
thrown about the vehicle during a
crash or sudden stop. Also, keep
all cargo below the bottom of the
windows. If it is higher, it could
interfere with the proper operation
of the side curtain airbags. Carrying Cargo in the Cargo Area
� Distribute cargo evenly on the
floor of the cargo area, placing the
heaviest items on the bottom and
as far forward as possible. Tie
down items that could be thrown
about the vehicle during a crash or
sudden stop.
� Do not stack items higher than the
back of the rear seats. They can
block your view and be thrown
around the vehicle during a crash.
� If you carry large items that
prevent you from closing the
tailgate, exhaust gas can enter the
passenger area. To avoid the
possibility of carbon monoxide
poisoning, follow the instructions
on page 53.
CONTINUED
Carrying Cargo
213
Before Driving
Main MenuTable of Contents
Page 218 of 356
Cargo Hooks
The two or four hooks on the floor
can be used to install a net for
securing items.
Your vehicle also has cargo hooks on
side panel in the cargo area.
They are designed to hold light
items. Heavy objects may damage
the hook. Make sure any items put
on each hook weigh less than 2.2 lbs
(1 kg).HOOK
� : If equipped HOOK
�
Carrying Cargo
214
Main MenuTable of Contents