2011 HONDA FIT ECU
[x] Cancel search: ECUPage 284 of 356
Winter Driving
Tires marked‘‘M + S’’ or ‘‘All
Season ’’on the sidewall have an all-
weather tread design suitable for
most winter driving conditions.
For the best performance in snowy
or icy conditions, you should install
snow tires or tire chains. They may
be required by local laws under
certain conditions.
Snow Tires
If you mount snow tires on your
vehicle, make sure they are radial
tires of the same size and load range
as the original tires. Mount snow
tires on all four wheels. The traction
provided by snow tires on dry roads
may be lower than your original tires.
Check with the tire dealer for
maximum speed recommendations.
Tire Chains
Mount tire chains on your tires when
required by driving conditions or
local laws. Install them only on the
front tires.
Because your vehicle has limited tire
clearance, Honda strongly
recommends using the chains listed
below, made by Security Chain
Company (SCC).
All models except Sport
SC1026
Sport model
SC1030
When installing cables, follow the
manufacturer's instructions, and
mount them as tight as you can.
Make sure they are not contacting
the brake lines or suspension. Drive
slowly with them installed. If you
hear them coming into contact with
the body or chassis, stop and
investigate. Remove them as soon as
you begin driving on cleared roads.
Traction devices that are the wrong size
or improperly installed can damage
your vehicle's brake lines, suspension,
body, and wheels. Stop driving if they
are hitting any part of the vehicle.
Using the wrong chains, or not
properly installing chains, can
damage the brake lines and
cause a crash in which you can
be seriously injured or killed.
Follow all instructions in this
owner's manual regarding the
selection and use of tire chains.
Tires
280
Main MenuTable of Contents
Page 294 of 356

14. Put on the spare tire. Put thewheel nuts back on finger-tight,
then tighten them in a crisscross
pattern with the wheel nut wrench
until the wheel is firmly against the
hub. Do not try to tighten the
wheel nuts fully.
15. Lower the vehicle to the ground, and remove the jack.
16. Tighten the wheel nuts securely in
the same crisscross pattern. Have
the wheel nut torque checked at
the nearest automotive servicefacility.
Tighten the wheel nuts to:
80 lbf·ft (108 N·m, 11 kgf·m)
17.
On Sport model and Canadian LX model with manual transmission:
Remove the center cap before
storing the flat tire.
18. Remove the strap loop from the
legs of the head restraint and
lower the cargo area floor lid.
19. Pull the floor lid toward you and remove the tabs.
20. Pull the floor lid out.
TAB
FLOOR LID
Changing a Flat Tire
290
Main MenuTable of Contents
Page 295 of 356
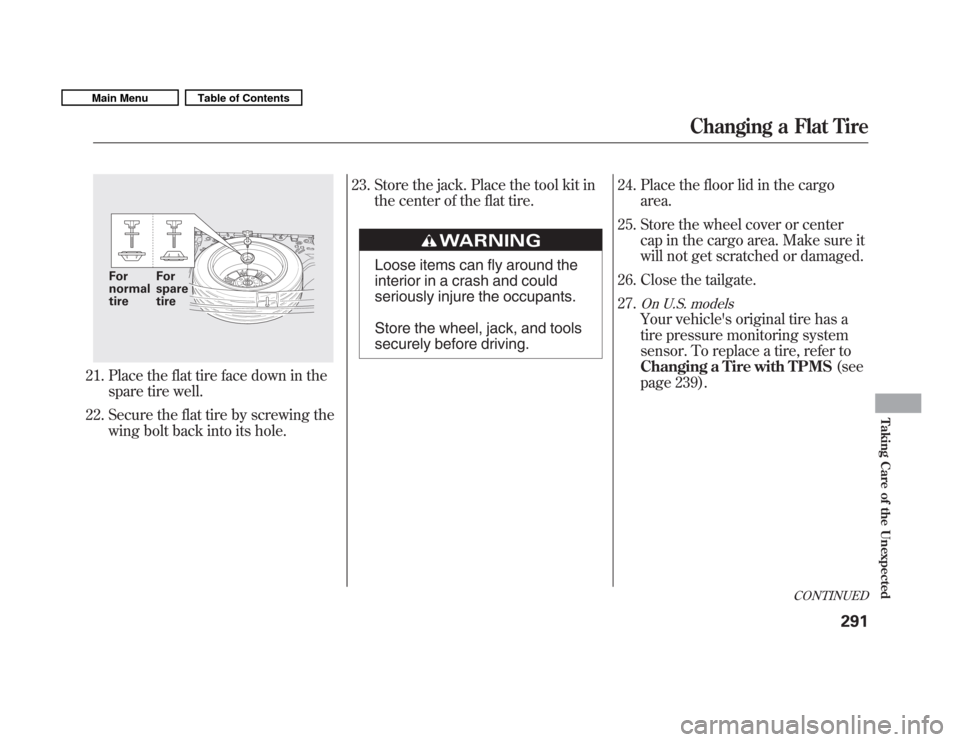
21. Place the flat tire face down in thespare tire well.
22. Secure the flat tire by screwing the wing bolt back into its hole. 23. Store the jack. Place the tool kit in
the center of the flat tire.
Loose items can fly around the
interior in a crash and could
seriously injure the occupants.
Store the wheel, jack, and tools
securely before driving. 24. Place the floor lid in the cargo
area.
25. Store the wheel cover or center cap in the cargo area. Make sure it
will not get scratched or damaged.
26. Close the tailgate. 27.
On U.S. models
Your vehicle's original tire has a
tire pressure monitoring system
sensor. To replace a tire, refer to
Changing a Tire with TPMS (see
page 239).
For normal tire For spare tire
CONTINUED
Changing a Flat Tire
291
Taking Care of the Unexpected
Main MenuTable of Contents
Page 301 of 356
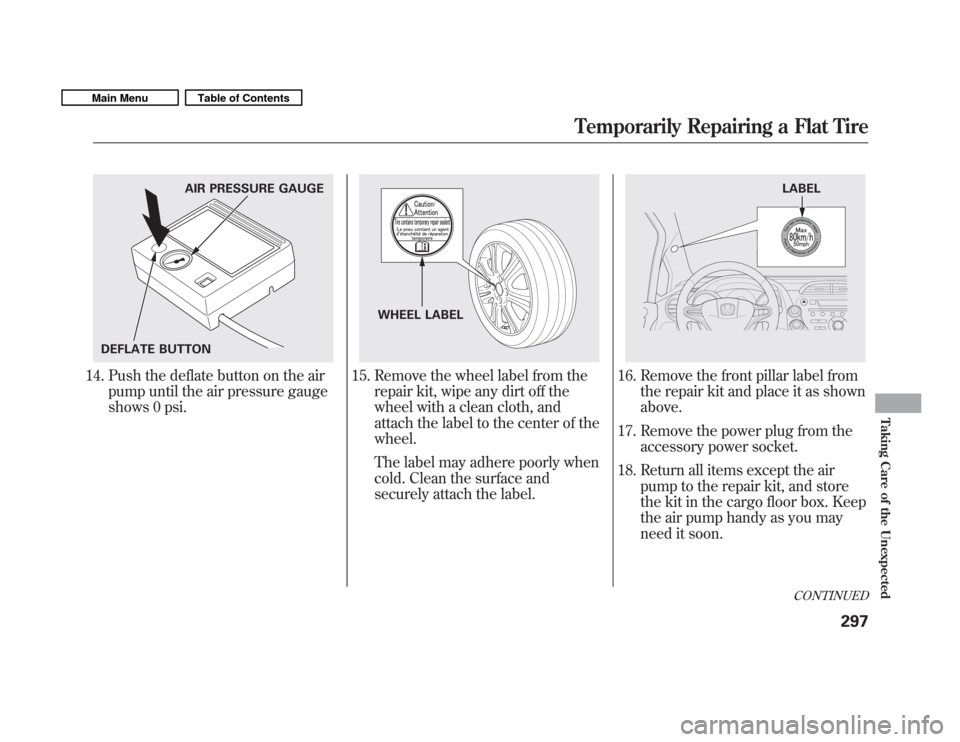
14. Push the deflate button on the airpump until the air pressure gauge
shows 0 psi.15. Remove the wheel label from the repair kit, wipe any dirt off the
wheel with a clean cloth, and
attach the label to the center of thewheel.
The label may adhere poorly when
cold. Clean the surface and
securely attach the label.16. Remove the front pillar label from the repair kit and place it as shown above.
17. Remove the power plug from the accessory power socket.
18. Return all items except the air pump to the repair kit, and store
the kit in the cargo floor box. Keep
the air pump handy as you may
need it soon.
AIR PRESSURE GAUGE
DEFLATE BUTTON
WHEEL LABEL
LABEL
CONTINUED
Temporarily Repairing a Flat Tire
297
Taking Care of the Unexpected
Main MenuTable of Contents
Page 319 of 356
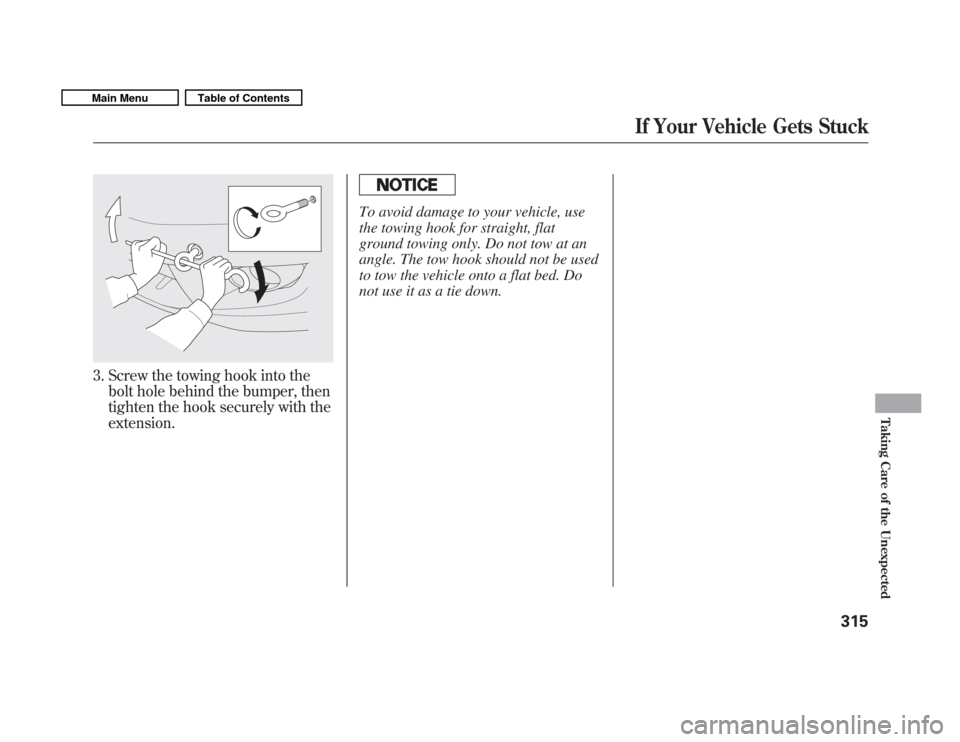
3. Screw the towing hook into thebolt hole behind the bumper, then
tighten the hook securely with theextension.
To avoid damage to your vehicle, use
the towing hook for straight, flat
ground towing only. Do not tow at an
angle. The tow hook should not be used
to tow the vehicle onto a flat bed. Do
not use it as a tie down.
If Your Vehicle Gets Stuck
315
Taking Care of the Unexpected
Main MenuTable of Contents
Page 347 of 356
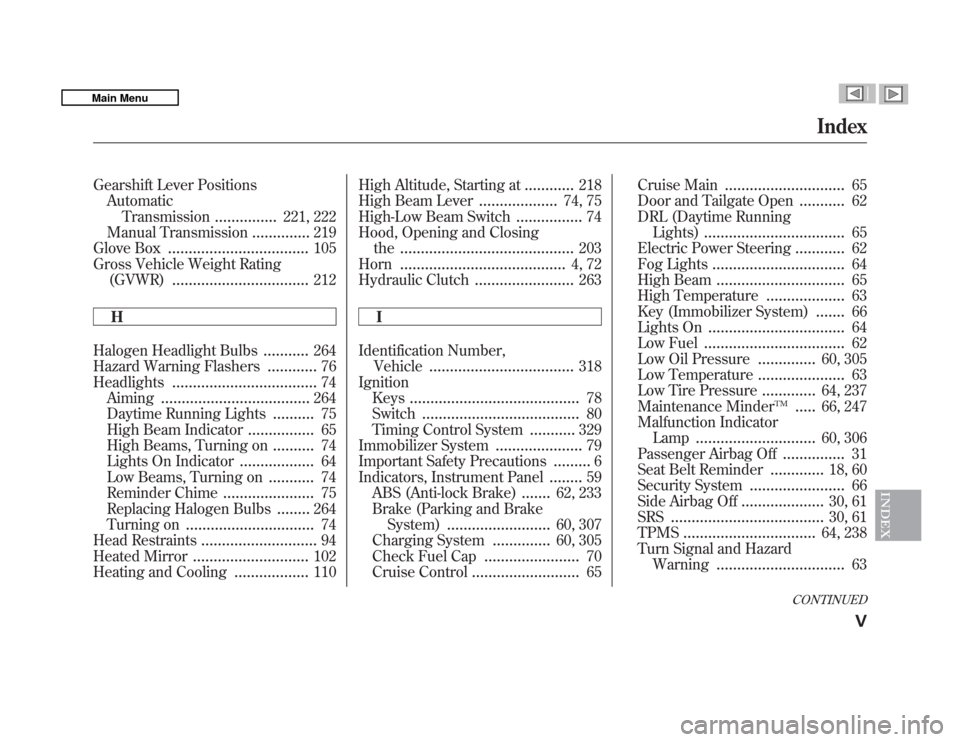
Gearshift Lever PositionsAutomatic
Transmission ...............221, 222
Manual Transmission ..............219
Glove Box .................................. 105
Gross Vehicle Weight Rating (GVWR) ................................. 212
H
Halogen Headlight Bulbs ...........264
Hazard Warning Flashers ............76
Headlights ................................... 74
Aiming .................................... 264
Daytime Running Lights ..........75
High Beam Indicator ................65
High Beams, Turning on ..........74
Lights On Indicator ..................64
Low Beams, Turning on ...........74
Reminder Chime ......................75
Replacing Halogen Bulbs ........264
Turning on ............................... 74
Head Restraints ............................ 94
Heated Mirror ............................ 102
Heating and Cooling ..................110High Altitude, Starting at
............
218
High Beam Lever ...................74, 75
High-Low Beam Switch ................74
Hood, Opening and Closing
the .......................................... 203
Horn ........................................ 4, 72
Hydraulic Clutch ........................263
IIdentification Number, Vehicle ................................... 318
Ignition Keys ......................................... 78
Switch ...................................... 80
Timing Control System ...........329
Immobilizer System .....................79
Important Safety Precautions .........6
Indicators, Instrument Panel ........59
ABS (Anti-lock Brake) .......62, 233
Brake (Parking and Brake System) ......................... 60, 307
Charging System ..............60, 305
Check Fuel Cap .......................70
Cruise Control .......................... 65Cruise Main
.............................
65
Door and Tailgate Open ...........62
DRL (Daytime Running Lights) .................................. 65
Electric Power Steering ............62
Fog Lights ................................ 64
High Beam ............................... 65
High Temperature ...................63
Key (Immobilizer System) .......66
Lights On ................................. 64
Low Fuel .................................. 62
Low Oil Pressure ..............60, 305
Low Temperature .....................63
Low Tire Pressure .............64, 237
Maintenance Minder
TM..... 66, 247
Malfunction Indicator
Lamp ............................. 60, 306
Passenger Airbag Off ...............31
Seat Belt Reminder .............18, 60
Security System .......................66
Side Airbag Off ....................30, 61
SRS ..................................... 30, 61
TPMS ................................ 64, 238
Turn Signal and Hazard Warning ............................... 63
CONTINUED
Index
V
INDEX
Main Menu
Page 351 of 356

Seat Under Box.......................... 106
Security System .........................194
Security System Indicator ............66
Sensors
Driver's Seat Position Sensor ...26
Front Passenger's Weight Sensors ................................ 26
Impact Sensors ........................22
Serial Number ............................ 318
Service Intervals .........................247
Service Manual (U.S. only) ........337
Service Station Procedures ........201
Setting the Clock ........................193
Shifting the Automatic Transmission .......................... 221
Shift Lever Position Indicators ...221
Shift Lock Release ......................225
Side Airbags ................................. 28
How the Side Airbag Off Indicator Works ...................30
How Your Side Airbags Work ..28
Side Curtain Airbags ....................29
How Your Side Curtain Airbags
Work .................................... 29
Side Marker Lights, Bulb Replacement in .......................265Signaling Turns
............................ 63
Snow Tires ................................. 280
Spare Tire .................................. 286
Inflating ........................... 275, 286
Specifications .......................... 322
Spark Plugs ................................ 320
Specifications ............................. 320
Speed Control ............................ 195
Speed Limiter ......................220, 224
Speedometer ................................ 68
SRS, Additional Information .........22
Additional Safety Precautions ...33
Airbag Service .......................... 32
Airbag System Components .....22
How the Side Airbag Off
Indicator Works ...................30
How the SRS Indicator Works ..30
How Your Front Airbags Work .................................... 24
How Your Side Airbags Work ..28
How Your Side Curtain Airbags Work .................................... 29
SRS Indicator ......................... 30, 61
START (Ignition Key Position) .....80 Starting the Engine
....................
218
In Cold Weather at High
Altitude ................................ 218
With a Dead Battery ................301
State Emissions Testing .............331
Steam Coming from Engine .......303
Steering Wheel Adjustments ............................. 77
Anti-theft Column Lock ............80
Buttons ........................... 190, 195
Storing Your Vehicle ..................283
Sun Visor ................................... 106
Supplemental Restraint
System .............................. 9, 22
Servicing .................................. 32
SRS Indicator ...................... 30, 61
System Components ................22
Synthetic Oil .............................. 256
T
Tachometer .................................. 68
Tailgate ........................................ 88
Open Indicator ......................... 62
Opening the ............................. 88
CONTINUED
Index
IX
INDEX
Main Menu