Page 84 of 356

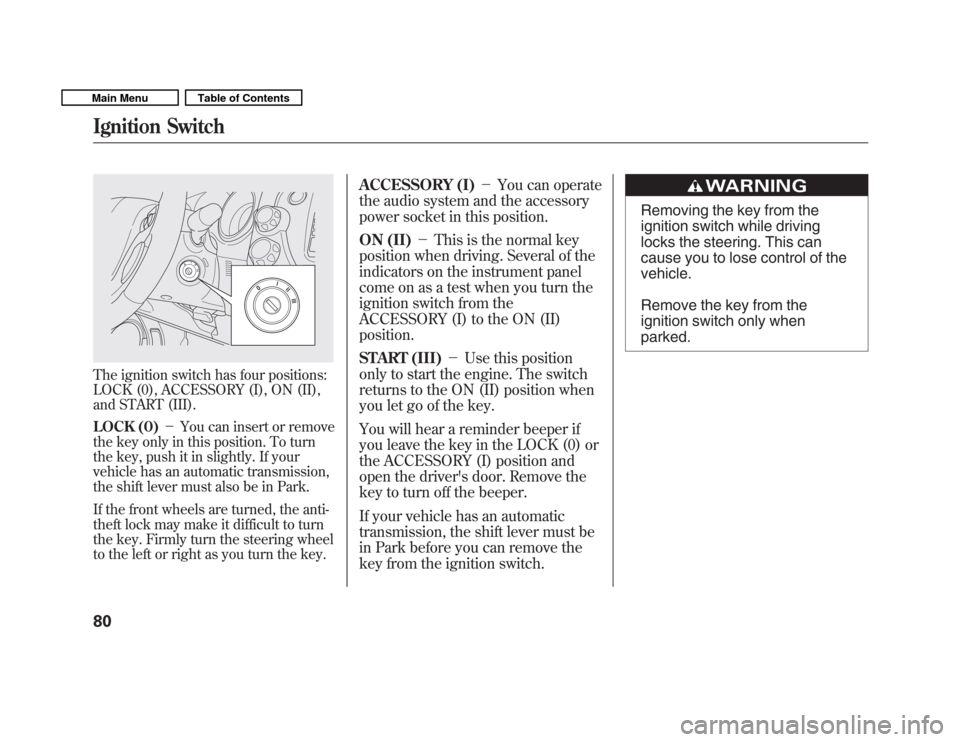
The ignition switch has four positions:
LOCK (0), ACCESSORY (I), ON (II),
and START (III).
LOCK (0)�You can insert or remove
the key only in this position. To turn
the key, push it in slightly. If your
vehicle has an automatic transmission,
the shift lever must also be in Park.
If the front wheels are turned, the anti-
theft lock may make it difficult to turn
the key. Firmly turn the steering wheel
to the left or right as you turn the key. ACCESSORY (I)
�You can operate
the audio system and the accessory
power socket in this position.
ON (II) �This is the normal key
position when driving. Several of the
indicators on the instrument panel
come on as a test when you turn the
ignition switch from the
ACCESSORY (I) to the ON (II)position.
START (III) �Use this position
only to start the engine. The switch
returns to the ON (II) position when
you let go of the key.
You will hear a reminder beeper if
you leave the key in the LOCK (0) or
the ACCESSORY (I) position and
open the driver's door. Remove the
key to turn off the beeper.
If your vehicle has an automatic
transmission, the shift lever must be
in Park before you can remove the
key from the ignition switch.
Removing the key from the
ignition switch while driving
locks the steering. This can
cause you to lose control of thevehicle.
Remove the key from the
ignition switch only whenparked.
Ignition Switch
80
Main MenuTable of Contents
Page 227 of 356

Reverse (R)�Press the brake
pedal and press the release button on
the front of the shift lever to shift
from Park to reverse. To shift from
reverse to neutral, come to a
complete stop, and then shift. Press
the release button before shifting
into reverse from neutral.
Neutral (N) �Use neutral if you
need to restart a stalled engine, or if
it is necessary to stop briefly with the
engine idling. Shift to the Park
position if you need to leave your
vehicle for any reason. Press on the
brake pedal when you are moving
the shift lever from neutral to
another gear. Drive (D)
�Use this position for
your normal driving. The
transmission automatically selects a
suitable gear (1 through 5) for your
speed and acceleration. You may
notice the transmission shifting up at
higher engine speeds when the
engine is cold. This helps the engine
warm up faster.
All models except U.S. Sport
Drive (D 3) � This position is similar
to D, except only the first three gears
are selected. Use D 3to provide
engine braking when going down a
steep hill. D 3can also keep the
transmission from cycling between
third and fourth gears in stop-and-godriving.
All models except U.S. Sport
Second (2) �To shift to second,
press the release button on the front
of the shift lever. This position locks
the transmission in second gear. It
does not downshift to first gear when
you come to a stop.
Use second gear:
� For more power when climbing.
� To increase engine braking when
going down steep hills.
� For starting out on a slippery
surface or in deep snow.
� To help reduce wheel spin.
CONTINUED
Automatic Transmission
223
Driving
Main MenuTable of Contents
Page 284 of 356

Winter Driving
Tires marked‘‘M + S’’ or ‘‘All
Season ’’on the sidewall have an all-
weather tread design suitable for
most winter driving conditions.
For the best performance in snowy
or icy conditions, you should install
snow tires or tire chains. They may
be required by local laws under
certain conditions.
Snow Tires
If you mount snow tires on your
vehicle, make sure they are radial
tires of the same size and load range
as the original tires. Mount snow
tires on all four wheels. The traction
provided by snow tires on dry roads
may be lower than your original tires.
Check with the tire dealer for
maximum speed recommendations.
Tire Chains
Mount tire chains on your tires when
required by driving conditions or
local laws. Install them only on the
front tires.
Because your vehicle has limited tire
clearance, Honda strongly
recommends using the chains listed
below, made by Security Chain
Company (SCC).
All models except Sport
SC1026
Sport model
SC1030
When installing cables, follow the
manufacturer's instructions, and
mount them as tight as you can.
Make sure they are not contacting
the brake lines or suspension. Drive
slowly with them installed. If you
hear them coming into contact with
the body or chassis, stop and
investigate. Remove them as soon as
you begin driving on cleared roads.
Traction devices that are the wrong size
or improperly installed can damage
your vehicle's brake lines, suspension,
body, and wheels. Stop driving if they
are hitting any part of the vehicle.
Using the wrong chains, or not
properly installing chains, can
damage the brake lines and
cause a crash in which you can
be seriously injured or killed.
Follow all instructions in this
owner's manual regarding the
selection and use of tire chains.
Tires
280
Main MenuTable of Contents