2011 FORD SUPER DUTY fuel
[x] Cancel search: fuelPage 232 of 441
TIRE PRESSURE MONITORING SYSTEM (TPMS) (IF EQUIPPED)
Each tire, including the spare (if
provided), should be checked
monthly when cold and inflated to
the inflation pressure recommended
by the vehicle manufacturer on the
vehicle placard or tire inflation pressure label. (If your vehicle has tires
of a different size than the size indicated on the vehicle placard or tire
inflation pressure label, you should determine the proper tire inflation
pressure for those tires.)
As an added safety feature, your vehicle has been equipped with a tire
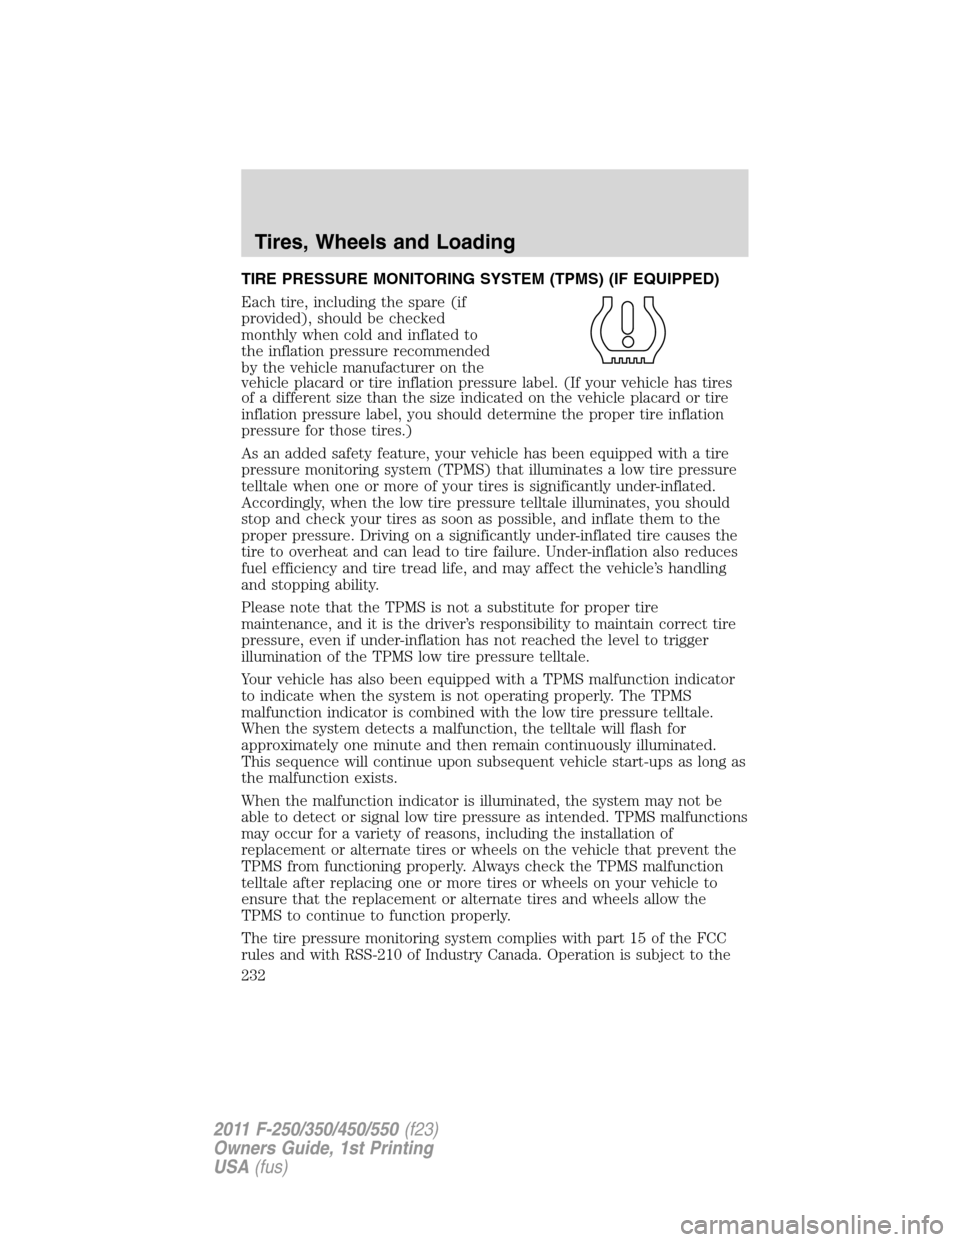
pressure monitoring system (TPMS) that illuminates a low tire pressure
telltale when one or more of your tires is significantly under-inflated.
Accordingly, when the low tire pressure telltale illuminates, you should
stop and check your tires as soon as possible, and inflate them to the
proper pressure. Driving on a significantly under-inflated tire causes the
tire to overheat and can lead to tire failure. Under-inflation also reduces
fuel efficiency and tire tread life, and may affect the vehicle’s handling
and stopping ability.
Please note that the TPMS is not a substitute for proper tire
maintenance, and it is the driver’s responsibility to maintain correct tire
pressure, even if under-inflation has not reached the level to trigger
illumination of the TPMS low tire pressure telltale.
Your vehicle has also been equipped with a TPMS malfunction indicator
to indicate when the system is not operating properly. The TPMS
malfunction indicator is combined with the low tire pressure telltale.
When the system detects a malfunction, the telltale will flash for
approximately one minute and then remain continuously illuminated.
This sequence will continue upon subsequent vehicle start-ups as long as
the malfunction exists.
When the malfunction indicator is illuminated, the system may not be
able to detect or signal low tire pressure as intended. TPMS malfunctions
may occur for a variety of reasons, including the installation of
replacement or alternate tires or wheels on the vehicle that prevent the
TPMS from functioning properly. Always check the TPMS malfunction
telltale after replacing one or more tires or wheels on your vehicle to
ensure that the replacement or alternate tires and wheels allow the
TPMS to continue to function properly.
The tire pressure monitoring system complies with part 15 of the FCC
rules and with RSS-210 of Industry Canada. Operation is subject to the
Tires, Wheels and Loading
232
2011 F-250/350/450/550(f23)
Owners Guide, 1st Printing
USA(fus)
Page 239 of 441
Follow these guidelines when using snow tires and chains:
•Use only SAE Class S chains.
•Install chains securely, verifying that the chains do not touch any
wiring, brake lines or fuel lines.
•Drive cautiously. If you hear the chains rub or bang against your
vehicle, stop and re-tighten the chains. If this does not work, remove
the chains to prevent damage to your vehicle.
•If possible, avoid fully loading your vehicle.
•Remove the tire chains when they are no longer needed. Do not use
tire chains on dry roads.
•The suspension insulation and bumpers will help prevent vehicle
damage. Do not remove these components from your vehicle when
using snow tires and chains.
VEHICLE LOADING – WITH AND WITHOUT A TRAILER
This section will guide you in the proper loading of your vehicle and/or
trailer, to keep your loaded vehicle weight within its design rating
capability, with or without a trailer. Properly loading your vehicle will
provide maximum return of vehicle design performance. Before loading
your vehicle, familiarize yourself with the following terms for determining
your vehicle’s weight ratings, with or without a trailer, from the vehicle’s
Tire Label or Safety Compliance Certification Label:
Base Curb Weight– is the weight of the vehicle including a full tank of
fuel and all standard equipment. It does not include passengers, cargo, or
optional equipment.
Vehicle Curb Weight– is the weight of your new vehicle when you
picked it up from your authorized dealer plus any aftermarket
equipment.
Tires, Wheels and Loading
239
2011 F-250/350/450/550(f23)
Owners Guide, 1st Printing
USA(fus)
Page 248 of 441
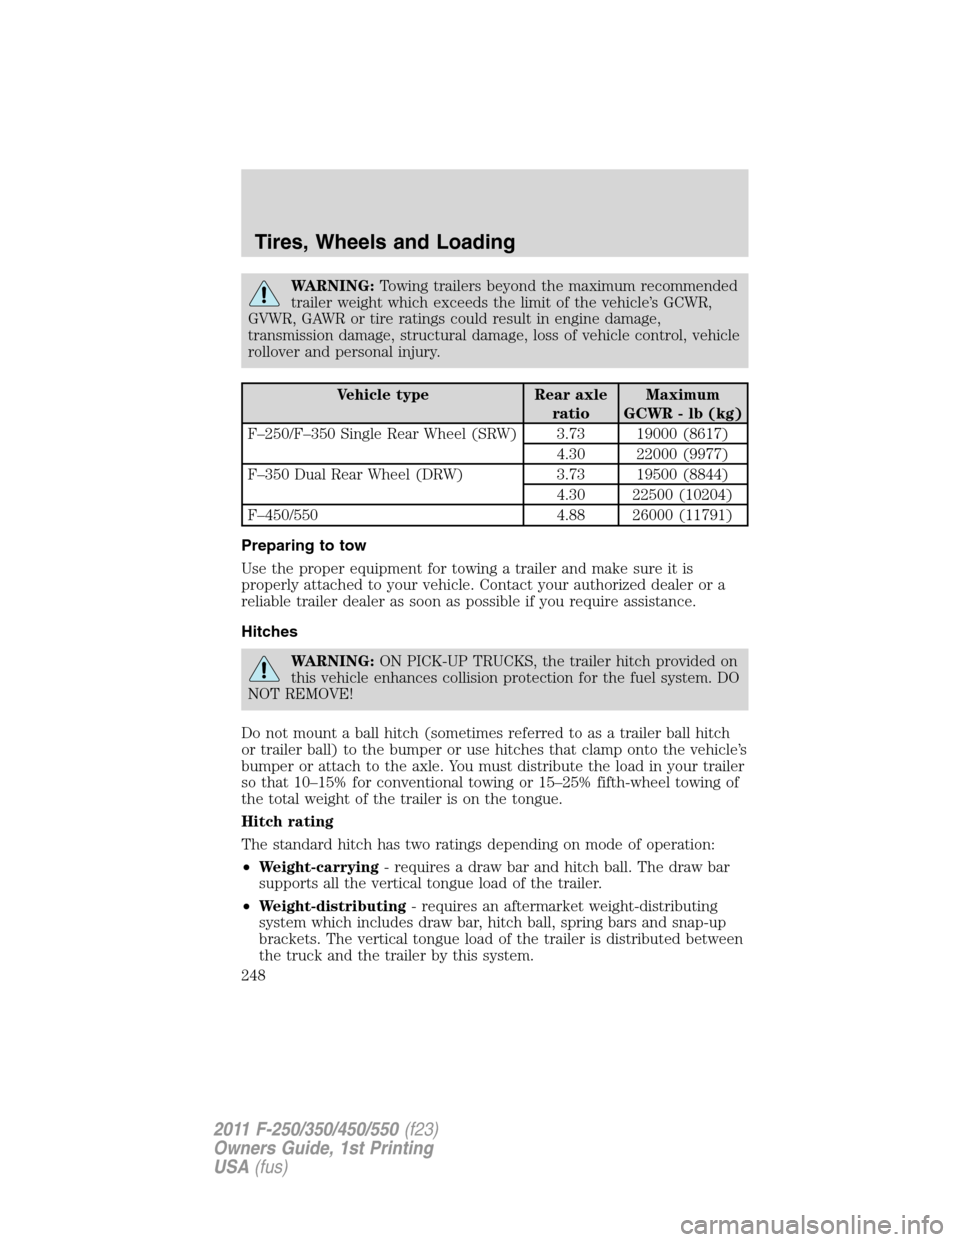
WARNING:Towing trailers beyond the maximum recommended
trailer weight which exceeds the limit of the vehicle’s GCWR,
GVWR, GAWR or tire ratings could result in engine damage,
transmission damage, structural damage, loss of vehicle control, vehicle
rollover and personal injury.
Vehicle type Rear axle
ratioMaximum
GCWR - lb (kg)
F–250/F–350 Single Rear Wheel (SRW) 3.73 19000 (8617)
4.30 22000 (9977)
F–350 Dual Rear Wheel (DRW) 3.73 19500 (8844)
4.30 22500 (10204)
F–450/550 4.88 26000 (11791)
Preparing to tow
Use the proper equipment for towing a trailer and make sure it is
properly attached to your vehicle. Contact your authorized dealer or a
reliable trailer dealer as soon as possible if you require assistance.
Hitches
WARNING:ON PICK-UP TRUCKS, the trailer hitch provided on
this vehicle enhances collision protection for the fuel system. DO
NOT REMOVE!
Do not mount a ball hitch (sometimes referred to as a trailer ball hitch
or trailer ball) to the bumper or use hitches that clamp onto the vehicle’s
bumper or attach to the axle. You must distribute the load in your trailer
so that 10–15% for conventional towing or 15–25% fifth-wheel towing of
the total weight of the trailer is on the tongue.
Hitch rating
The standard hitch has two ratings depending on mode of operation:
•Weight-carrying- requires a draw bar and hitch ball. The draw bar
supports all the vertical tongue load of the trailer.
•Weight-distributing- requires an aftermarket weight-distributing
system which includes draw bar, hitch ball, spring bars and snap-up
brackets. The vertical tongue load of the trailer is distributed between
the truck and the trailer by this system.
Tires, Wheels and Loading
248
2011 F-250/350/450/550(f23)
Owners Guide, 1st Printing
USA(fus)
Page 259 of 441
STARTING
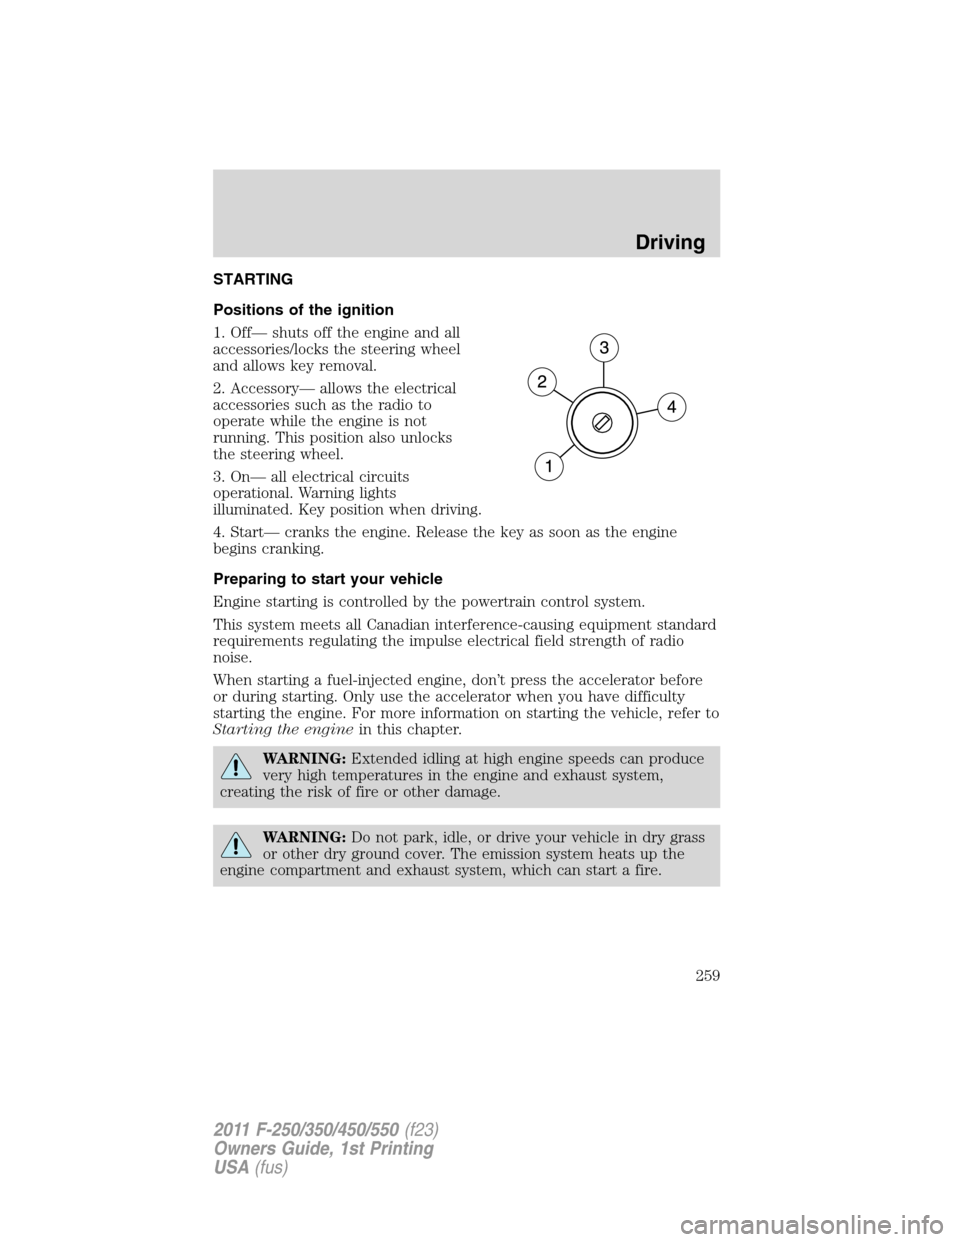
Positions of the ignition
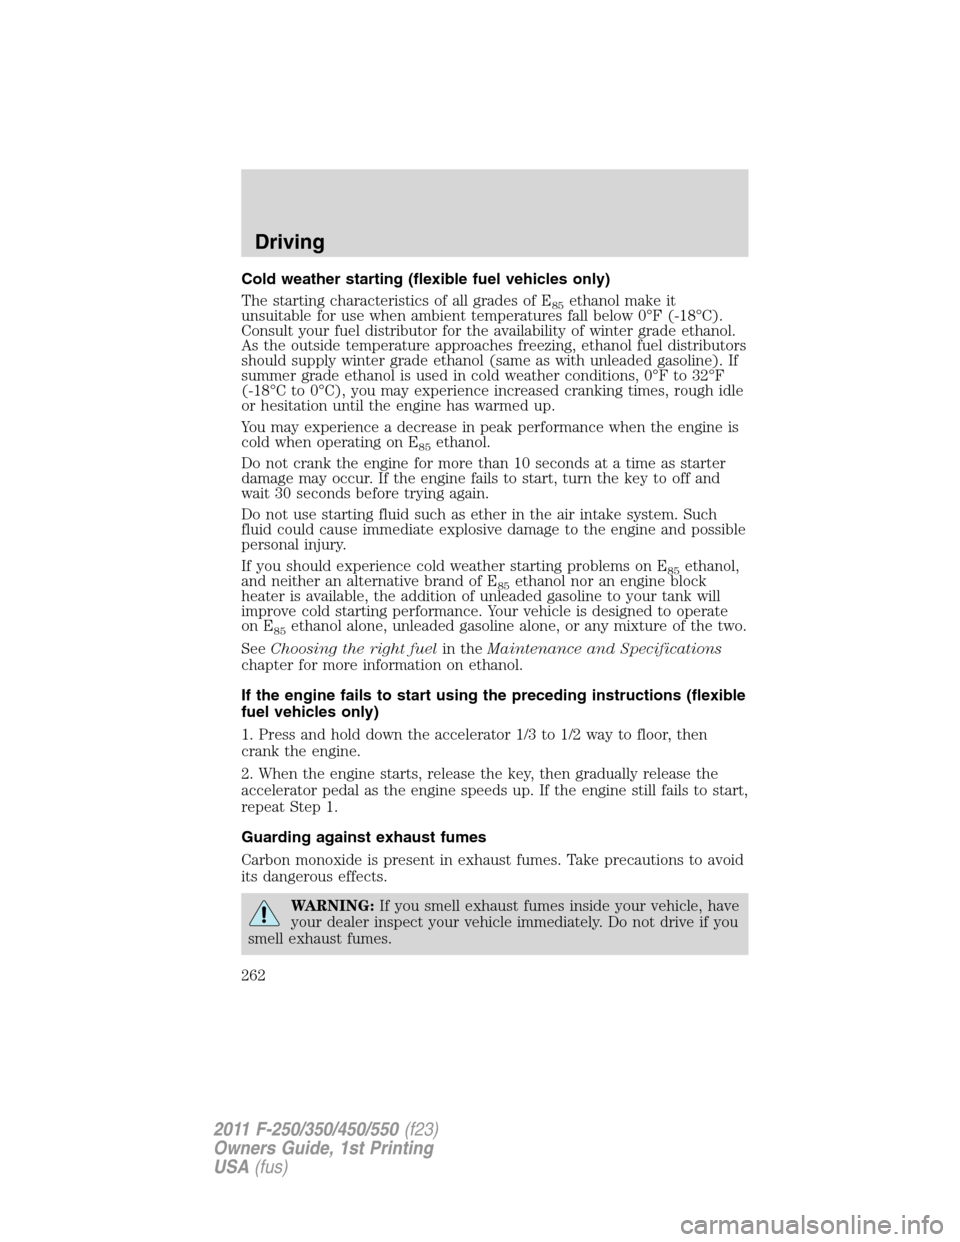
1. Off— shuts off the engine and all
accessories/locks the steering wheel
and allows key removal.
2. Accessory— allows the electrical
accessories such as the radio to
operate while the engine is not
running. This position also unlocks
the steering wheel.
3. On— all electrical circuits
operational. Warning lights
illuminated. Key position when driving.
4. Start— cranks the engine. Release the key as soon as the engine
begins cranking.
Preparing to start your vehicle
Engine starting is controlled by the powertrain control system.
This system meets all Canadian interference-causing equipment standard
requirements regulating the impulse electrical field strength of radio
noise.
When starting a fuel-injected engine, don’t press the accelerator before
or during starting. Only use the accelerator when you have difficulty
starting the engine. For more information on starting the vehicle, refer to
Starting the enginein this chapter.
WARNING:Extended idling at high engine speeds can produce
very high temperatures in the engine and exhaust system,
creating the risk of fire or other damage.
WARNING:Do not park, idle, or drive your vehicle in dry grass
or other dry ground cover. The emission system heats up the
engine compartment and exhaust system, which can start a fire.
Driving
259
2011 F-250/350/450/550(f23)
Owners Guide, 1st Printing
USA(fus)
Page 261 of 441
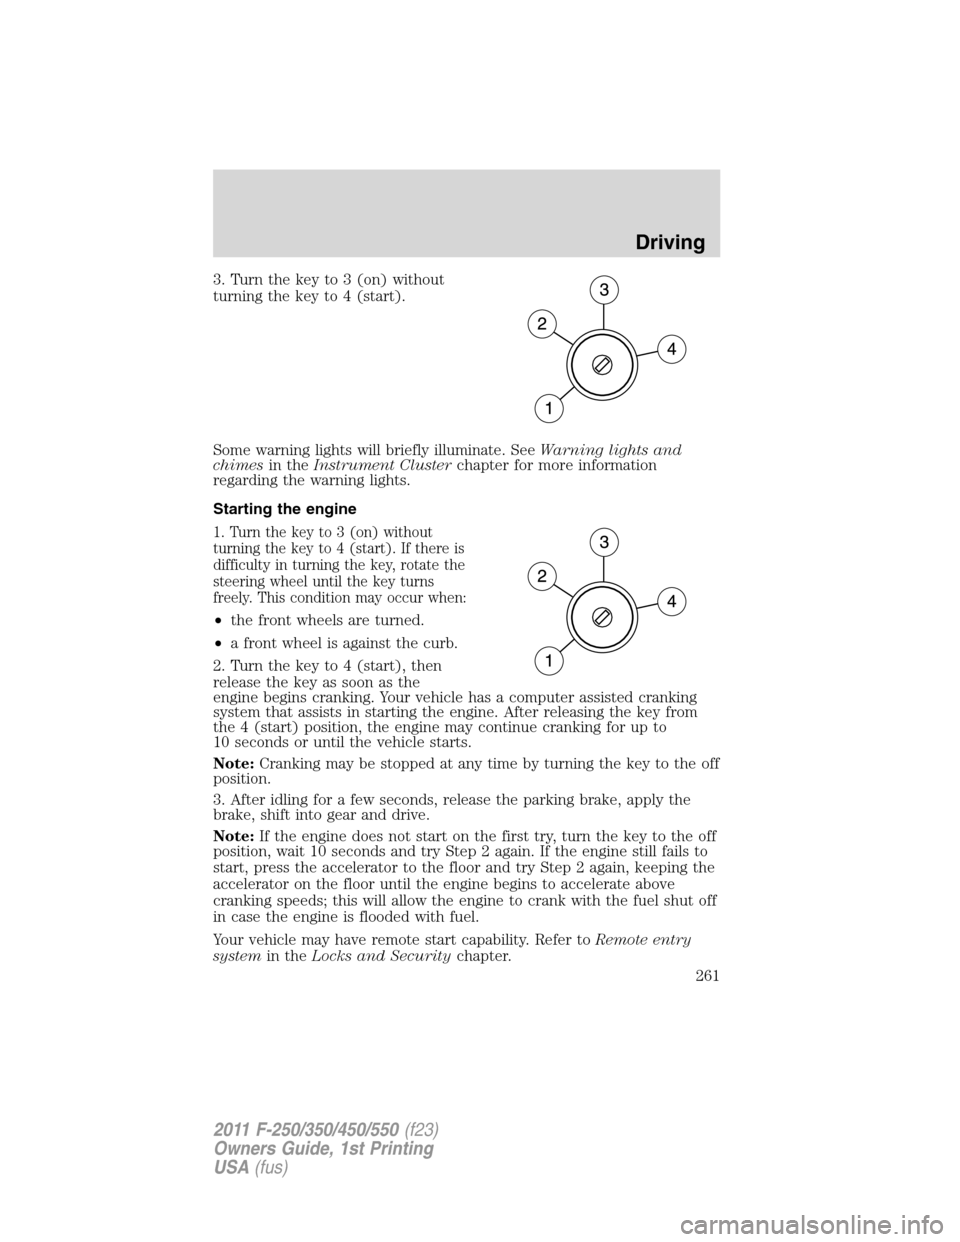
3. Turn the key to 3 (on) without
turning the key to 4 (start).
Some warning lights will briefly illuminate. SeeWarning lights and
chimesin theInstrument Clusterchapter for more information
regarding the warning lights.
Starting the engine
1. Turn the key to 3 (on) without
turning the key to 4 (start). If there is
difficulty in turning the key, rotate the
steering wheel until the key turns
freely. This condition may occur when:
•the front wheels are turned.
•a front wheel is against the curb.
2. Turn the key to 4 (start), then
release the key as soon as the
engine begins cranking. Your vehicle has a computer assisted cranking
system that assists in starting the engine. After releasing the key from
the 4 (start) position, the engine may continue cranking for up to
10 seconds or until the vehicle starts.
Note:Cranking may be stopped at any time by turning the key to the off
position.
3. After idling for a few seconds, release the parking brake, apply the
brake, shift into gear and drive.
Note:If the engine does not start on the first try, turn the key to the off
position, wait 10 seconds and try Step 2 again. If the engine still fails to
start, press the accelerator to the floor and try Step 2 again, keeping the
accelerator on the floor until the engine begins to accelerate above
cranking speeds; this will allow the engine to crank with the fuel shut off
in case the engine is flooded with fuel.
Your vehicle may have remote start capability. Refer toRemote entry
systemin theLocks and Securitychapter.
Driving
261
2011 F-250/350/450/550(f23)
Owners Guide, 1st Printing
USA(fus)
Page 262 of 441
Cold weather starting (flexible fuel vehicles only)
The starting characteristics of all grades of E
85ethanol make it
unsuitable for use when ambient temperatures fall below 0°F (-18°C).
Consult your fuel distributor for the availability of winter grade ethanol.
As the outside temperature approaches freezing, ethanol fuel distributors
should supply winter grade ethanol (same as with unleaded gasoline). If
summer grade ethanol is used in cold weather conditions, 0°F to 32°F
(-18°C to 0°C), you may experience increased cranking times, rough idle
or hesitation until the engine has warmed up.
You may experience a decrease in peak performance when the engine is
cold when operating on E
85ethanol.
Do not crank the engine for more than 10 seconds at a time as starter
damage may occur. If the engine fails to start, turn the key to off and
wait 30 seconds before trying again.
Do not use starting fluid such as ether in the air intake system. Such
fluid could cause immediate explosive damage to the engine and possible
personal injury.
If you should experience cold weather starting problems on E
85ethanol,
and neither an alternative brand of E
85ethanol nor an engine block
heater is available, the addition of unleaded gasoline to your tank will
improve cold starting performance. Your vehicle is designed to operate
on E
85ethanol alone, unleaded gasoline alone, or any mixture of the two.
SeeChoosing the right fuelin theMaintenance and Specifications
chapter for more information on ethanol.
If the engine fails to start using the preceding instructions (flexible
fuel vehicles only)
1. Press and hold down the accelerator 1/3 to 1/2 way to floor, then
crank the engine.
2. When the engine starts, release the key, then gradually release the
accelerator pedal as the engine speeds up. If the engine still fails to start,
repeat Step 1.
Guarding against exhaust fumes
Carbon monoxide is present in exhaust fumes. Take precautions to avoid
its dangerous effects.
WARNING:If you smell exhaust fumes inside your vehicle, have
your dealer inspect your vehicle immediately. Do not drive if you
smell exhaust fumes.
Driving
262
2011 F-250/350/450/550(f23)
Owners Guide, 1st Printing
USA(fus)
Page 263 of 441
Important ventilating information
If the engine is idling while the vehicle is stopped for a long period of
time, open the windows at least 1 inch (2.5 cm) or adjust the heating or
air conditioning to bring in fresh air.
ENGINE BLOCK HEATER (IF EQUIPPED)
An engine block heater warms the engine coolant which aids in starting
and allows the heater/defroster system to respond quickly. If your vehicle
is equipped with this system, your equipment includes a heater element
which is installed in your engine block and a wire harness which allows
the user to connect the system to a grounded 120 volt A/C electrical
source. The block heater system is most effective when outdoor
temperatures reach below 0°F (-18°C).
For flexible fuel vehicles, if operating with E
85ethanol, an engine block
heater must be used if ambient temperature is below 0°F (-18°C).
SeeCold weather startingearlier in this chapter for more information
on starting with ethanol.
WARNING:Failure to follow engine block heater instructions
could result in property damage or physical injury.
WARNING:To reduce the risk of electrical shock, do not use
your heater with ungrounded electrical systems or two-pronged
(cheater) adapters.
Prior to using the engine block heater, follow these recommendations for
proper and safe operation:
•For your safety, use an outdoor extension cord that is product
certified by Underwriter’s Laboratory (UL) or Canadian Standards
Association (CSA). Use only an extension cord that can be used
outdoors, in cold temperatures, and is clearly marked “Suitable for Use
with Outdoor Appliances.” Never use an indoor extension cord
outdoors; it could result in an electric shock or fire hazard.
•Use a 16 gauge outdoor extension cord, minimum.
•Use as short an extension cord as possible.
•Do not use multiple extension cords. Instead, use one extension cord
which is long enough to reach from the engine block heater cord to
the outlet without stretching.
Driving
263
2011 F-250/350/450/550(f23)
Owners Guide, 1st Printing
USA(fus)
Page 282 of 441
N (Neutral)
With the gearshift lever in N (Neutral), the vehicle can be started and is
free to roll. Hold the brake pedal down while in this position.
D (Overdrive) with Tow/Haul Off
D (Overdrive) with tow/haul off is the normal driving position for the
best fuel economy. The overdrive function allows automatic upshifts and
downshifts through gears one through five.
D (Overdrive) with Tow/Haul On
The tow/haul feature improves transmission operation when towing a
trailer or a heavy load. All transmission gear ranges are available when
using tow/haul.
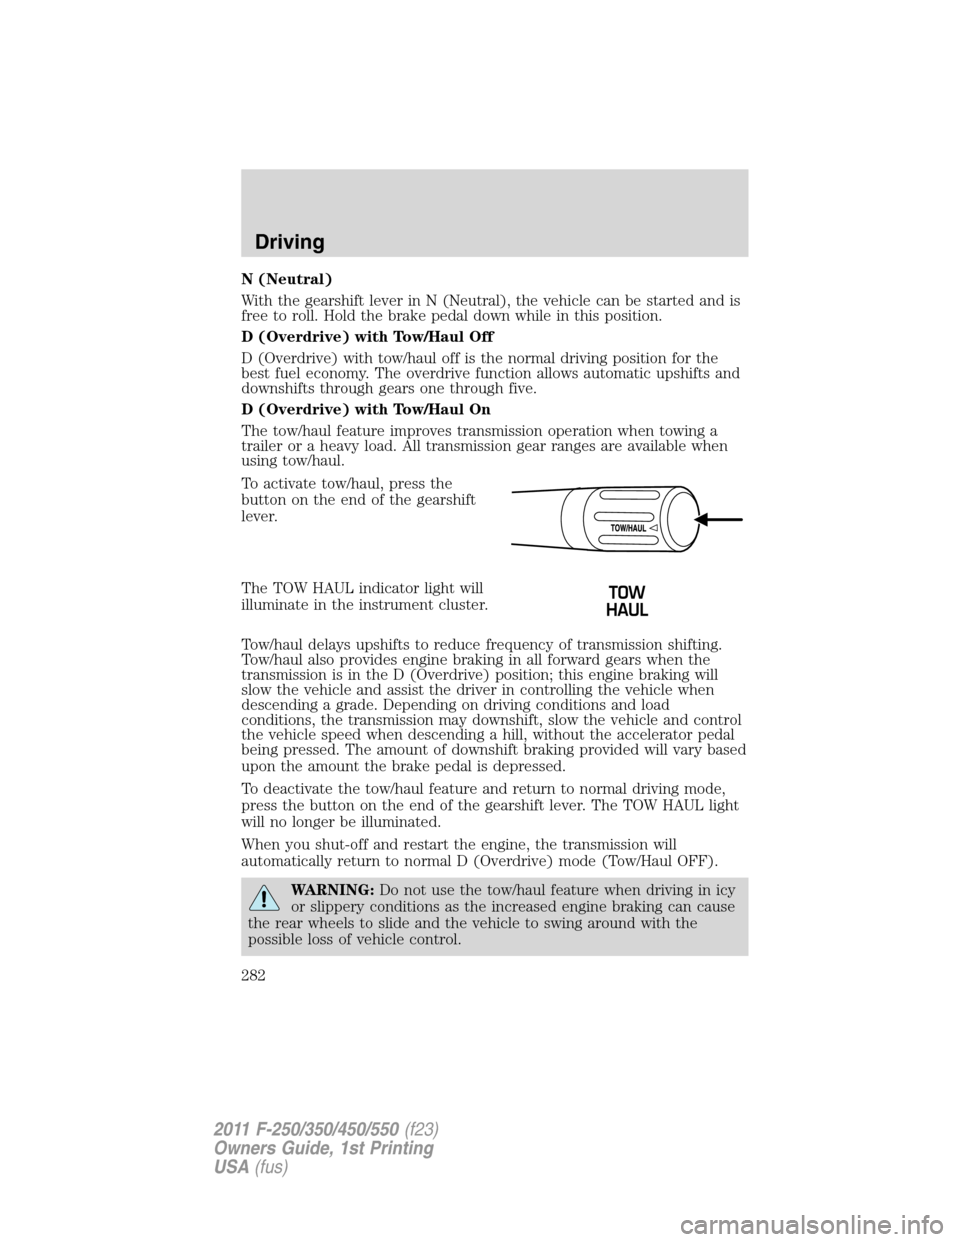
To activate tow/haul, press the
button on the end of the gearshift
lever.
The TOW HAUL indicator light will
illuminate in the instrument cluster.
Tow/haul delays upshifts to reduce frequency of transmission shifting.
Tow/haul also provides engine braking in all forward gears when the
transmission is in the D (Overdrive) position; this engine braking will
slow the vehicle and assist the driver in controlling the vehicle when
descending a grade. Depending on driving conditions and load
conditions, the transmission may downshift, slow the vehicle and control
the vehicle speed when descending a hill, without the accelerator pedal
being pressed. The amount of downshift braking provided will vary based
upon the amount the brake pedal is depressed.
To deactivate the tow/haul feature and return to normal driving mode,
press the button on the end of the gearshift lever. The TOW HAUL light
will no longer be illuminated.
When you shut-off and restart the engine, the transmission will
automatically return to normal D (Overdrive) mode (Tow/Haul OFF).
WARNING:Do not use the tow/haul feature when driving in icy
or slippery conditions as the increased engine braking can cause
the rear wheels to slide and the vehicle to swing around with the
possible loss of vehicle control.
Driving
282
2011 F-250/350/450/550(f23)
Owners Guide, 1st Printing
USA(fus)