2011 FORD SUPER DUTY automatic transmission
[x] Cancel search: automatic transmissionPage 285 of 441
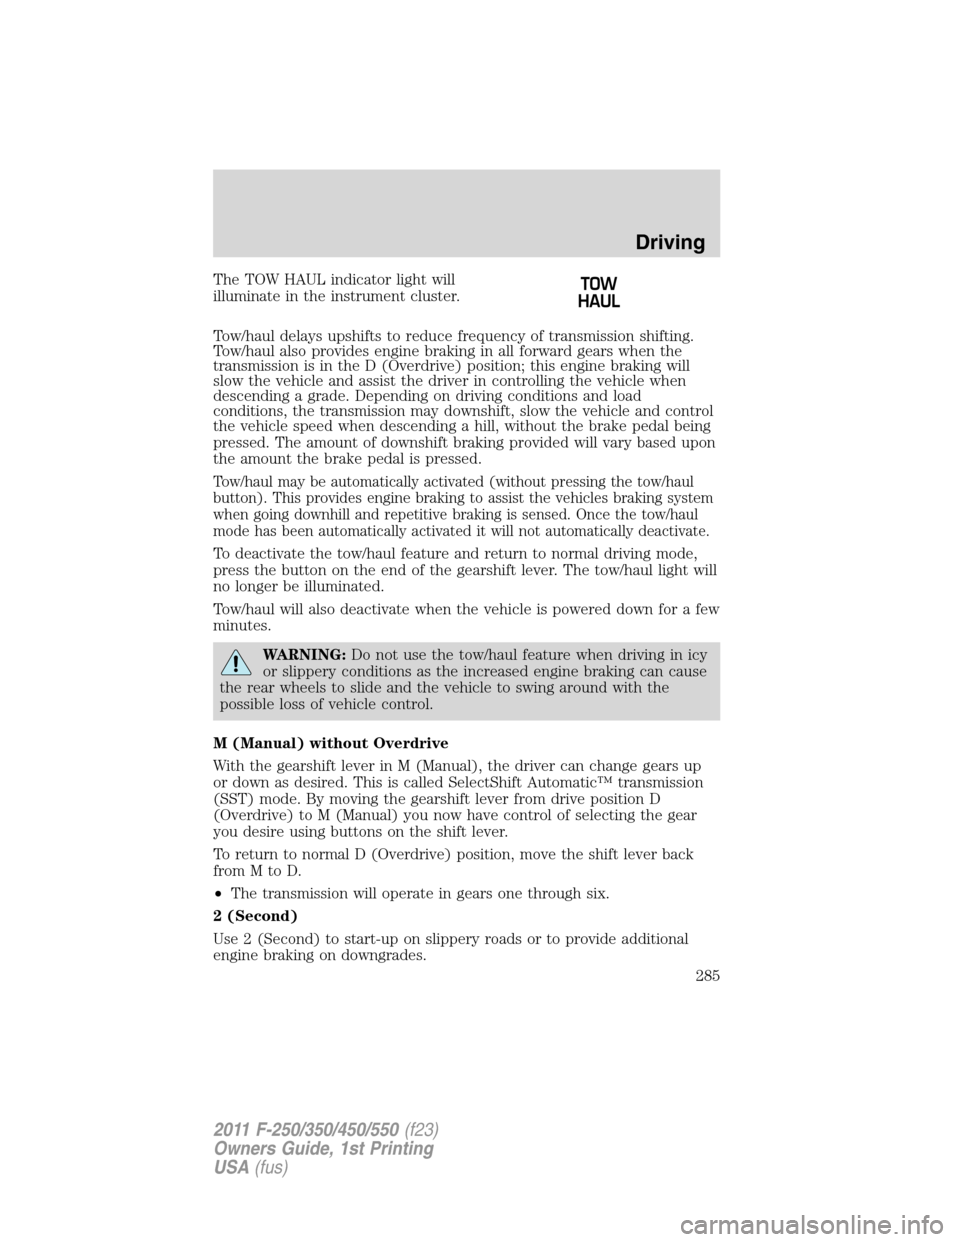
The TOW HAUL indicator light will
illuminate in the instrument cluster.
Tow/haul delays upshifts to reduce frequency of transmission shifting.
Tow/haul also provides engine braking in all forward gears when the
transmission is in the D (Overdrive) position; this engine braking will
slow the vehicle and assist the driver in controlling the vehicle when
descending a grade. Depending on driving conditions and load
conditions, the transmission may downshift, slow the vehicle and control
the vehicle speed when descending a hill, without the brake pedal being
pressed. The amount of downshift braking provided will vary based upon
the amount the brake pedal is pressed.
Tow/haul may be automatically activated (without pressing the tow/haul
button). This provides engine braking to assist the vehicles braking system
when going downhill and repetitive braking is sensed. Once the tow/haul
mode has been automatically activated it will not automatically deactivate.
To deactivate the tow/haul feature and return to normal driving mode,
press the button on the end of the gearshift lever. The tow/haul light will
no longer be illuminated.
Tow/haul will also deactivate when the vehicle is powered down for a few
minutes.
WARNING:Do not use the tow/haul feature when driving in icy
or slippery conditions as the increased engine braking can cause
the rear wheels to slide and the vehicle to swing around with the
possible loss of vehicle control.
M (Manual) without Overdrive
With the gearshift lever in M (Manual), the driver can change gears up
or down as desired. This is called SelectShift Automatic™ transmission
(SST) mode. By moving the gearshift lever from drive position D
(Overdrive) to M (Manual) you now have control of selecting the gear
you desire using buttons on the shift lever.
To return to normal D (Overdrive) position, move the shift lever back
fromMtoD.
•The transmission will operate in gears one through six.
2 (Second)
Use 2 (Second) to start-up on slippery roads or to provide additional
engine braking on downgrades.
Driving
285
2011 F-250/350/450/550(f23)
Owners Guide, 1st Printing
USA(fus)
Page 286 of 441
1 (First)
•Provides maximum engine braking.
•Allows upshifts by moving gearshift lever.
•The transmission will not downshift into 1 (First) at high speeds; it
will downshift to a lower gear and then shift into 1 (First) when the
vehicle reaches slower speeds.
Forced downshifts
•Allowed in D (Overdrive).
•Press the accelerator to the floor.
•Allows transmission to select an appropriate gear.
Understanding your SelectShift Automatic™ transmission (SST)
gearshift lever
This vehicle is equipped with a SelectShift Automatic™ transmission
(SST) gearshift lever. The SST is an automatic transmission with the
ability for the driver to change gears up or down (without a clutch) as
desired.
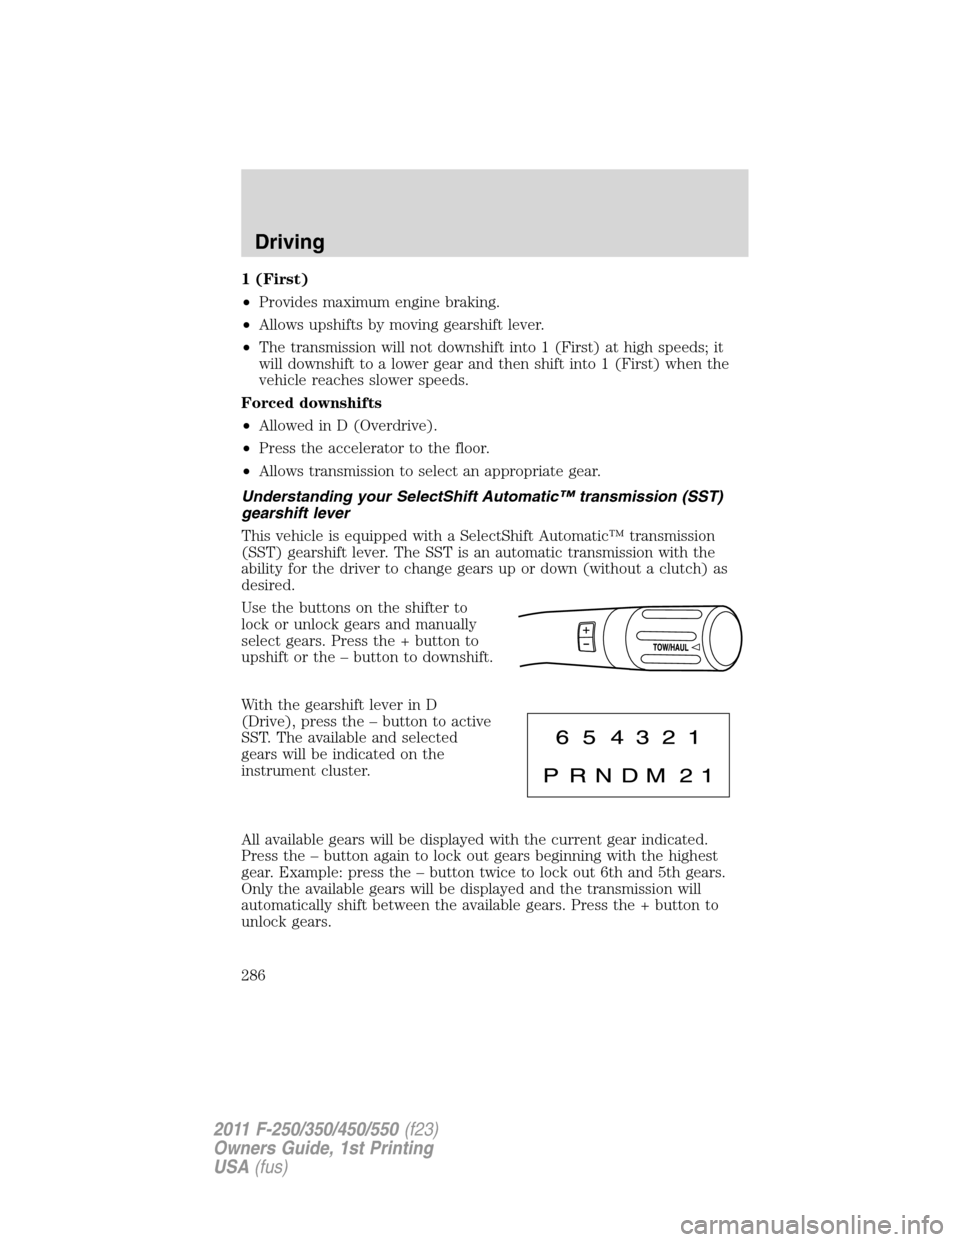
Use the buttons on the shifter to
lock or unlock gears and manually
select gears. Press the + button to
upshift or the – button to downshift.
With the gearshift lever in D
(Drive), press the – button to active
SST. The available and selected
gears will be indicated on the
instrument cluster.
All available gears will be displayed with the current gear indicated.
Press the – button again to lock out gears beginning with the highest
gear. Example: press the – button twice to lock out 6th and 5th gears.
Only the available gears will be displayed and the transmission will
automatically shift between the available gears. Press the + button to
unlock gears.
Driving
286
2011 F-250/350/450/550(f23)
Owners Guide, 1st Printing
USA(fus)
Page 287 of 441
By moving the gearshift lever from the D (Drive) position to the M
(Manual) position you may now manually select the gear you desire.
Only the current gear will be displayed. Press the + button or the –
button to upshift or downshift. If the – button is pressed at a vehicle
speed that would cause an engine overspeed, the requested gear will
flash then disappear and the transmission will remain in the current gear.
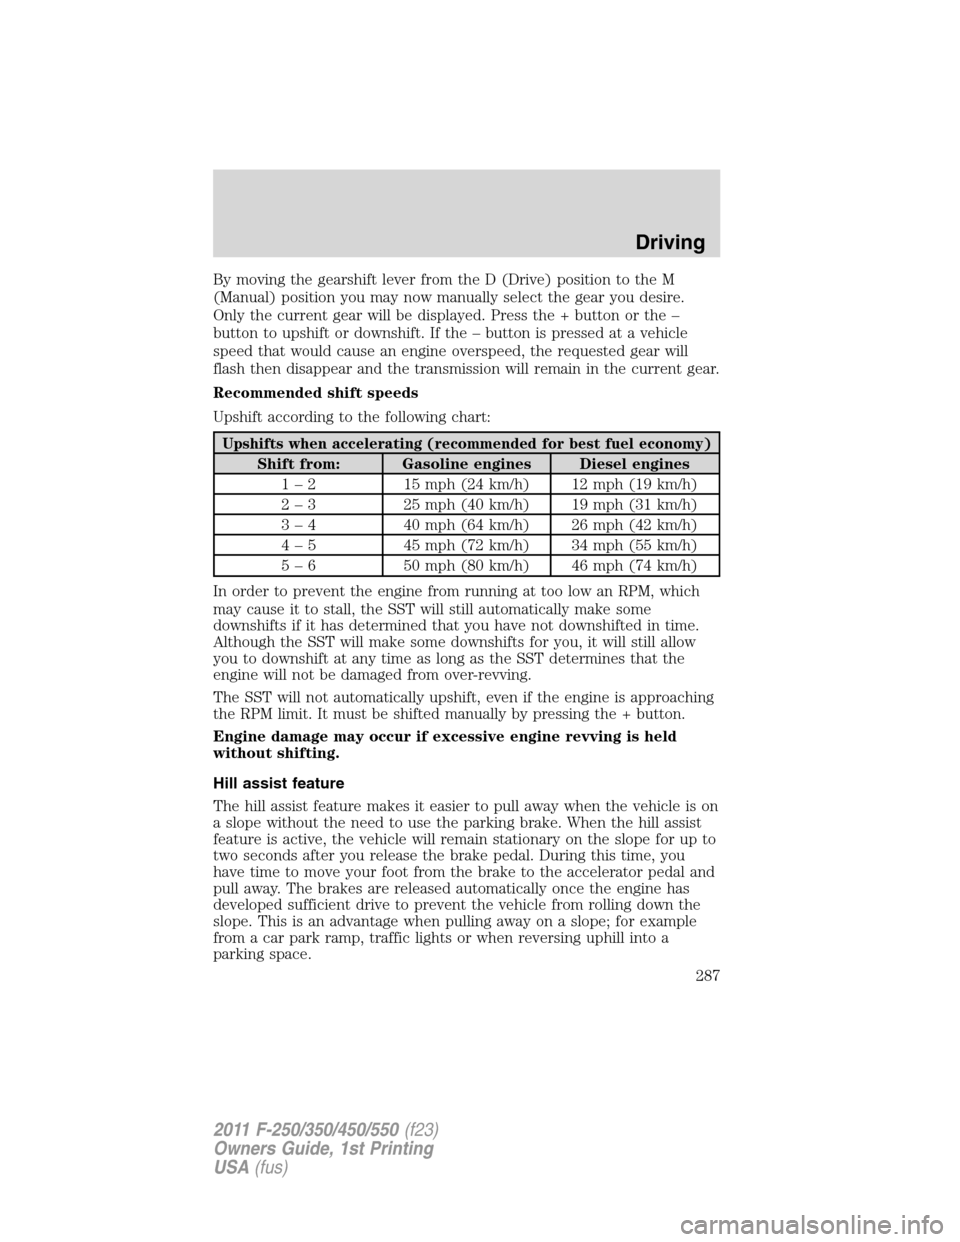
Recommended shift speeds
Upshift according to the following chart:
Upshifts when accelerating (recommended for best fuel economy)
Shift from: Gasoline engines Diesel engines
1 – 2 15 mph (24 km/h) 12 mph (19 km/h)
2 – 3 25 mph (40 km/h) 19 mph (31 km/h)
3 – 4 40 mph (64 km/h) 26 mph (42 km/h)
4 – 5 45 mph (72 km/h) 34 mph (55 km/h)
5 – 6 50 mph (80 km/h) 46 mph (74 km/h)
In order to prevent the engine from running at too low an RPM, which
may cause it to stall, the SST will still automatically make some
downshifts if it has determined that you have not downshifted in time.
Although the SST will make some downshifts for you, it will still allow
you to downshift at any time as long as the SST determines that the
engine will not be damaged from over-revving.
The SST will not automatically upshift, even if the engine is approaching
the RPM limit. It must be shifted manually by pressing the + button.
Engine damage may occur if excessive engine revving is held
without shifting.
Hill assist feature
The hill assist feature makes it easier to pull away when the vehicle is on
a slope without the need to use the parking brake. When the hill assist
feature is active, the vehicle will remain stationary on the slope for up to
two seconds after you release the brake pedal. During this time, you
have time to move your foot from the brake to the accelerator pedal and
pull away. The brakes are released automatically once the engine has
developed sufficient drive to prevent the vehicle from rolling down the
slope. This is an advantage when pulling away on a slope; for example
from a car park ramp, traffic lights or when reversing uphill into a
parking space.
Driving
287
2011 F-250/350/450/550(f23)
Owners Guide, 1st Printing
USA(fus)
Page 288 of 441
WARNING:The hill assist feature does not replace the parking
brake. When you leave the vehicle, always apply the parking
brake and select first or reverse gear.
Using the hill assist feature
The hill assist feature is activated automatically when the vehicle is
stopped on a slope greater than five degrees. The hill assist feature
operates with the vehicle facing downhill if reverse gear is selected. The
hill assist feature will not operate if the parking brake is activated.
WARNING:You must remain in the vehicle once you have
activated the hill assist feature.
Activating the hill assist feature
1. Press the brake pedal to bring the vehicle to a complete standstill.
Keep the brake pedal pressed.
2. If the sensors detect that the vehicle is on a slope, the hill assist
feature will be activated automatically.
3. When you remove your foot from the brake pedal, the vehicle will
remain on the slope without rolling away for approximately up to two
seconds. This hold time will automatically be extended if you are in the
process of driving off.
4. Drive off in the normal manner. The brakes will be released
automatically.
WARNING:If the engine is revved excessively, or if a
malfunction is detected when the hill assist feature is active, the
hill assist feature will be deactivated.
If your vehicle gets stuck in mud or snow
If your vehicle gets stuck in mud or snow, it may be rocked out by
shifting between forward and reverse gears, stopping between shifts in a
steady pattern. Press lightly on the accelerator in each gear.
Do not rock the vehicle if the engine is not at normal operating
temperature or damage to the transmission may occur.
Do not rock the vehicle for more than a minute or damage to the
transmission and tires may occur, or the engine may overheat.
Driving
288
2011 F-250/350/450/550(f23)
Owners Guide, 1st Printing
USA(fus)
Page 302 of 441
•If the vehicle goes from one type of surface to another (i.e., from
concrete to gravel) there will be a change in the way the vehicle
responds to a maneuver (steering, acceleration or braking). Again,
avoid these abrupt inputs.
Parking
On some 4WD vehicles, when the transfer case is in the N (Neutral)
position, the engine and transmission are disconnected from the rest of
the driveline. Therefore, the vehicle is free to roll even if the automatic
transmission is in P (Park). Do not leave the vehicle unattended with the
transfer case in the N (Neutral) position. Always set the parking brake
fully and turn off the ignition when leaving the vehicle.
WARNING:Always set the parking brake fully and make sure
the gearshift is latched in P (Park). Turn the ignition to the off
position and remove the key whenever you leave your vehicle.
WARNING:If the parking brake is fully released, but the brake
warning lamp remains illuminated, the brakes may not be
working properly. See your authorized dealer.
4WD Systems
4WD (when you select a 4WD mode), uses all four wheels to power the
vehicle. This increases traction, enabling you to drive over terrain and
road conditions that a conventional two-wheel drive vehicle cannot.
Power is supplied to all four wheels through a transfer case. On 4WD
vehicles, the transfer case allows you to select 4WD when necessary.
Information on transfer case operation and shifting procedures can be
found in theDrivingchapter. Information on transfer case maintenance
can be found in theMaintenance and Specificationschapter. You
should become thoroughly familiar with this information before you
operate your vehicle.
Normal characteristics
On some 4WD models, the initial shift from two-wheel drive to 4x4 while
the vehicle is moving can cause some momentary clunk and ratcheting
sounds. This is the front drivetrain coming up to speed and the
automatic locking hubs engaging and is not cause for concern.
Driving
302
2011 F-250/350/450/550(f23)
Owners Guide, 1st Printing
USA(fus)
Page 309 of 441
Snowplowing with your airbag-equipped vehicle
Your vehicle is equipped with a driver and passenger airbag
Supplemental Restraint System (SRS) The SRS is designed to activate in
certain frontal and offset frontal collisions when the vehicle sustains
sufficient longitudinal deceleration.
Careless or high speed driving while plowing snow which results in
sufficient vehicle decelerations can deploy the airbag. Such driving also
increases the risk of accidents.
WARNING:All occupants of the vehicle, including the driver,
should always properly wear their safety belts, even when an air
bag supplemental restraint system (SRS) is provided.
Never remove or defeat the “tripping mechanisms” designed into the
snow removal equipment by its manufacturer. Doing so may cause
damage to the vehicle and the snow removal equipment as well as
possible airbag deployment.
WARNING:Do not attempt to service, repair, or modify the air
bag supplemental restraint system (SRS) or its fuses. See your
Ford or Lincoln Mercury dealer.
WARNING:Additional equipment such as snowplow equipment
may effect the performance of the airbag sensors increasing the
risk of injury. Please refer to theBody Builders Layout Bookfor
instructions about the appropriate installation of additional equipment.
Transmission operation while plowing
Operate the vehicle with the automatic transmission gearshift lever in
the D (Overdrive) position and tow/haul off.
•Shift transfer case to 4L (4x4 Low) when plowing in small areas at
speeds below 5 mph (8 km/h).
•Shift transfer case to 4H (4x4 High) when plowing larger areas or light
snow at higher speeds. Do not exceed 15 mph (24 km/h).
•Do not shift the transmission from a forward gear to R (Reverse) until
the engine is at idle and the wheels are stopped.
•If the vehicle is stuck, shift the transmission in a steady motion
between forward and reverse gears. Do not rock the vehicle for more
than a few minutes. The transmission and tires may be damaged or
the engine can overheat.
Driving
309
2011 F-250/350/450/550(f23)
Owners Guide, 1st Printing
USA(fus)
Page 326 of 441
Spare tire information
Note:If your vehicle is equipped the tire pressure monitoring system
(TPMS), the system indicator light will illuminate when the spare is in
use. To restore the full functionality of the TPMS system, all road wheels
equipped with the tire pressure monitoring sensors must be mounted on
the vehicle.
If your vehicle is equipped with TPMS, have a flat tire serviced by an
authorized dealer in order to prevent damage to the TPMS sensor; refer
toTire Pressure Monitoring System (TPMS)in theTires, Wheel and
Loadingchapter. Replace the spare tire with the road tire as soon as
possible.
Stopping and securing the vehicle
WARNING:To help prevent the vehicle from moving when you
change a tire, be sure the parking brake is set, then block (in
both directions) the wheel that is diagonally opposite to the tire being
changed.
Refer to the instruction sheet (located under the jack tool kit) for
detailed tire change instructions.
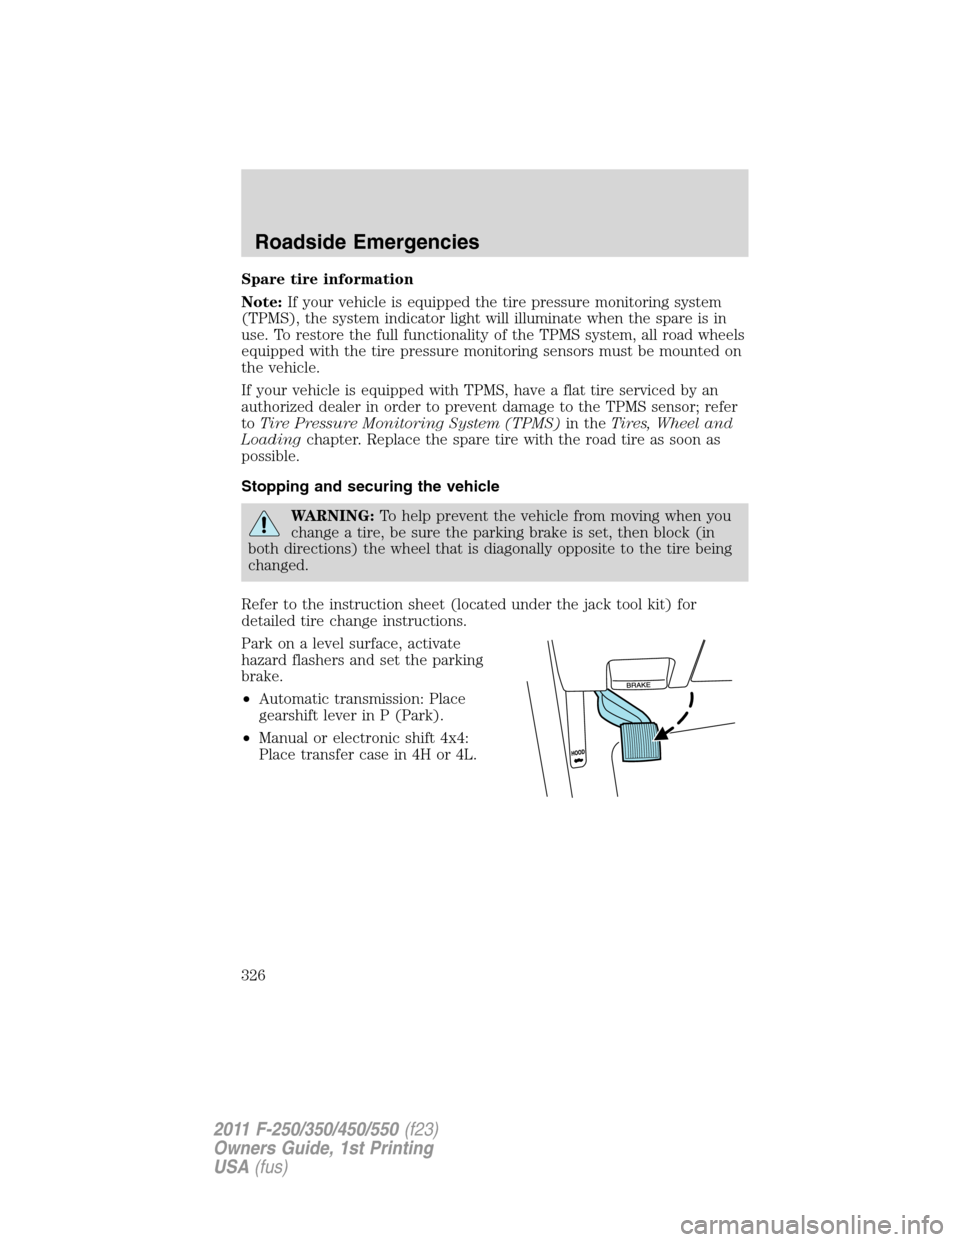
Park on a level surface, activate
hazard flashers and set the parking
brake.
•Automatic transmission: Place
gearshift lever in P (Park).
•Manual or electronic shift 4x4:
Place transfer case in 4H or 4L.
Roadside Emergencies
326
2011 F-250/350/450/550(f23)
Owners Guide, 1st Printing
USA(fus)
Page 340 of 441
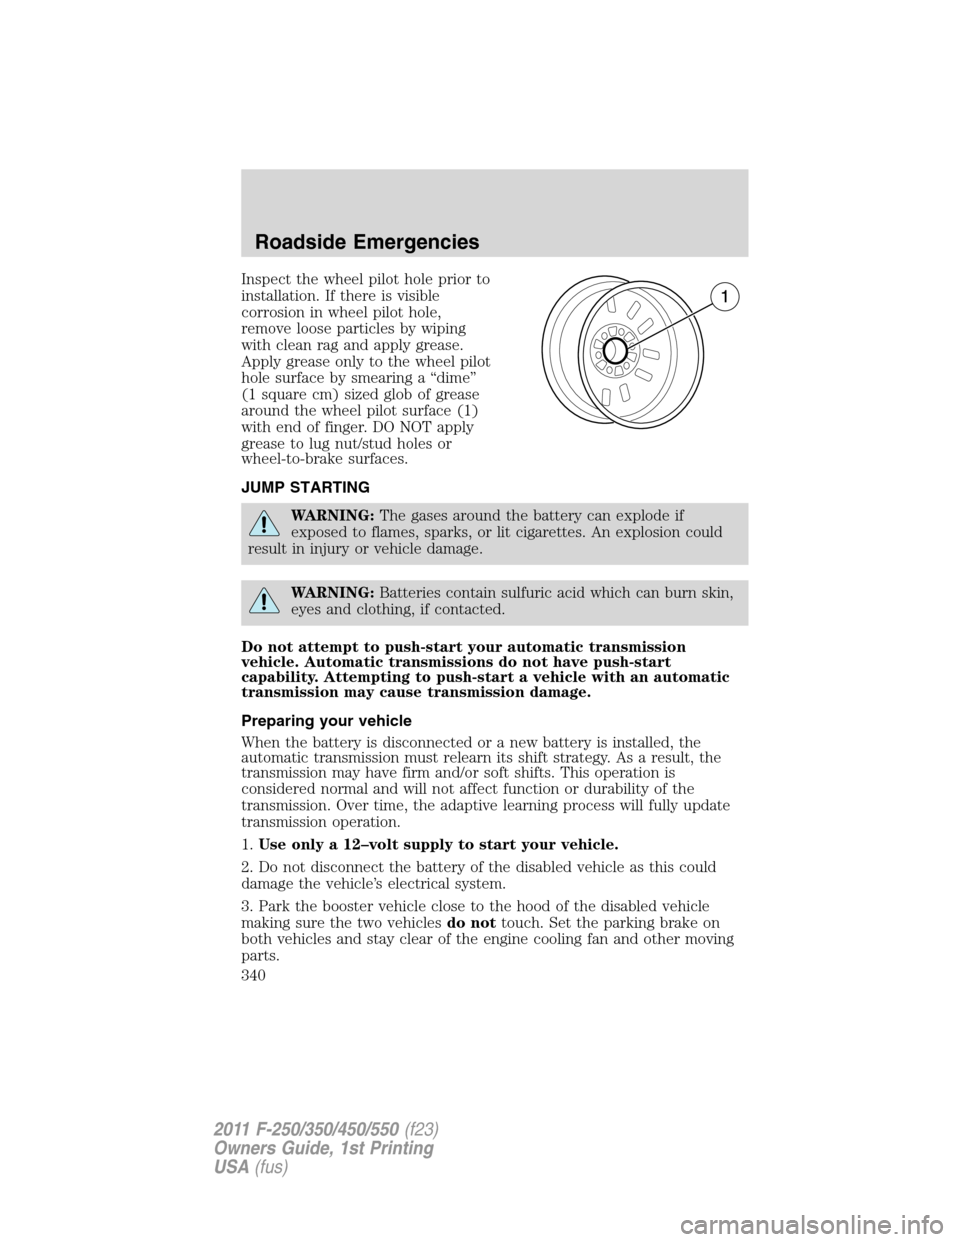
Inspect the wheel pilot hole prior to
installation. If there is visible
corrosion in wheel pilot hole,
remove loose particles by wiping
with clean rag and apply grease.
Apply grease only to the wheel pilot
hole surface by smearing a “dime”
(1 square cm) sized glob of grease
around the wheel pilot surface (1)
with end of finger. DO NOT apply
grease to lug nut/stud holes or
wheel-to-brake surfaces.
JUMP STARTING
WARNING:The gases around the battery can explode if
exposed to flames, sparks, or lit cigarettes. An explosion could
result in injury or vehicle damage.
WARNING:Batteries contain sulfuric acid which can burn skin,
eyes and clothing, if contacted.
Do not attempt to push-start your automatic transmission
vehicle. Automatic transmissions do not have push-start
capability. Attempting to push-start a vehicle with an automatic
transmission may cause transmission damage.
Preparing your vehicle
When the battery is disconnected or a new battery is installed, the
automatic transmission must relearn its shift strategy. As a result, the
transmission may have firm and/or soft shifts. This operation is
considered normal and will not affect function or durability of the
transmission. Over time, the adaptive learning process will fully update
transmission operation.
1.Use only a 12–volt supply to start your vehicle.
2. Do not disconnect the battery of the disabled vehicle as this could
damage the vehicle’s electrical system.
3. Park the booster vehicle close to the hood of the disabled vehicle
making sure the two vehiclesdo nottouch. Set the parking brake on
both vehicles and stay clear of the engine cooling fan and other moving
parts.
Roadside Emergencies
340
2011 F-250/350/450/550(f23)
Owners Guide, 1st Printing
USA(fus)