Page 113 of 418

•Do not leave the liftgate open while driving. Doing so could cause
serious damage to the liftgate and its components as well as allowing
carbon monoxide to enter the vehicle.
WARNING:Make sure that the liftgate door is closed to prevent
exhaust fumes from being drawn into the vehicle. This will also
prevent passengers and cargo from falling out. If you must drive with
the liftgate door open, keep the vents open so outside air comes into
the vehicle.
POWER LIFTGATE (IF EQUIPPED)
You can power open or close the liftgate with the following controls:
•Instrument panel control button
•Integrated keyhead transmitter button
•Outside liftgate control button
•Control button in the rear cargo area
Note:The liftgate movement direction can be reversed with a second
press of the instrument panel, or the rear cargo area control button, or a
second double press of the integrated keyhead transmitter button.
Opening and Closing the power liftgate:
WARNING:Make sure all persons are clear of the power liftgate
area before using the power liftgate control.
WARNING:Keep keys out of reach of children. Do not allow
children to play near an open or moving power liftgate.
The liftgate will only operate with the vehicle in P (Park).
When the liftgate is being power closed, a chime will sound three times
as the liftgate begins to power close. A single chime indicates a problem
with the close request, caused by:
•the ignition is in on and the transmission is not in P (Park);
•or the battery voltage is below the minimum operating voltage;
•or the vehicle speed is at or above 3 mph (5 km/h).
Driver Controls
113
2011 Flex(471)
Owners Guide, 1st Printing
USA(fus)
Page 114 of 418

If the liftgate reverses and starts to close after a open request, a fast
continuous chime indicates excessive load on the gate or a possible strut
failure. If any excessive load is removed and you still have a faster
chime, have the system serviced immediately by your authorized dealer.
Do not attempt to manually force the liftgate to travel faster than the
power system will permit. This will activate the obstacle detection
feature.
Note:Cycling the ignition prior to completely latching the liftgate could
result in damage to the liftgate and/or its power components. Make sure
the liftgate is fully latched before operating the vehicle.
Care should be exercised in starting the engine before the liftgate is fully
closed (latched). If the ignition is cycled during a liftgate power close
cycle and the liftgate is 6-10 inches (15–24 cm) from being latched, the
liftgate may reverse to the full open position. Verify that the gate is
closed before operating or moving the vehicle, especially in an enclosure,
like a garage or a parking structure. The liftgate or its components could
be damaged in an enclosure, if the liftgate is open.
When power operating the liftgate at temperatures below 32°F (0°C), the
liftgate may stop about 5 inches (12.7 cm) from the full open position.
The liftgate can be fully opened by pushing it upward to the maximum
open position.
The power liftgate feature can be enabled or disabled using the message
center. With the control in the OFF position, power operation is disabled
from the liftgate handle button and from the rear cargo area button. The
integrated keyhead transmitter and instrument panel switch will still
continue to operate the liftgate regardless of the position state of the
message center. Refer toMessage centerin theInstrument Cluster
chapter.
To power open or close the
liftgate from the instrument
panel:
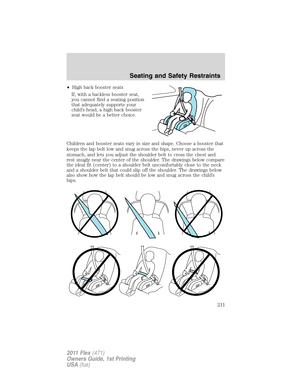
Press the button, located on the
instrument panel, once to power
open or close the liftgate.
Driver Controls
114
2011 Flex(471)
Owners Guide, 1st Printing
USA(fus)
Page 115 of 418

To power open or close the
liftgate with the integrated
keyhead transmitter:
Press
twice within three
seconds to power open or close the
liftgate. Refer toRemote entry
systemin theLocks and Security
chapter.
To power open the liftgate with
outside liftgate control button:
1. To open, unlock the liftgate with
the integrated keyhead transmitter
or power door unlock control.
2. To open the liftgate, push the
control button located in the top of
the liftgate pull cup handle.
Note:For the best performance
allow the power system to open the
liftgate after pressing the control. Manually pushing or pulling the liftgate
may activate the system’s obstacle detection feature and stop the power
operation.
To power close the liftgate with
the rear cargo area control
button:
Press and release the control on the
left rear quarter panel to close the
liftgate.
Note:The rear cargo area control
button is disabled when the liftgate
is latched (fully closed).
WARNING:Keep clear of the liftgate when activating the rear
switch.
Driver Controls
115
2011 Flex(471)
Owners Guide, 1st Printing
USA(fus)
Page 116 of 418

Note:The liftgate movement direction can be reversed with a second
press of the instrument panel, or the rear cargo area control buttons, or
a second double press of the integrated keyhead transmitter button.
To manually operate the liftgate:
1. Disable the liftgate power function. Refer to theMessage centerin the
Instrument Clusterchapter.
2. Open and close the liftgate as you would a standard liftgate. Refer to
Manual liftgatein this chapter.
Note:In case of operation in extreme cold -40°F (-40°C), or on extreme
inclines, manual operation of the liftgate is suggested.
Obstacle detection:
The power liftgate system is equipped with an obstacle detection feature.
If the power liftgate is closing, the system will reverse to full open when
it detects an obstacle. A chime will sound three times when an obstacle
is detected as the liftgate begins to reopen. Once the obstacle is
removed, the liftgate can be closed under power.
If the power liftgate is opening, the system will stop and a chime will
sound three times when an obstacle is detected. Once the obstacle is
removed, the liftgate can again be operated normally.
Resetting the power liftgate:
The power liftgate may not operate properly and may need to be reset if
any of these conditions occur:
•A low voltage or dead battery
•Disconnected battery
•The liftgate is manually closed and left ajar (unlatched)
To reset the power liftgate:
1. Disconnect the battery for 20 seconds then, reconnect the battery.
2. Manually close and fully latch the liftgate.
3. Power open the liftgate by using the integrated keyhead transmitter,
or the instrument panel control button.
Note:If the power liftgate system is turned off in the message center,
the system cannot be activated with the outside release handle or rear
cargo area control button. The system will need to be turned on to
resume operation with the outside release handle or rear cargo area
control button. The power liftgate is still operational through the use of
the remote entry transmitter and instrument panel button when the
power liftgate is turned off in the message center.
Driver Controls
116
2011 Flex(471)
Owners Guide, 1st Printing
USA(fus)
Page 117 of 418

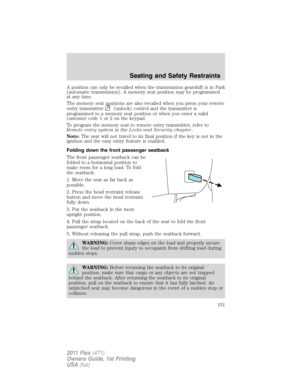
CARGO AREA FEATURES
Cargo net (if equipped)
The cargo pouch net secures
lightweight objects in the cargo
area. Attach the net to the anchors
provided. Do not put more than
50 lb (22 kg) in the net.
WARNING:The cargo net
is not designed to restrain
objects during a collision or heavy
braking.
ROOF RACK SYSTEM
(IF EQUIPPED)
Loads should never be placed directly on the roof panel. For proper
function of the roof rack system, loads must be placed directly on
crossbars affixed to the roof rack side rails. Your vehicle may be
equipped with factory-installed crossbars. Ford Genuine Accessory
crossbars, designed specifically for your vehicle, are also recommended
for use with your roof rack system.
The vehicle’s roof panel isNOTdesigned to directly carry a load.The
maximum recommended load is 100 lb (45 kg), evenly distributed
on the crossbars.Ensure that the load is securely fastened.
WARNING:When loading the roof rail crossbars, it is
recommended to evenly distribute the load, as well as maintain a
low center of gravity. Loaded vehicles, with higher centers of gravity,
may handle differently than unloaded vehicles. Extra precautions, such
as slower speeds and increased stopping distance, should be taken
when driving a heavily loaded vehicle.
When the rail system is loaded, check the tightness of the load before
driving and at each fuel stop.
Driver Controls
117
2011 Flex(471)
Owners Guide, 1st Printing
USA(fus)
Page 118 of 418

KEYS
Your vehicle is equipped with two
Integrated Keyhead Transmitters
(IKTs). The IKT functions as both a
programmed ignition key that
operates all the locks and starts the
vehicle, and the transmitter portion
functions as the remote entry
transmitter. Vehicles with a power
liftgate will have a four-button IKT
while vehicles without a power
liftgate will have a three-button IKT.
Your IKTs are programmed to your vehicle; using a non-programmed key
will not permit your vehicle to start. If you lose your authorized dealer
supplied IKTs, replacement IKTs are available through your authorized
dealer. Standard SecuriLockkeys without remote entry transmitter
functionality can also be purchased from your authorized dealer if
desired.
Always carry a spare key with you in case of an emergency.
For more information regarding programming replacement IKTs, refer to
theSecuriLockpassive anti-theft systemsection later in this chapter.
Note:Your vehicle’s IKTs were
issued with a security label that
provides important vehicle key cut
information. It is recommended that
you keep the label in a safe place
for future reference.
Locks and Security
118
2011 Flex(471)
Owners Guide, 1st Printing
USA(fus)
Page 119 of 418

MYKEY™
The MyKey™ feature allows you to program a restricted driving mode to
promote good driving habits. All but one of the keys programmed to the
vehicle can be activated as a MyKey™. The key will remain restricted
until MyKey™ is disabled. Any remaining keys are referred to as an
“administrator key” or admin key. The admin key can be used to create a
MyKey™, program optional MyKey™ settings, and clear the MyKey™
feature. When the MyKey™ feature is enabled the user can use system
check in the message center to see how many MyKeys™ and admin keys
are programmed to the vehicle, and how many total miles have been
driven with the MyKey™ active.
MyKey™ restricted features
Standard settings – These settings cannot be changed
•The audio system will be muted whenever Belt-Minderis activated
until the safety belts are buckled. Refer to theSeating and Safety
Restraintschapter for a detailed description of Belt-Minder
operation.
•Low fuel warnings are displayed in the message center followed by a
chime when the distance to empty value reaches 75 miles (120 km).
•The reverse sensing system cannot be turned off.
Optional settings – These settings can be changed
•Vehicle speed is limited to 80 mph (130 km/h). Visual warnings are
displayed followed by a chime when the vehicle speed has reached
80 mph (130 km/h).
•Visual warnings are displayed followed by a chime when a preselected
vehicle speed of 45, 55 or 65 mph (75, 90, or 105 km/h) is exceeded
•The maximum volume of the audio system is limited to 45%. MYKEY
VOLUME LIMITED will be displayed in the radio or (if equipped)
navigation screen when attempting to exceed the limited volume
•The AdvanceTracsystem cannot be turned off. When this optional
setting is on, the MyKey™ user will not be able to deactivate the
system.Note:It may be beneficial to deactivate the AdvanceTrac
system if the vehicle is stuck in snow, mud, or sand.
Create a MyKey™
To program MyKey™ on one of the keys programmed to the vehicle,
insert the key that you want to make a MyKey™ into the ignition. Turn
the ignition on. Use the message center buttons to do the following:
1. Press SETUP until PRESS RESET TO CREATE MYKEY is displayed.
Locks and Security
119
2011 Flex(471)
Owners Guide, 1st Printing
USA(fus)
Page 120 of 418

2. Press and release the RESET button. HOLD RESET TO CONFIRM
MYKEY will be displayed.
3. Press and hold the RESET button for two seconds until MARK THIS
AS RESTRICTED is displayed.
4. Wait until KEY RESTRICTED AT NEXT START is displayed.
MyKey™ is successfully programmed. Make sure you label it so you can
distinguish it from the admin keys.Note:To program the optional
settings go to Step 2 in theProgramming MyKey™ optional settings
section. If your vehicle is equipped with remote start, see theUsing
MyKey™ with remote start systemssection.
Note:The MyKey™ can be cleared within the same key cycle that it was
created, otherwise a standard key (administrator key) is required to
clear the MyKey™ programming. To clear all MyKeys™ go to Step 2 in
theClear MyKey™section.
Programming MyKey™ optional settings
Turn the ignition on using an admin key. To program the optional
settings, use the message center buttons to do the following:
1. Press SETUP until RESET FOR MYKEY SETTINGS is displayed.
2. Press and release the RESET button to display MyKey™ setup menus.
The first menu shown is:
MYKEY MAX MPH <80 MPH> OFF
3. If you don’t want to change the maximum speed setting, press the
SETUP button to display the next menu. The remaining menus appear as
follows with the default settings shown:
MYKEY MPH TONES 45 55 65
MYKEY VOLUME LIMIT OFF
MYKEY ADVTRAC CTRL ON .
4. On any of the menus press RESET to highlight your choice with the
<…>.
5. Press SETUP to enter your choice. The next optional setting will be
displayed.
6. Repeat Steps 4 and 5 until you are done changing the optional
settings.
Clear MyKey™
To reset all MyKeys™ as admin keys do the following:
1. Turn the vehicle on using the admin key.
Locks and Security
120
2011 Flex(471)
Owners Guide, 1st Printing
USA(fus)