Page 211 of 494
Tire PSI
Press and release the MENU button until�Tire PSI�is
highlighted in the EVIC. Press and release the SELECT
button and one of the following will be displayed:
•If tire pressure is OK for all tires a vehicle ICON is
displayed with tire pressure values in each corner of
the ICON.
•If one or more tires have low pressure, �Tire Pressure
LOW� is displayed with the vehicle ICON and the tire
pressure values in each corner of the ICON.
•If the Tire Pressure system requires service, �Service
Tire Pressure System� is displayed.
Tire PSI is an information only function and cannot be
reset. Press and release the MENU button to return to the
main menu.
Compass Display
The compass heading indicates the direction
the vehicle is facing. Press and release the
compass button to display one of eight
compass heading and the outside tempera-
ture.
NOTE: The system will display the last known outside
temperature when starting the vehicle and may need to
be driven several minutes before the updated tempera-
ture is displayed. Engine temperature can also affect the
displayed temperature; therefore, temperature readings
are not updated when the vehicle is not moving.
Automatic Compass Calibration
This compass is self-calibrating, which eliminates the
need to calibrate the compass manually. When the ve-
hicle is new, the compass may appear erratic and the
EVIC will flash the “CAL” indicator until the compass is
calibrated. You may calibrate the compass by completing
COMPASS
Button
4
UNDERSTANDING YOUR INSTRUMENT PANEL 209
Page 215 of 494

Sound Horn with Lock
When ON is selected, a short horn sound will occur when
the RKE transmitter LOCK button is pressed. This feature
may be selected with or without the Flash Lights with
Lock feature. To make your selection, press and release
the SELECT button until ON or OFF appears.
Flash Lamps with Lock
When ON is selected, the front and rear turn signals will
flash when the doors are locked or unlocked with the
RKE transmitter. This feature may be selected with or
without the Sound Horn on lock feature selected. To
make your selection, press and release the SELECT
button until ON or OFF appears.
Headlamp Off Delay
When this feature is selected, the driver can choose to
have the headlights remain on for 0, 30, 60, or 90 seconds
when exiting the vehicle. To make your selection, press
the SELECT button until 0, 30, 60, or 90 seconds appears.
Headlights With Wipers
(Available with Auto Headlights Only)
When ON is selected, and the headlight switch is in the
AUTO position, the headlights will turn on approxi-
mately 10 seconds after the wipers are turned on. The
headlights will also turn off when the wipers are turned
off if they were turned on by this feature. To make your
selection, press the SELECT button until ON or OFF
appears.
NOTE:Turning the headlights on during the daytime
causes the instrument panel lights to dim. To increase the
brightness, refer to “Lights” in “Understanding The
Features Of Your Vehicle.”
Key-Off Power Delay
When this feature is selected, the power window
switches, radio, Uconnect™ phone (if equipped), and
power outlets will remain active for up to 10 minutes
after the ignition switch is turned to the LOCK position.
4
UNDERSTANDING YOUR INSTRUMENT PANEL 213
Page 216 of 494
Opening either front vehicle door will cancel this feature.
To make your selection, press the SELECT button until
Off, 45 sec., 5 min., or 10 min. appears.
Illumin. Approach
When this feature is selected, the headlights will activate
and remain on for up to 90 seconds when the doors are
unlocked with the remote keyless entry transmitter. To
make your selection, press the SELECT button until
“OFF,” “30 sec,” “60 sec,” or “90 sec” appears.
Hill Start Assist (HSA) — If Equipped
When on is selected, the HSA system is active. Refer to
“Electronic Brake Control System” in “Starting And
Operating” for system function and operating informa-
tion. To make your selection, press and release the
SELECT button until “On” or “Off” appears.
Display ECO — If Equipped
The “ECO” message is located in the EVIC, this message
can be turned on or off. To make your selection, press and
release the SELECT button until “ON” or “OFF” appears.
Display Units In
The EVIC and odometer can be changed between English
and Metric units of measure. To make your selection,
press and release the SELECT button until “ENGLISH”
or “METRIC” appears.
Calibrate Compass
Refer to “Compass Display” for more information.
Compass Variance
Refer to “Compass Display” for more information.
214 UNDERSTANDING YOUR INSTRUMENT PANEL
Page 222 of 494
•DVD Enter -When the disc is in DVD Menu mode,
selecting DVD Enter will allow you to play the current
highlighted selection. Use the remote control to scroll
up and down the menu (if equipped).
•DISC Play/Pause - You can toggle between
playing the DVD and pausing the DVD by
pushing the SELECT button (if equipped).
•DVD Play Options - Selecting the DVD Play Options
will display the following:
•Subtitle – Repeatedly pressing SELECT will switch
subtitles to different subtitle languages that are
available on the disc (if equipped).
•Audio Stream – Repeatedly pressing SELECT will
switch to different audio languages (if supported on
the disc) (if equipped).
•Angle – Repeatedly pressing SELECT will change
the viewing angle if supported by the DVD disc (if
equipped).
NOTE:
•The available selections for each of the above entries
varies depending upon the disc.
•These selections can only be made while playing a
DVD.
•VES™ Power - Allows you to turn VES™ ON and
OFF (if equipped).
•VES™ Lock - Locks out rear VES™ remote controls (if
equipped).
•VES™ CH1/CH2 - Allows the user to change the
mode of either the IR1 or IR2 wireless headphones by
pressing the AUDIO/SELECT button (if equipped).
220 UNDERSTANDING YOUR INSTRUMENT PANEL
Page 265 of 494

List Or Browse Mode
During Play mode, pressing any of the buttons described
below, will bring up List mode. List mode enables
scrolling through the list of menus and tracks on the
audio device.
•TUNEcontrol knob: The TUNEcontrol knob functions
in a similar manner as the scroll wheel on the audio
device or external USB device.
•Turning it clockwise (forward) and counterclock-
wise (backward) scrolls through the lists, displaying
the track detail on the radio display. Once the track
to be played is highlighted on the radio display,
press the TUNEcontrol knob to select and start
playing the track. Turning the TUNEcontrol knob
fast will scroll through the list faster. During fast
scroll, a slight delay in updating the information on
the radio display may be noticeable.
•During all List modes, the iPod� displays all lists in
“wrap-around” mode. So if the track is at the
bottom of the list, just turn the wheel backward
(counterclockwise) to get to the track faster.
•In List mode, the radio PRESETbuttons are used as
shortcuts to the following lists on the iPod� or
external USB device.
•Preset 1 – Playlists
•Preset 2 – Artists
•Preset 3 – Albums
•Preset 4 – Genres
•Preset 5 – Audiobooks
•Preset 6 – Podcasts
4
UNDERSTANDING YOUR INSTRUMENT PANEL 263
Page 270 of 494
4. Do not use solvents such as benzene, thinner, cleaners,
or anti-static sprays.
5. Store the disc in its case after playing.
6. Do not expose the disc to direct sunlight.
7. Do not store the disc where temperatures may become
too high.
NOTE:If you experience difficulty in playing a particu-
lar disc, it may be damaged (i.e., scratched, reflective
coating removed, a hair, moisture or dew on the disc)
oversized, or have protection encoding. Try a known
good disc before considering disc player service.RADIO OPERATION AND MOBILE PHONES
Under certain conditions, the mobile phone being on in
your vehicle can cause erratic or noisy performance from
your radio. This condition may be lessened or eliminated
by relocating the mobile phone antenna. This condition is
not harmful to the radio. If your radio performance does
not satisfactorily “clear” by the repositioning of the
antenna, it is recommended that the radio volume be
turned down or off during mobile phone operation when
not using Uconnect™ (if equipped).
CLIMATE CONTROLS
The air conditioning and heating system is designed to
make you comfortable in all types of weather.
268 UNDERSTANDING YOUR INSTRUMENT PANEL
Page 274 of 494
NOTE:
•Continuous use of the Recirculation mode may make
the inside air stuffy and window fogging may occur.
Extended use of this mode is not recommended.
•The use of the Recirculation mode in cold or damp
weather will cause windows to fog on the inside,
because of moisture buildup inside the vehicle. Select
the outside air position for maximum defogging.
•The A/C will engage automatically to prevent fogging
when the recirculation button is pressed and the mode
control is set to panel or Bi-Level.
•Recirculated air is not allowed in Floor, Mix or Defrost
modes. If the Recirculation button is depressed while
in any of these modes, the LED indicator will flash
several times then go out. Recirculation will be dis-
abled automatically is these modes are selected.
•The A/C can be deselected manually without disturb-
ing the mode control selection.
•When the ignition switch is turned to the LOCK
position, the recirculation feature will be cancelled.
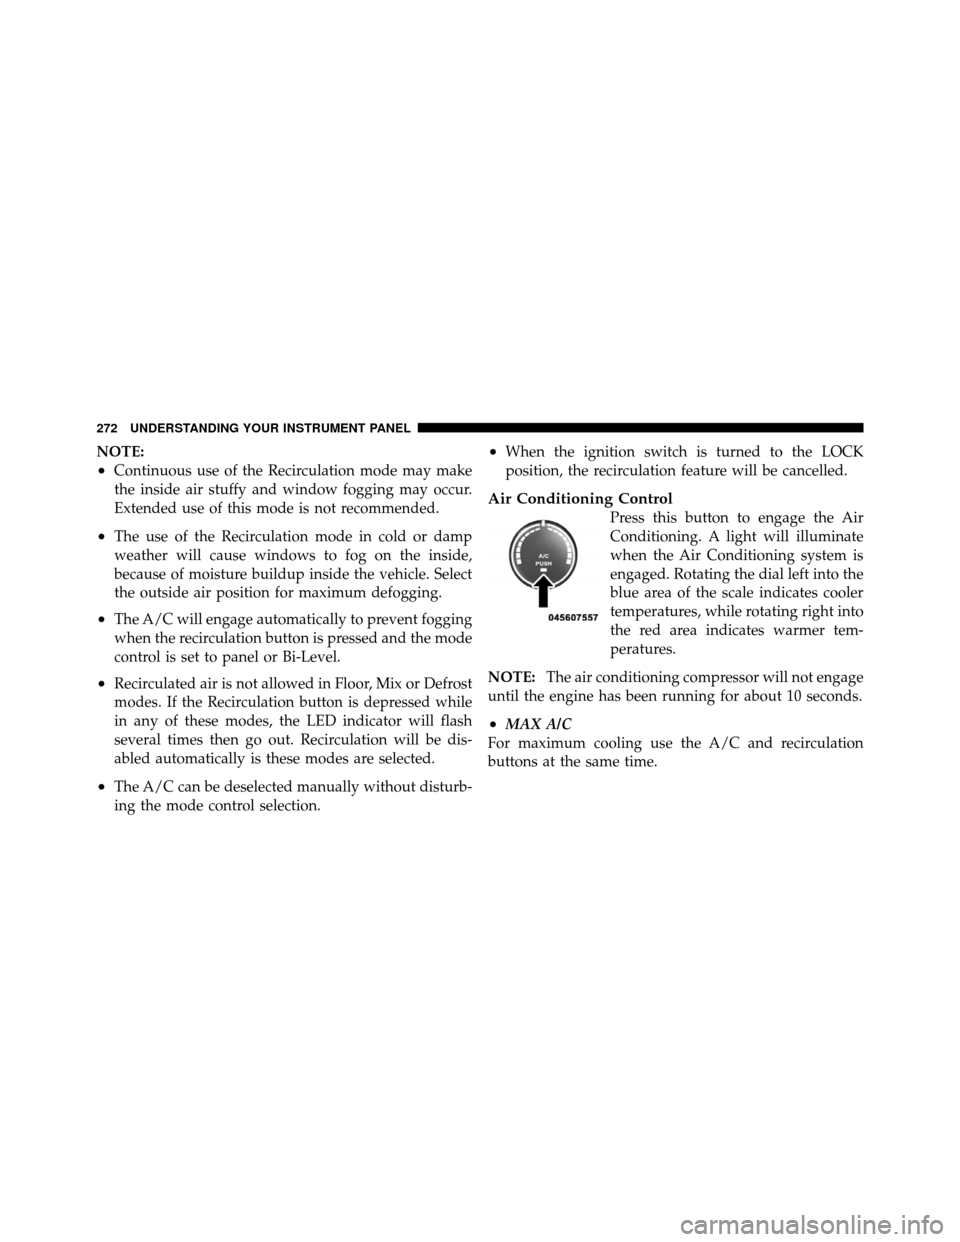
Air Conditioning Control
Press this button to engage the Air
Conditioning. A light will illuminate
when the Air Conditioning system is
engaged. Rotating the dial left into the
blue area of the scale indicates cooler
temperatures, while rotating right into
the red area indicates warmer tem-
peratures.
NOTE: The air conditioning compressor will not engage
until the engine has been running for about 10 seconds.
•MAX A/C
For maximum cooling use the A/C and recirculation
buttons at the same time.
272 UNDERSTANDING YOUR INSTRUMENT PANEL
Page 275 of 494
•ECONOMY MODE
If economy mode is desired, press the A/C button to turn
OFF the indicator light and the A/C compressor. Then,
move the temperature control to the desired temperature.
Automatic Temperature Control (ATC) — If
Equipped Automatic Operation
The Automatic Temperature Control system automati-
cally maintains the climate in the cabin of the vehicle at
the comfort levels desired by the driver and passenger.
Operation of the system is quite simple.
1. Turn the Mode Control knob (on the right) and the
Blower Control knob (on the left) to AUTO.
NOTE:
The AUTO position performs best for front seat
occupants only.
2. Dial in the temperature you would
like the system to maintain by rotating
the Temperature Control knob. Once
the comfort level is selected, the sys-
tem will maintain that level automati-
cally using the heating system. Should
Automatic Temperature Control
4
UNDERSTANDING YOUR INSTRUMENT PANEL 273